2022.10.10
Let’s use the Focus Lines filter to create a simple perspective guide !
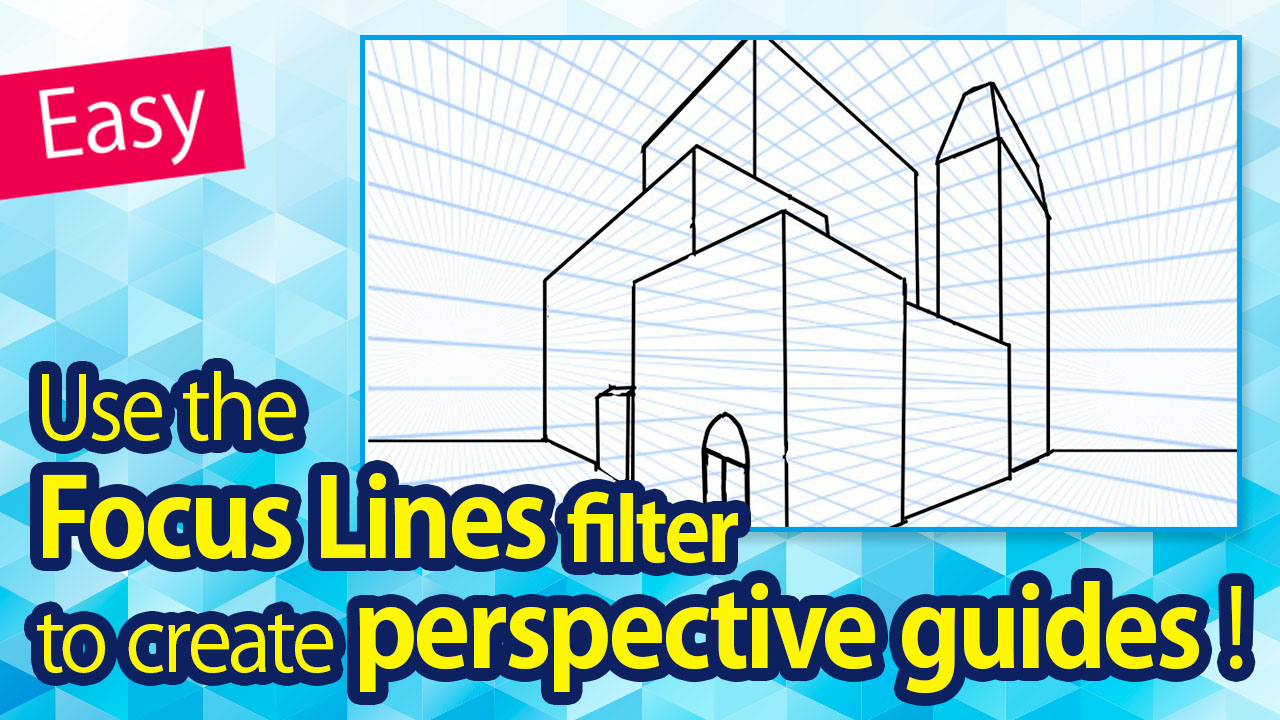

In this tutorial, I will be making a perspective guide using the filter function available in the MediBang Paint app.
Index
What is “perspective” ?
Perspective (shortened to “pers” in Japanese art vocabulary) refers to the linear perspective.
It is a technique in art where objects in the far distance are drawn small and vice versa.
One of the representative perspective drawing styles is called the “point-projection perspective”.
Point-projection perspective is drawn with an eye-level and a vanishing point.
Vanishing point refers to the point in which the depth of three-dimensional objects drawn in a two-dimensional drawing appears to converge.
The objects become smaller as it extends towards the vanishing point.
When the drawing has one vanishing point, it is called one-point perspective while with two vanishing points it is called the two-point perspective and with three vanishing points it is a three-point perspective.
Since one-point perspective has only one vanishing point, focus lines can be used as a perspective guide.
In the MediBang Paint app, there is a focus lines filter inside one of the filter functions which I will be using to create the pers guide.
Let’s create pers using the focus lines filter
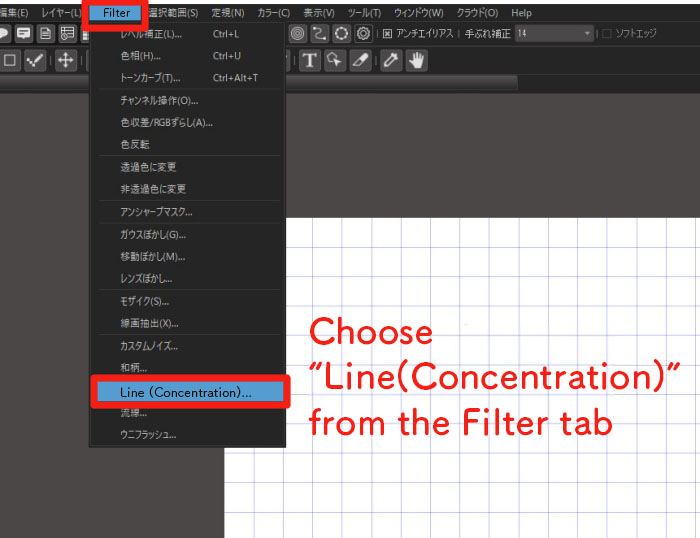
I will start off by turning on focus lines from the filter functions right away.
From the Filter tab of the menu bar, select “Line (Concentration)”.
You will then see a window “Concentrated Line” where you can edit the settings.
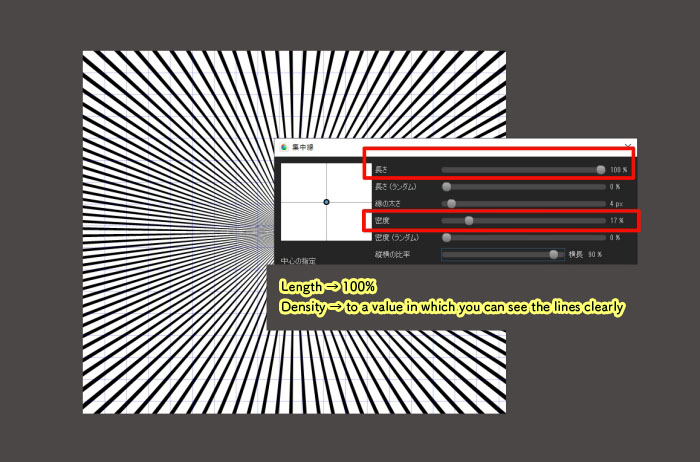
Set the Length to 100% and lower the Density so you can see each focus line clearly.
Click OK and the focus lines will appear on your canvas.
They can be used as a guide for one-point perspective immediately.

Lower the opacity of the layer where you added the focus lines filter and create a new layer, where you would draw the objects along the lines of the perspective guide.

I recommend registering the focus lines you created as a material for pers guide.

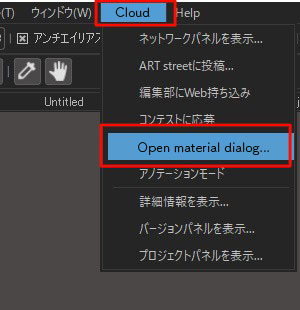
To register this filter as a material, select “Open material dialog” from the Cloud tab of the menu bar.
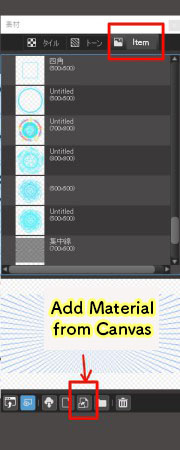
Then a “Material” window will appear so switch to the “Item” tab. Once you click on the bottom icon with “Add Material from Canvas”, your focus lines filter has been registered.
Using the focus lines filter for a two-point perspective drawing
Let’s see how the filter can be applied for a two-point perspective drawing.
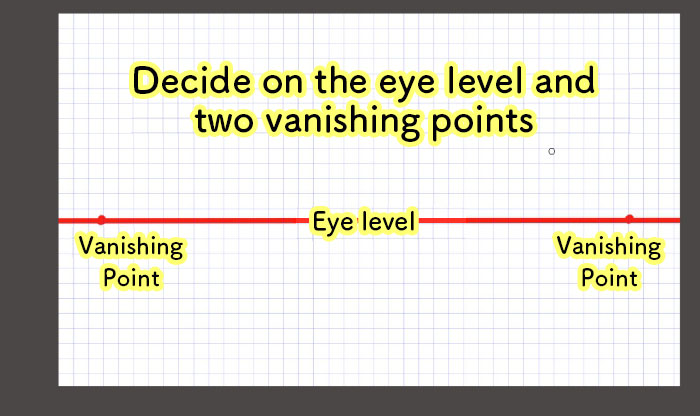
As for the two-point perspective, the two vanishing points are placed on the eye-level.
Create a new layer and paste the focus lines you just registered as a material.
(Drag the focus lines material from the Material window)
Set each center of the two focus lines material to match the two vanishing points and now you have a pers guide for a two-point perspective drawing.

The standard for perspectives with two or more points is for the vanishing points to be positioned outside of the canvas. I’ve placed them inside for this tutorial so you can see how it’s constructed.
Draw a three-dimensional object (cube) following the two-point perspective guide.

This was a tutorial introducing how you can create a perspective guide using the filter function inside MediBang Paint.
I hope you try creating perspective drawings with the focus lines filter too.
(Text・Illustration/吉田 セツ)
\ We are accepting requests for articles on how to use /

