2022.10.17
From basics to application ! Drawing various types of windows

In this tutorial, I will be introducing how to make windows from basics to applications !
This tutorial is for those of you who are confused with how to draw windows in an illustration as I explain in detail the various types of windows including basic slider windows as well as oriel windows that add extra fanciness.
I hope you stay with me until the very end !
Basic: “Slider Windows”
Snap Setting
Before I start drawing the windows, I will set my Snap so I can draw with depth.
From the top of the application window, select the Radial Snap inside the Snap Tool.

Once you select the Radial Snap, position the center of the radial lines (the small cross) far outside the canvas.
Here, pay attention to positioning the snap so that the horizontal line passes through the canvas as shown below.

Create the snap on both sides of the canvas.
If you want to reposition the snap, click on the gear icon next to the snap icons to move the snap around.

Once you have decided on the center of the radial lines, go to the top menu bar and click Save Snap… of the Snap tab.

Rough Sketch and Line Drawing
Now, I will start drawing the window frame using the snap together with the Crisscross Snap.
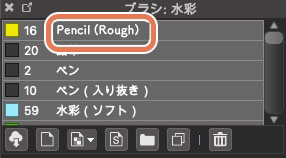
I used the Pencil (rough) brush.
Using a Radial Snap on the right in addition to the Crisscross Snap, I made a rectangle with depth.

Create the same rectangle shape in a smaller size.

I want to divide the window into two so I will now be taking the center.
Draw a large X (support line) on the window and use the Crisscross snap to draw a straight line cutting through the center of X.

When you draw in the X, click on the Shape Brush Tool and
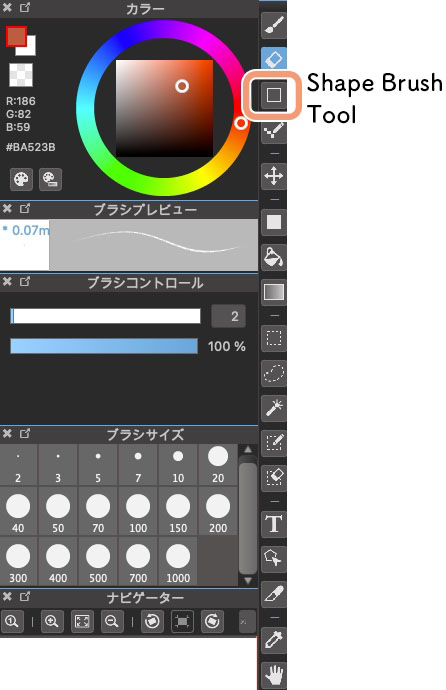
select Line inside the shape brush tools. With this tool, you can draw straight lines at any angle.

Next, I will create depth for the window frame.
Add an extra line on the inside at the top, bottom and right side of the window frame.

For the parts enclosed in blue circles (see the image below), draw the lines using the Radial Snap set on the left since they determine the angle of depth.

Next, I will draw the window sashes.
Draw the vertical lines first, connecting the top and bottom of the window frame. Make sure to shorten the horizontal lines in the sash.

Before drawing in the sashes on the left, I will explain some tips for this step.
① The window panels consist of two overlapping rectangles.
② As you can see in the image below, the window frame (in orange) overlaps on top of those two rectangles.
③ If you draw in the blue parts where the windows would slide, you can recreate realistic windows.

Back to drawing the sketch.
Add another vertical line on the left of the centerline.

Using the Radial Snap, add short lines at the bottom of the window, to create a bottom rail (the blue part below).
Now, create a sash on the left side as well.

Do the same for the top of the window frame to create the toprail too.

I will then also add depth to the inside of the sashes I just created.
On the top, right and bottom side, make sure to draw the depth with a narrow width.

The rough sketch is complete.
Let’s move on to the line drawing.
I have changed the brush to Pen.

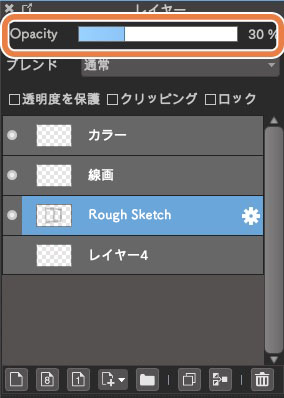
It will be easier to draw the line drawing if you drop the opacity of your rough sketch layer.
Drop the opacity to about 30%, from the top of the Layer window.
As done for the sketch, I will proceed with the line drawing using the Snaps.
Here, draw only the vertical lines first,

then continue to draw the depth lines and angled lines for better efficiency.

I have now finished the line drawing.

Coloring
Move on to coloring the windows.
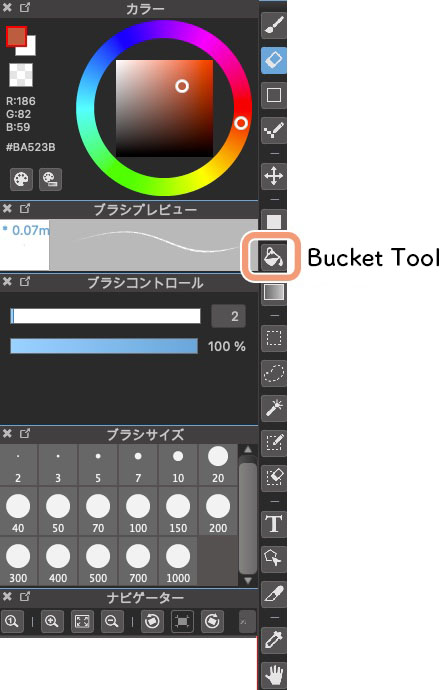
Select the Bucket Tool.
Create a new layer for each part of the window, window frame, sashes, panels etc., and use the Bucket Tool to fill them with paint.
Remember that the narrow depth parts will be a shadow so choose a darker shade for them.

Once you have filled each part with paint, start adding in the details.
Choose the Watercolor brush.
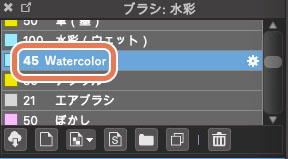
Paint the reflections of window sashes.

For this step, don’t forget to choose Clipping for the new layer created on top of the paint layer for sashes so you don’t paint beyond the sash lines.
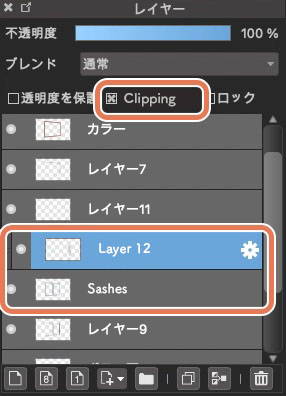
Then, draw in the shadows of the brown window frame on top of the silver sashes.
Using the Snap Tool, paint with a slightly darker shade.
The shadows will be easily recognizable if you paint half of the sashes.
Next is the white reflections on glass panels.
By adding white paint along the sashes, the panels have become more realistic.

Let’s make the shadows deeper.
Paint over the shadows with a darker shade.
Instead of painting over all of the shadows, you can create dynamics in the illustration by adding them “on the borderline between the shadow and the light” and “in the corner”.

I also layered a soft lighter shade of brown on top of the window frame and improved the flat look.

Add some textures by painting light colors where I placed the arrows.

Lastly, layer a soft blue shade on the glass panels and the coloring step is complete.

This completes the tutorial for basic window making !
Let’s move on to the application stage.
Applications
Oriel Windows
Similarly to the slider windows, start from the window frames using the Radial Snap and Crisscross Snap tools.
① Create a rectangle for the outer frame
② Create a rectangle one size smaller than the outer frame
③ Divide the window into two panels horizontally

Since this window moves up and down, I divided the panel horizontally.
Next,
④Draw depth to create thickness for the window frame.
⑤Create sashes at the top and the bottom. As I explained for the slider window, pay attention to how the panels overlap. For the oriel window, I have drawn the bottom window behind the top window.
⑥Draw in depth to create thickness for the sashes.

The sketch is complete.
This is how it looks as a line drawing.

Again, I used the Bucket Tool to paint the colors.

The basic steps for coloring are the same as done for the slider window but the difference here is where you add the shadows, this time on the parts of the bottom panel overlapping with the top panel.

Shade in the bottom sash properly so you can see that the top window panel sticks out (over the bottom panel).
From the rest, follow the steps I explained for the slider window and the completed oriel window looks like this.

Center Pivot Window
The next application is a center pivot window.
Draw the window frames as I did for the two previous windows.
Don’t forget to draw the depth as well.

Once you are done up to the sashes, use Line from the shape brush tools to take the center of the window and draw a vertical straight line across the frame.

Then select the Radial Snap tool and create a new snap.
Position the snap so the horizontal line of the Radial Snap cuts through the center of the window frame.

Use the Radial Snap and the Crisscross Snap to create the structure of the window panel turning around the axis.

At this step, pay attention to making sure that the top and the bottom line of the panel touches the center line you drew earlier.

Decide on the thickness of the window panel along the pivot structure and start drawing the sashes.

Create a line drawing based on your sketch.
Don’t forget to erase the lines that should be hidden when the sashes overlap.

Now move on to the coloring step.
Follow the previous method and use the Bucket Tool again.

Paint the details including the highlights and now it is complete.

Jalousie Window
I will now explain how to draw the jalousie window.
Start off by creating the window frame.

The jalousie window has multiple glass panels overlapping on top of each other, similarly to window blinds.
Set a new Radial Snap at the top left corner to create a perspective guide for the glass panels.

Position the glass panels.

Here, the lines inside the two blue circles should follow the Radial Snap and the long side should be drawn towards the Radial Snap lines on the right.
Create small parts for the hinges on both sides of the glass panel.

When you are done with the first one, start making the same ones below.
① Decide on where you want to position the next panel, with equal intervals.
② Use the Radial Snap you created, to determine the angle of the glass panel.
③ Draw the shape of each glass panel.

④ Draw the thickness of the glass panels.
⑤ Draw in the details of the shape of hinges etc.
⑥ Create a line drawing based on your sketch.

Proceed to the coloring step.
Color the entire illustration using the Bucket Tool.

Since the jalousie window has a unique shape, the shadows change by each panel.
Add in the shadows on the window frame little by little along each glass panel.

Shade in the left of the window frame too.

Paint the shadows below every single panel, from the top to bottom and add a few highlights to the window frame to complete the window.
The glasses of the jalousie window tend to be translucent so you don’t have to worry about drawing the reflections.

Hopper・Awning Window
The last applications I will explain are the hopper and awning windows.
To make sure you can see the difference properly, I aligned them together.

As done for the others, add depth to the window frame.

Next, use the Parallel Snap to draw the angle for when the windows are left open.

Pay attention to drawing with long vertical lines and short horizontal lines.

Don’t forget to draw the bottom sash as well.

Proceed to draw the rough sketch for an awning window.
Decide on the angle using the Parallel Snap and follow the Radial Snap to draw the horizontal sides.

Once you have the approximate size and angle, think about the thickness of the window panel and start drawing the sashes.

Once you have your rough sketches, start making the line drawing.
Don’t forget to erase the parts that overlap.

Continue to the coloring step with the Bucket Tool, for both windows.

Once you are finished with drawing in the details, the hopper and awning windows are complete !

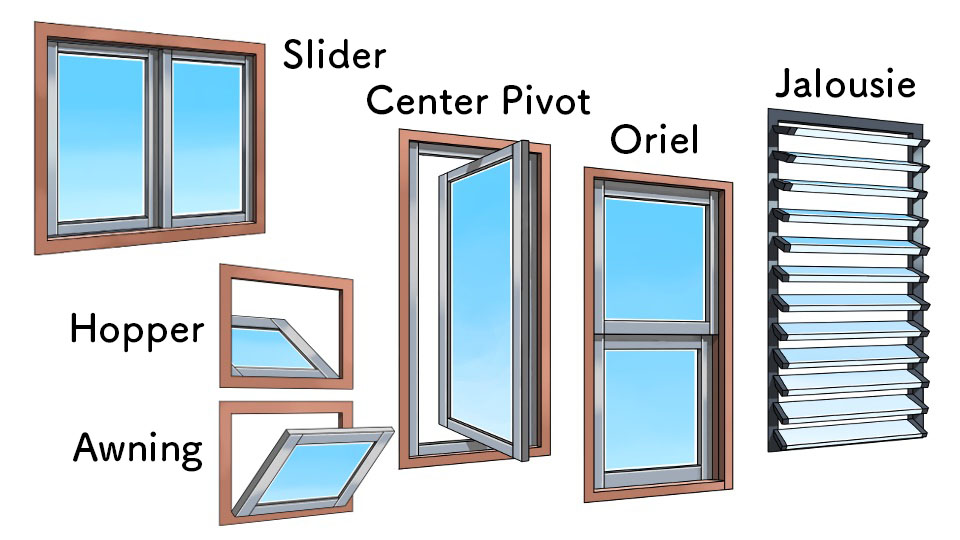
This is how it looks when you compare all the window types side by side.

How was this tutorial?
I created various types of windows, based on the steps for drawing a standard window.
I hope this article helps you as a guide for illustrating windows !
Thank you for reading this tutorial !
(Text・Illustration/荒金ひろみ)
\ We are accepting requests for articles on how to use /


