2022.11.30
【For super beginners】I want to fix my inexperienced drawings! 4 tips you can start today!
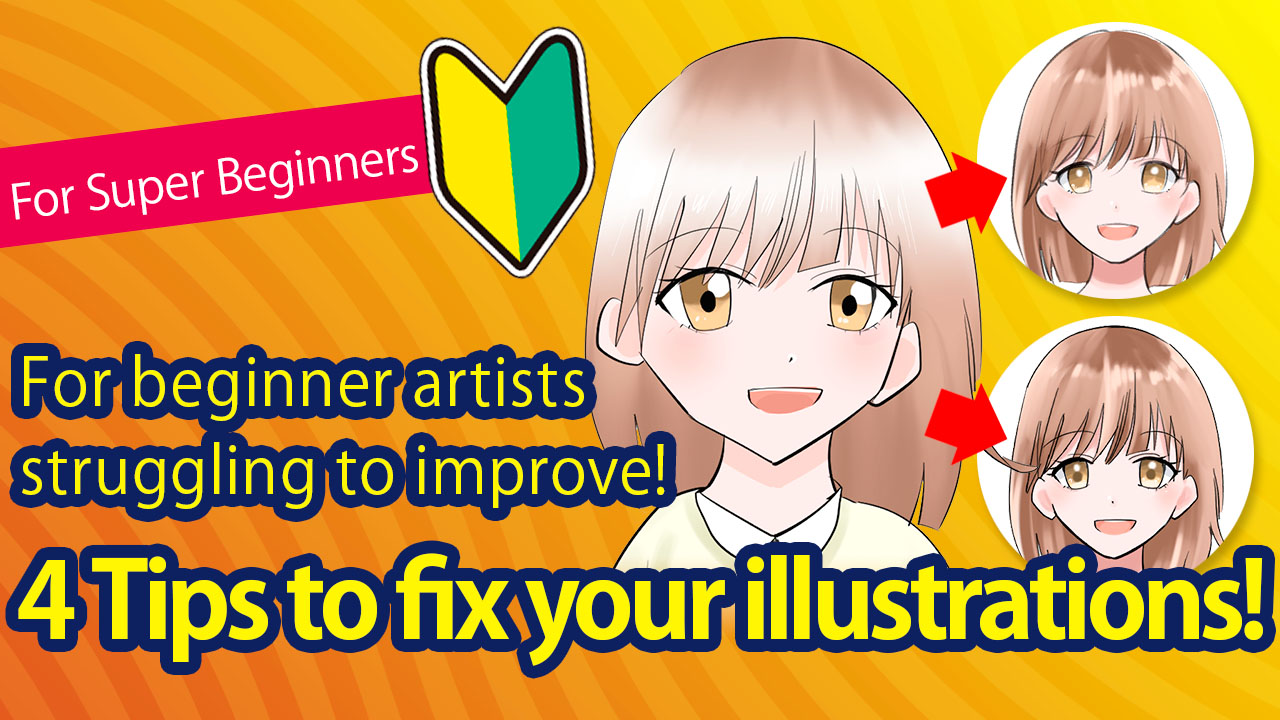
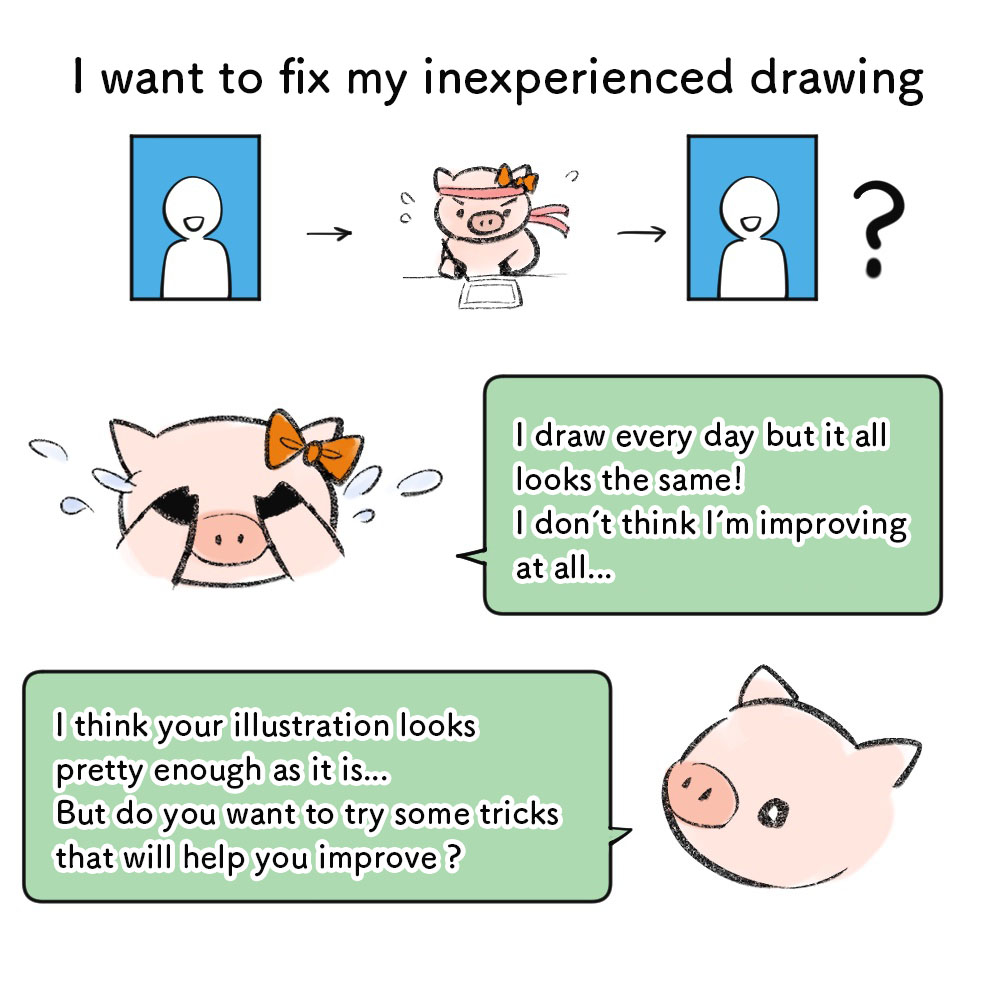
“I like drawing illustrations! I want to improve! so I draw every day but I’m not improving at all… I try my best every time but they all look plain and unattractive…”
I’m sure many beginner artists feel this way.
There are various ways you can improve your illustration but I will be covering the four main points you can change today to refine your drawing!
Look at the illustration below.
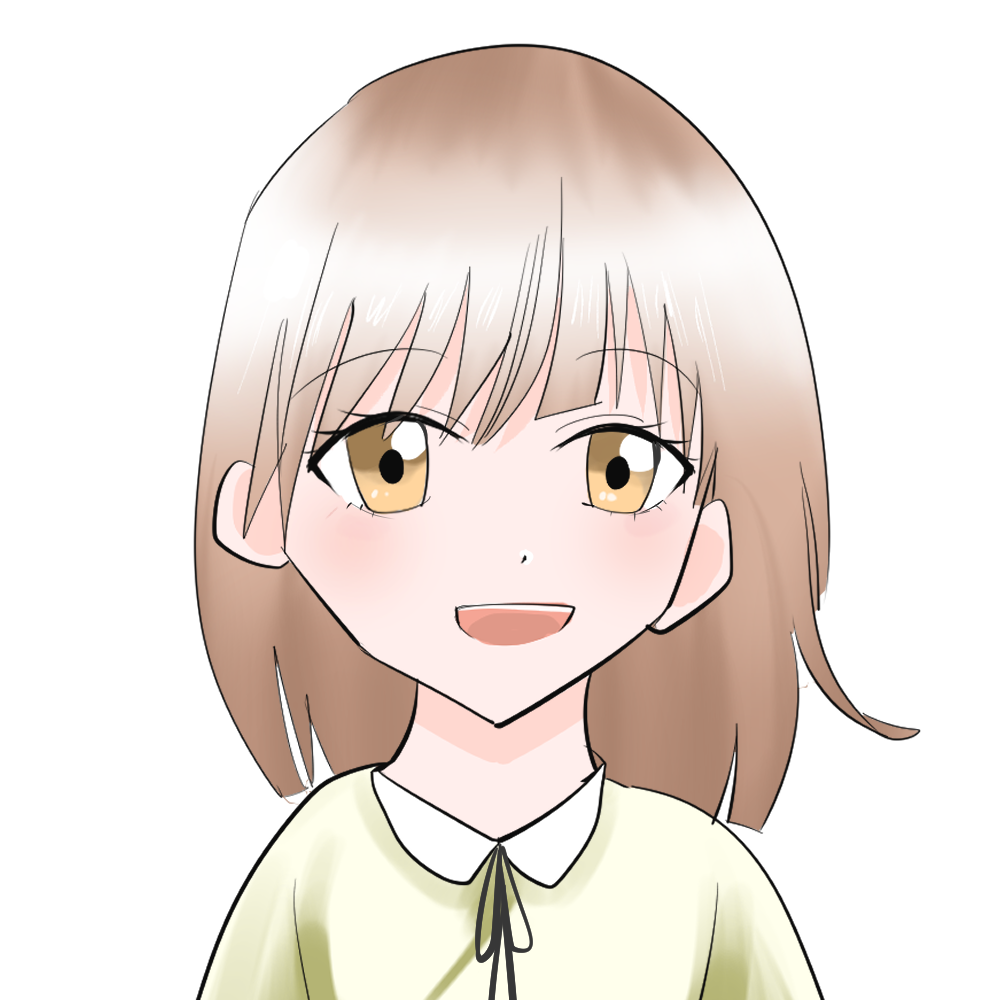
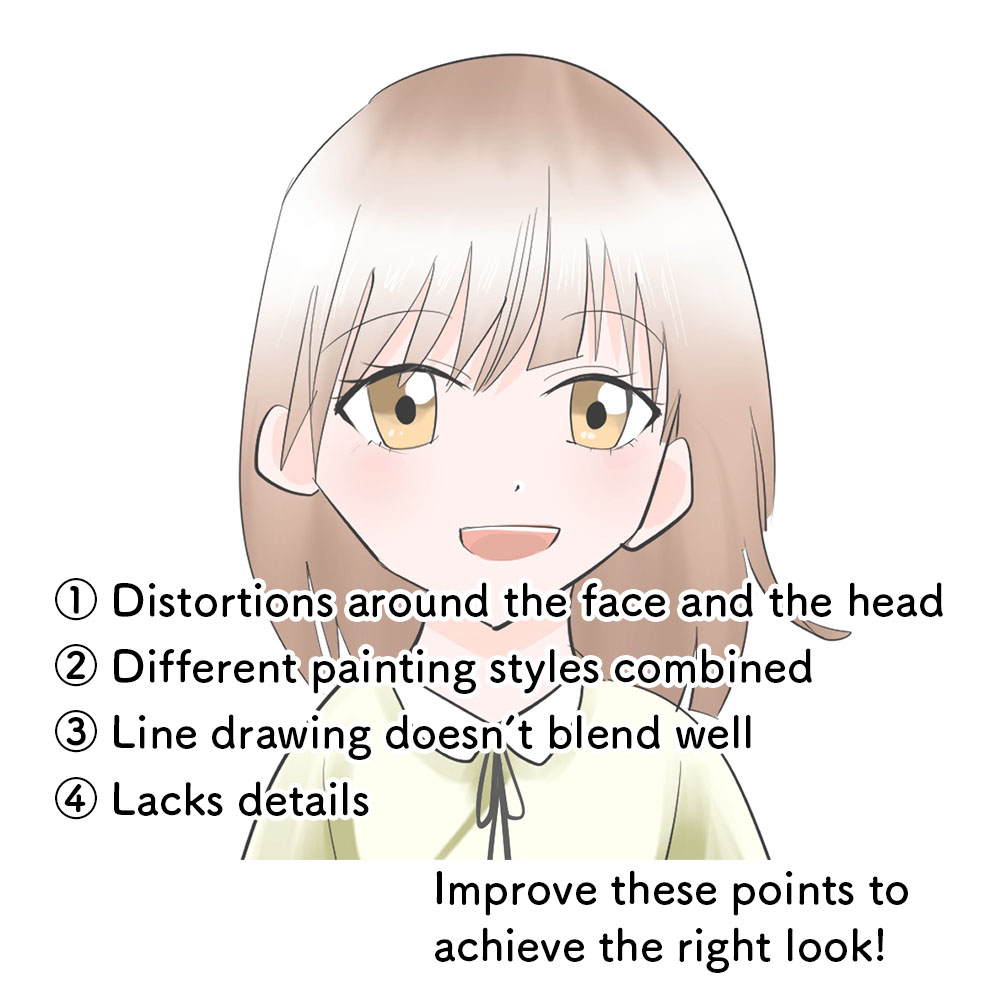
I created this sample drawing based on my past experience and the issues/mistakes often faced by beginner artists.
I think there are different issues for every beginner artist but
① Distortion problem
② Inconsistent painting style problem
③ Line drawing out of place
④ Not enough details
These are the main points you can fix very easily.
When you get them right, your illustration will start to look more refined even if your drawing skill is still the same.
① Distortions around the face and the head
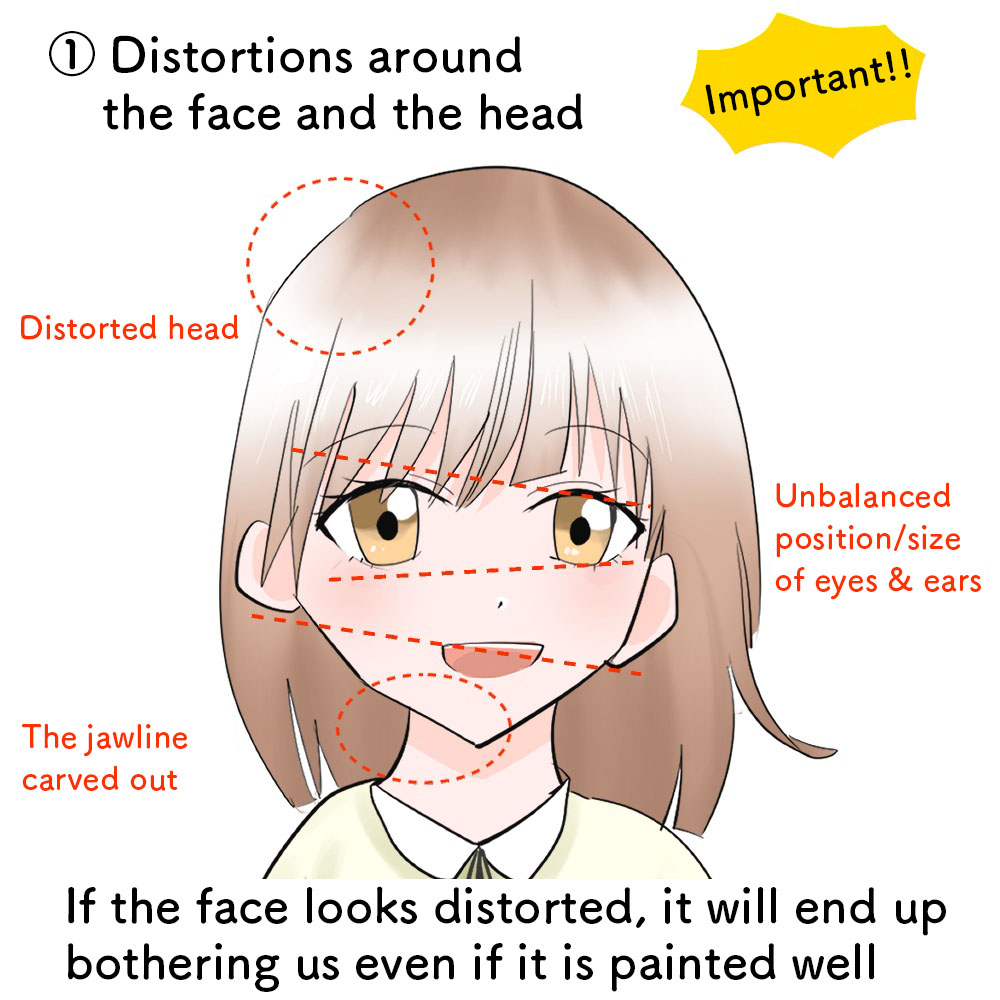
This is what happens!!!
It might sound a little bit harsh but even if you paint the illustration well, even if your character is well designed, we will only look at the distortions when the facial parts are misplaced.
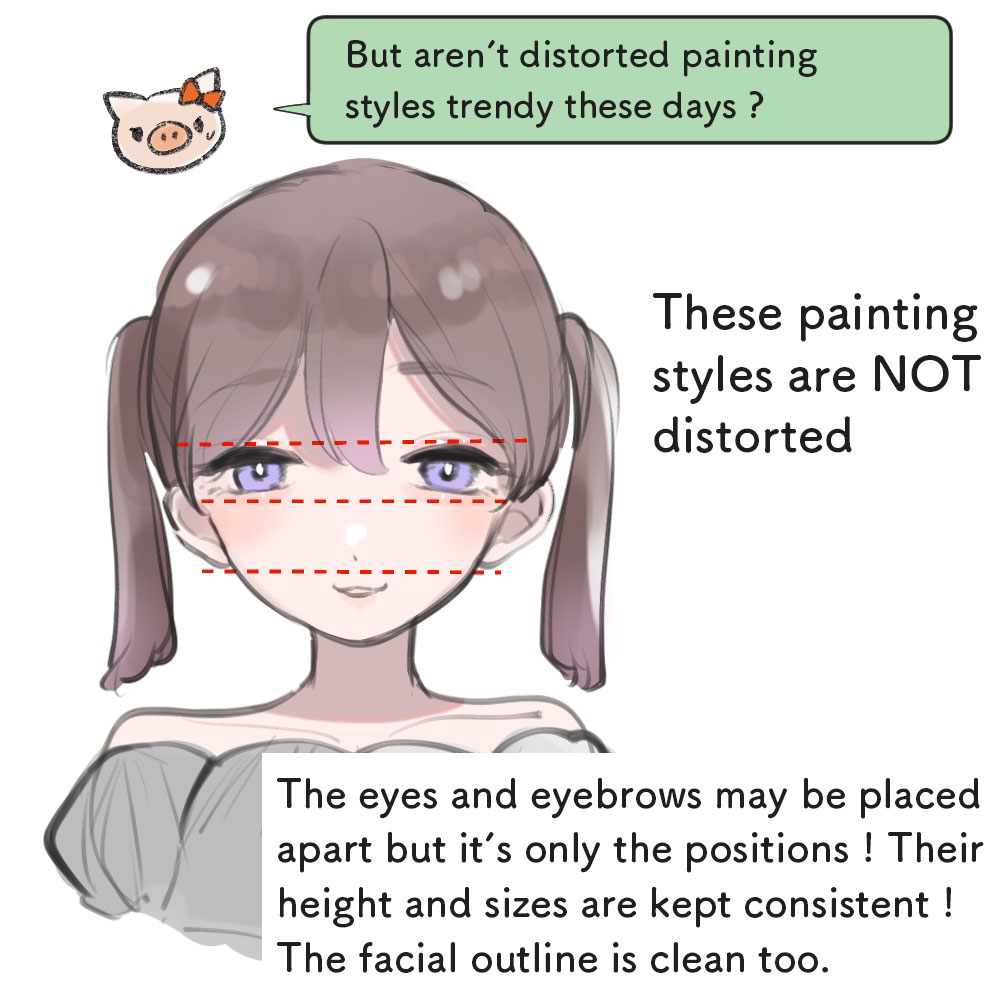
Recent trends include unbalanced portraits but you can see that skilled artists still keep the position of the ears and the eyes symmetrical in those too.
You can practice drawing the body later.
Let’s practice drawing the front face until you can draw without any distortions.
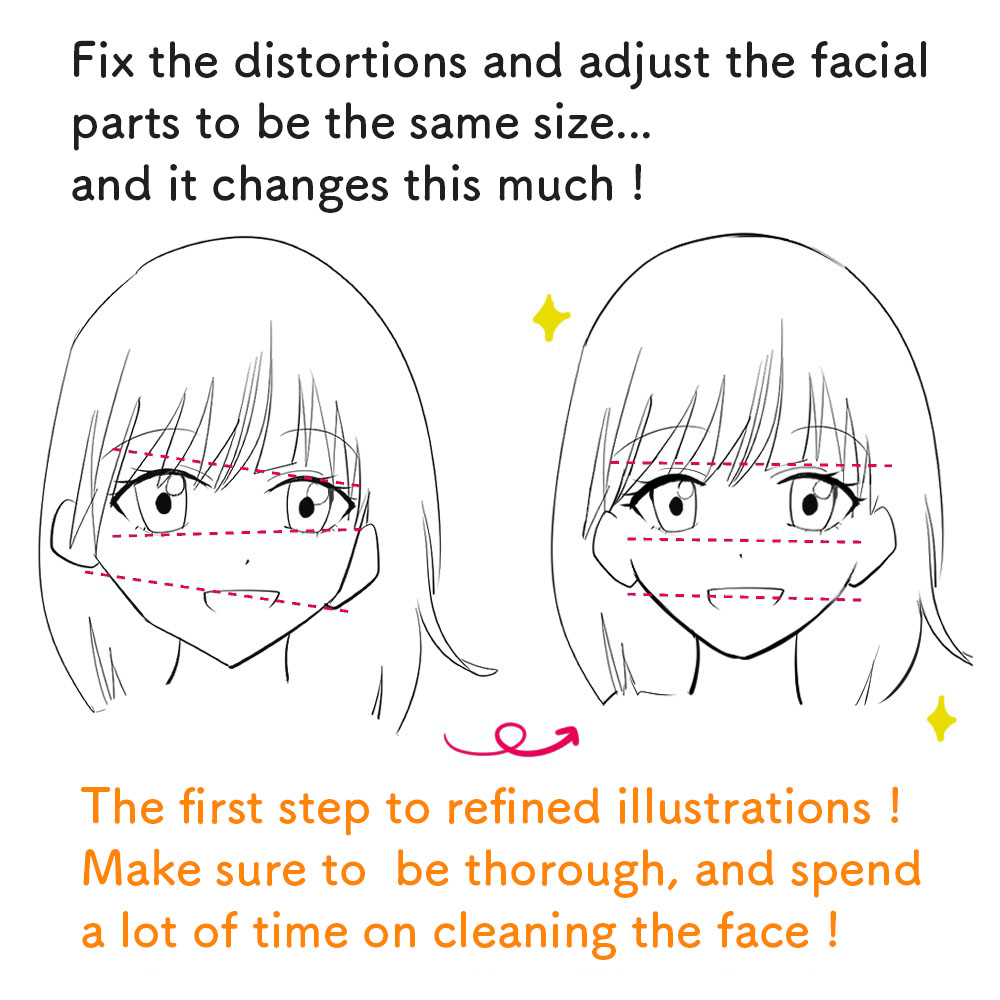
The basic rule is “symmetry”!
You can draw and adjust as many times as you want so take your time and be thorough with the cleaning process.
Most distortions are found in
① The height of the eyes
② The height of the ears
③ The jawline
④ The size and shape of the head
Keep the height of the eyes and the ears symmetrical.
The jawline tends to be unnecessarily sharp so pay attention to making it round.
The head tends to be too large as well.
When you draw the rough sketch, make sure to draw an approximation for the head too.
☆ You can read the below article to learn how to draw with the right facial proportions.
[For Beginners] Learn how to balance your face & get the basic ‘Atari’!
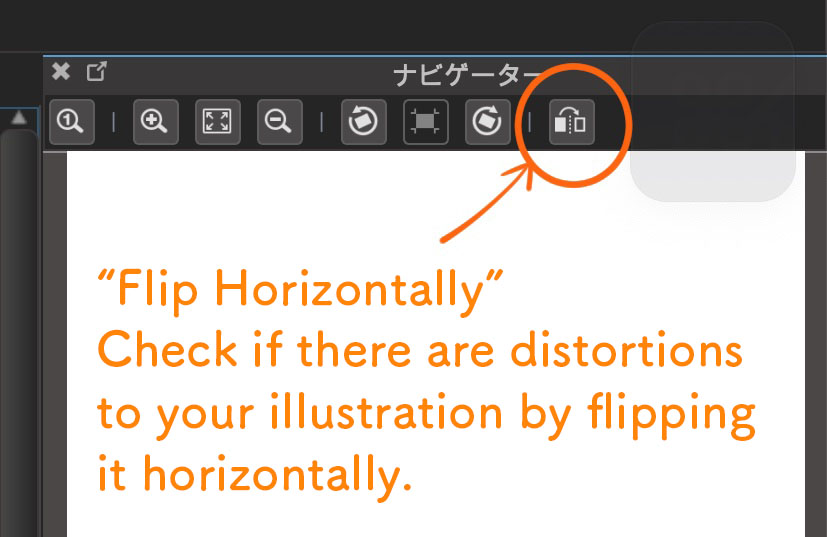
Additionally, the “Flip Horizontally” tool comes in handy when you check for distortions.
When you click on this icon inside the Navigator panel of MediBang Paint (for PC in the image), your illustration will be flipped horizontally.
There are often times when you feel like you drew a symmetrical illustration but it’s actually distorted when you flip it horizontally…
When you get to the point where you can draw the front face properly, you can move to the next step of drawing the side face.
The jawline tends to be very unbalanced for the side face.
Isn’t the jaw too sharp? Isn’t the jawline carved straight? Make sure to avoid these two points.
② Inconsistent painting styles
This is the drawing I showed in the beginning.
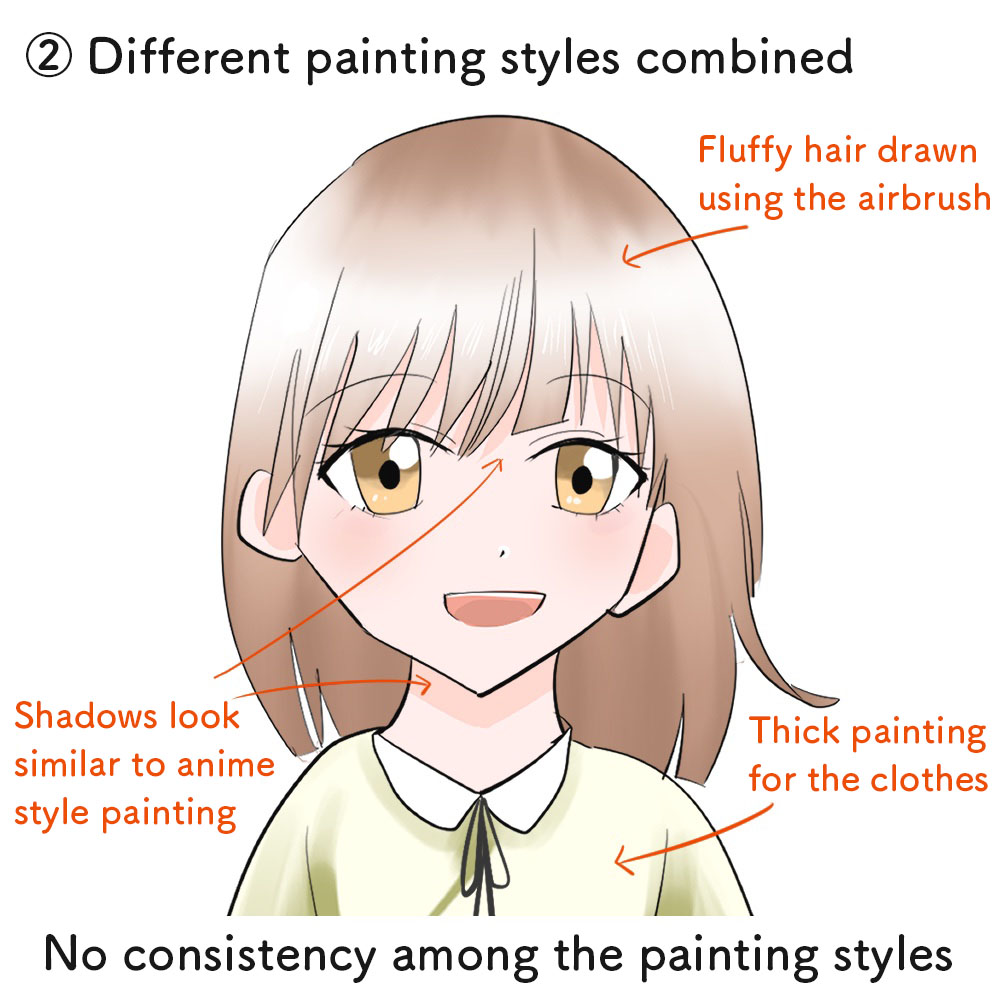
I can see that there was a lot of effort put into this illustration, having used the airbrush, having drawn the highlights etc… but it honestly doesn’t look pretty.
This is because “different painting techniques are combined”.
In this illustration, anime style painting is applied for the shadows around the face, thick painting is used for the clothes and the hair seems to be painted with the airbrush, mixing various painting styles in a single drawing.
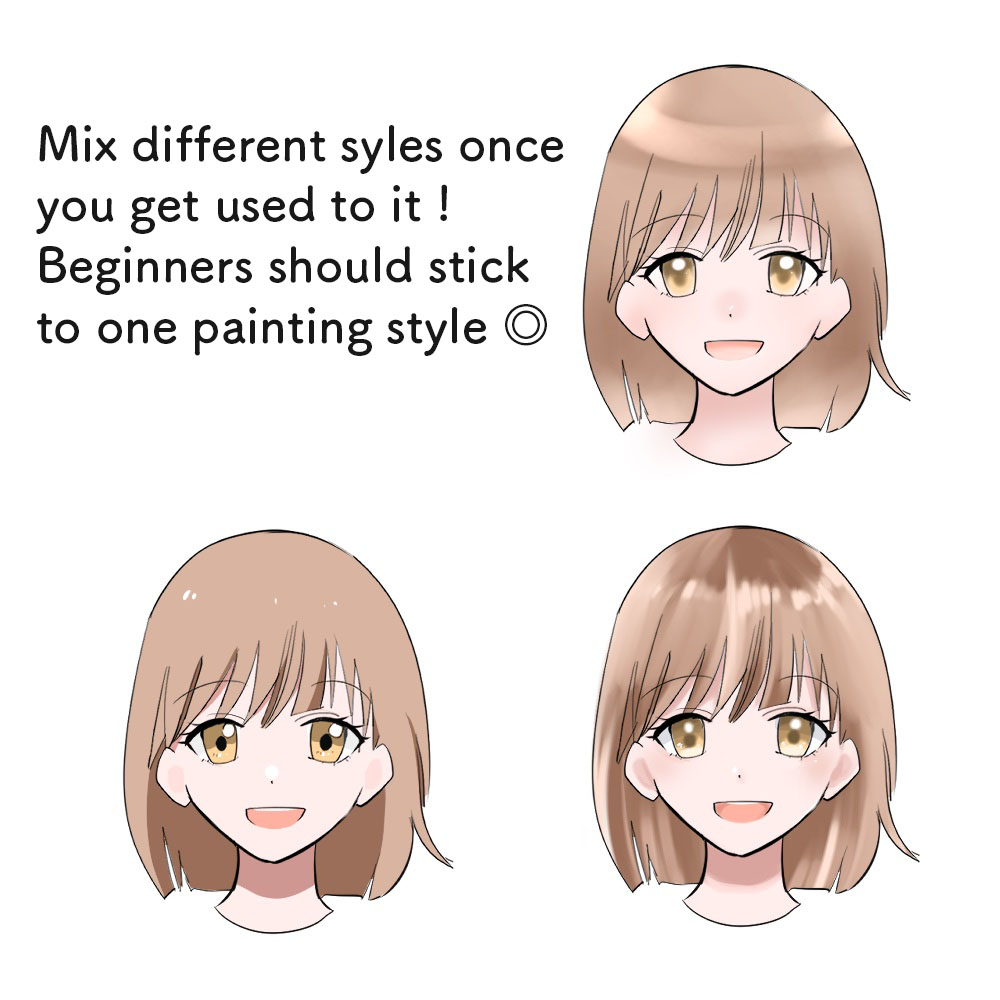
Mixing various techniques is recommended for intermediates and advanced artists so I recommend beginners to choose only one painting technique.
Choose the right, single painting style that will suit the mood of your illustration.
For those of you thinking “I don’t really understand what a mood is…”, I recommend starting with “Anime-style Painting”.
In anime-style painting, everything is painted very clearly without soft touches or blurs applied to the shadows etc.
Since you can’t blur the shadows in anime-style painting, you will be forced to practice where to add the shadows.
☆ An article for an anime-style painting tutorial.
Create Glossy Hair with Anime Glossing!
Easy! How to color like an Anime.
③ The line drawing looks off
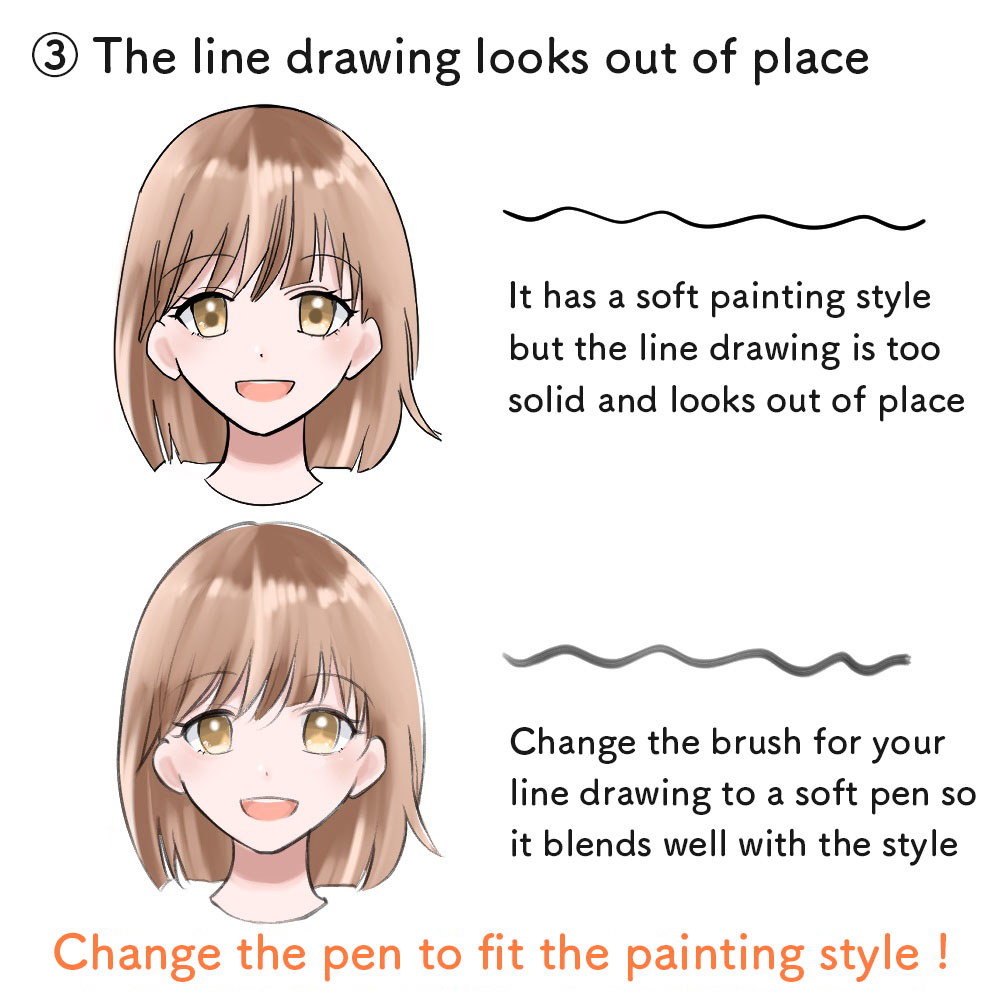
This also relates to the painting styles I explained in ② but it often happens to be the case that the line drawing looks out of place even though the painting is done pretty.
“Line drawing must be drawn in black with the pen tool !” This is a wrong assumption.
Stiff, sharp lines do match with the anime-style painting but when you want to paint softly, the line drawing should also be drawn with soft touches.
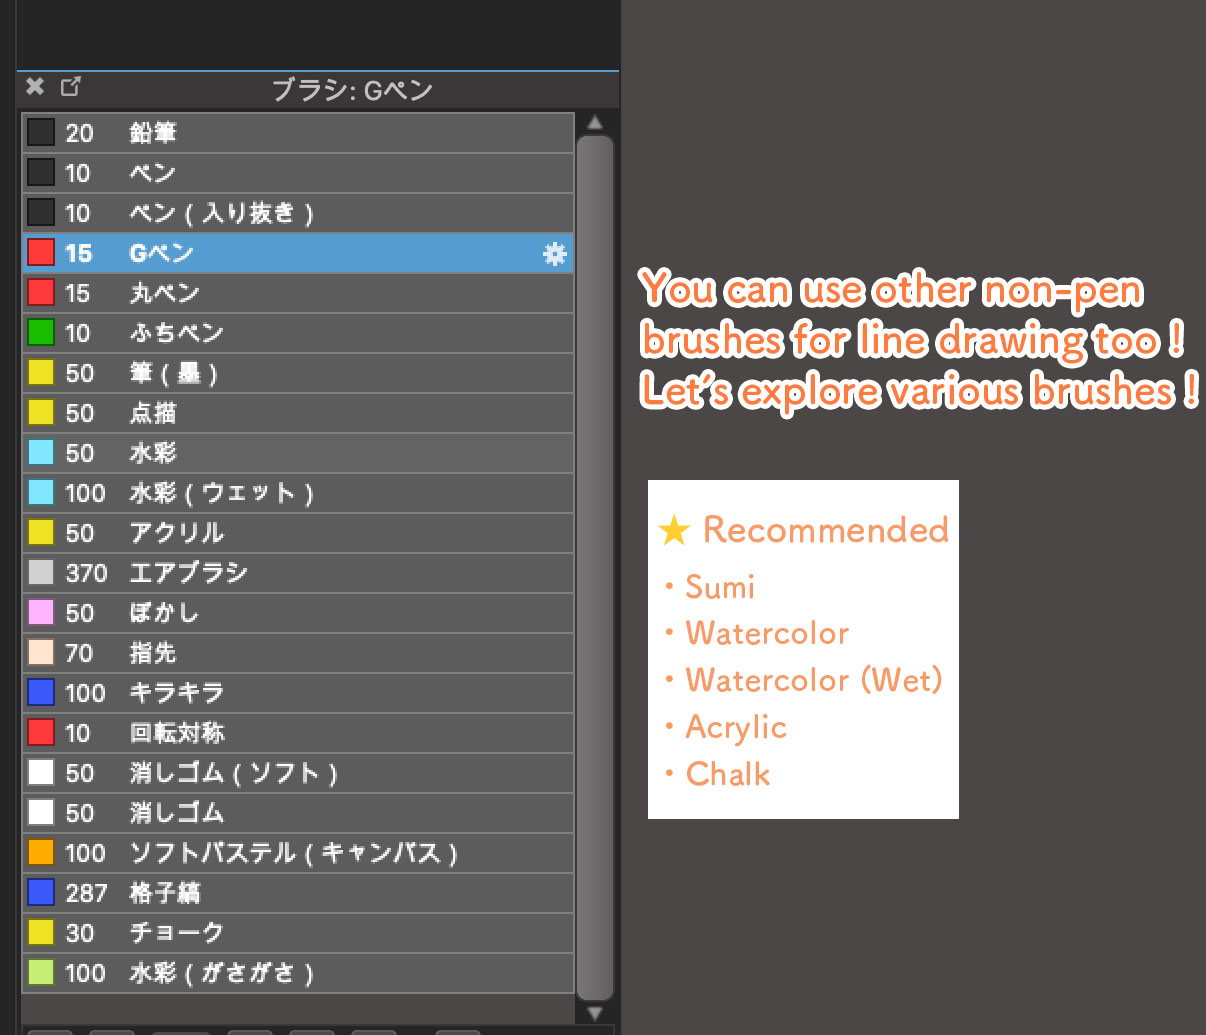
Inside MediBang Paint, you can use brushes like Sumi, Watercolor or Watercolor (Wet) for line drawing besides the pen.
You can see the drastic difference in how the line drawing blends with the rest!
Adjust your line drawing to fit the mood of the illustration you want to draw!
I also recommend changing the color of the line drawing to fit the shades of surrounding parts like the hair and the skin.
④ Lacking details
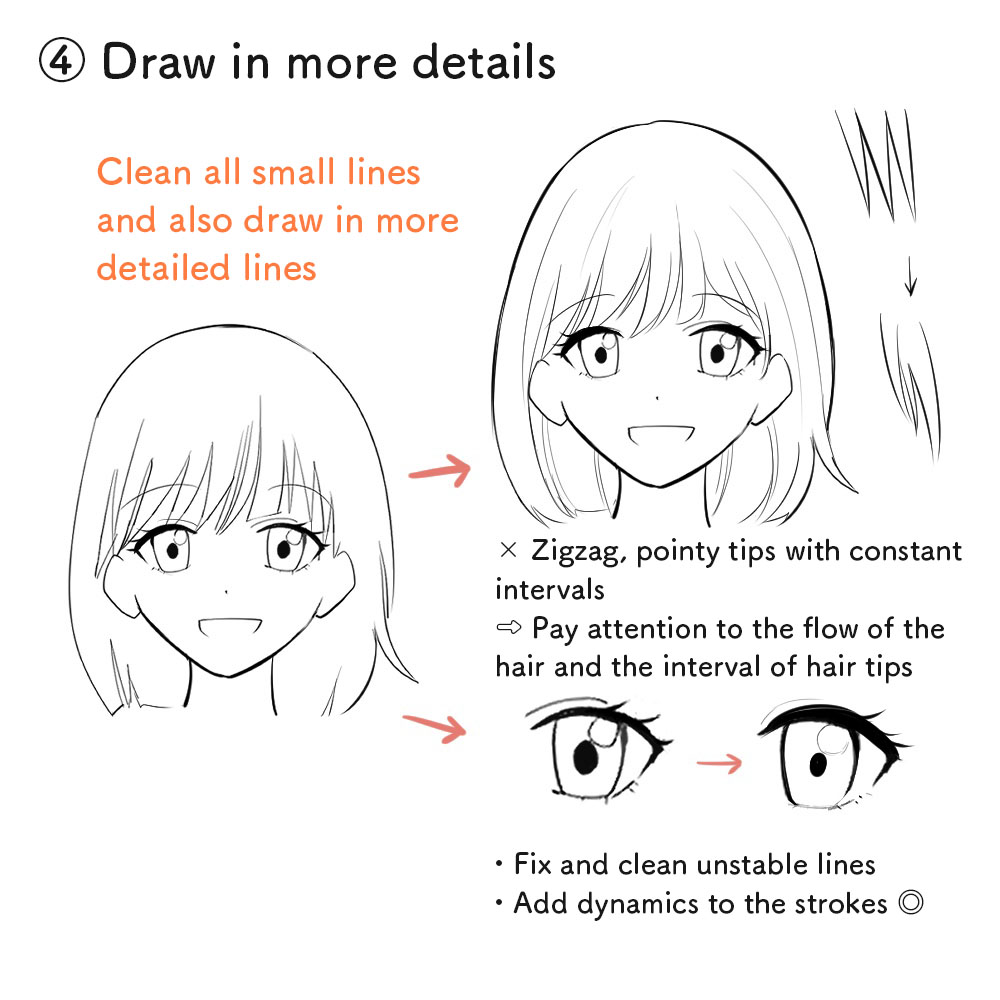
In particular, pay close attention to the hair.
You can see that the hair is drawn straight with very few lines in the unedited version.
This isn’t a problem if you are drawing deformed or chibi characters but when you are creating a regular illustration, adding a lot of details will make it look much more attractive.
Follow the shape of the head and draw in the natural flow of the hair.
Furthermore, the hair tips should be uneven in terms of both direction and size.
The eyes are also drawn with thin lines and have very little details.
Make sure to draw with thick lines for the upper eyelid and draw in a lot of details for the pupils and reflecting lights during the painting process.
You will see that every artist has their own way of drawing the eyes so start off by observing the characters in your favorite illustrations or how your favorite artists draw pretty eyes!
When you are drawing the face,
・Hair
・Eyes
remember that these two points above are what we pay attention to the most.
By drawing in a lot of details for the hair and the eyes, you will be able to make your illustration look “well drawn”.
If you think it will be too challenging to incorporate the four tips I explained in this tutorial, start off by paying attention to just one of them. I’m sure it will be a great opportunity to fix the mistakes you are making.
Enjoy making your illustrations and improve your drawing skill step by step!
☆ Improving illustrations in the long-term
[For Beginner] How to Practice Drawing!
Where do I start? How to start and improve your illustration skills. [For super beginners]
If you want to raise the level of your drawing skill as well, please refer to the articles above.
(Text・Illustration/はらなおこ)
twitter:@nao_comic
\ We are accepting requests for articles on how to use /

