2023.05.24
[For beginners] Let’s draw backgrounds! [Easy]
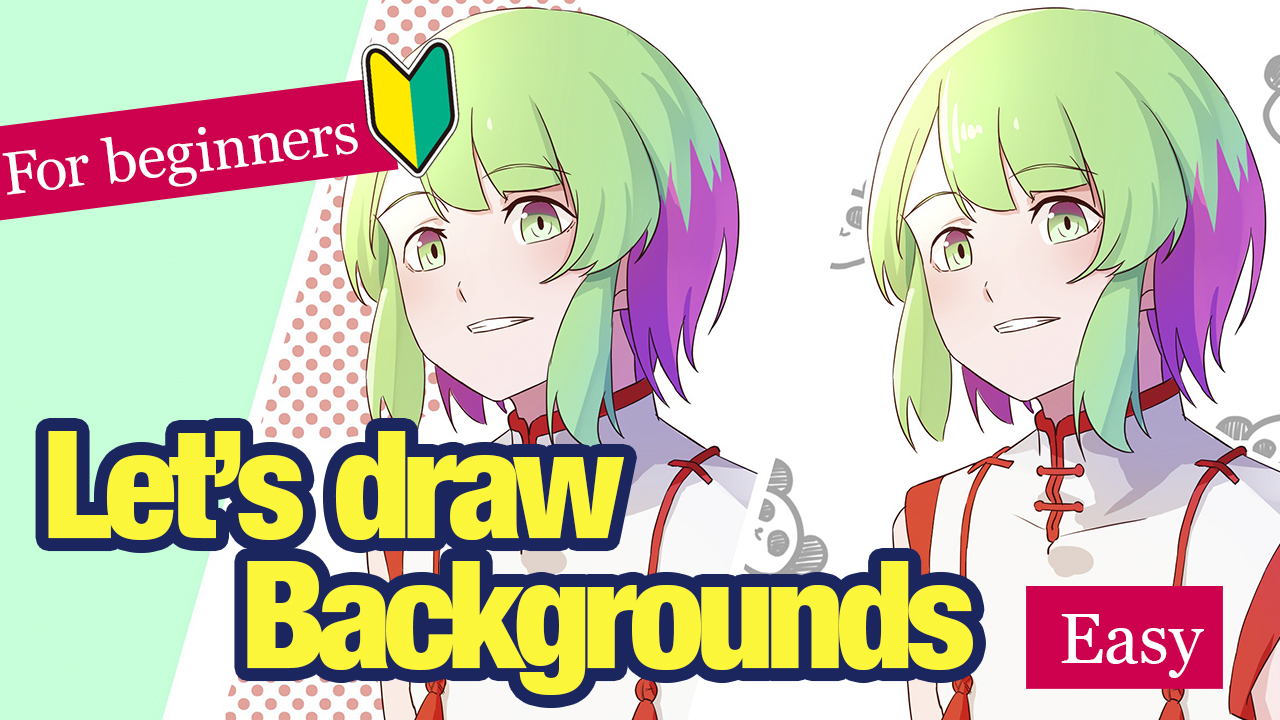
Do you draw illustrations of characters with backgrounds?
Today’s article is for those who think “I cannot draw difficult backgrounds or sceneries”.
I will show you some patterns for drawing backgrounds that are easy to draw with the Shape Tool!
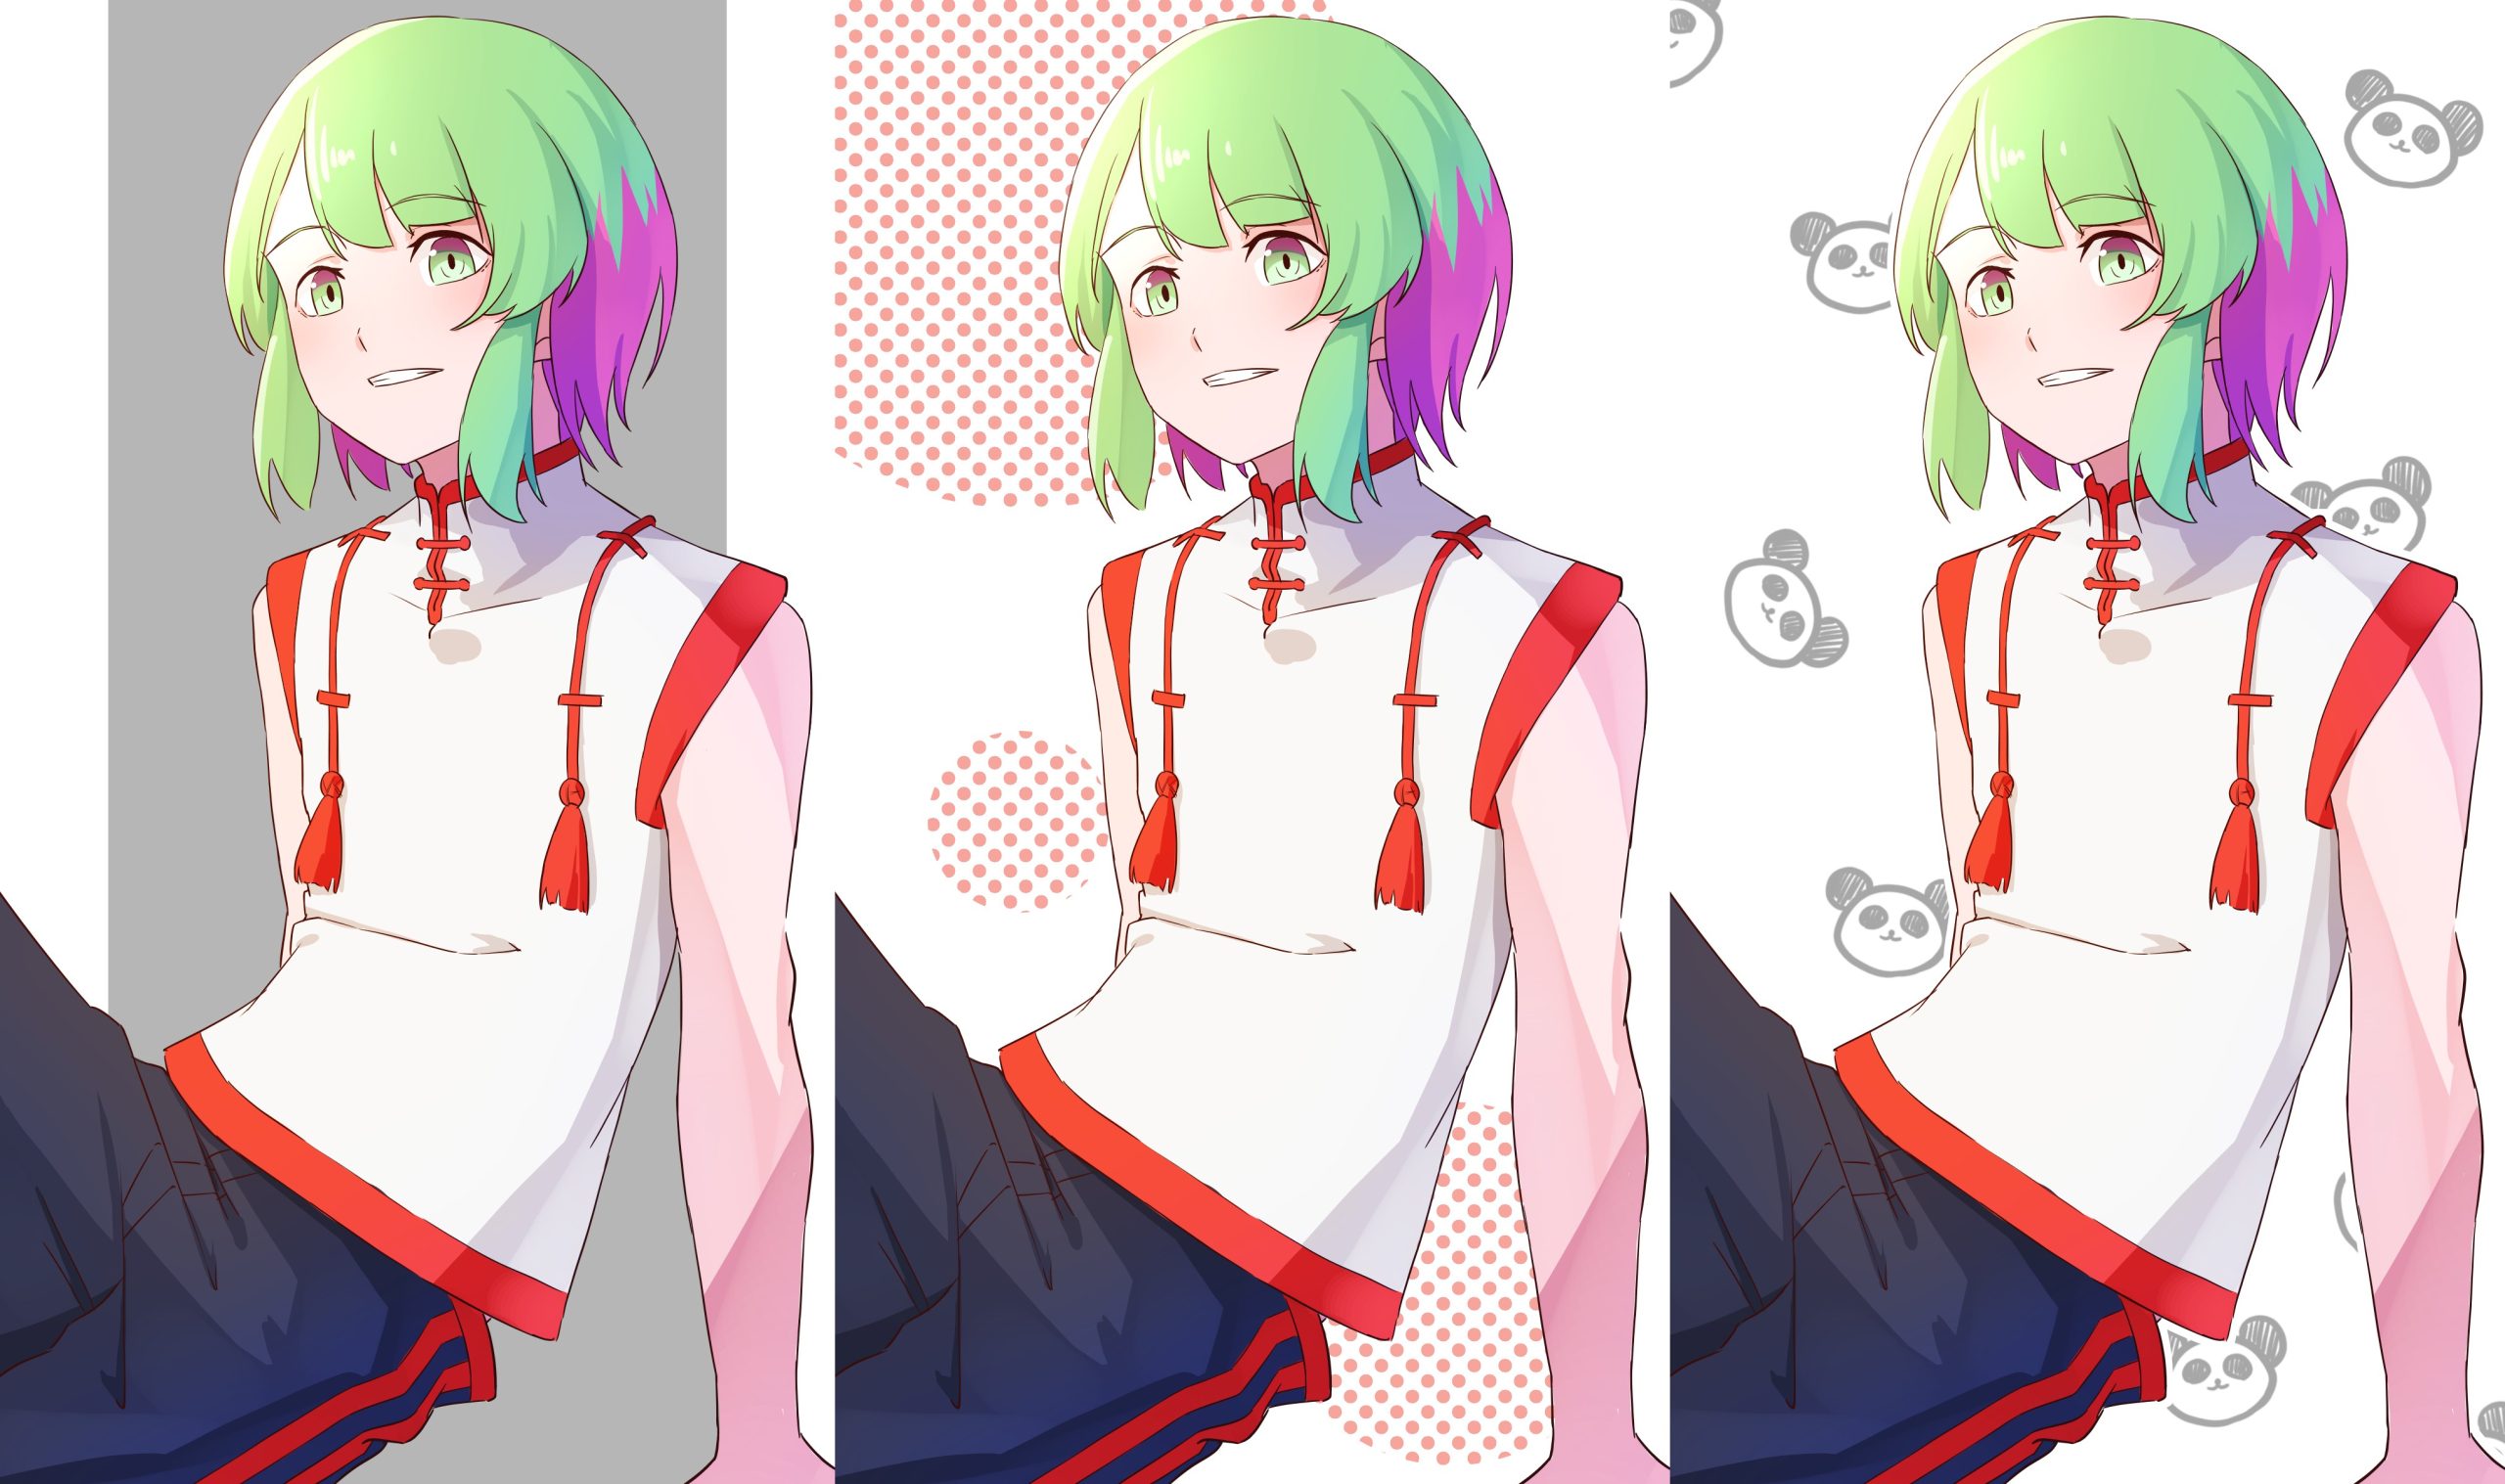
After reading this tutorial, you will be able to draw these 3 background patterns below.
Select rectangles for backgrounds
- “I can’t come up with any background ideas when I’m staring at a blank canvas.”
- “I don’t know what color to use for backgrounds.”
For those who think like this, gray rectangles are recommended.
Below is the completed image↓
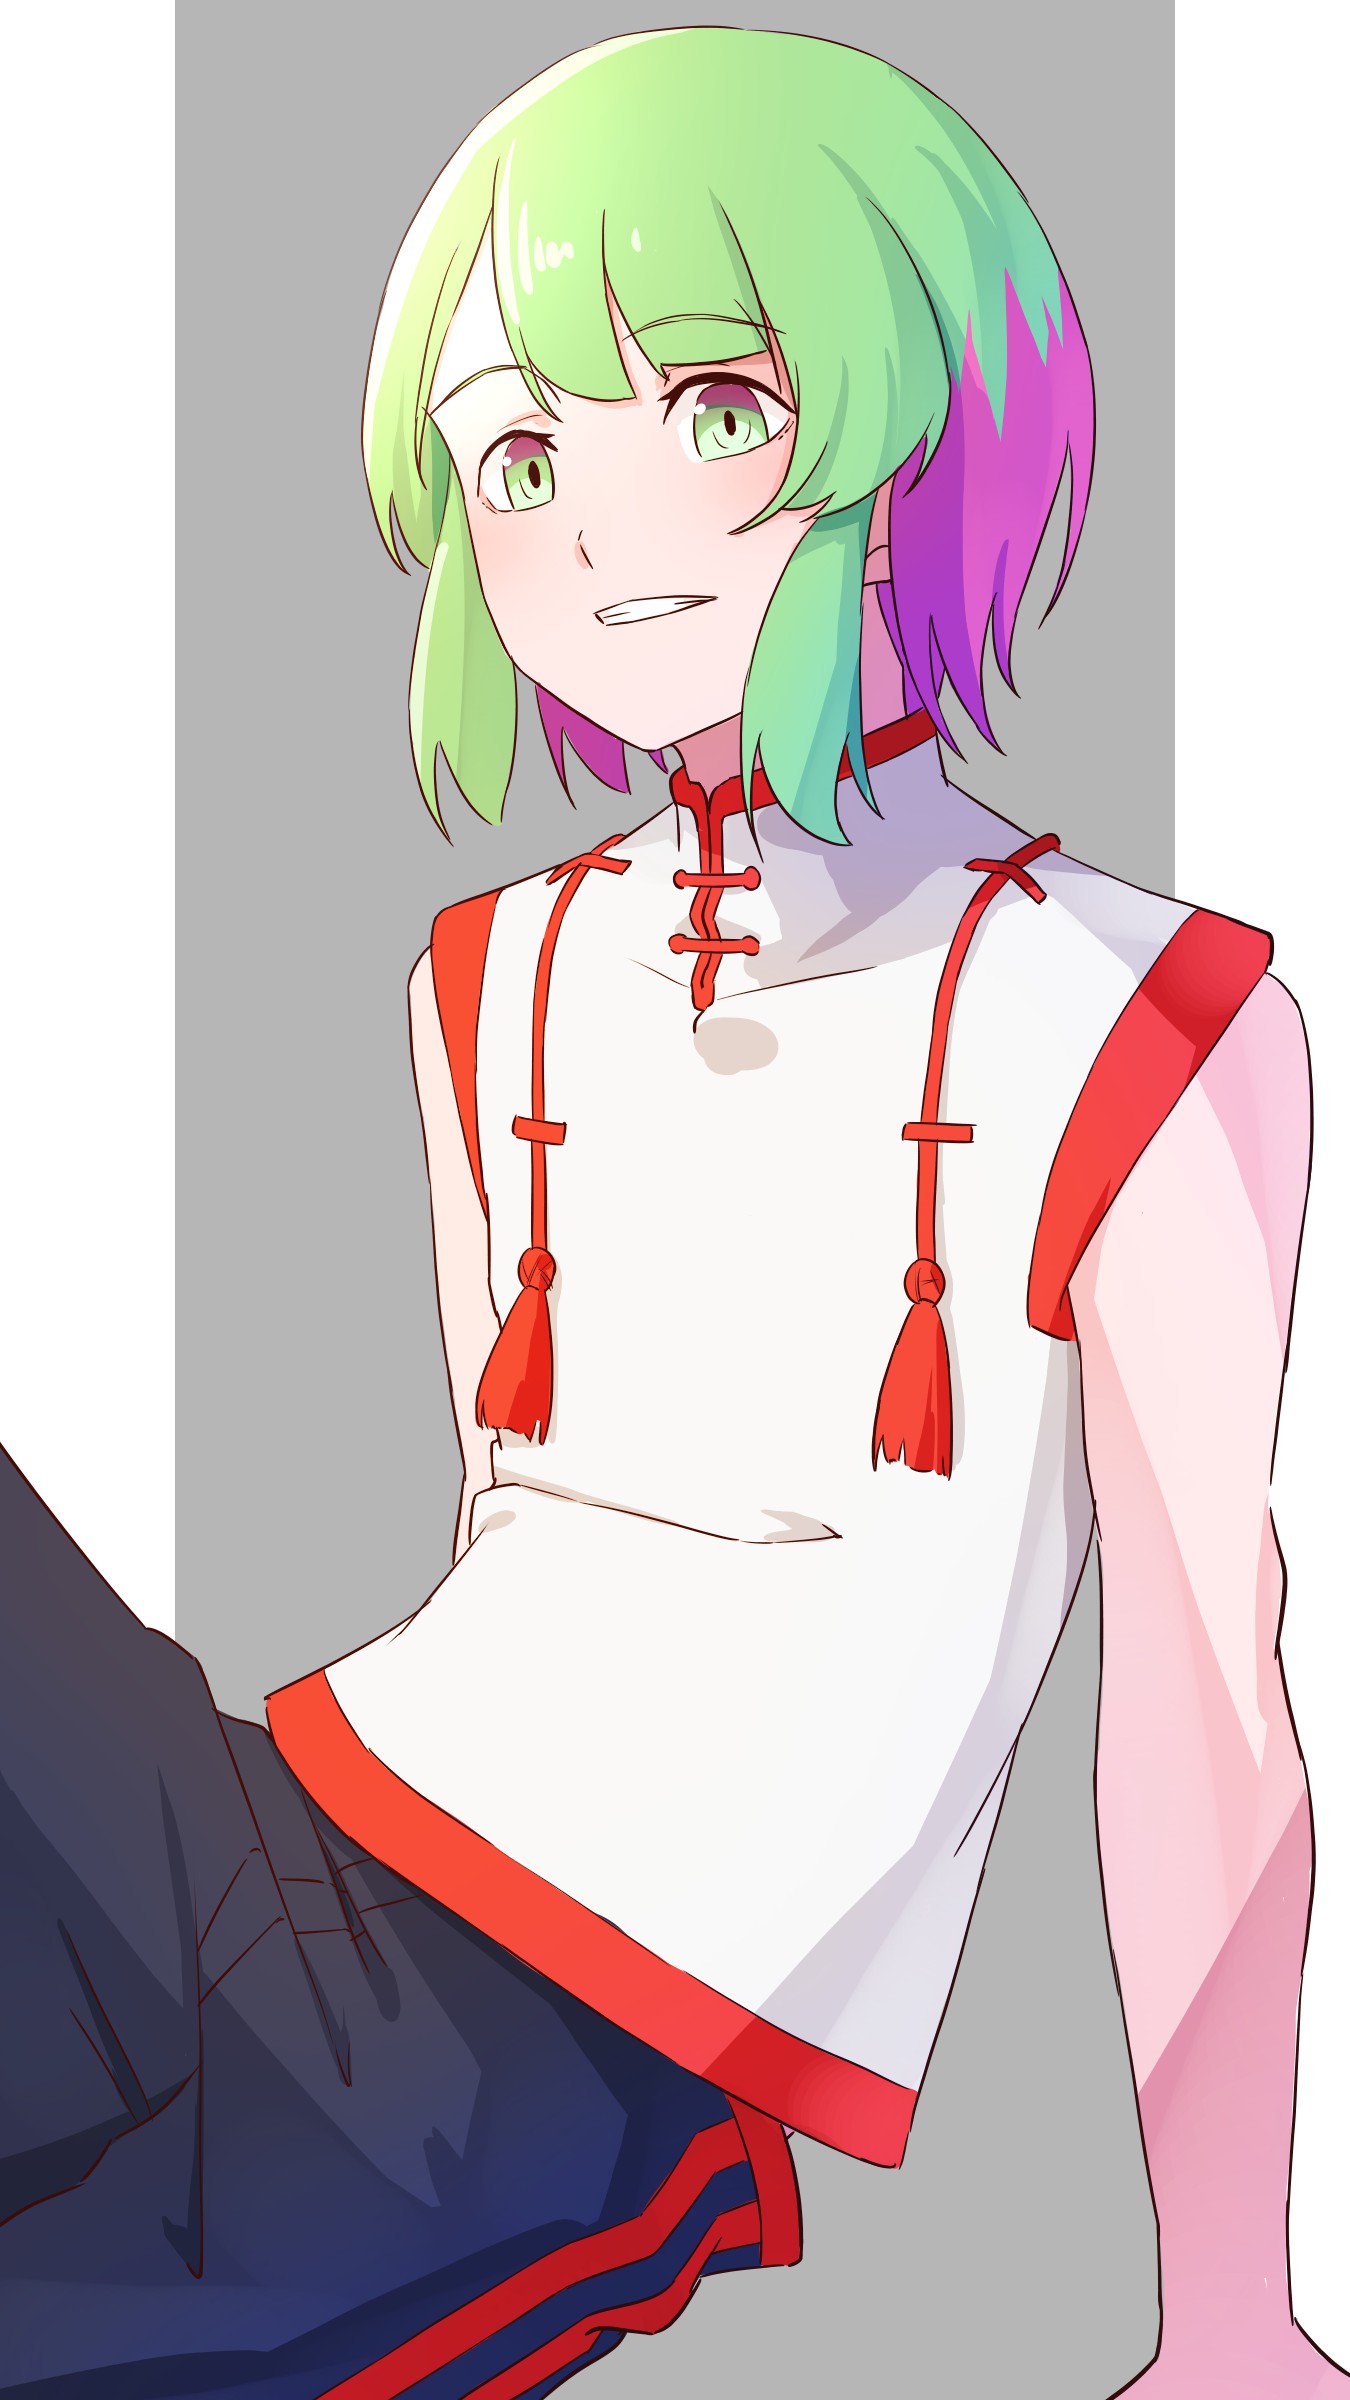
Gray rectangles are perfect for illustrations with a chic atmosphere.
Now, let’s see how to draw them.
Select Rectangle from the Fill Tool to place boxes
Add a new layer under the character layer.
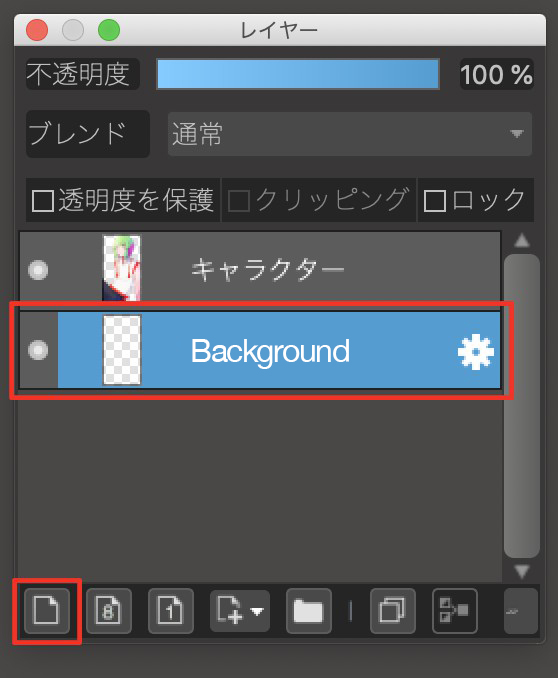
Choose gray from the color palette.
Select the Fill Tool.
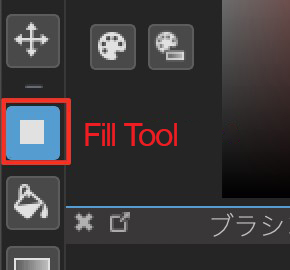
Select “Rectangle”.
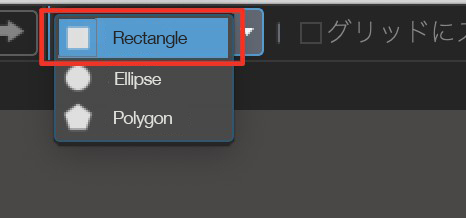
Click and drag a large rectangle to make it protrude from the canvas.
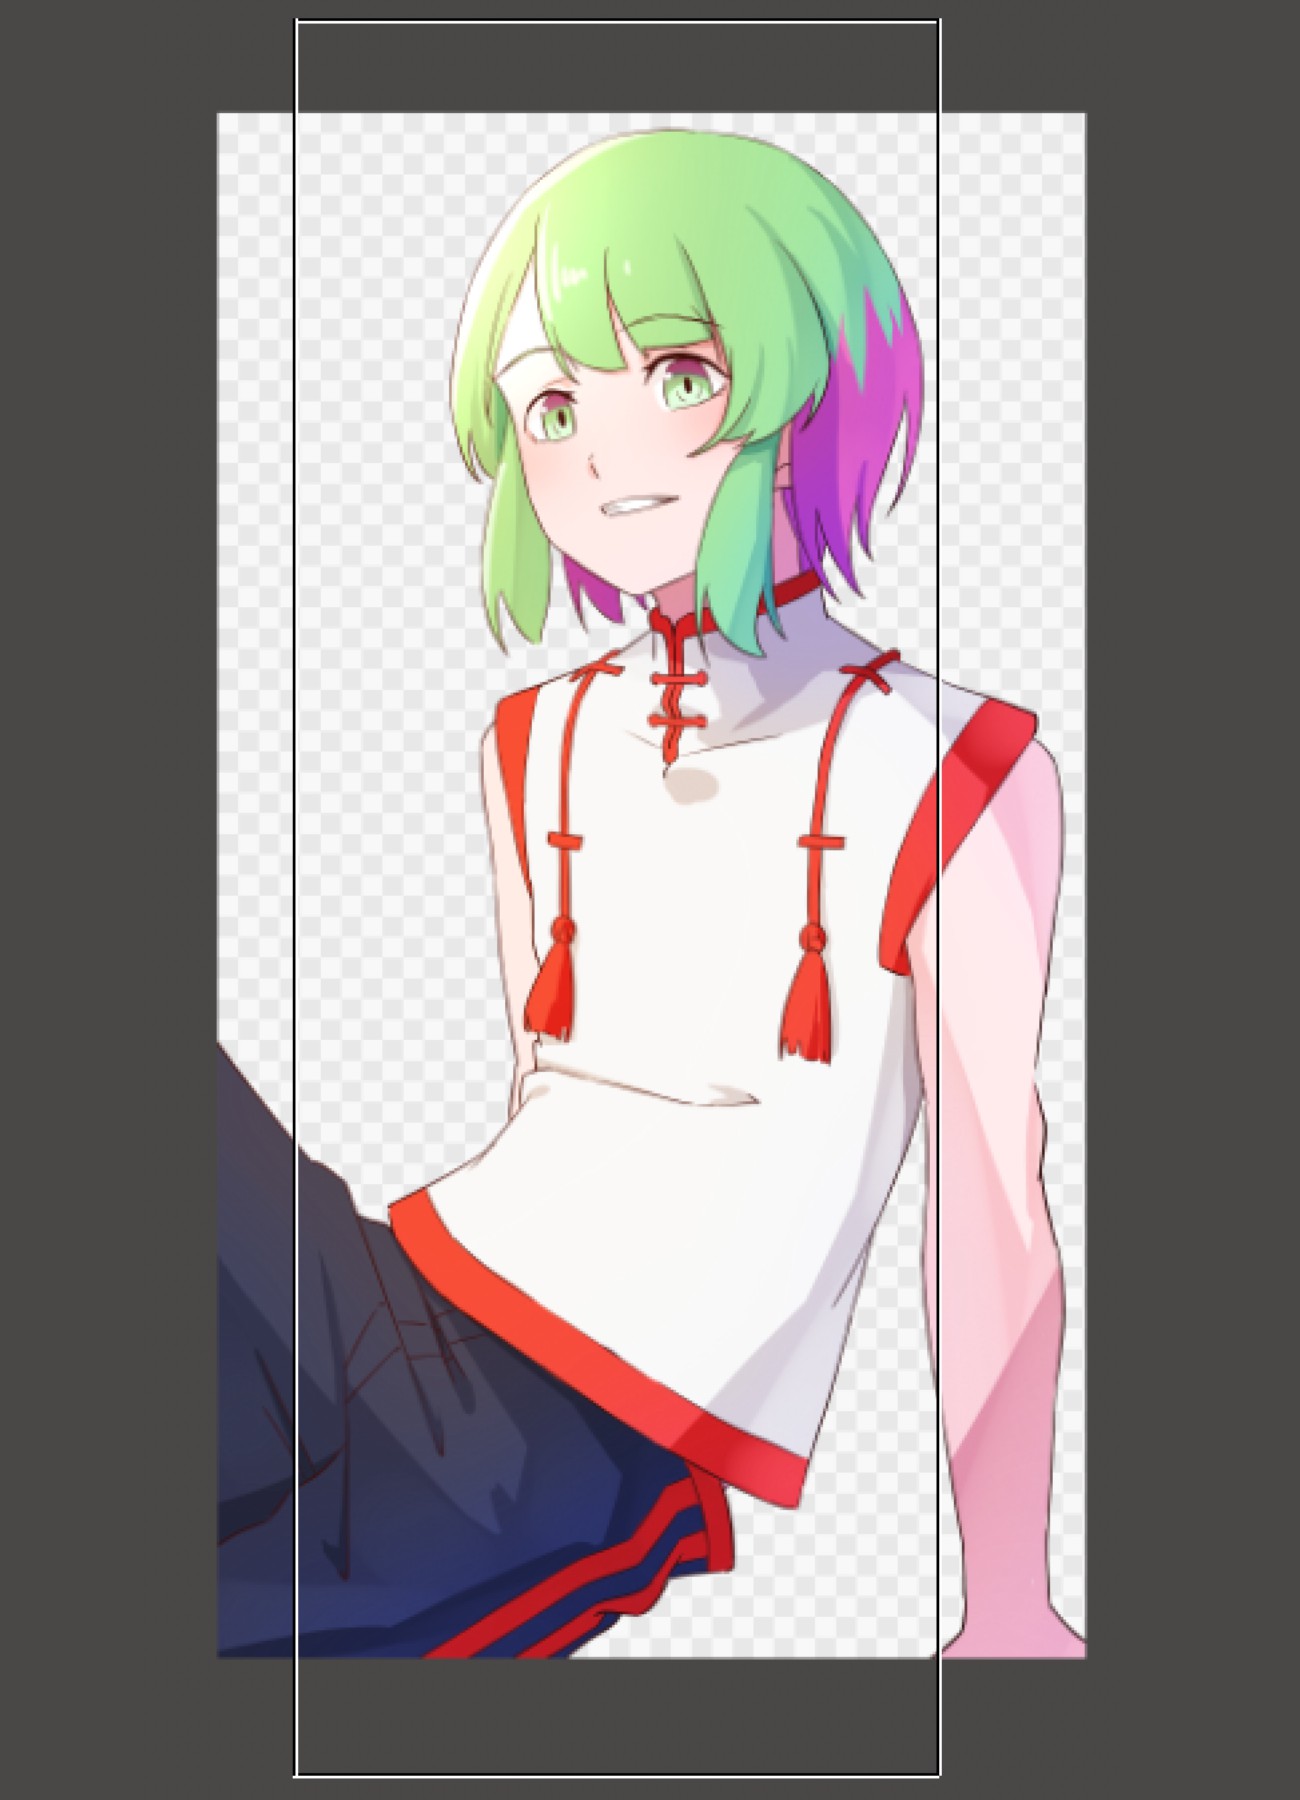
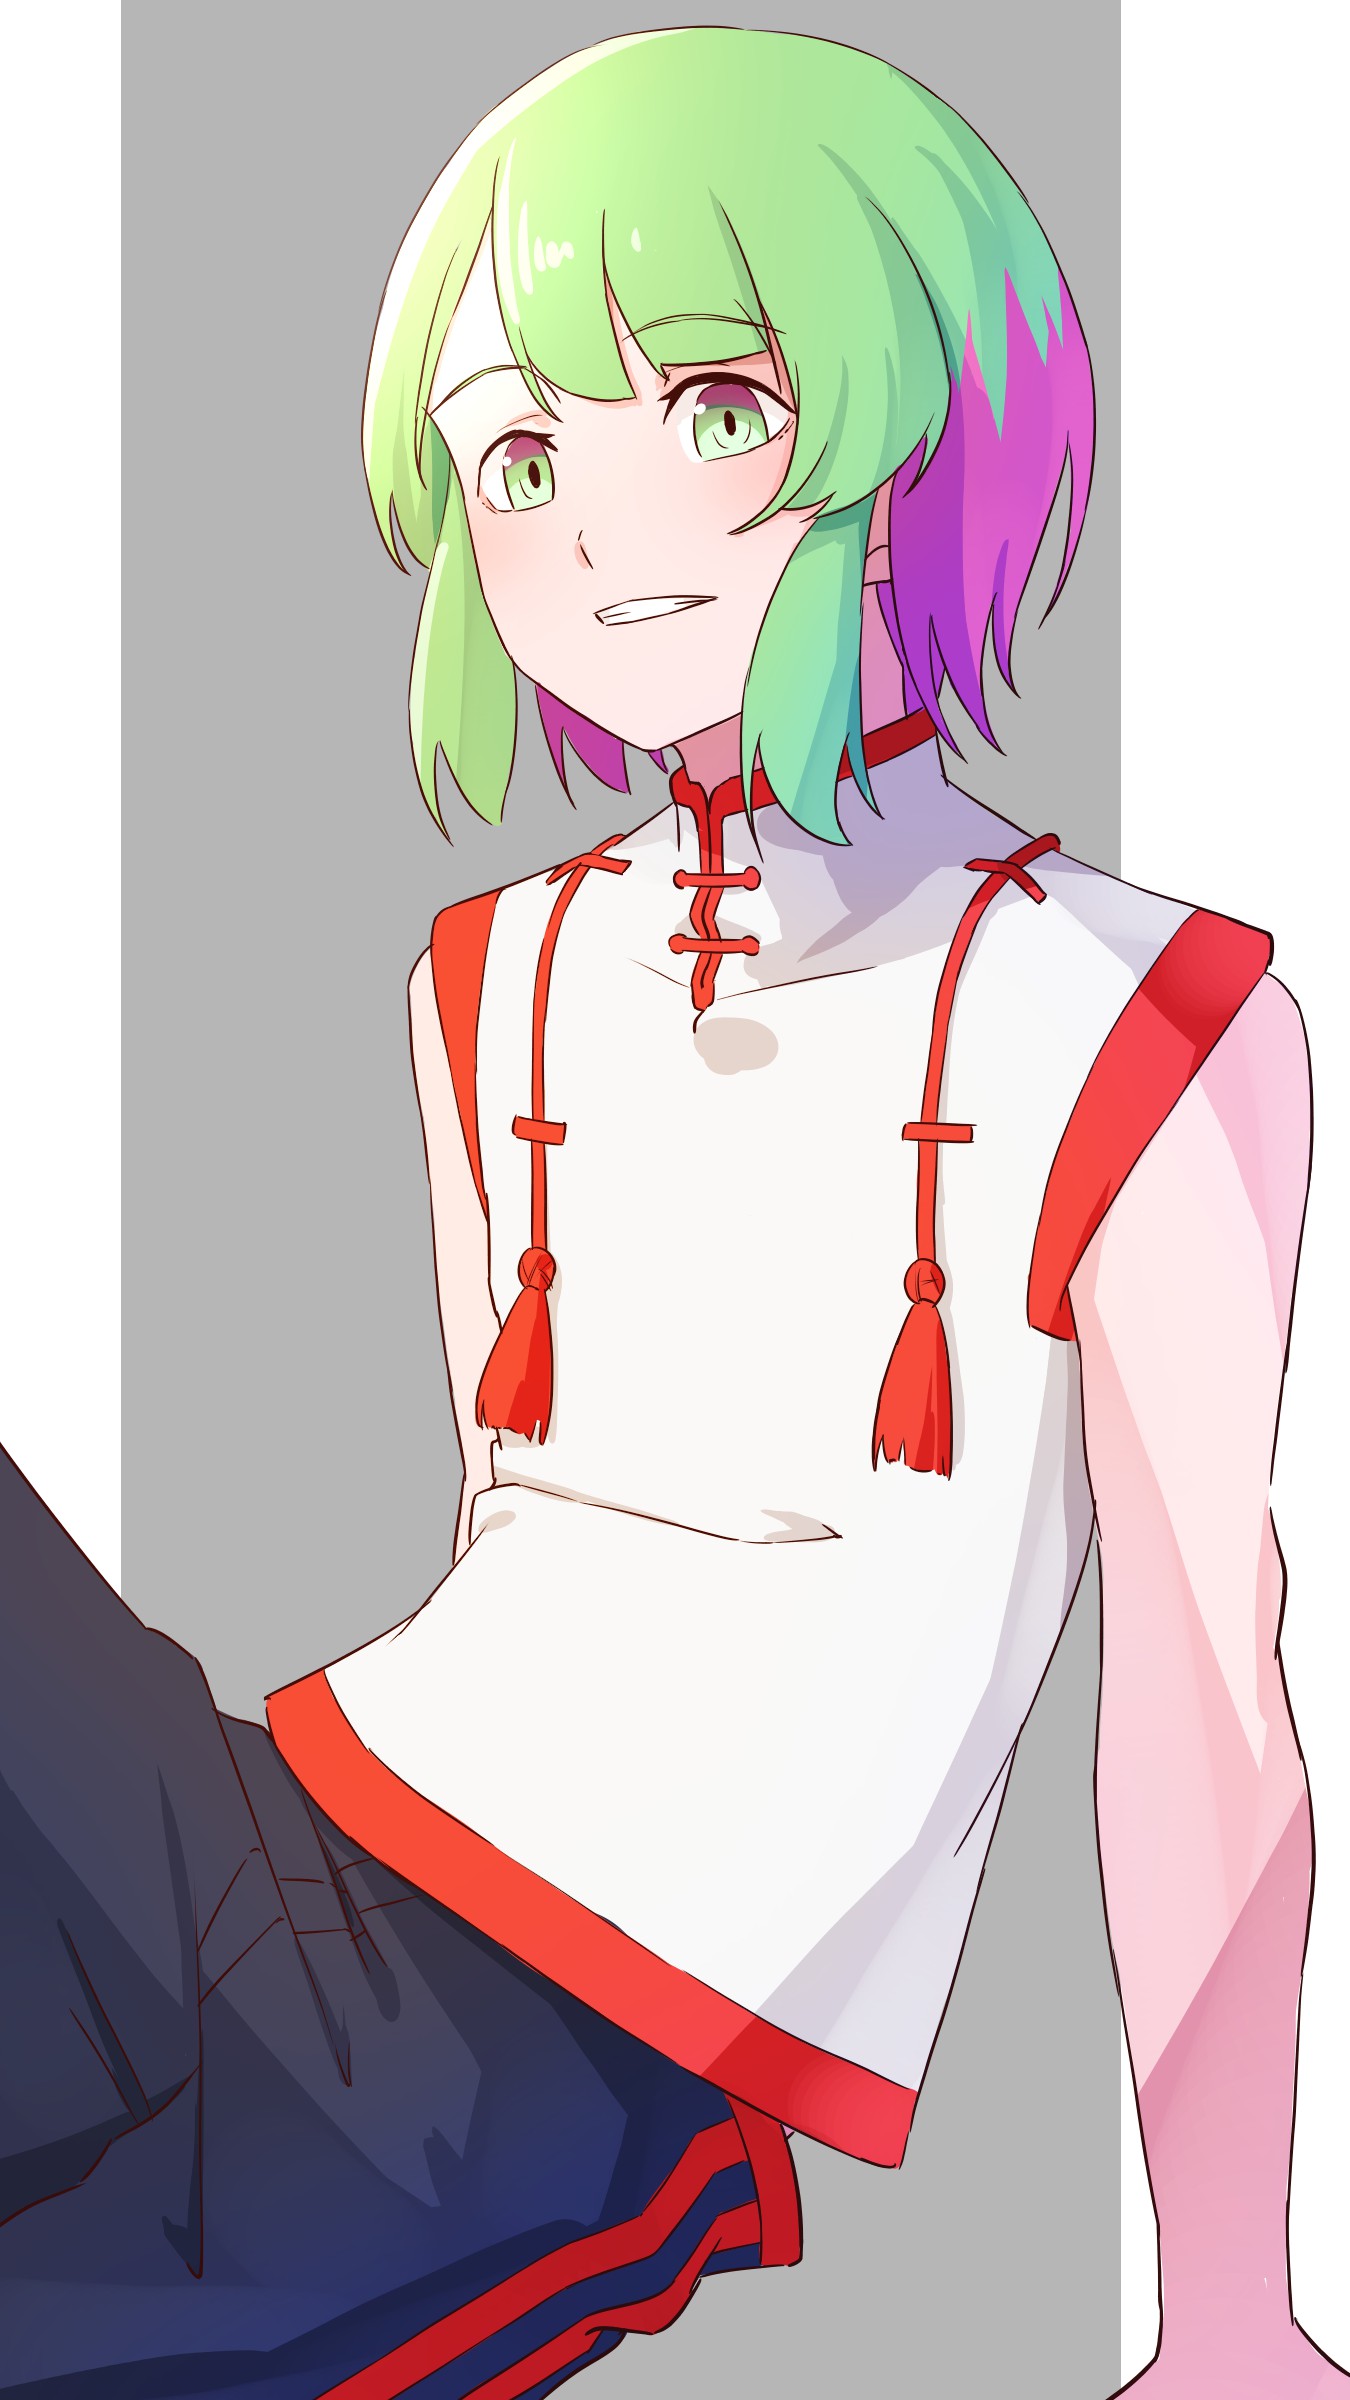
We will move the rectangle as it is not on the center on the canvas.
From the Layer menu, select “Move” and “Align Center”.
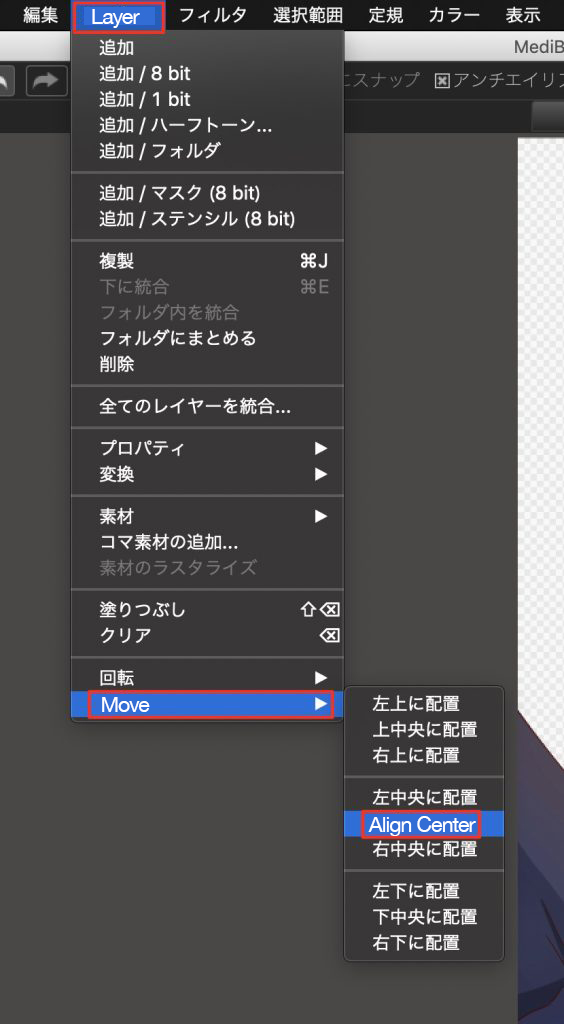
The rectangle is now centered.
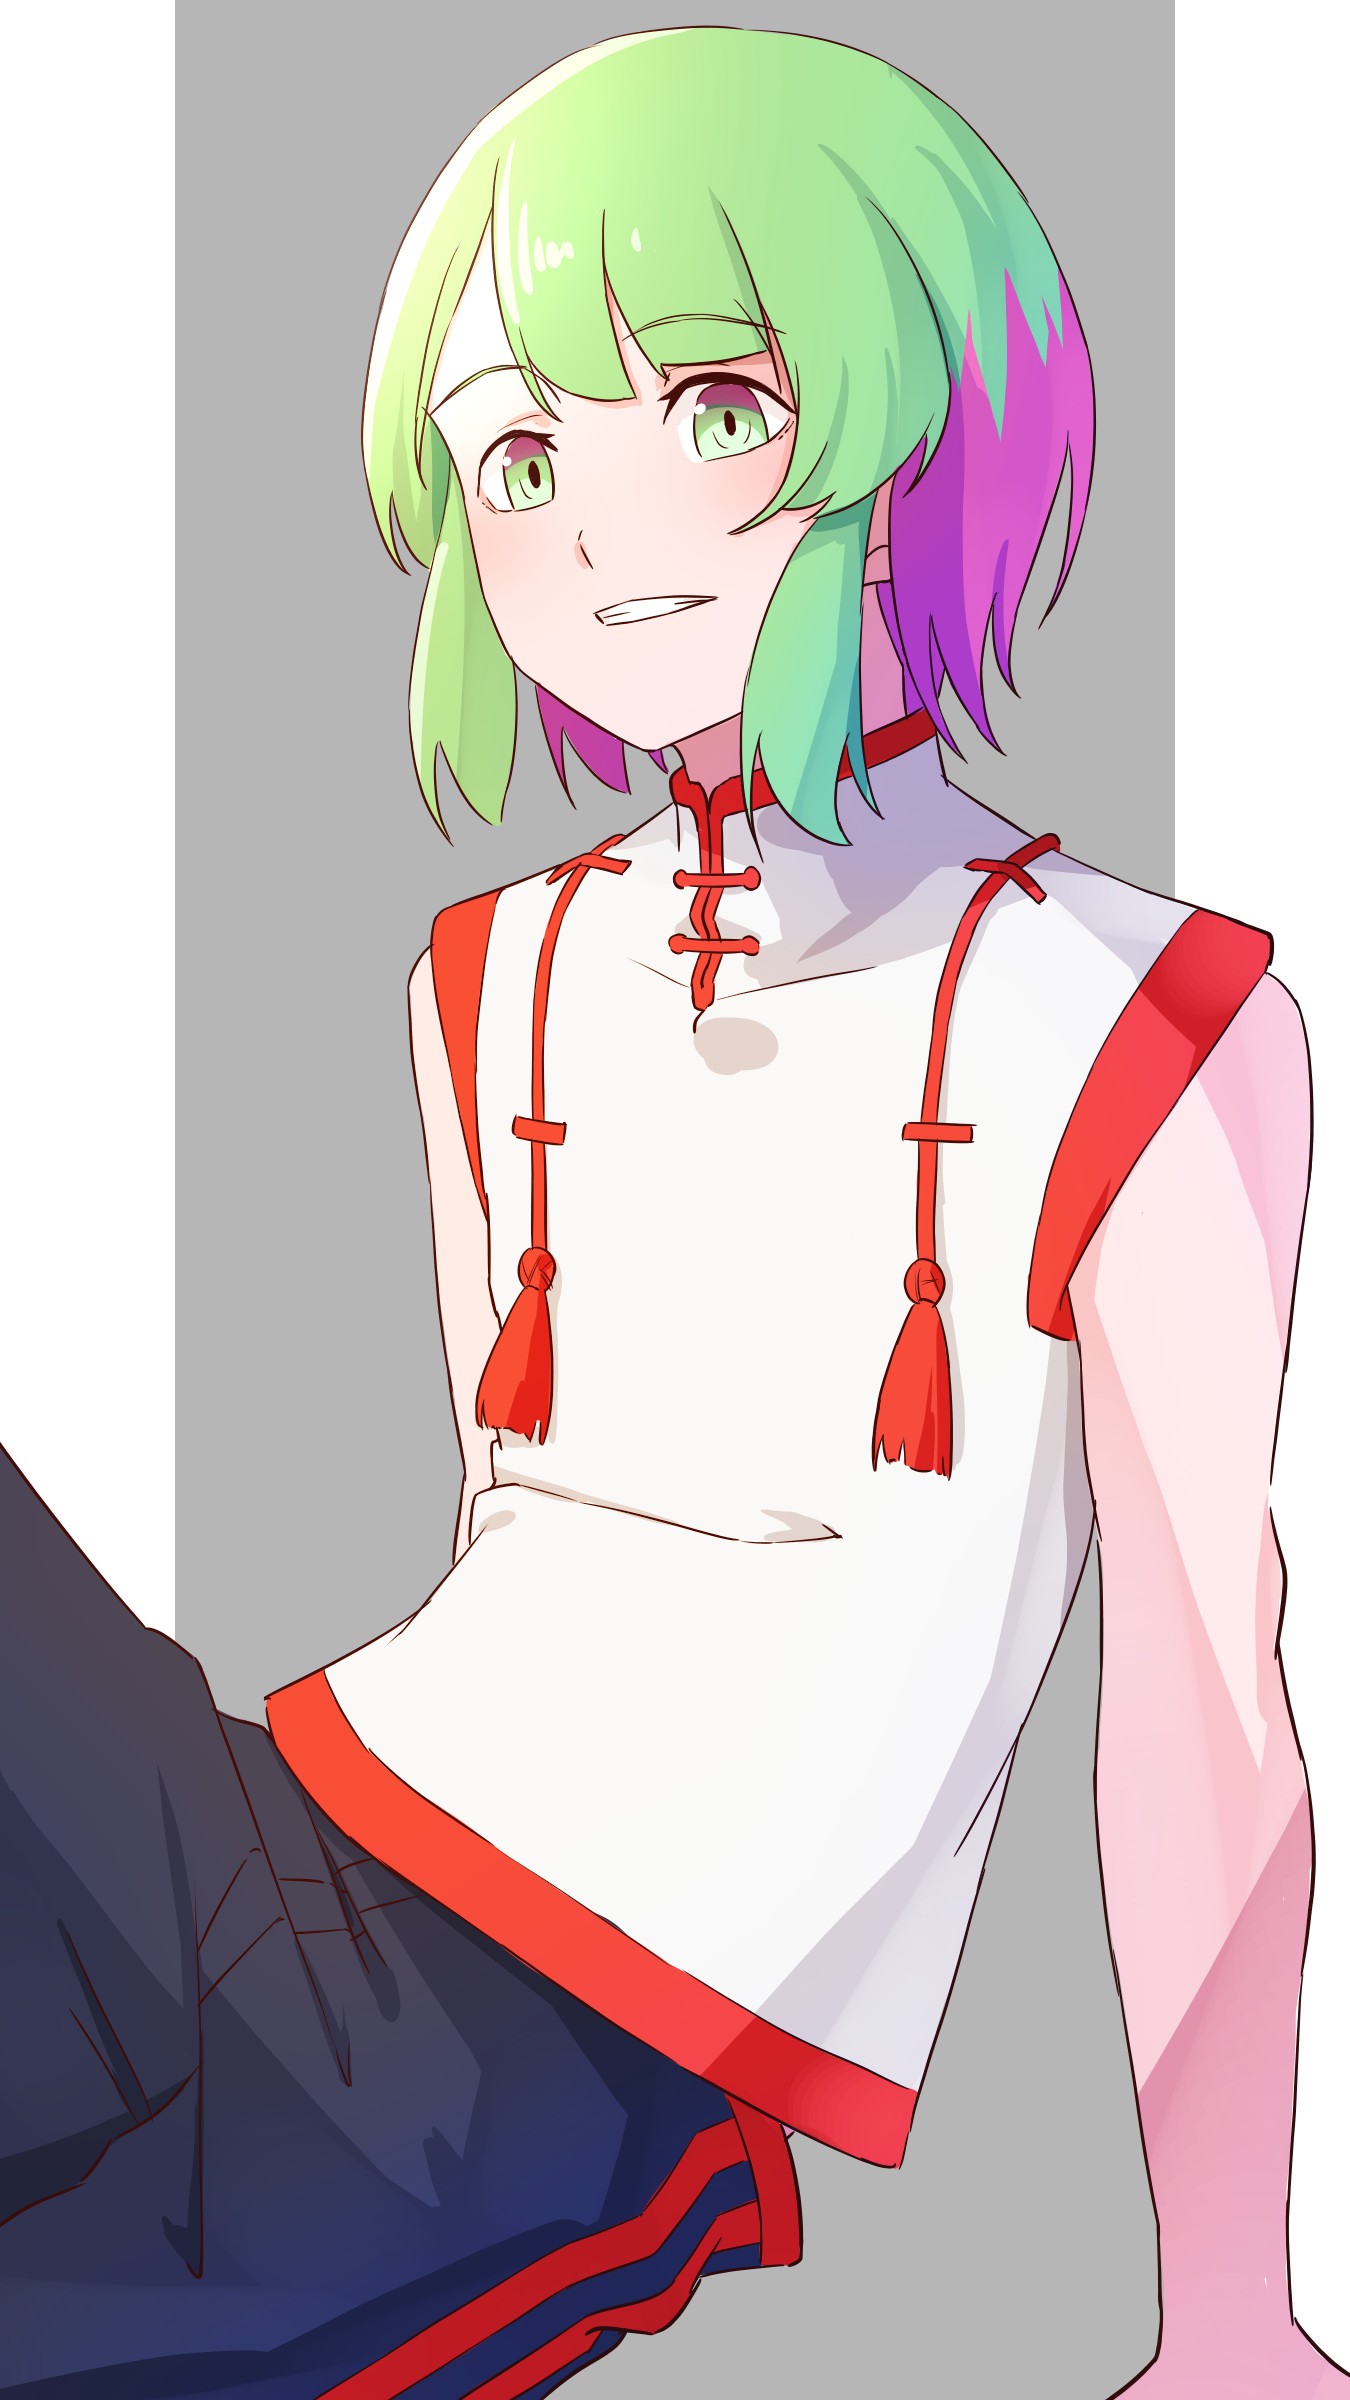
Next, I will tell you what kind of gray we should choose.
What kind of gray should we choose?
I’ve got two images with different depths of gray background.
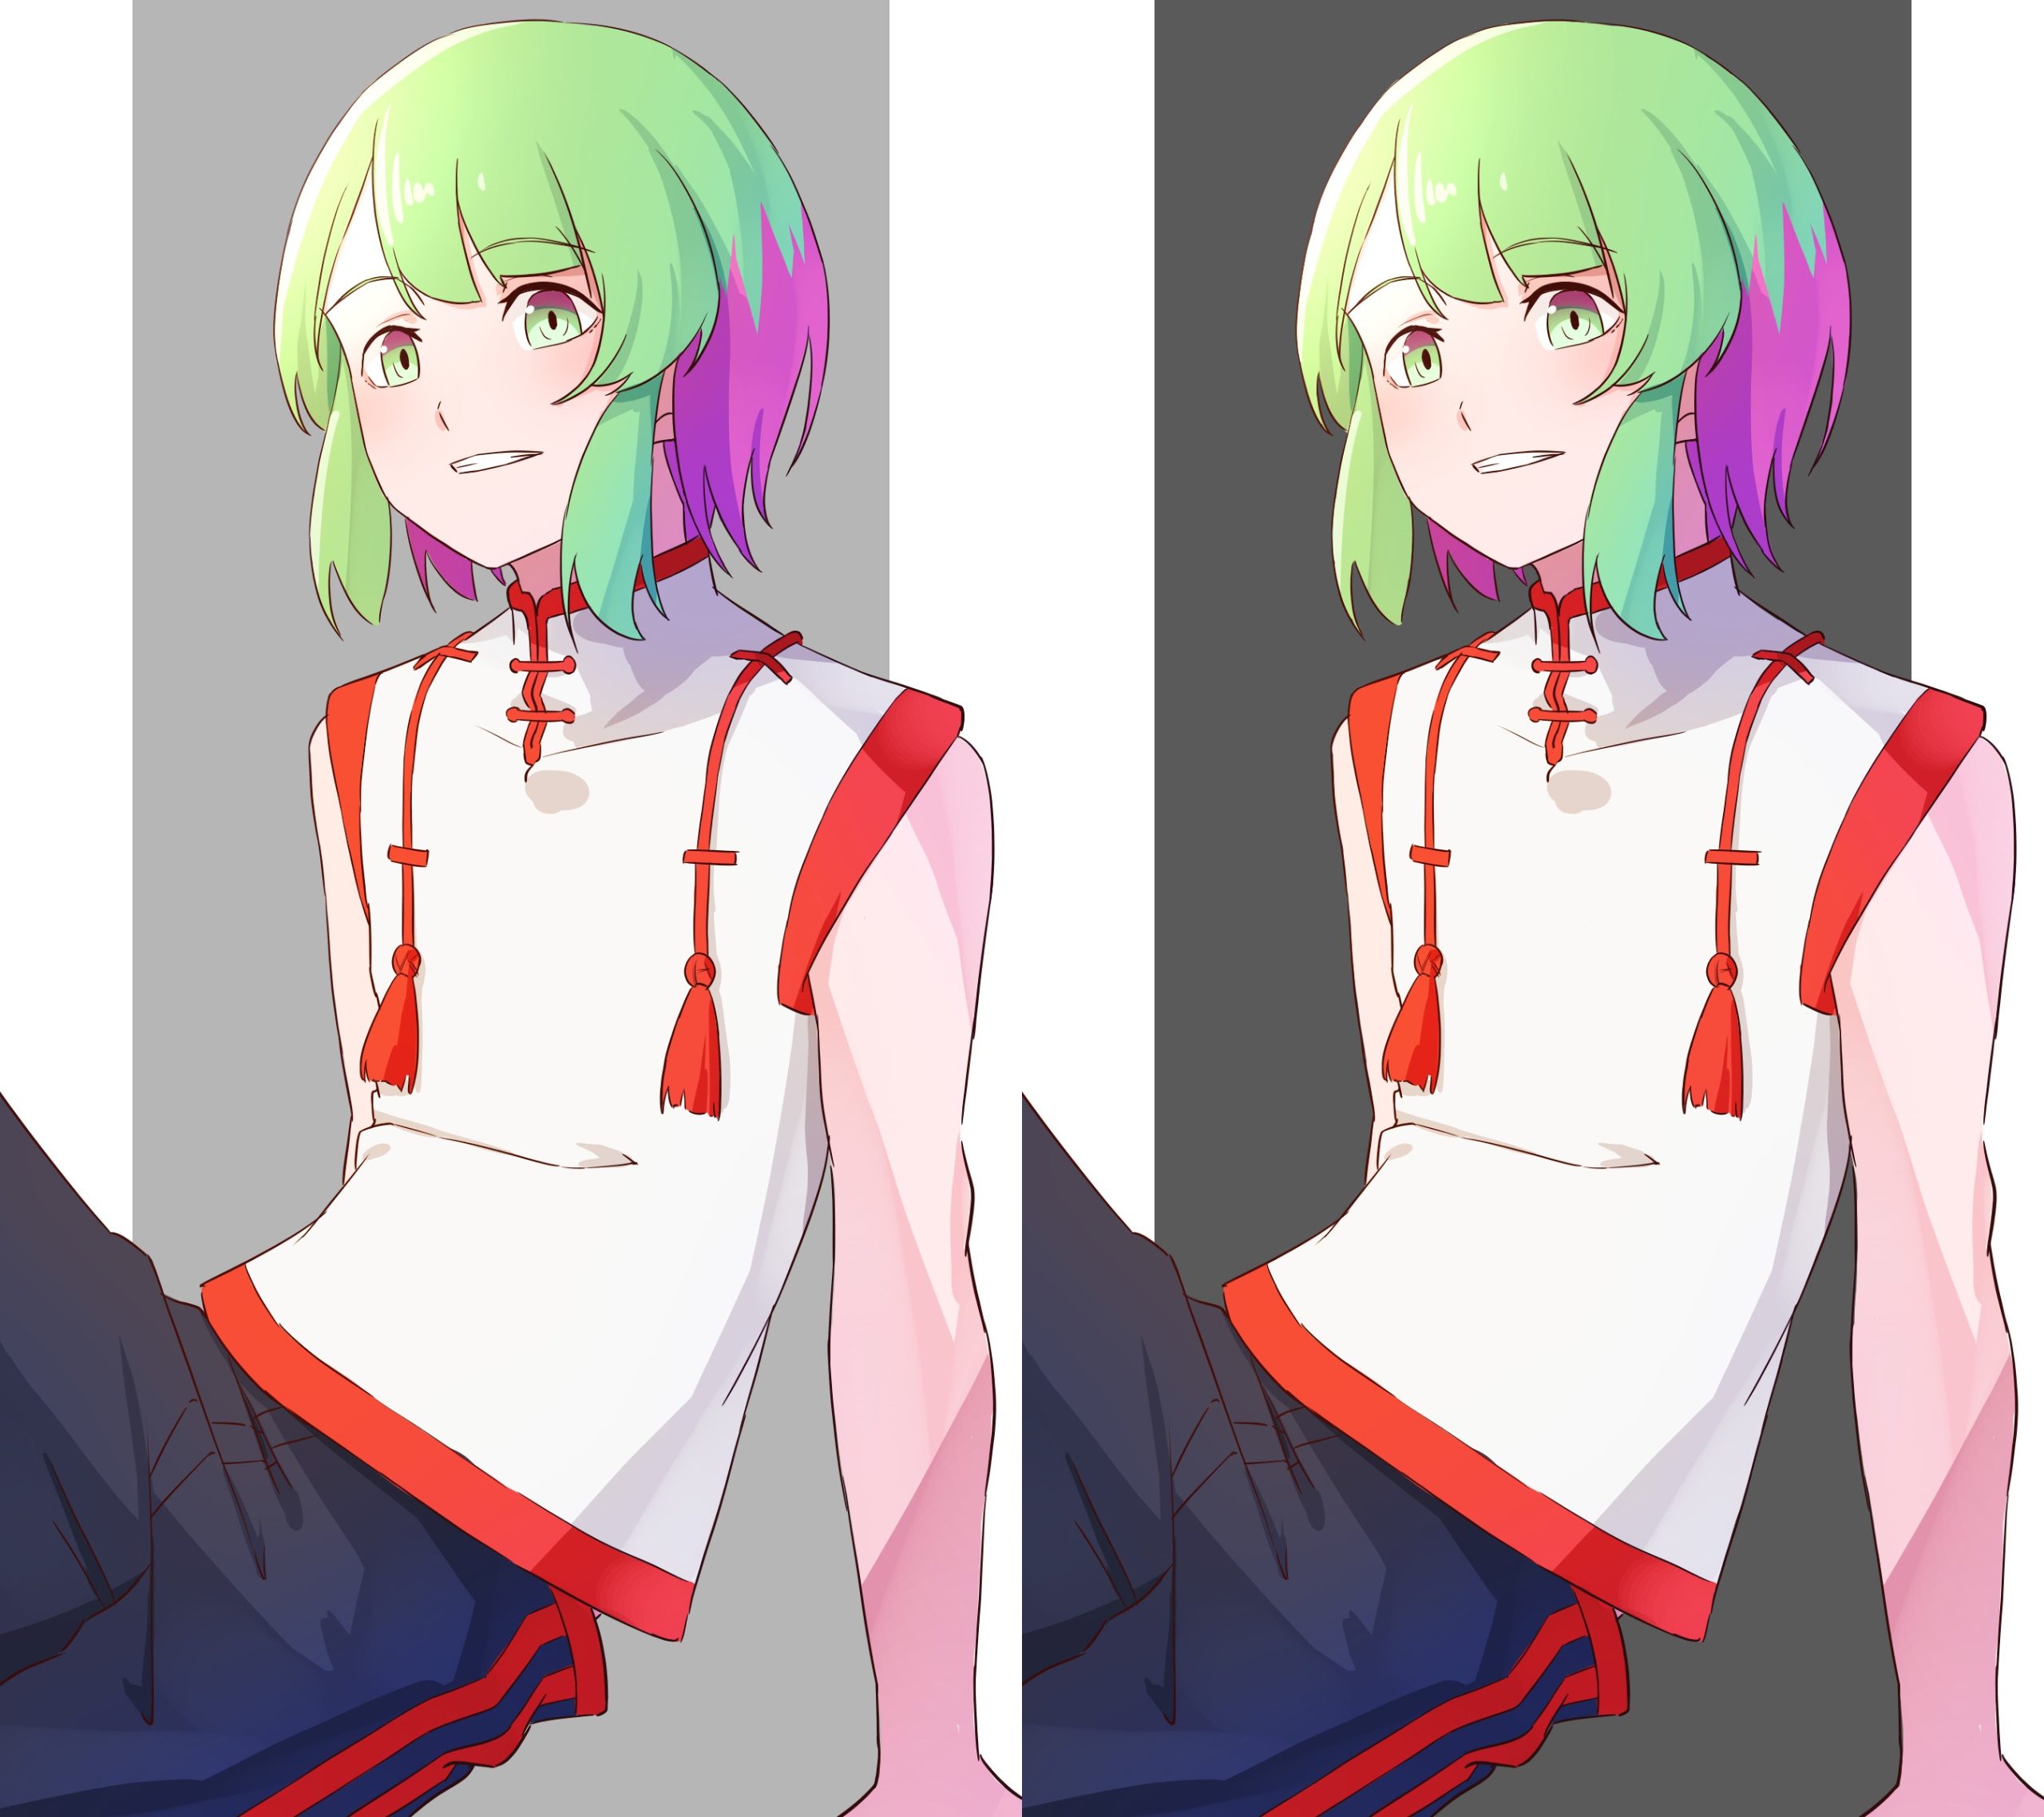
Now I am going to reduce the saturation of the characters so that the two can be easily compared.
The images below show how they look when their saturation is reduced.
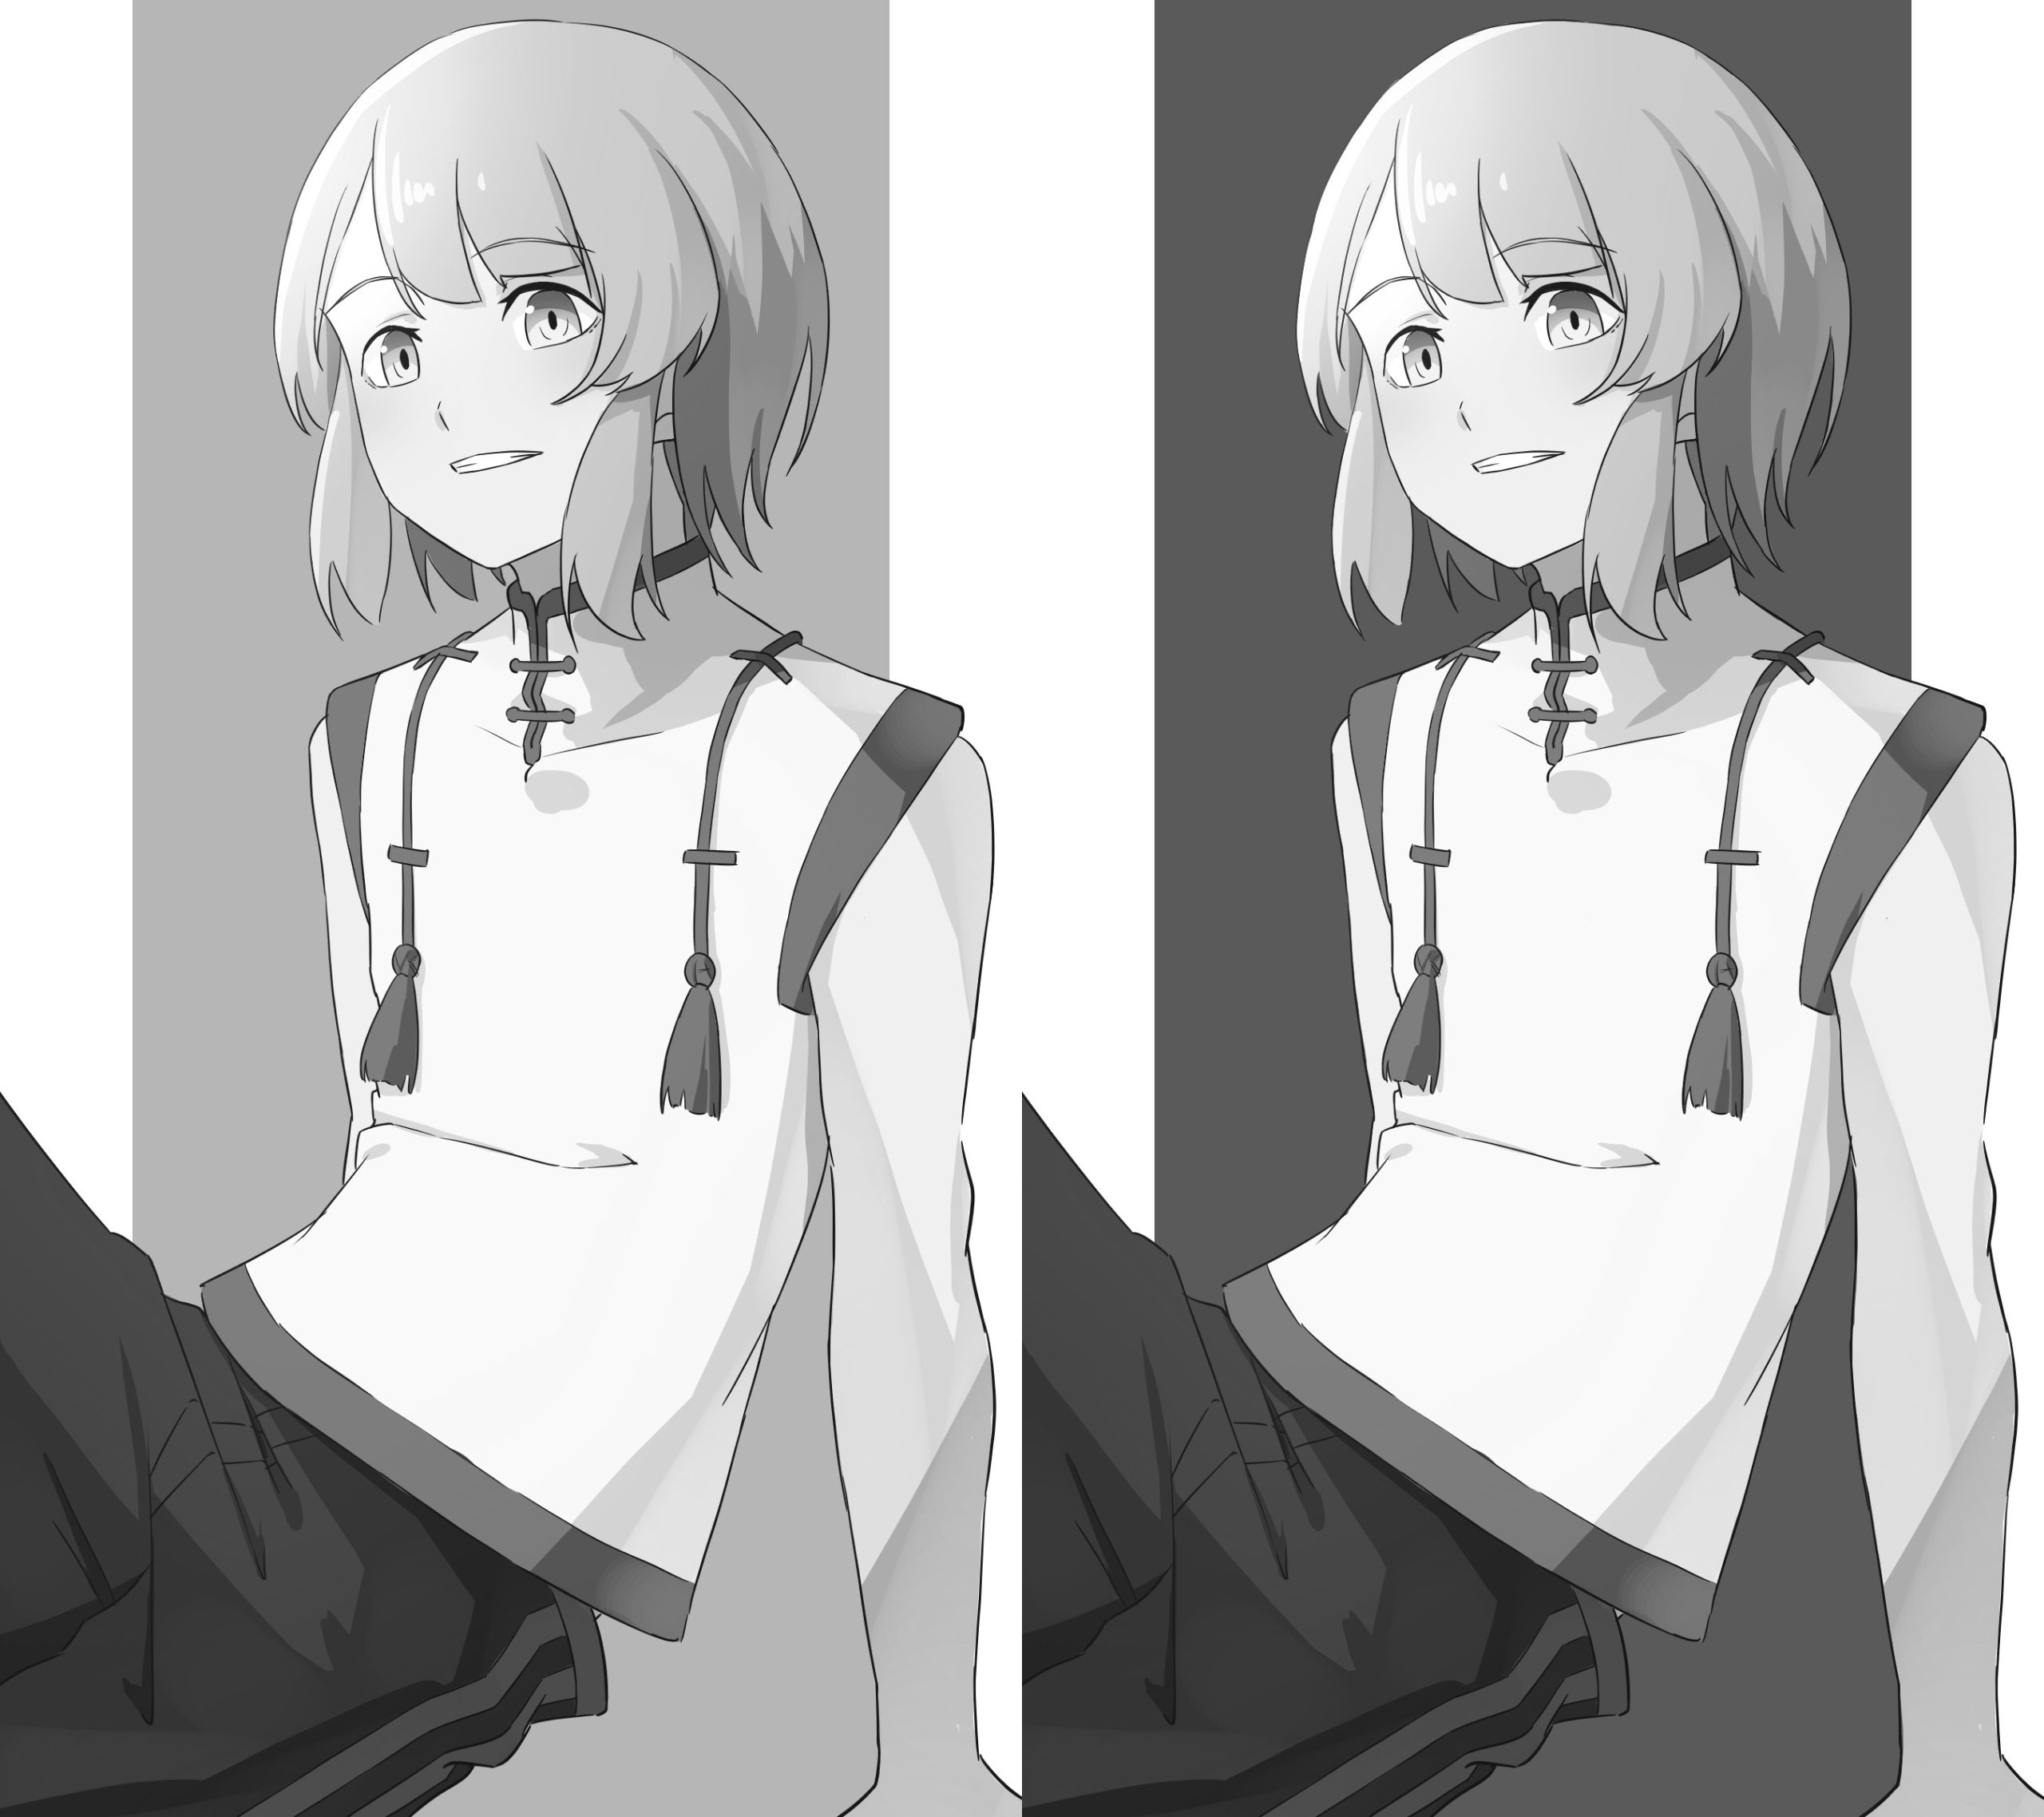
Looking at the images without saturation, do you notice that the background of the right image stands out too much?
The pale gray of the left image seems better as it won’t interfere with the presence of the figure.
Arrange rectangles horizontally or diagonally
As well as arranging vertically long rectangles, you can also..
- Arrange horizontally long rectangles
- Arrange rectangles diagonally
And there are plenty of applications.
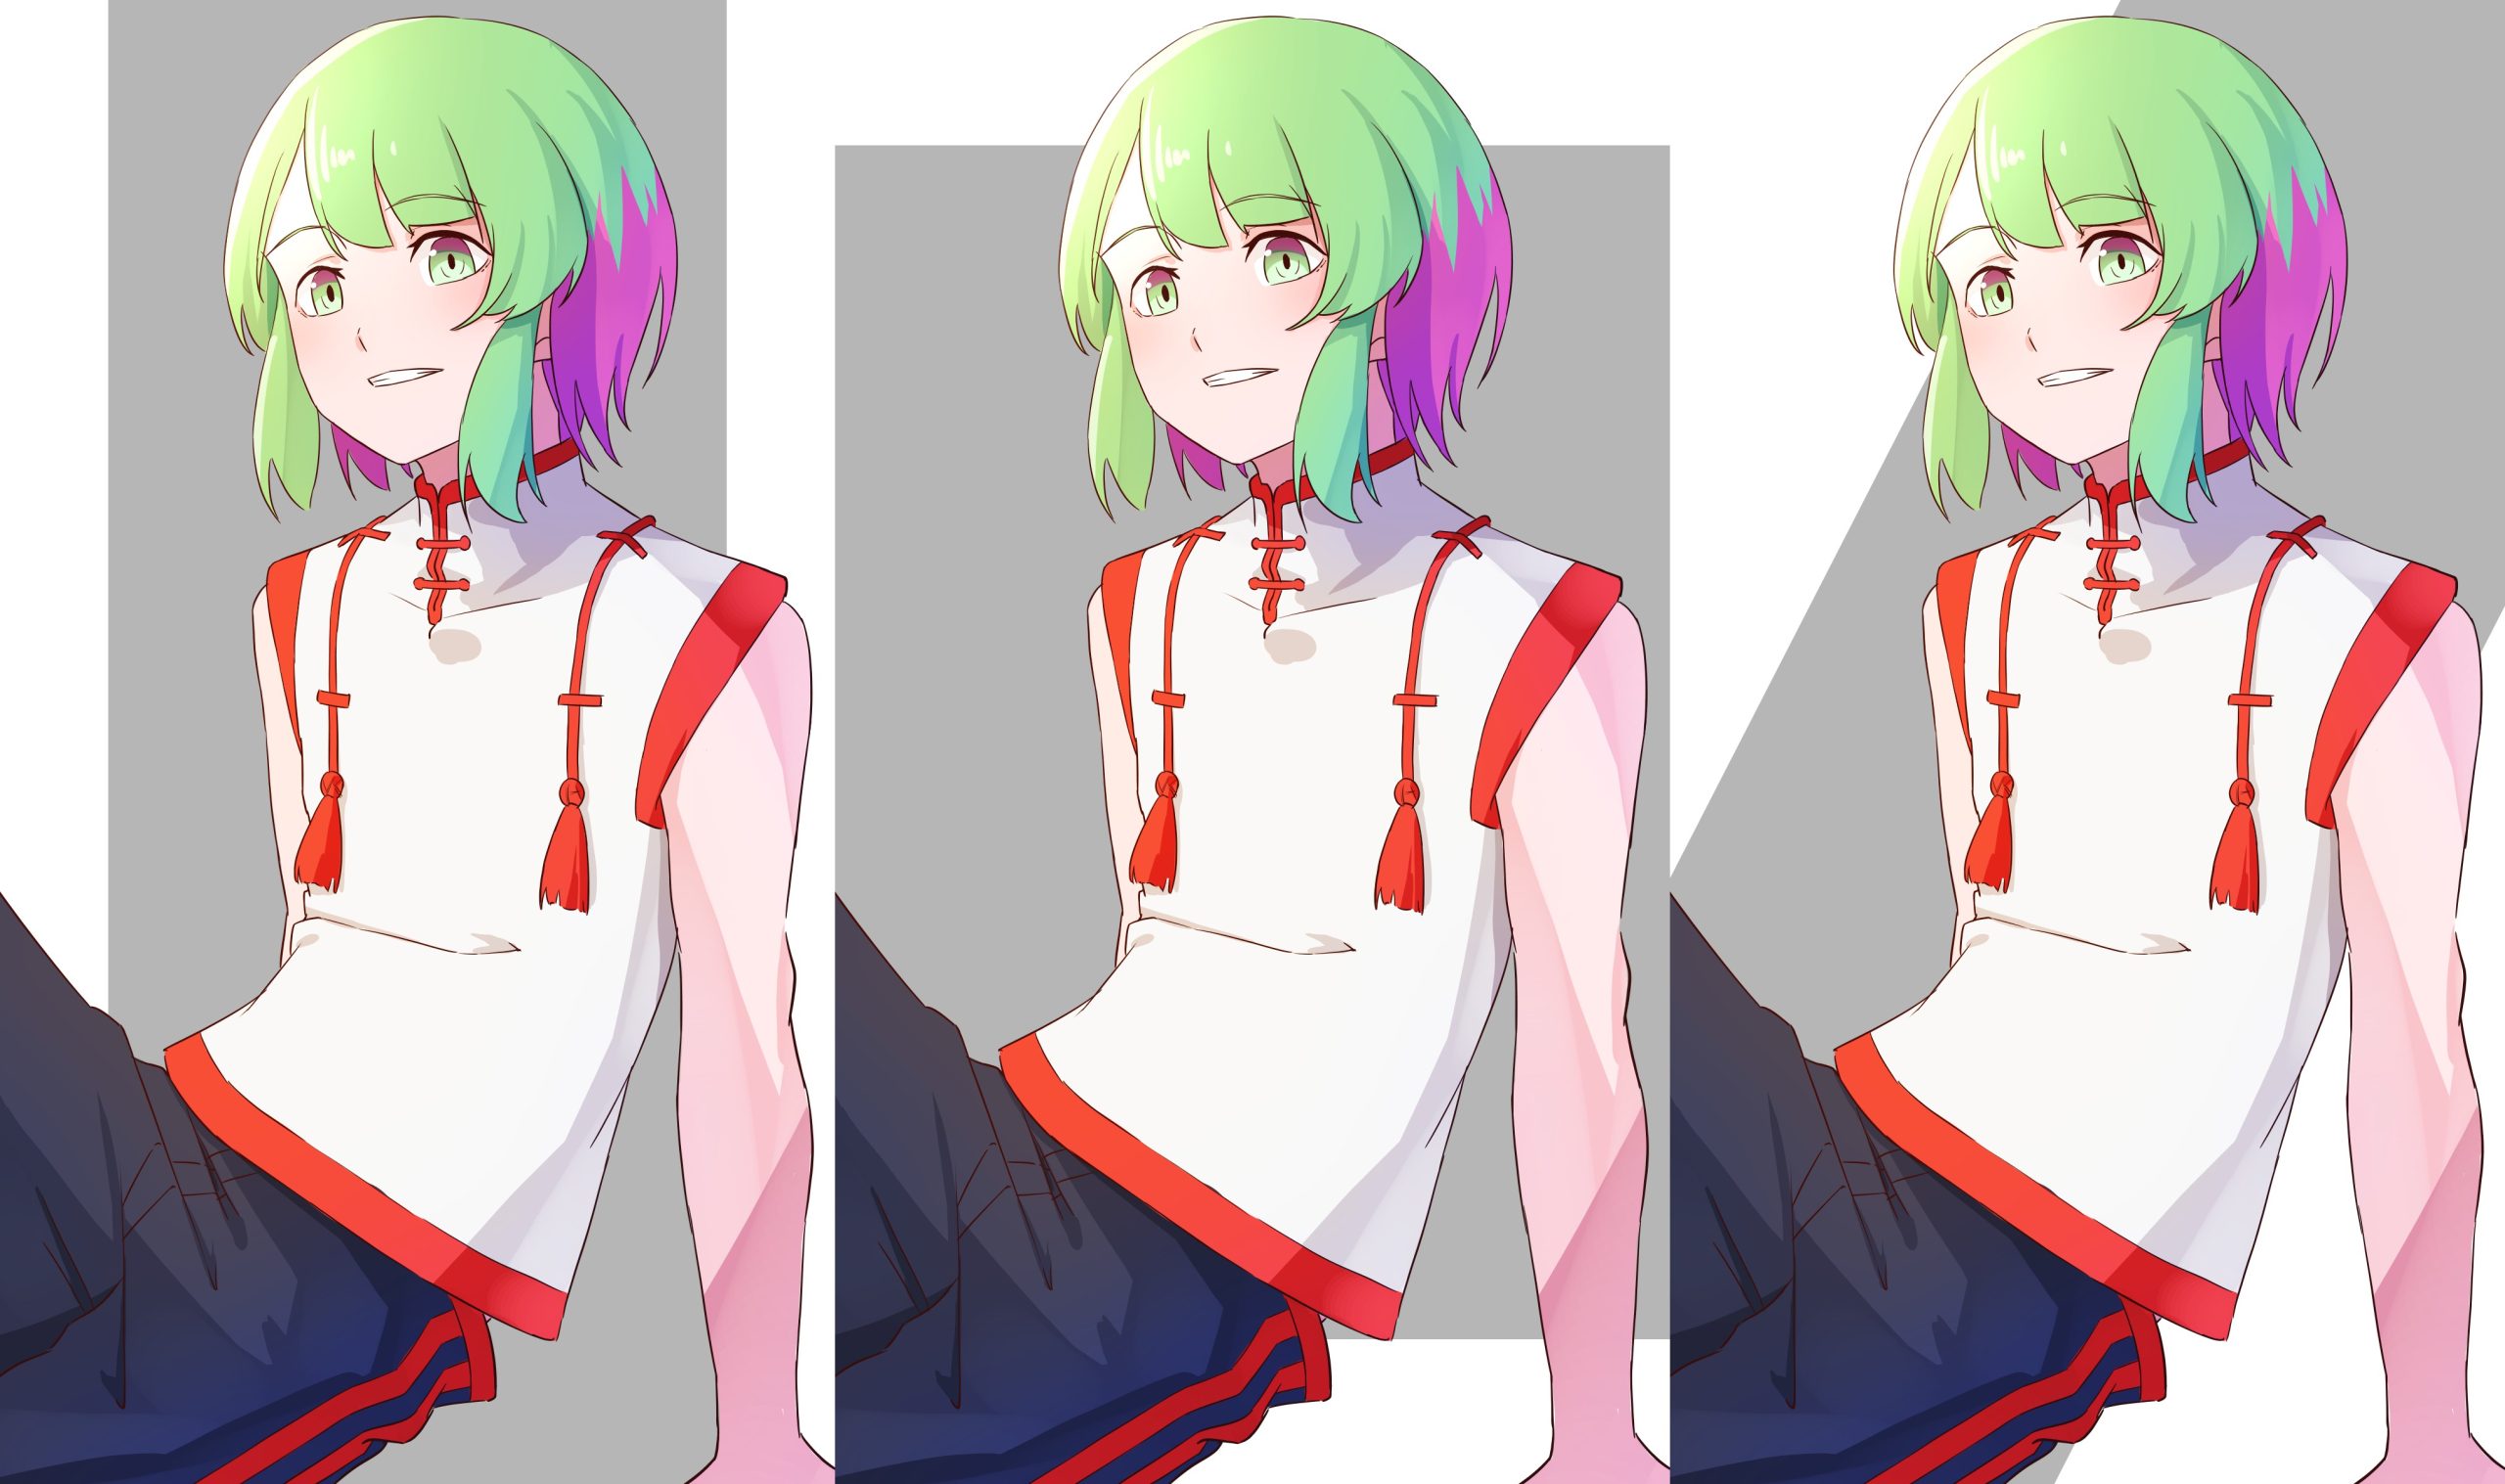
The images below show how they look when rectangles are added at different angles.
Select shapes other than rectangles
You may feel that simple rectangle backgrounds are not enough.
Especially if a character you are drawing has a cheerful mood.
Then let’s create a background that isn’t a rectangle, using the Ellipse tool and the Tile material.
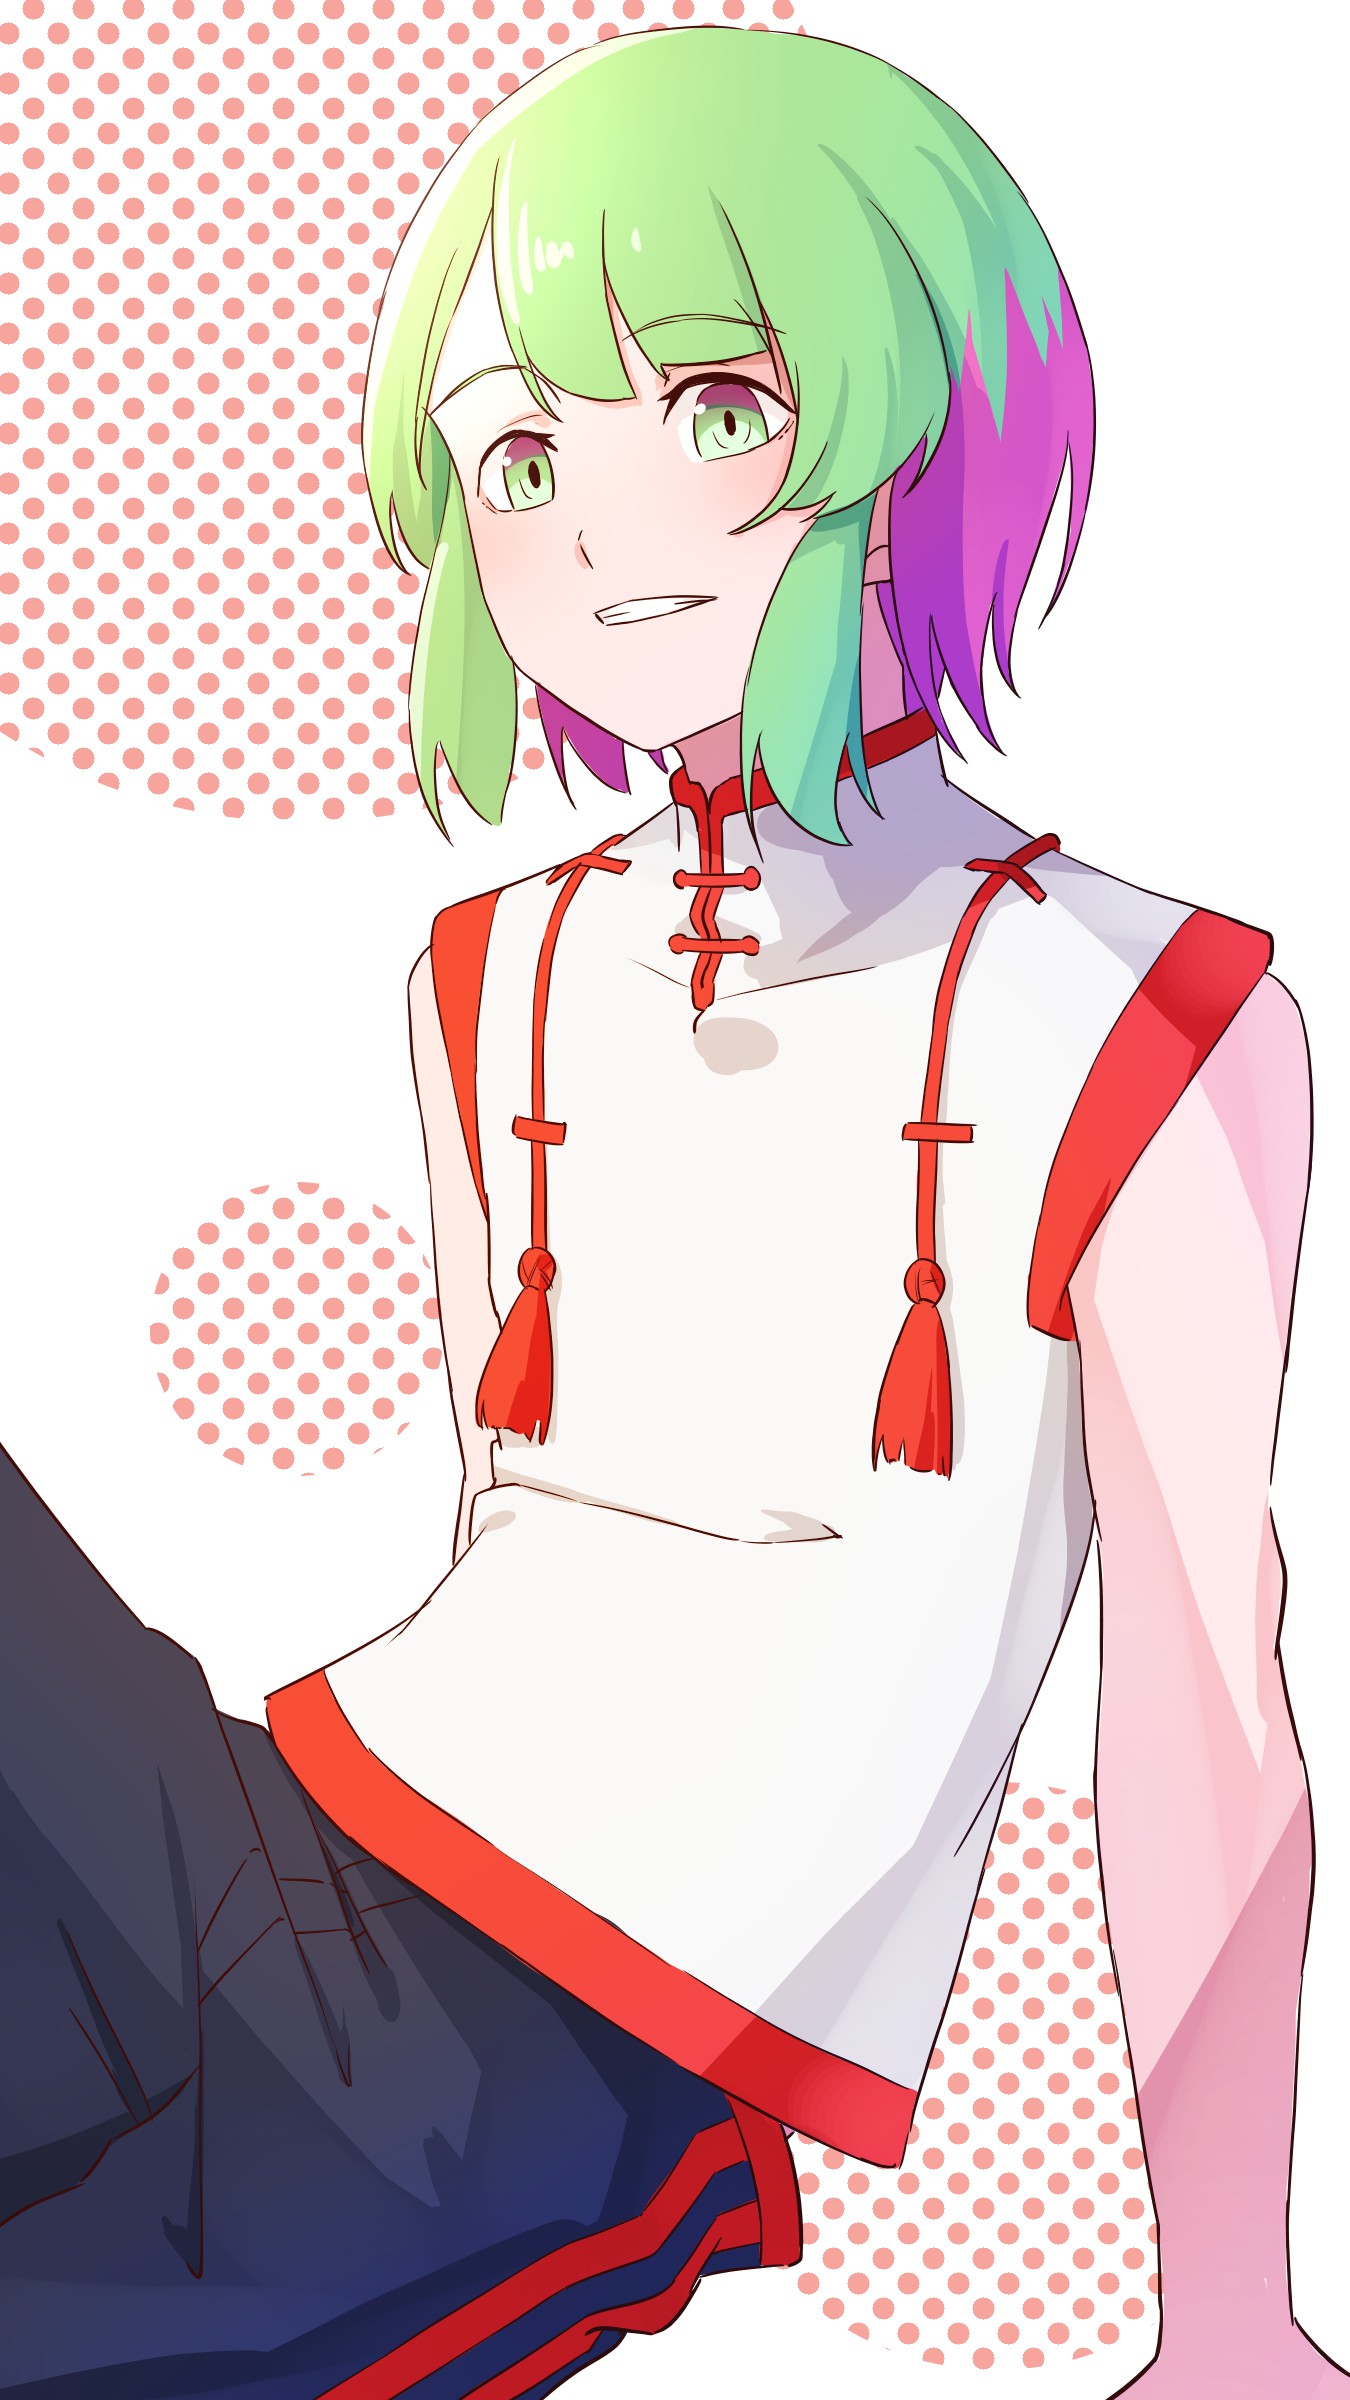
Here’s the finished image ↓
Select Ellipse from the Fill Tool to place circles
Select the Fill Tool and choose the Ellipse from the Shape Tool.
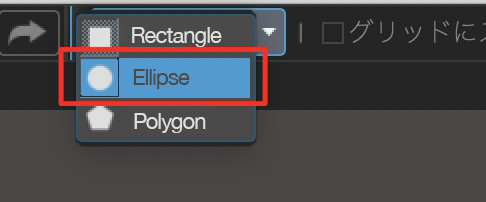
Tick the “Constrain Proportions” box.

Temporarily hide the character to define the size of the circle.
Once you have roughly selected the size, define the position.
I have added 3 circles this time.
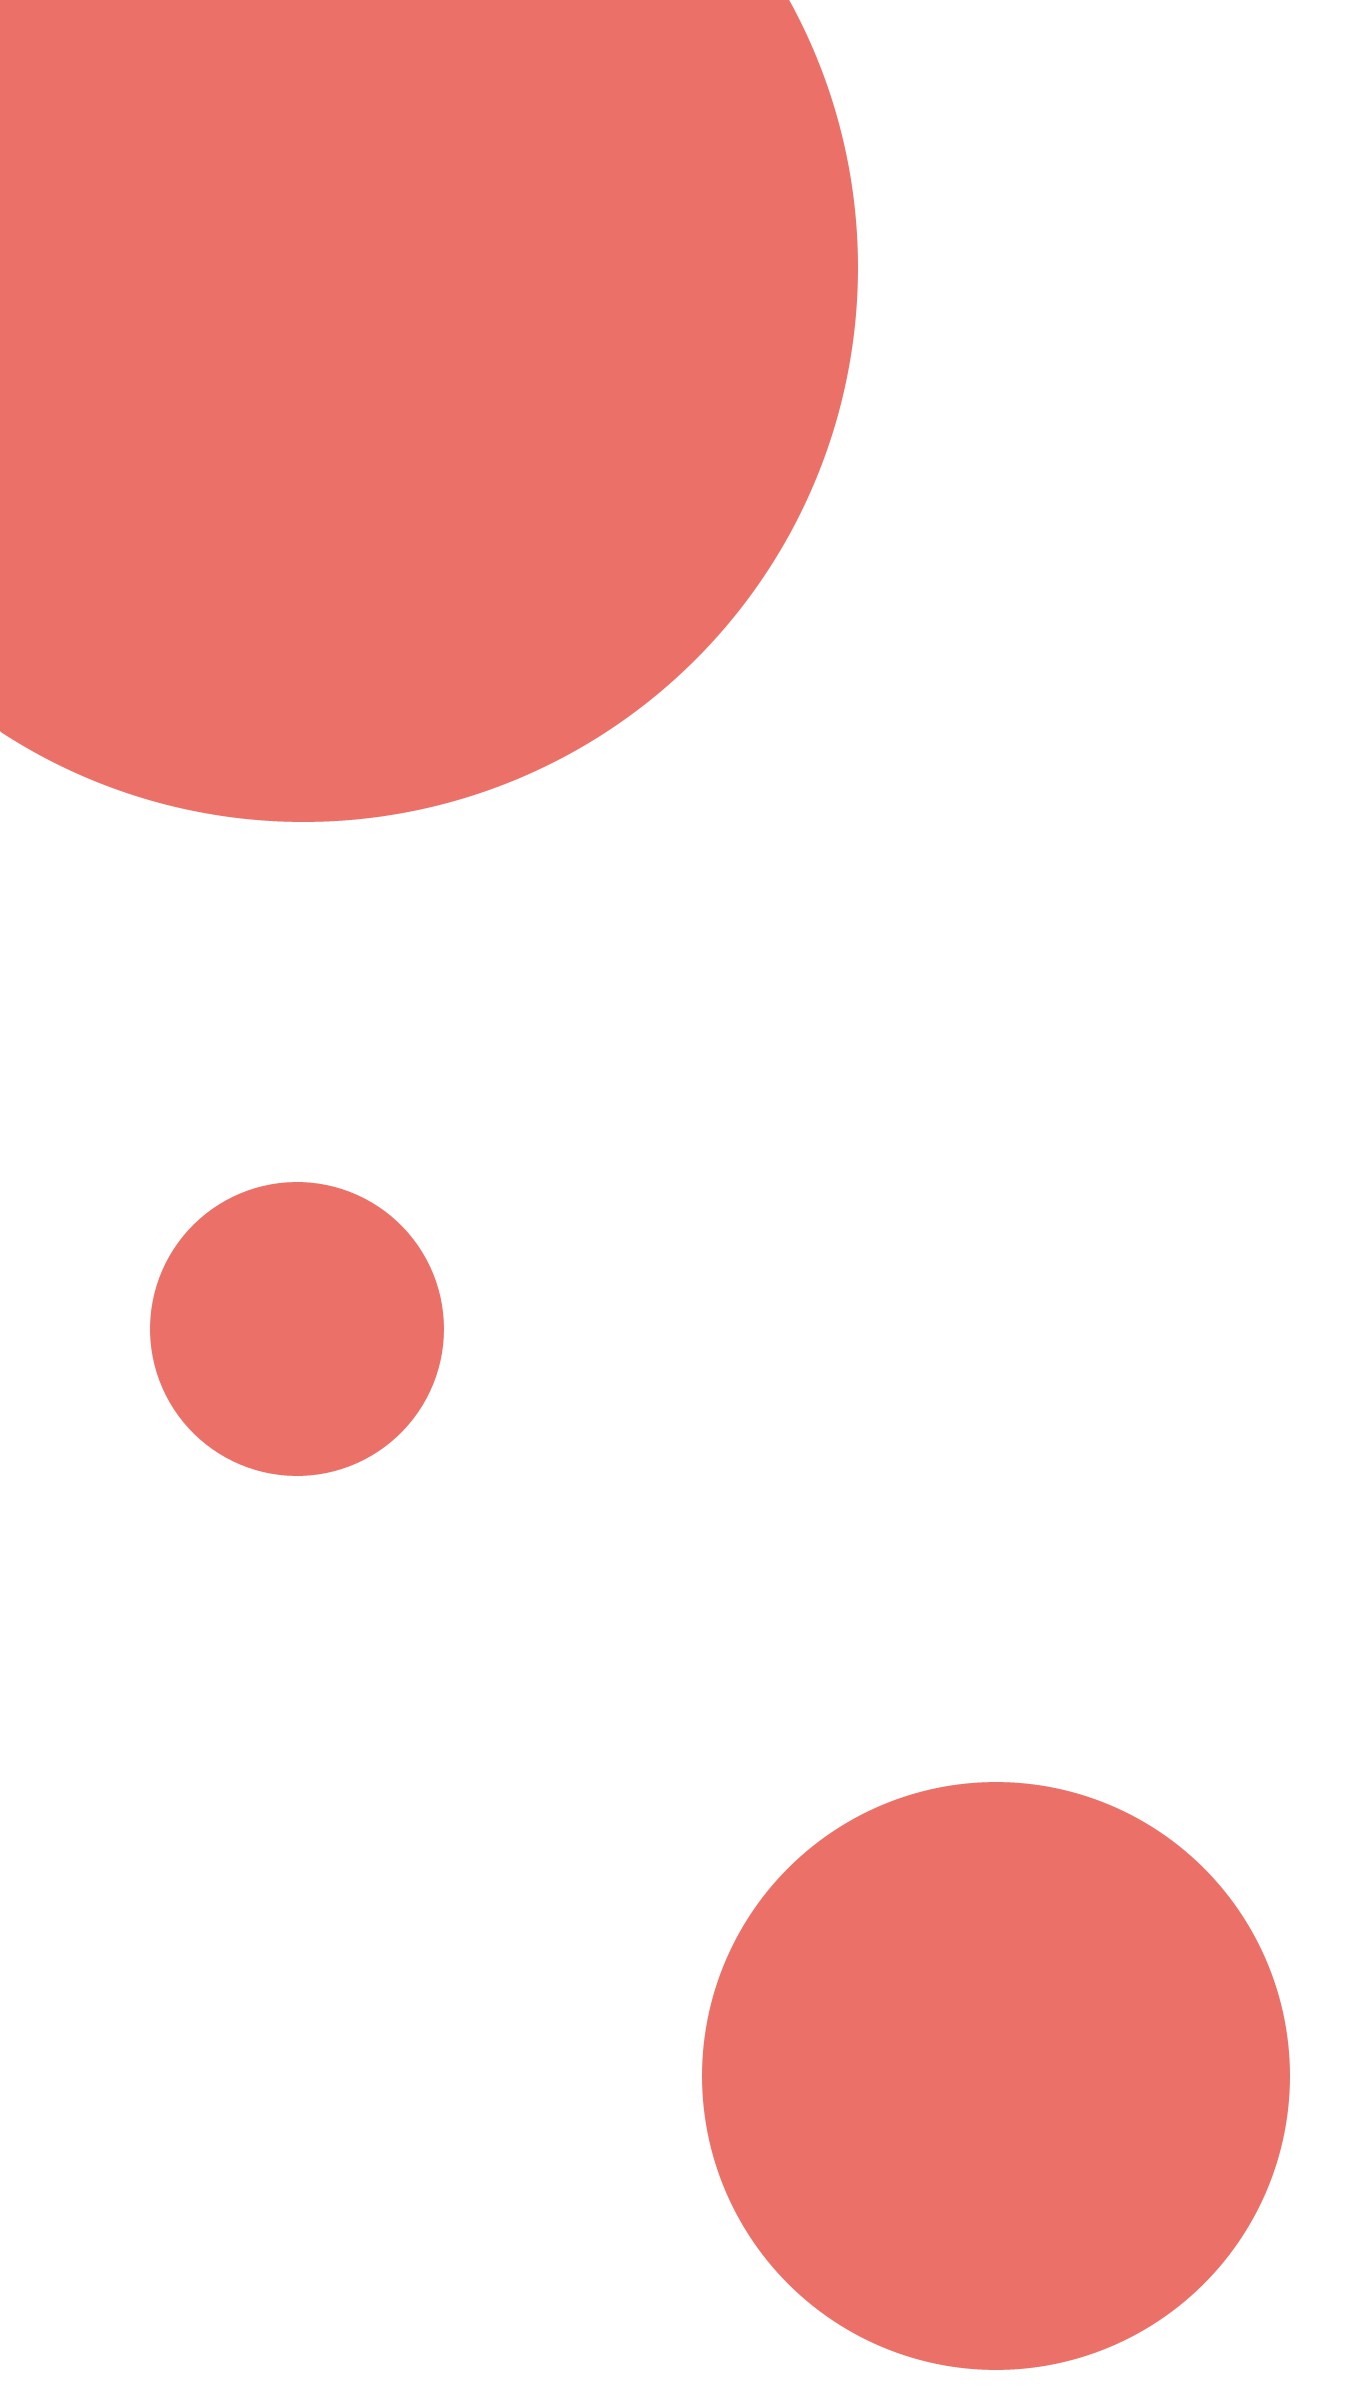
I want to change these circles to dotted circles.
Arrange dotted backgrounds
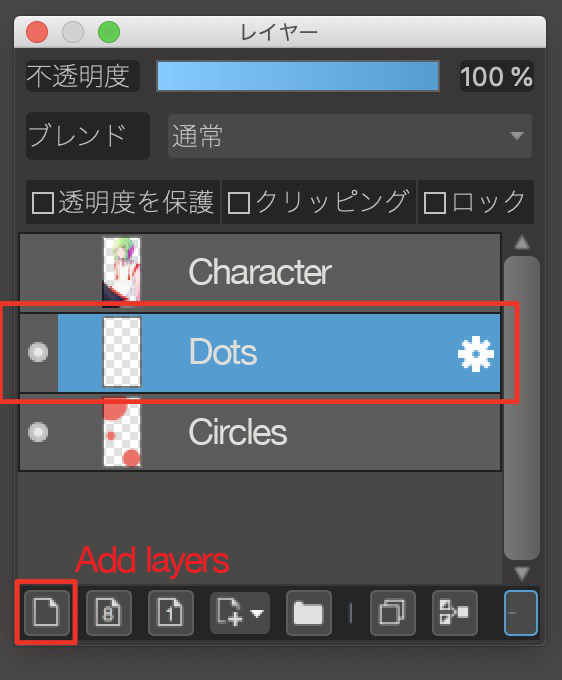
Add a new layer for the dots on top of the circle layer.
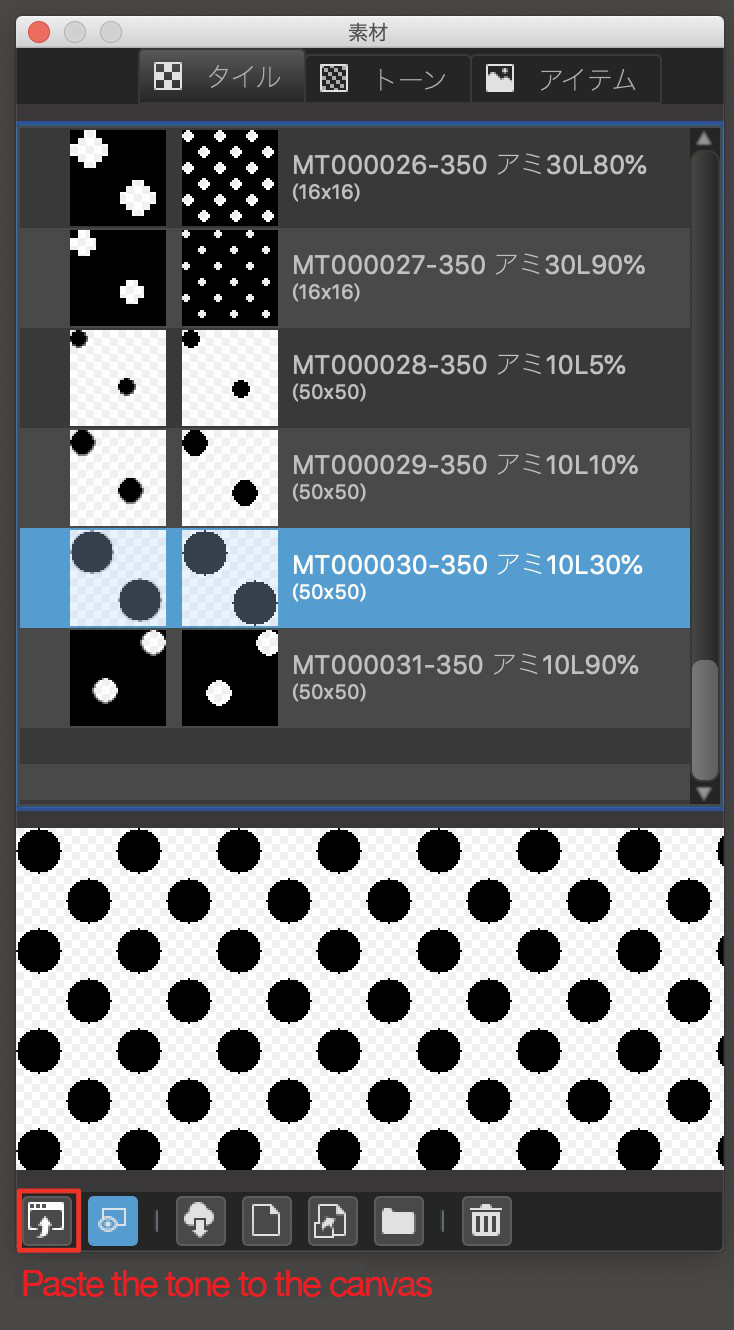
Open the material window and select dots with your preferred size from the tiles.
This time I chose “MT000030-350 Tone 10L30%”.
Then click on the “paste to the canvas” button.
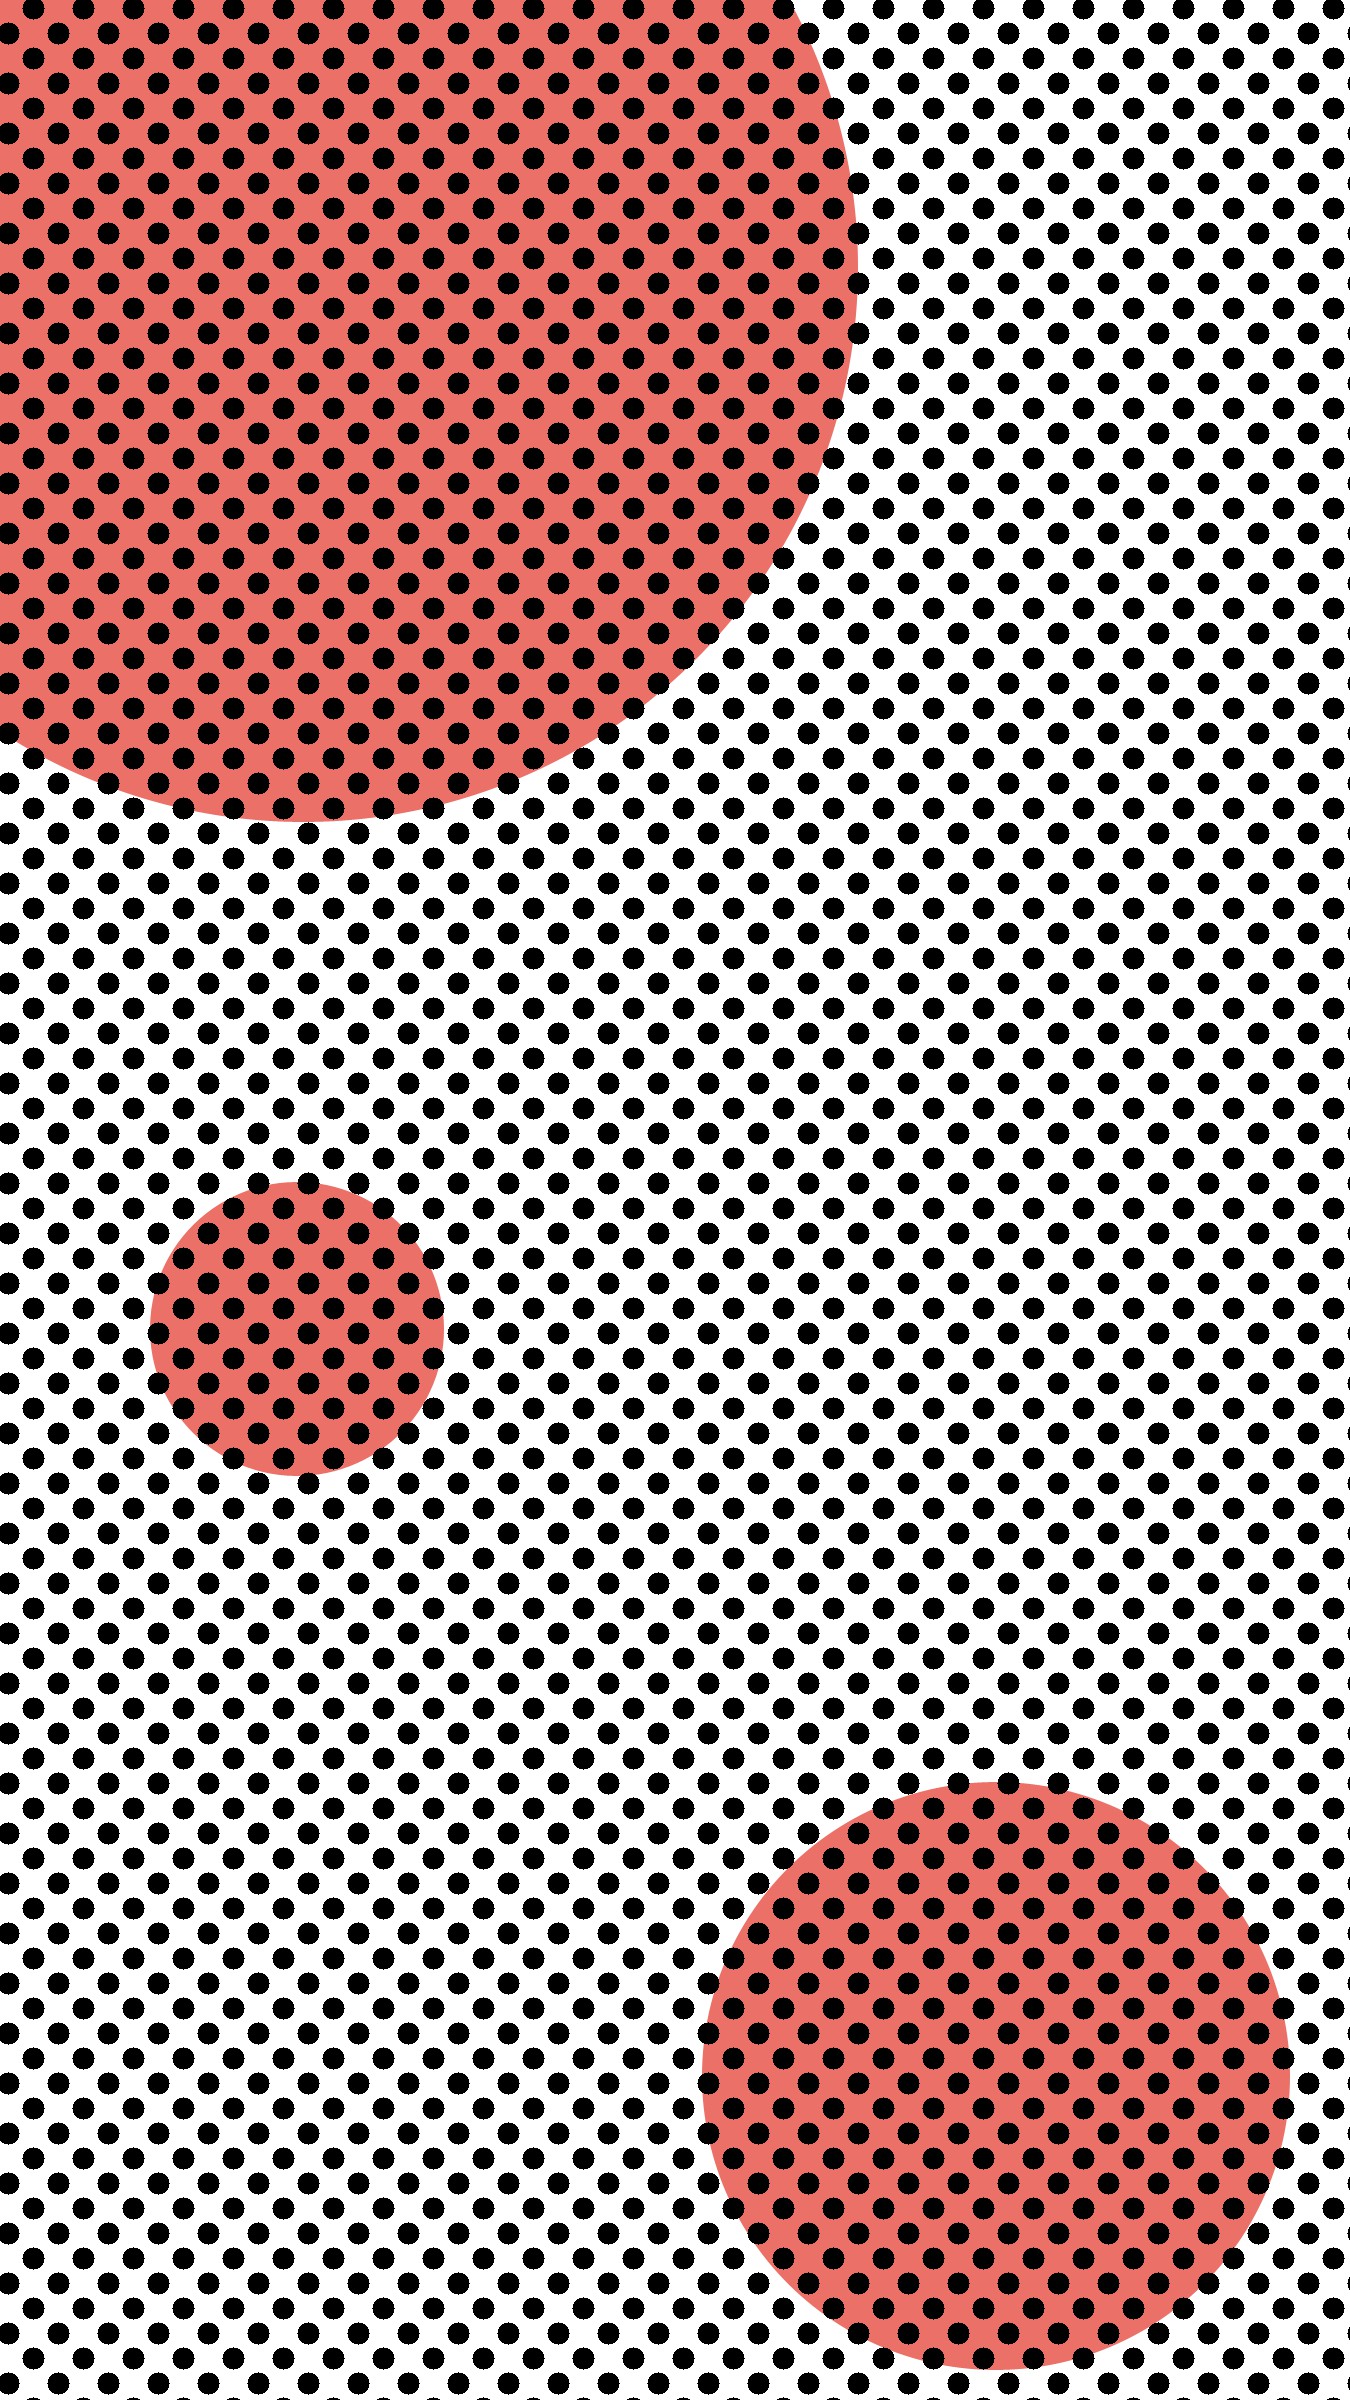
Now the background has turned to dots.
Cut the dot pattern out of the background to leave circular areas
Select the circle layer and select “Create Selection from Layer (Opacity)” from the Select menu.
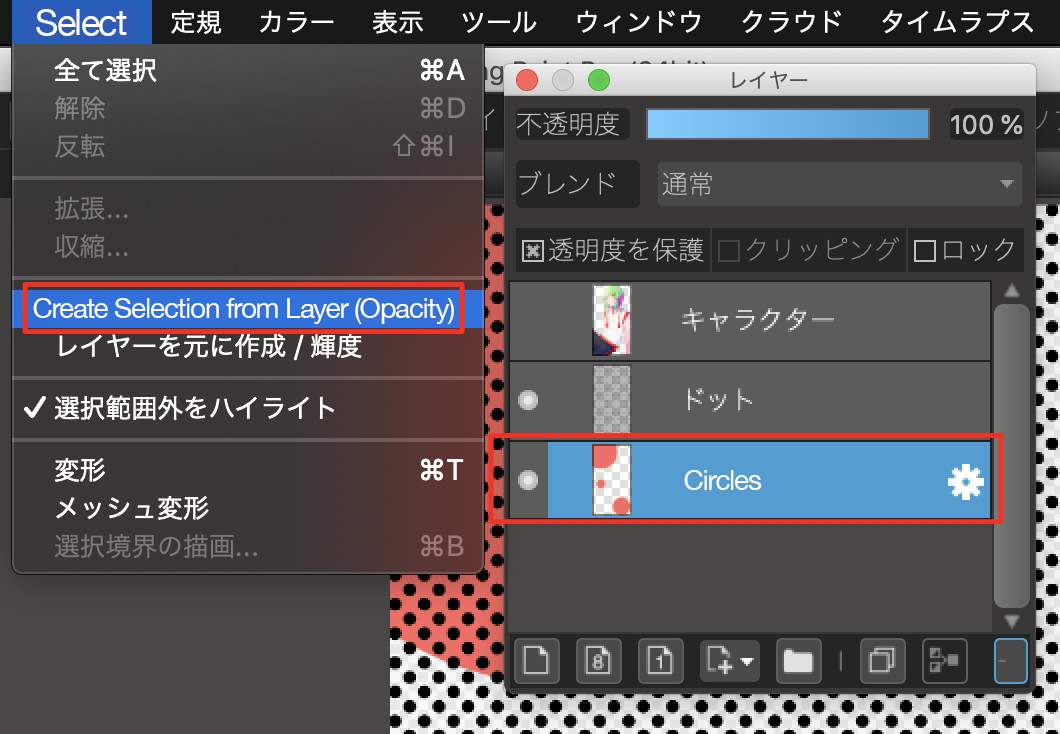
This ensures that only the circles are selected.
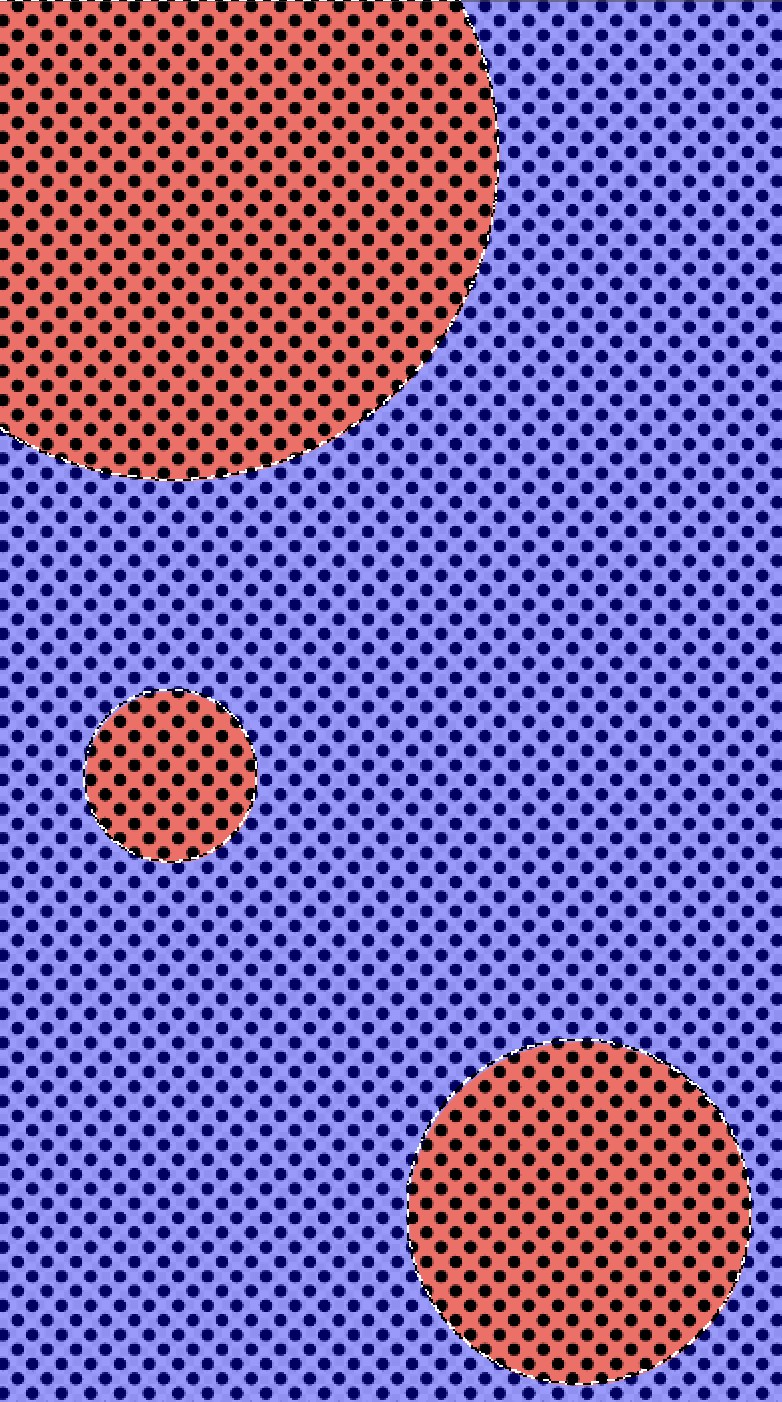
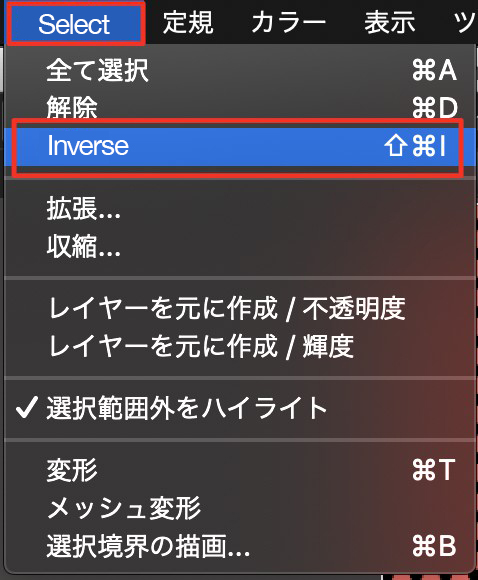
We want to select the areas outside the circles and cut the dots in the unwanted areas.
So we select “Inverse” to select the non-circle part.
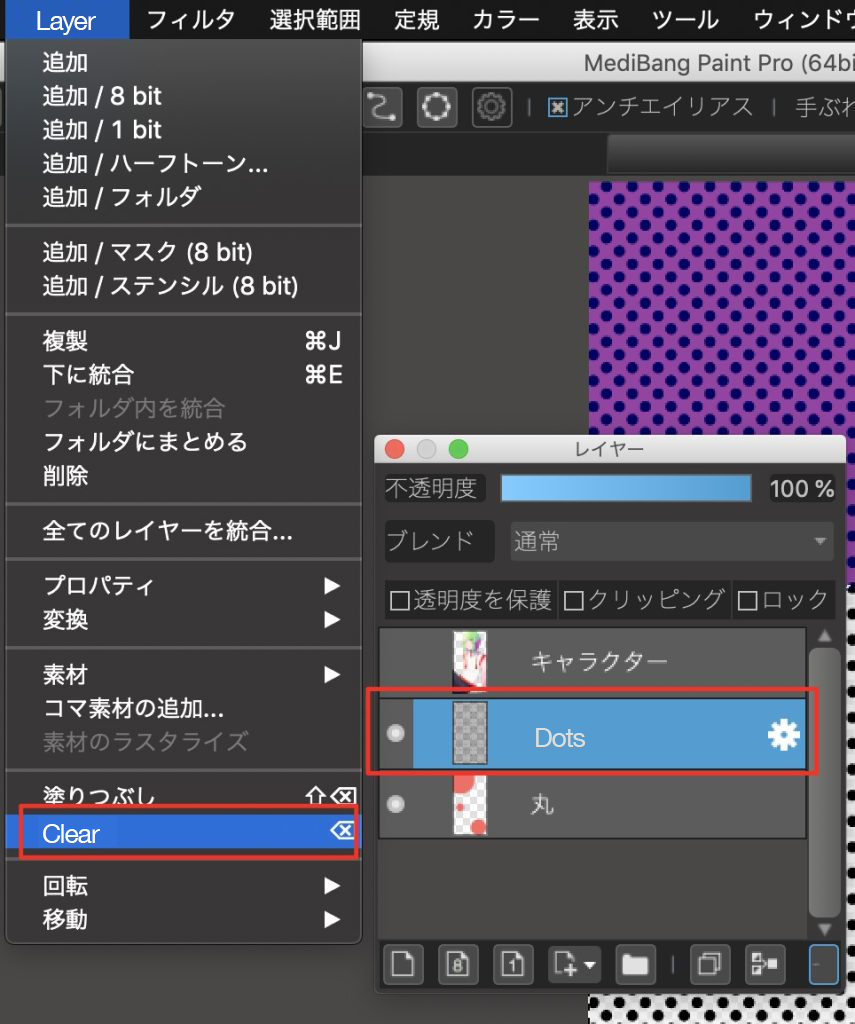
Select the dot layer you want to cut out, and select “Clear” from the layer menu.
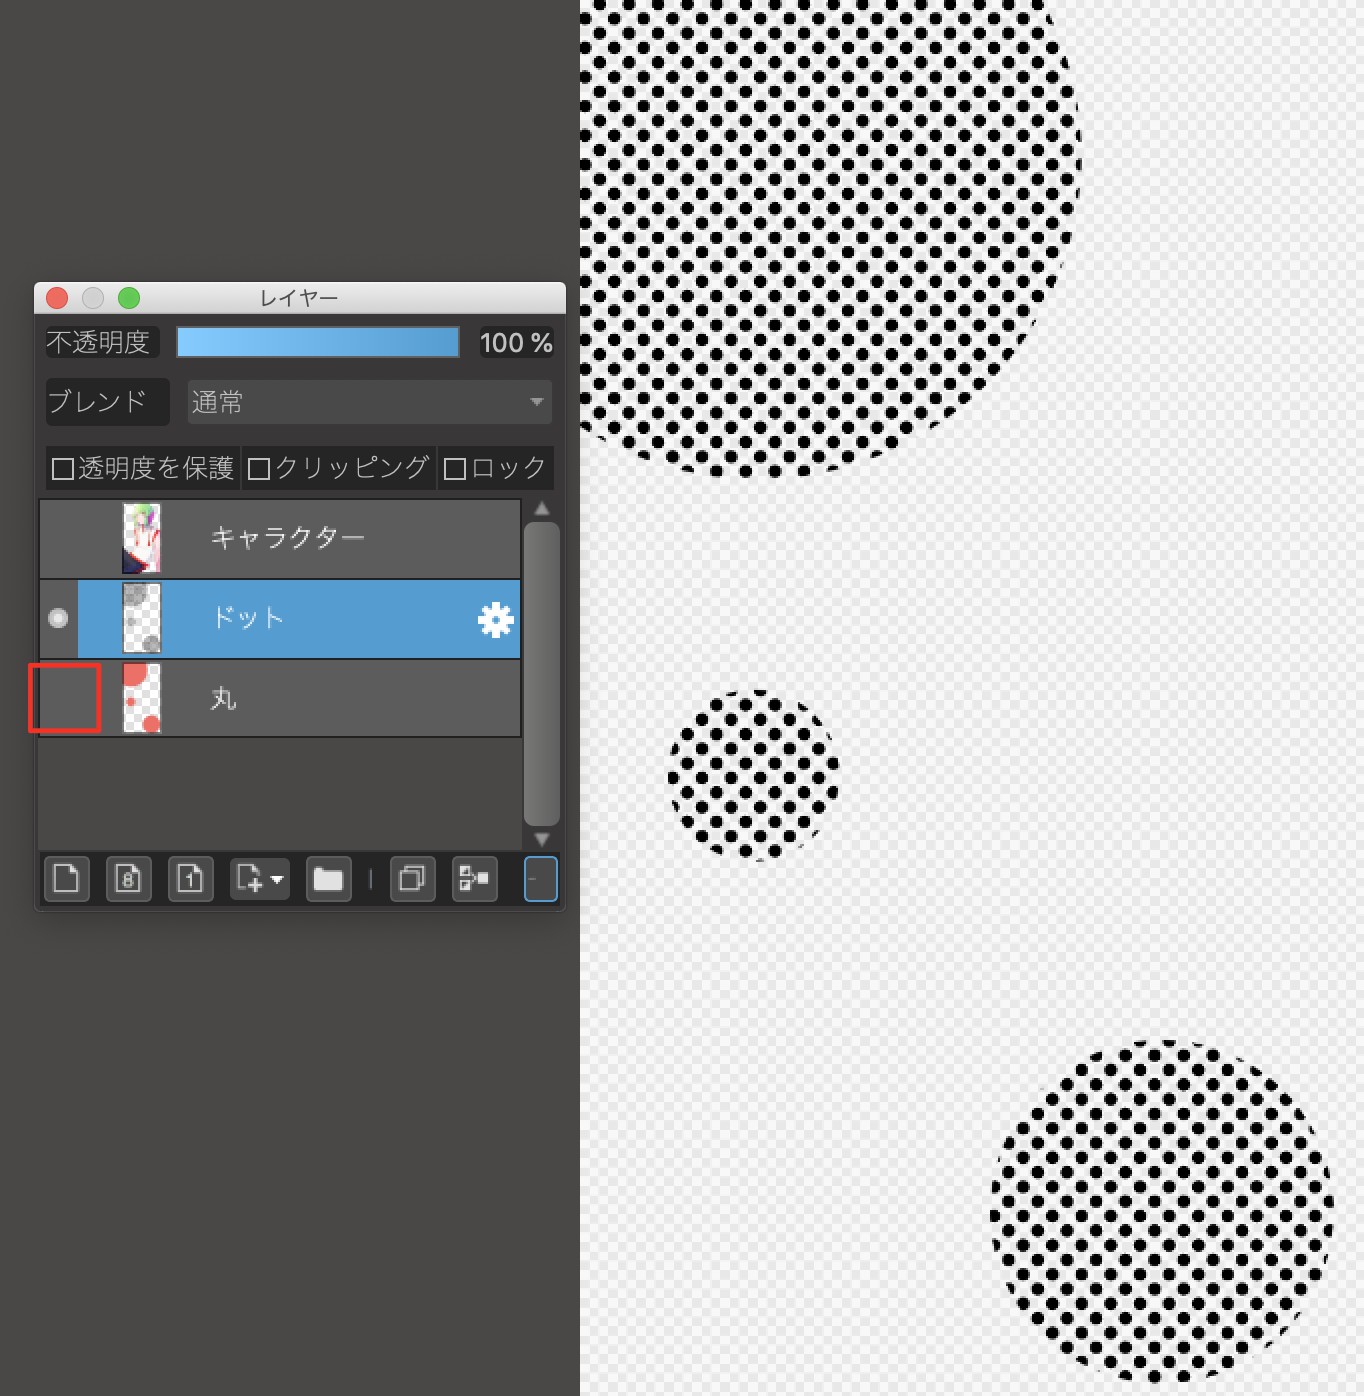
Hide the base circle layer, and we’re done creating dot circles.
Change the color of dots.
Add a new layer on top of the dot layer.
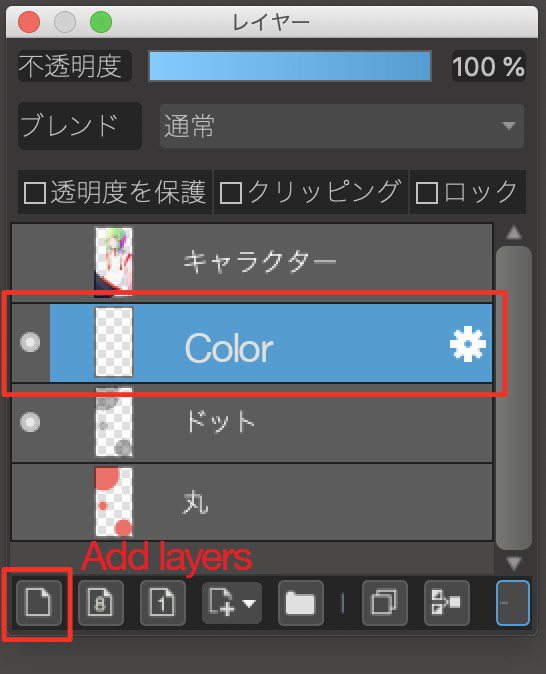
Select the color you want to use for the background and paint all over the canvas with it, then select the “Clipping” check box.
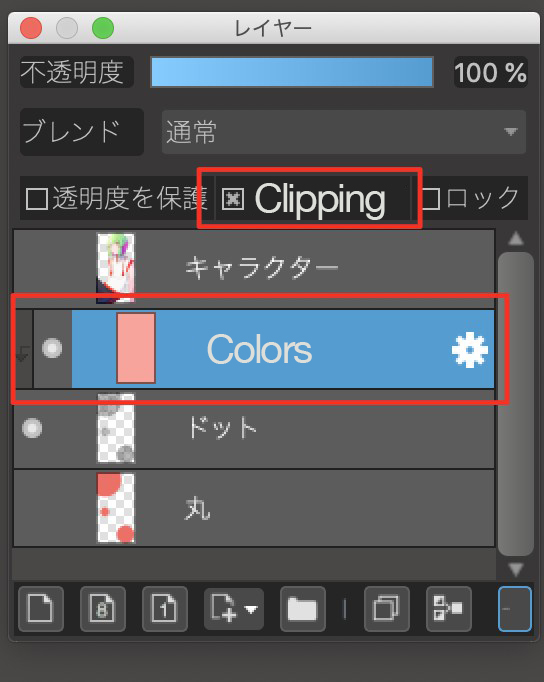
We’re done.
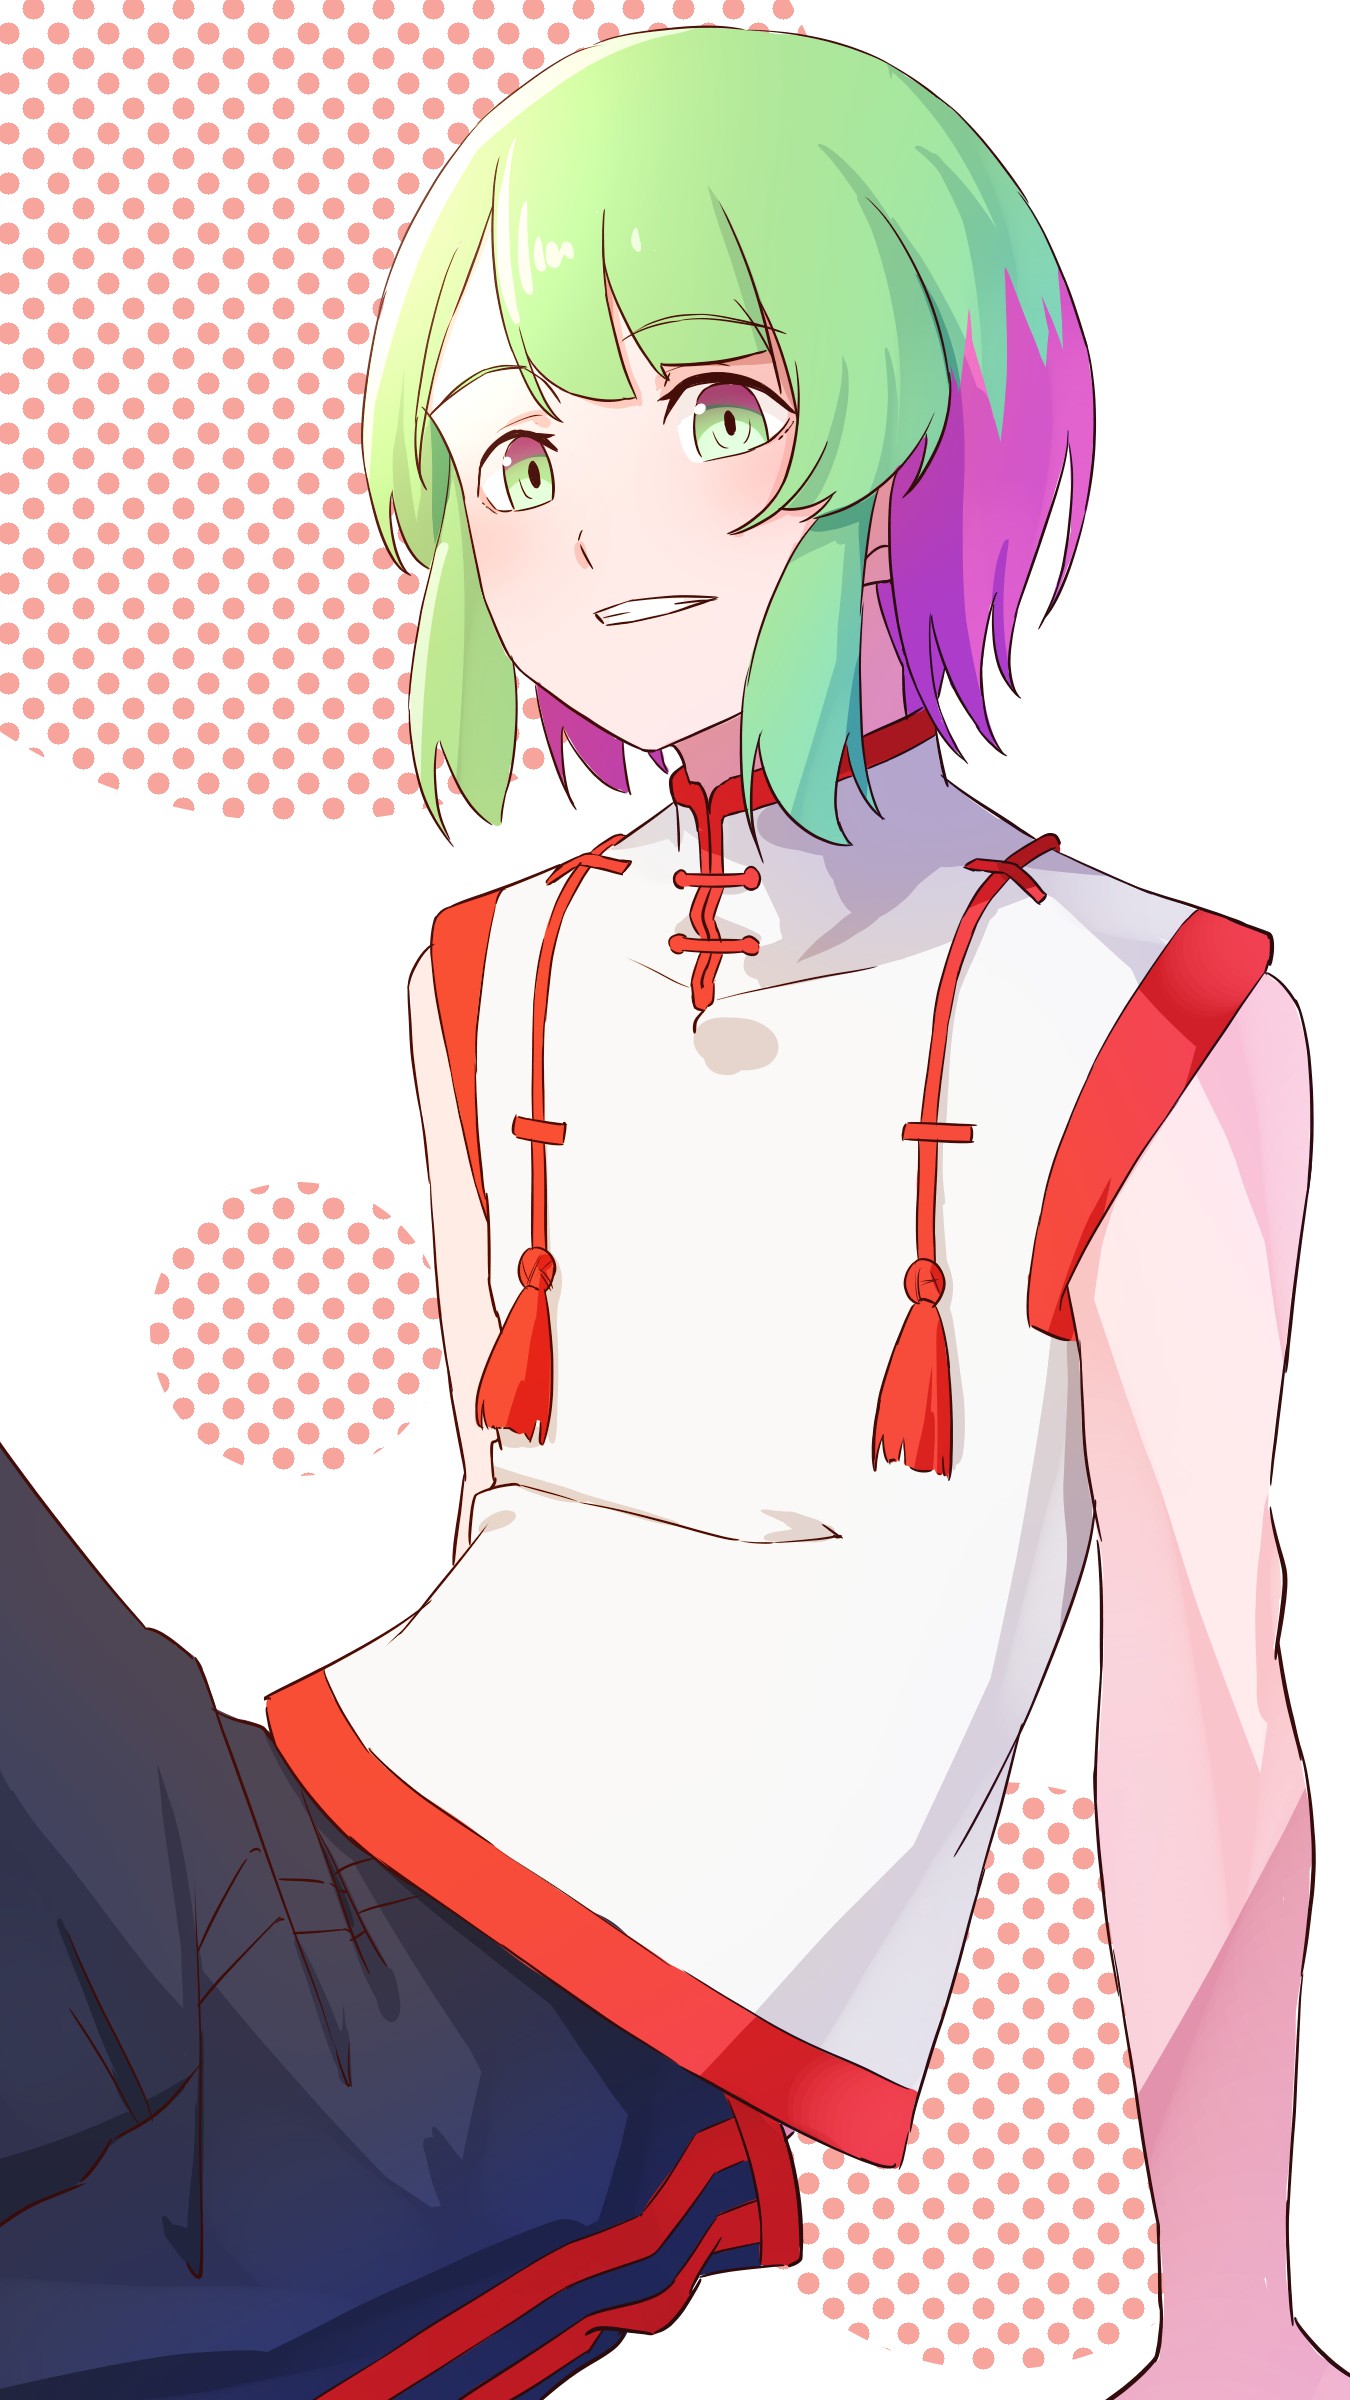
This technique can be applied to more than just the ellipse we used this time, so try it with any shape you like.
Create backgrounds by arranging small images
Some people may find the technique of “creating backgrounds with shapes” difficult.
I’ll encourage them to add “handwritten-like illustrations” to the backgrounds.
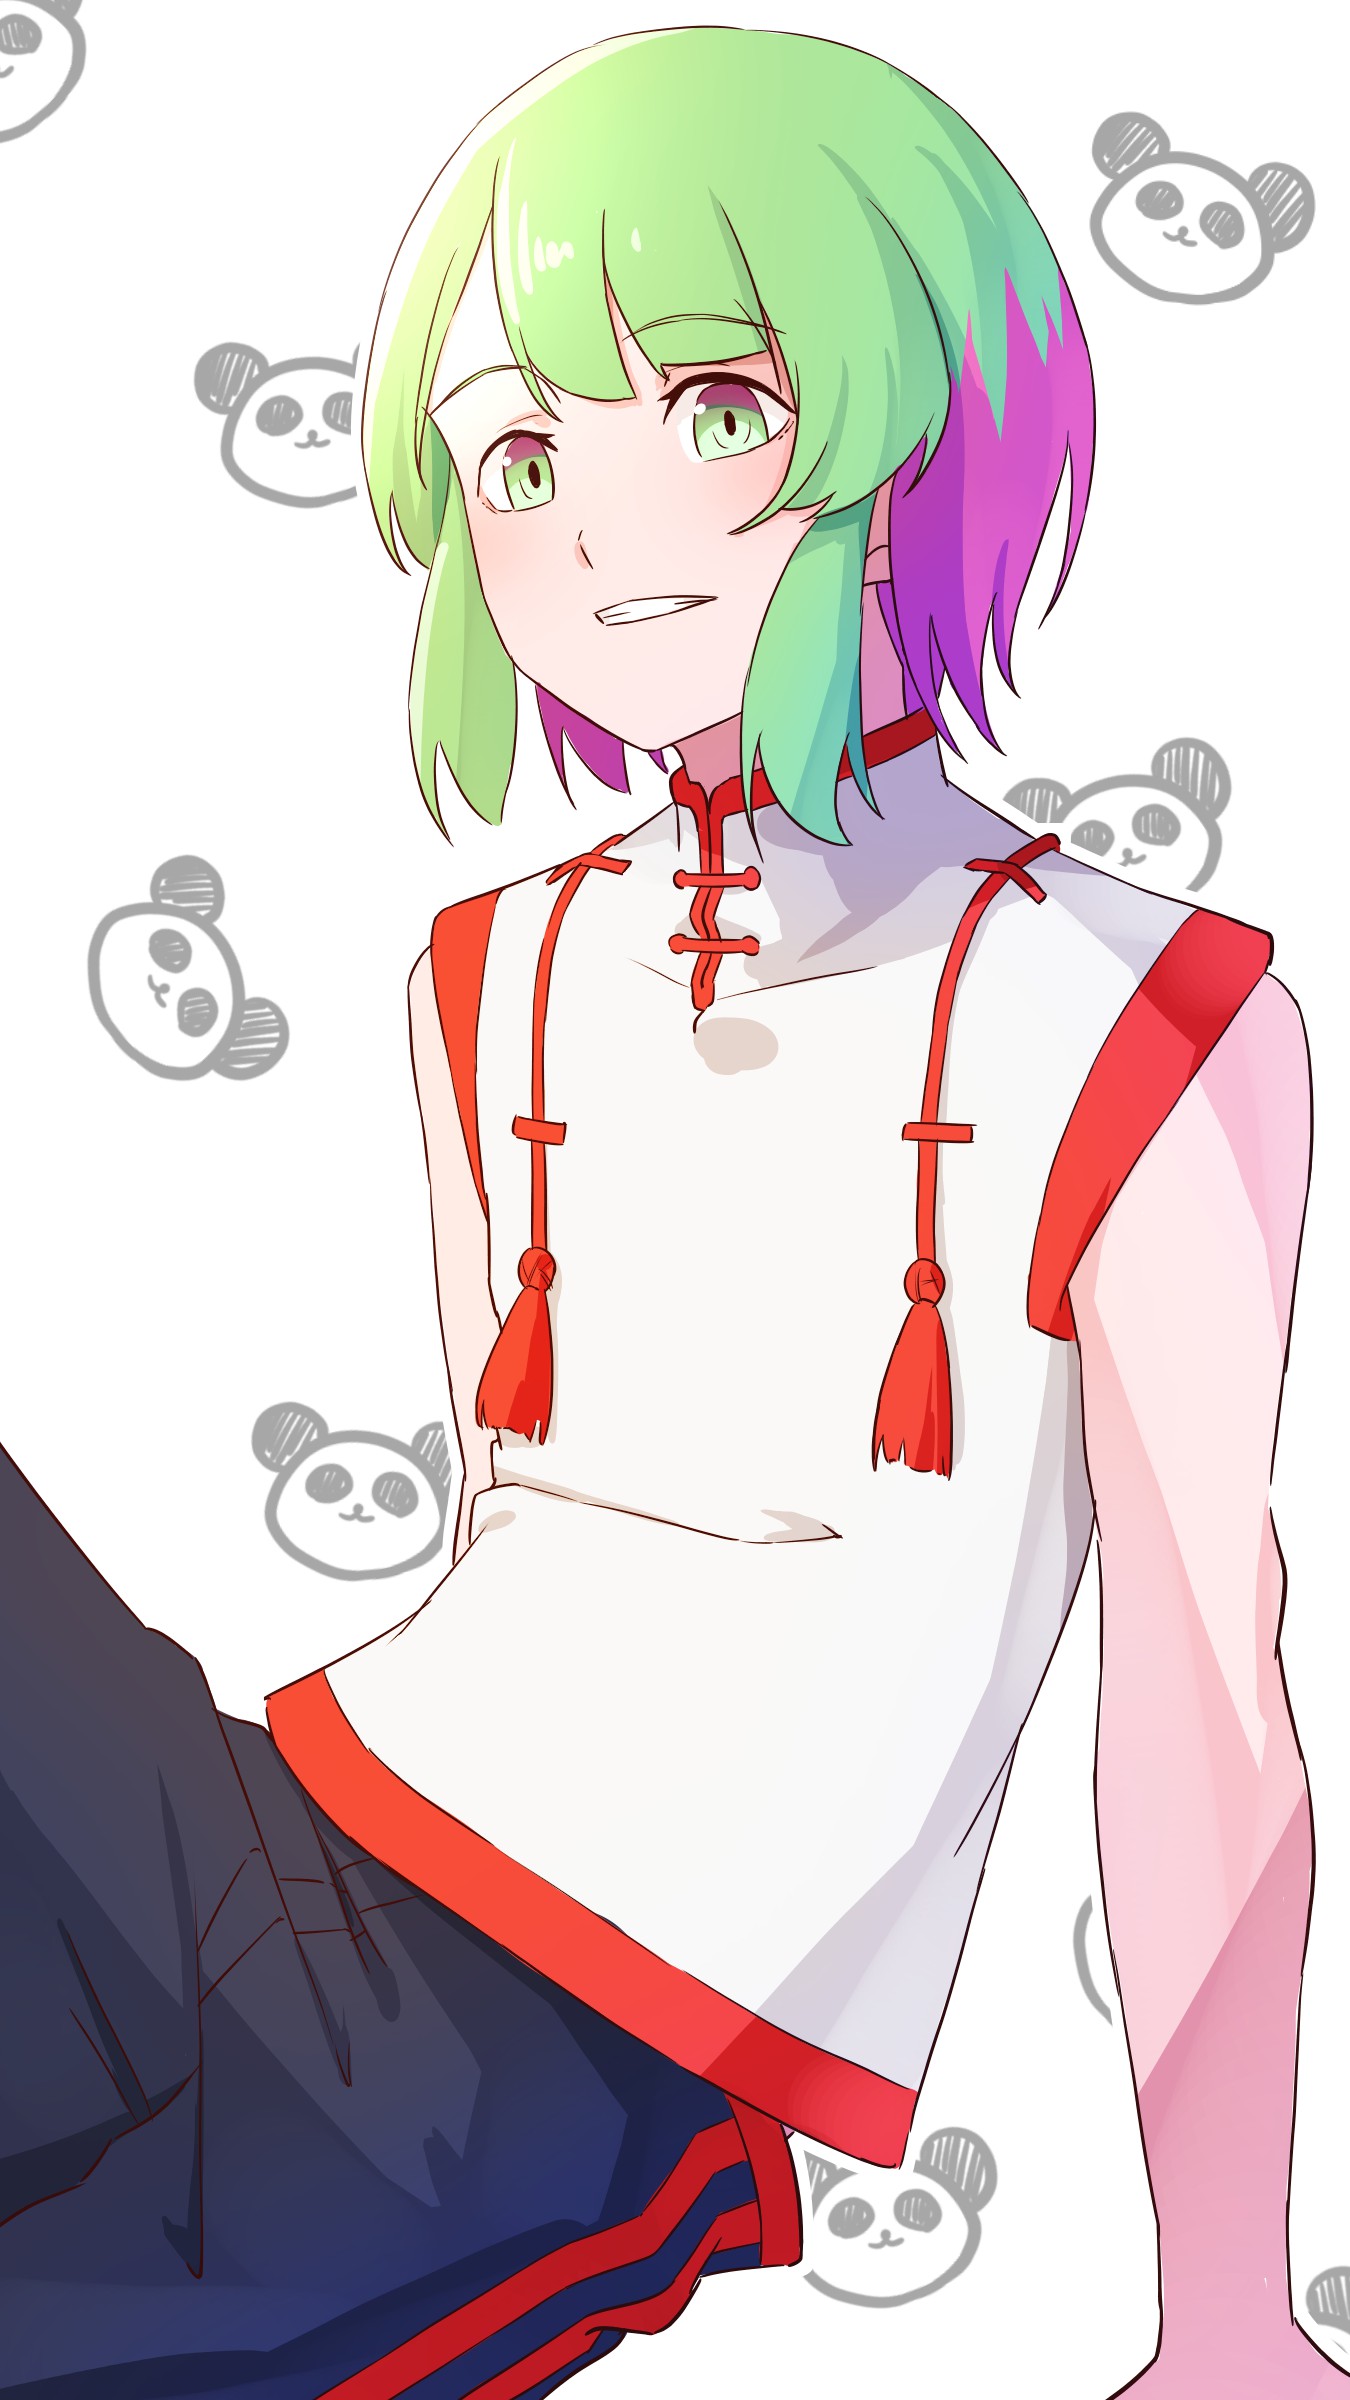
This is what it looks like when finished↓
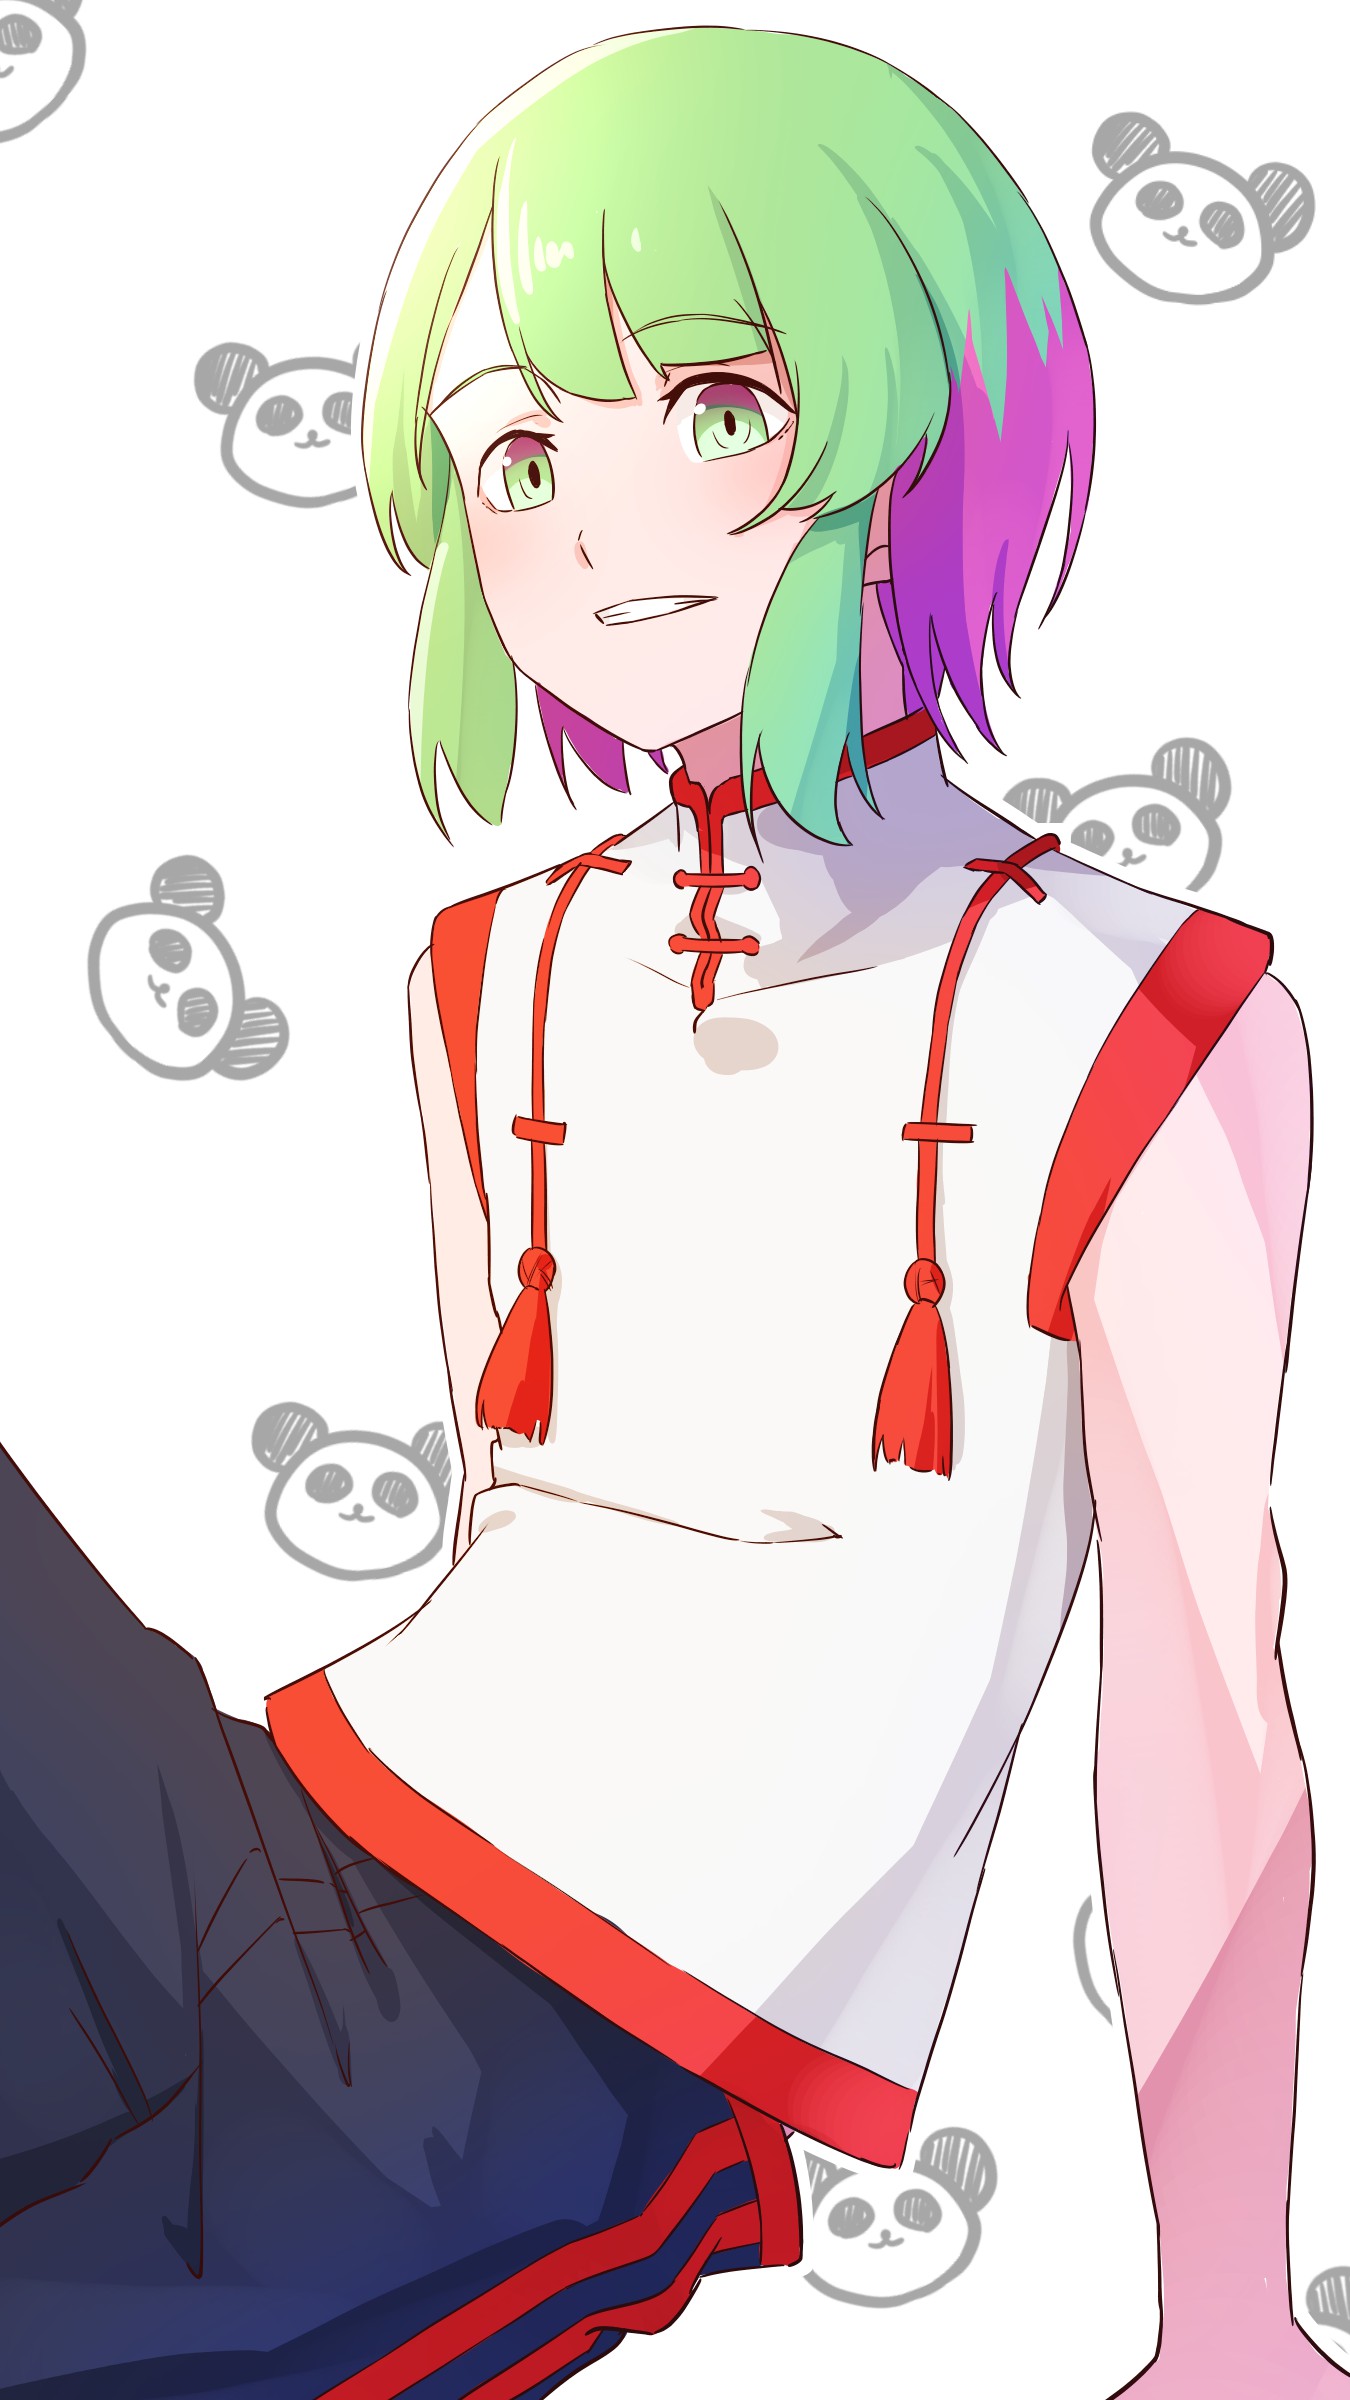
I will draw pandas as the character has a Chinese atmosphere.
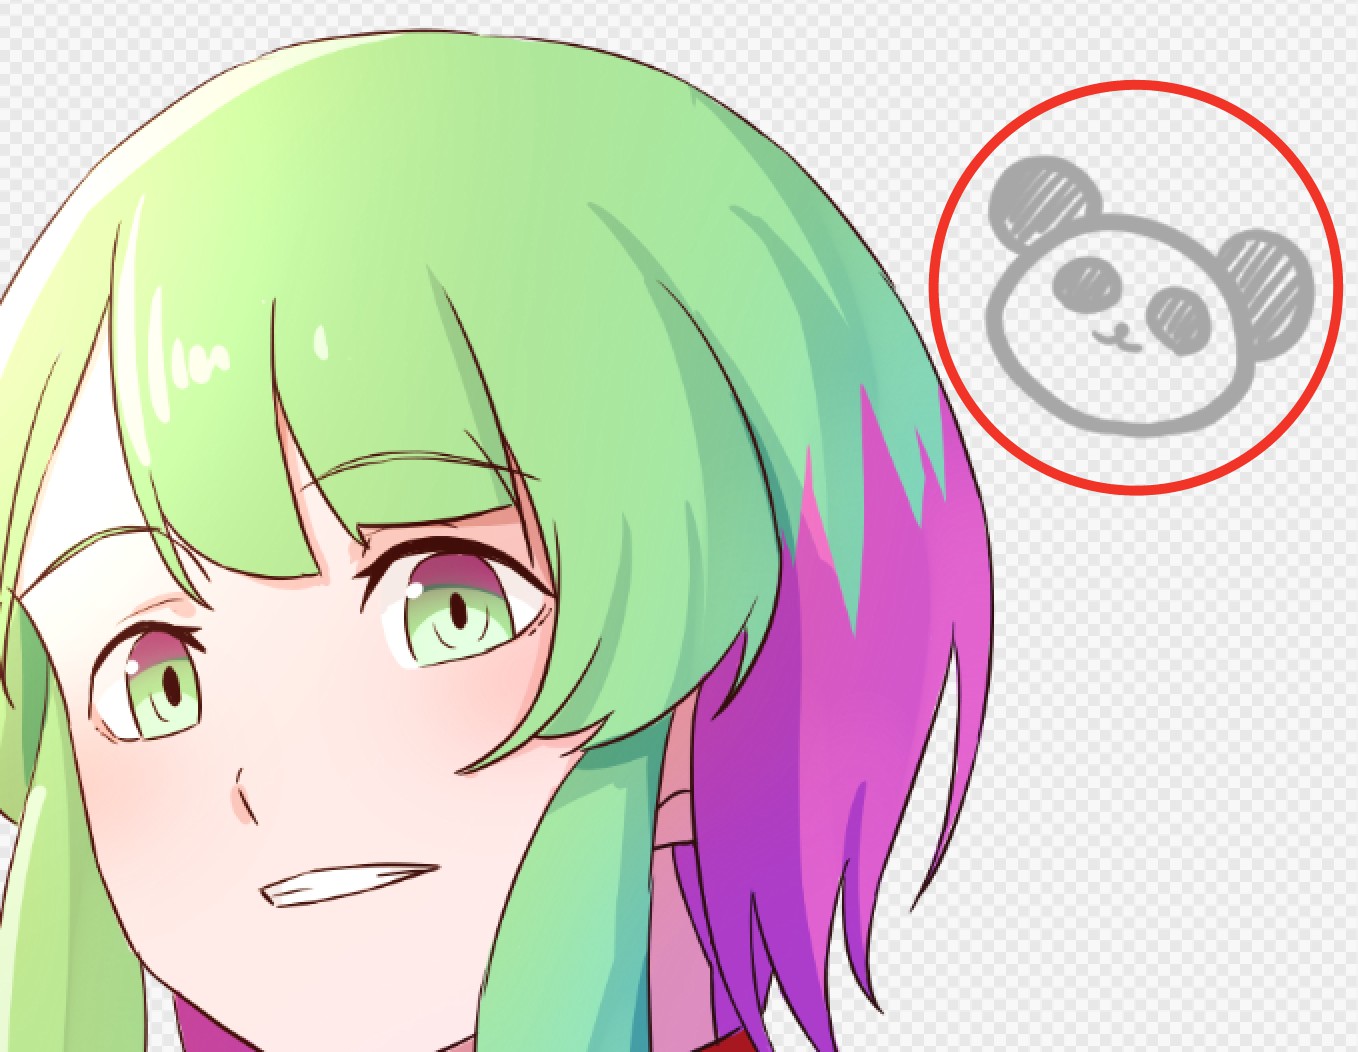
Things to remember when arranging randomly
Copy and paste pandas to randomly arrange them at different angles.
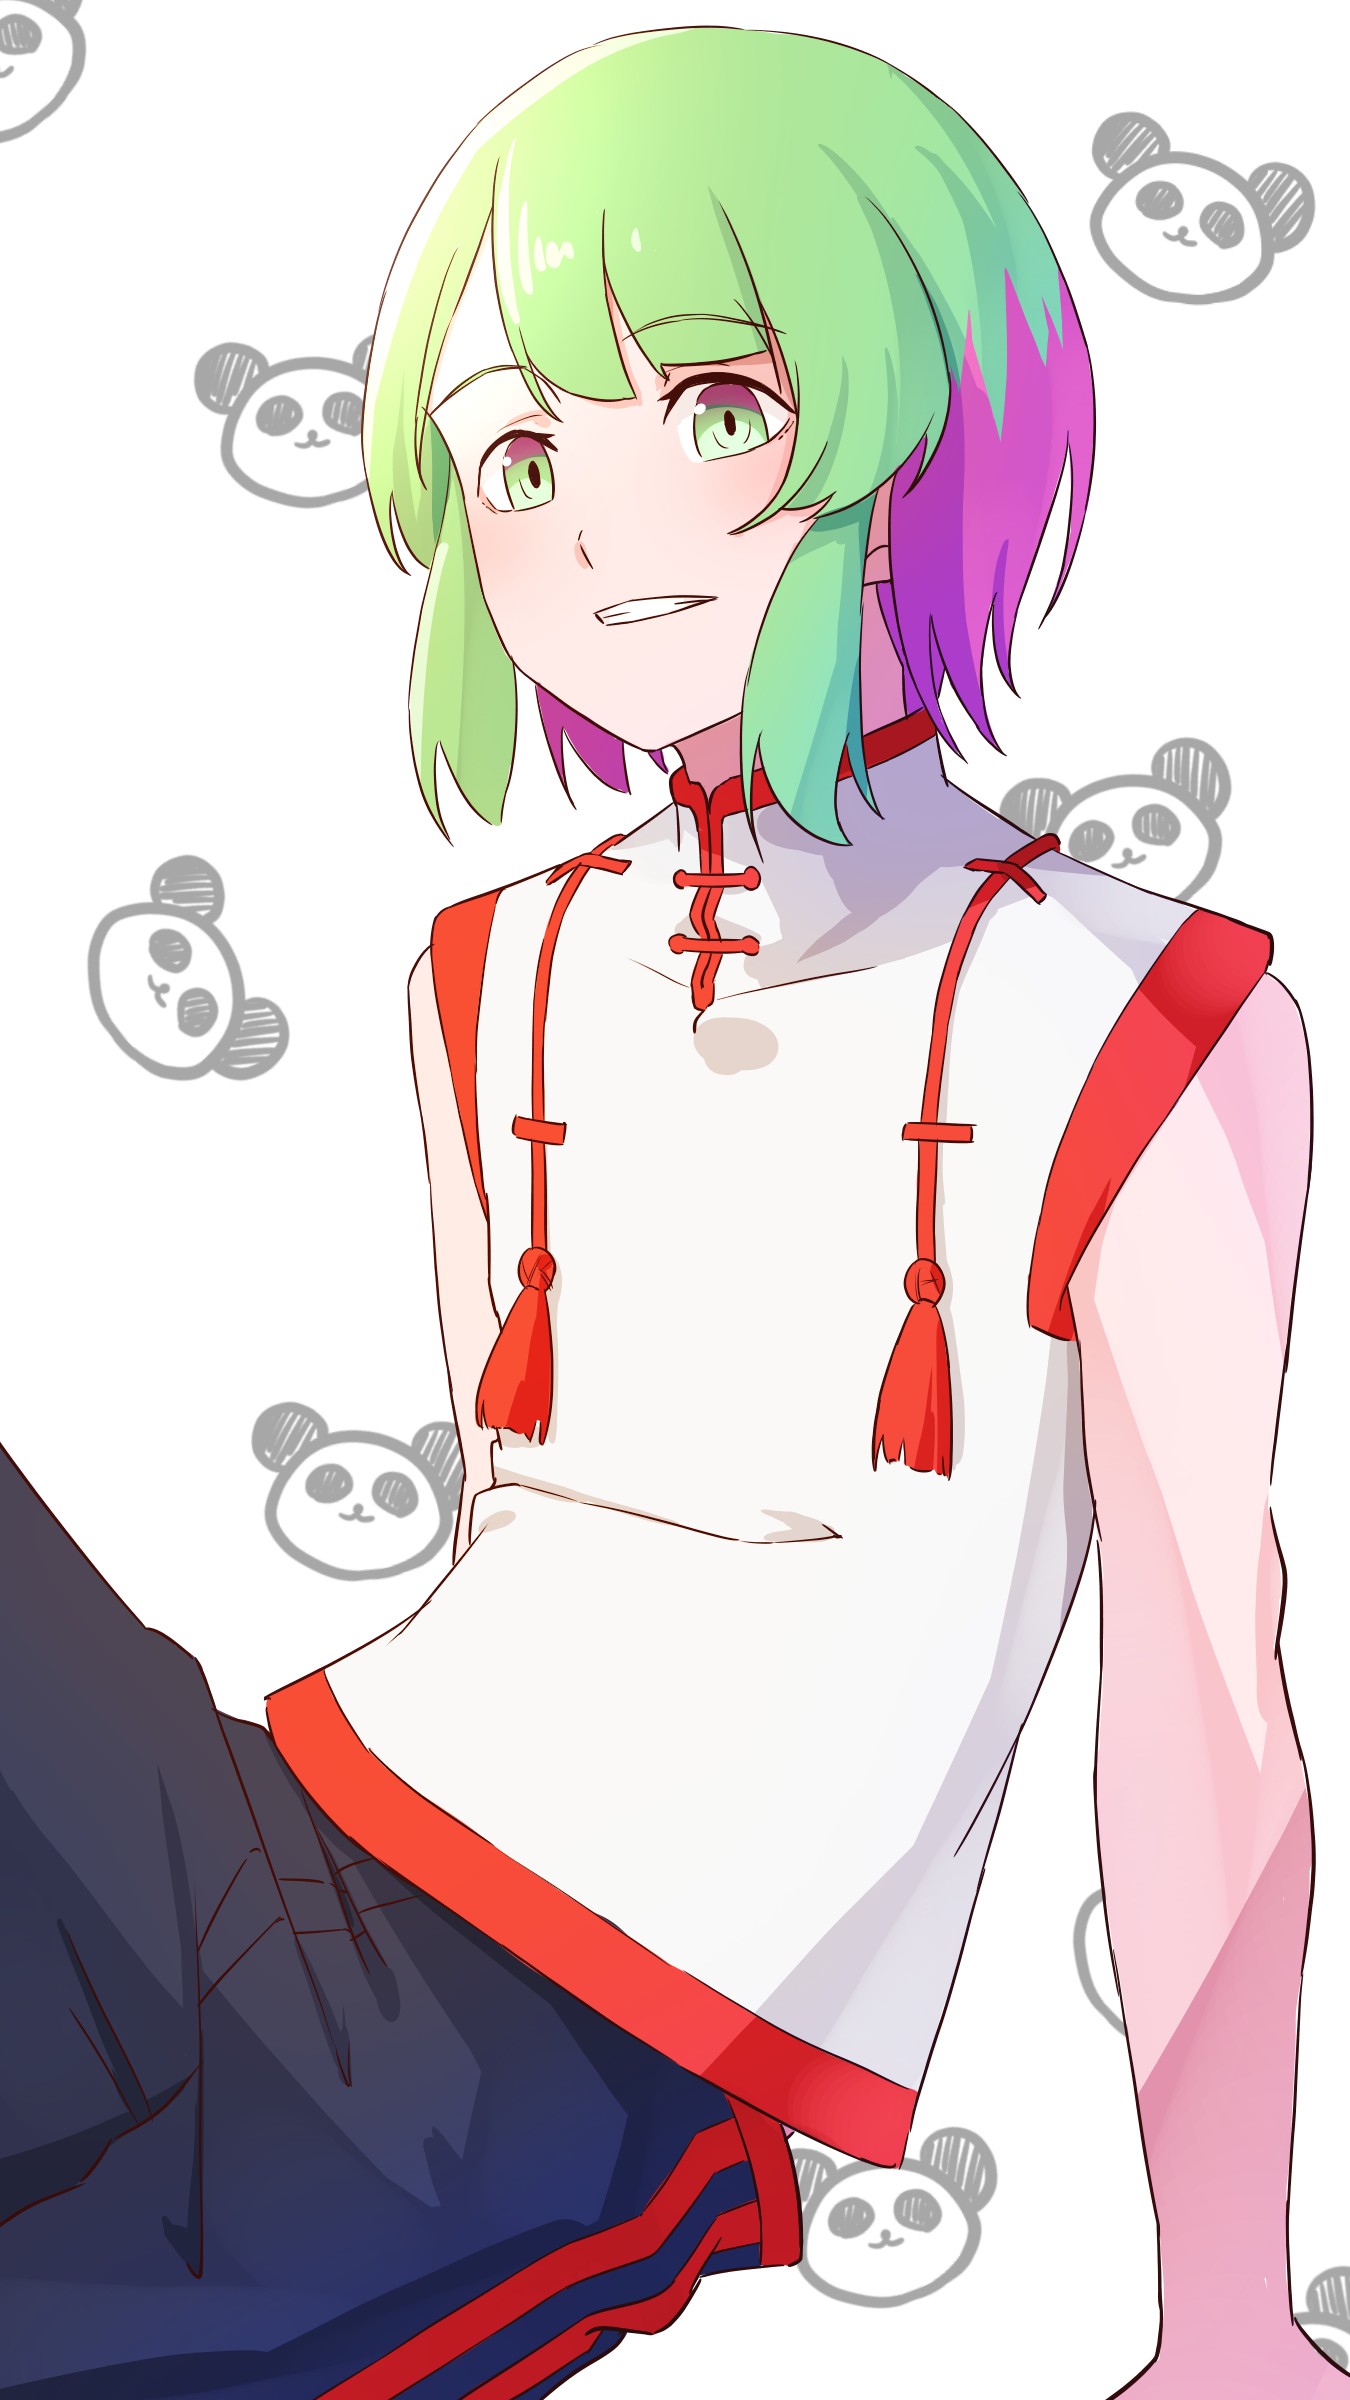
Good randomness can be achieved by being aware of the following:
- Do not arrange them vertically
- Do not place them close together at the same angle
Add the white border to make characters stand out
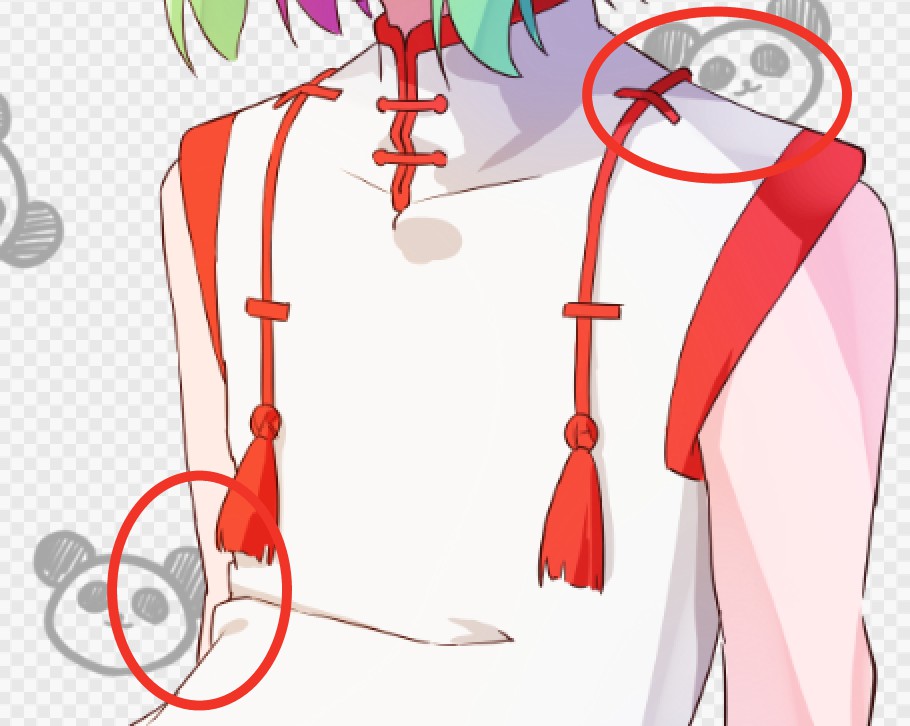
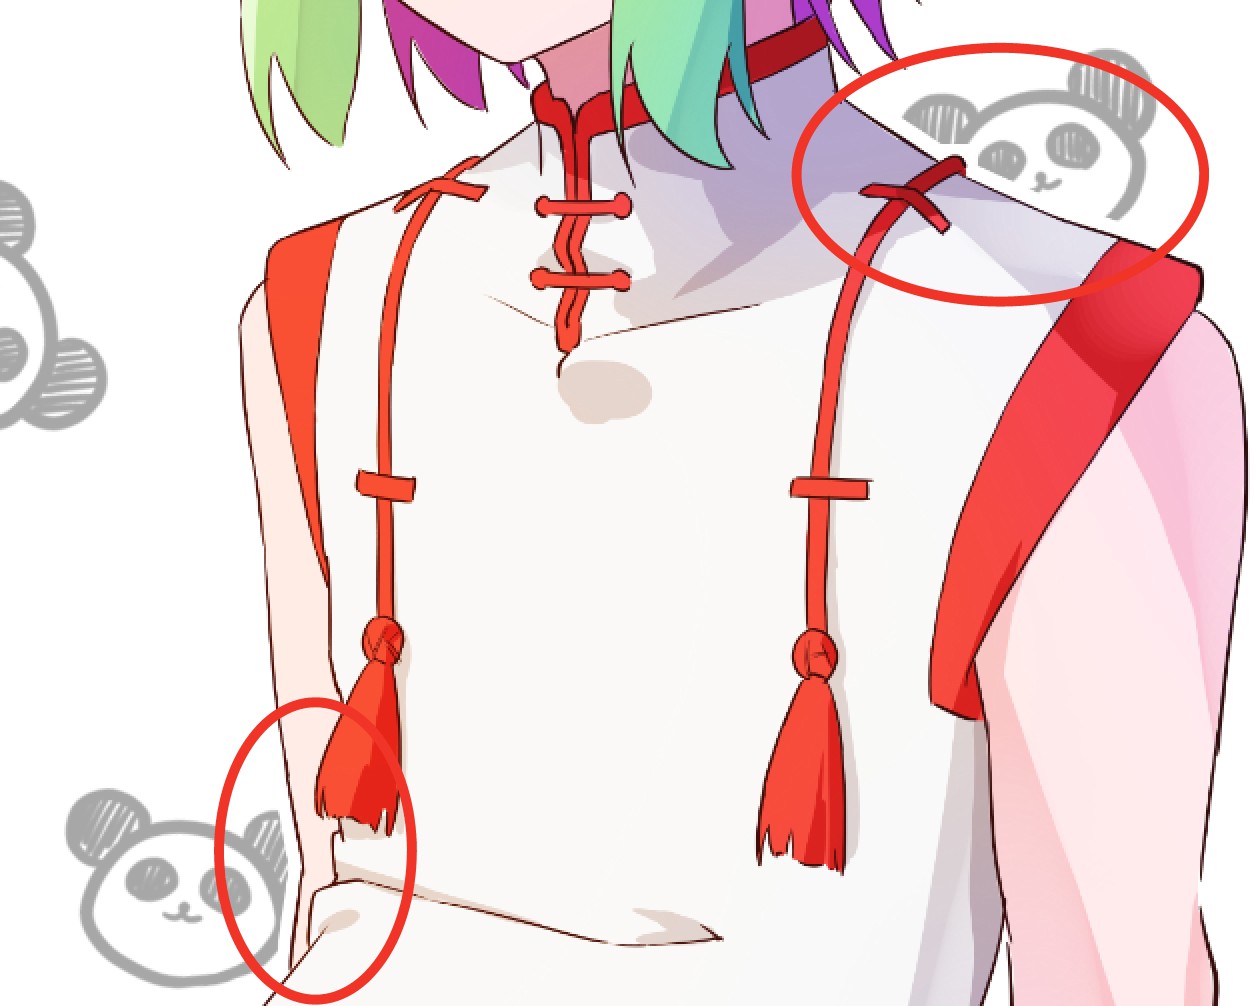
I noticed that there are areas where the character and the pandas overlap, which is not good.
So I will add a white border around the character.
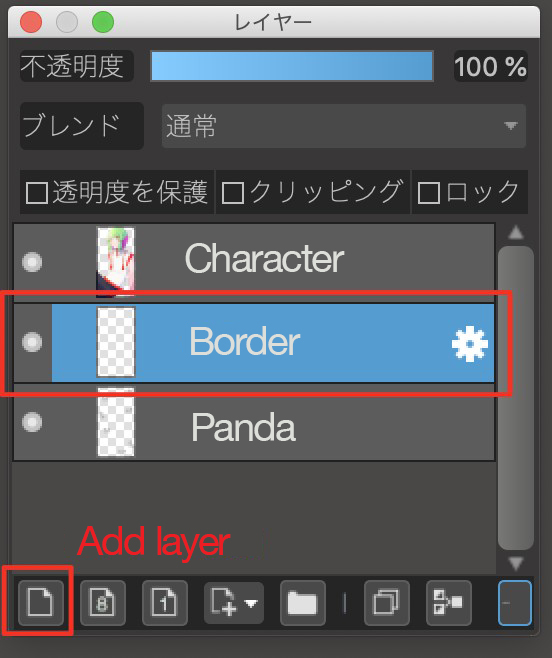
Add a new layer for the white border under the character layer.
Select the area of the character and select “Expand”.
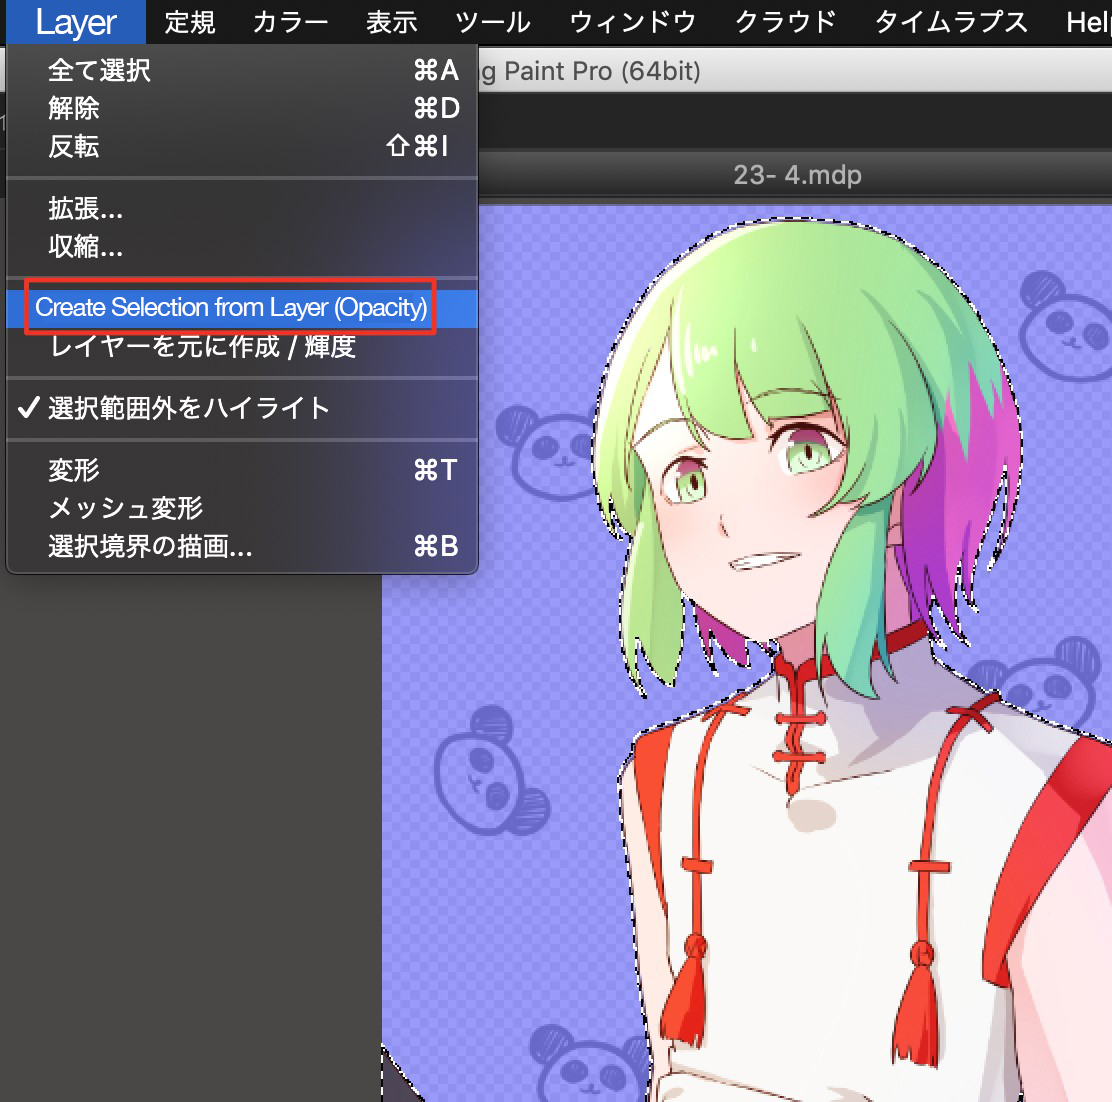
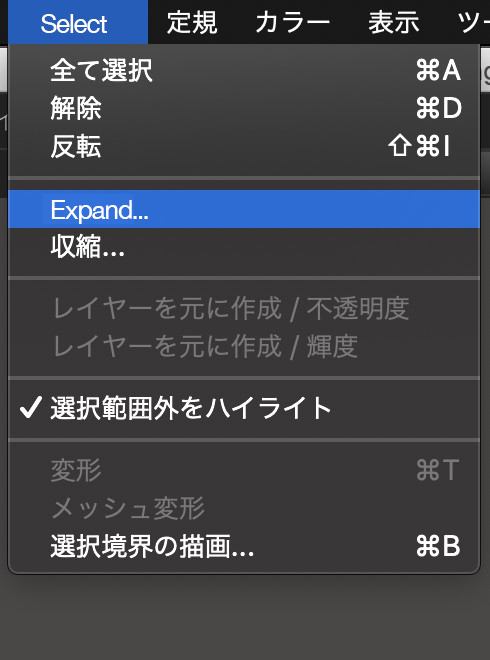
Then enter the pixel value to which you want to expand.
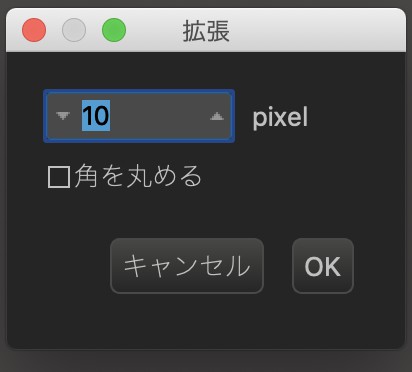
I expanded 10 pixels this time.
We’re done with selecting areas for white border.
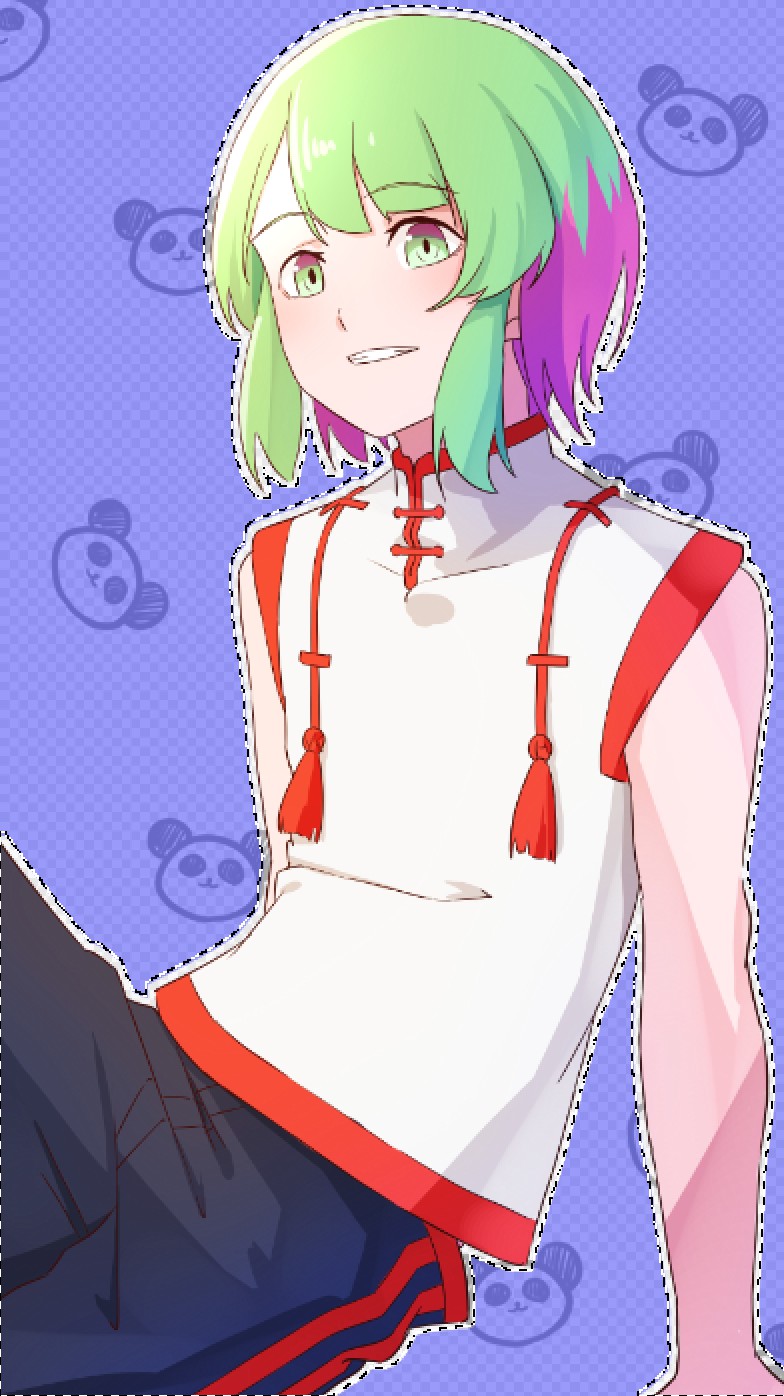
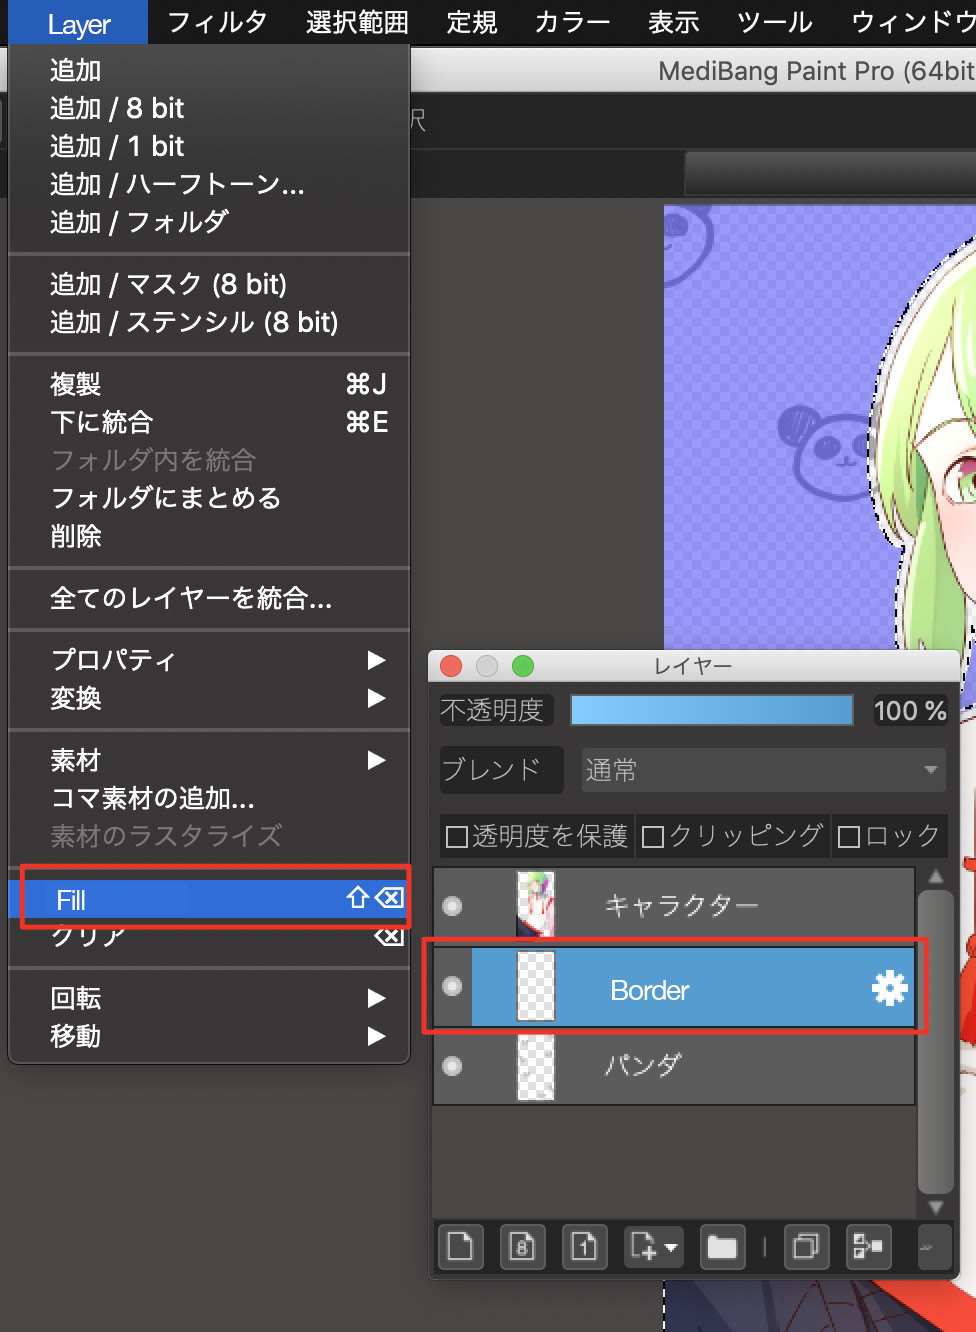
Now select the border layer you created earlier.
Select white from the color circle and choose “Fill” from the layer menu.
Now the white border has been added.
Conclusion: Try out different backgrounds
- Select rectangles for backgrounds
Select Rectangle from Fill Tool to place boxes
What kind of gray should we choose?
Arrange rectangles vertically or diagonally - Select shapes other than rectangles
Select Ellipse from Fill Tool to place circles
Arrange dotted backgrounds
Cut the dot pattern out of the background to leave circular areas - Create backgrounds by arranging small images
Things to remember when arranging randomly
Add the white border to make characters stand out
How do you like this tutorial?
I hope you will feel less anxious and more confident about drawing backgrounds.
Please try different types of backgrounds.
(Illustrations/時計)
Twitter @Clock1231
\ We are accepting requests for articles on how to use /

