2020.12.21
How to draw various face directions [Aori].
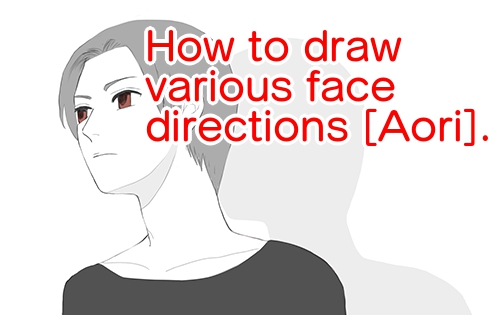
If you change the direction of the character’s face, you can draw different compositions.
However, the way you draw a character’s face changes as well, and it’s easy to get more confused than when drawing the front face.
So, here I’ll show you how to draw the “aoli”, the angle of the face looking up from below.
1. Points to remember when drawing the bite
1-1. Eye Height
When getting a bite, you should pay attention to where your eyes are at.
When drawing a bite, you should pay attention to the height of the eyes, which changes with each of the three angles: front, aori and fukan.
Eye Height.
Front: near the center parallel line
Orientation: above the central parallel line
Vulcan: below the central parallel line
1-2. How to get the bite of the eye
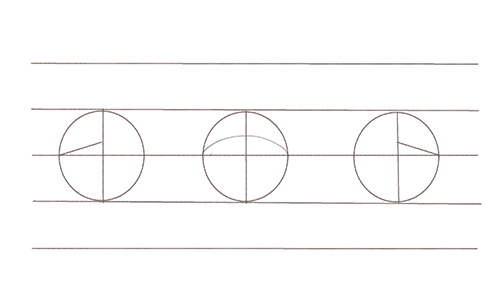
Even with aolian angles, the way you get a bite depends on whether your face is facing left or right or front.
Leftward
In the case of a slightly upward-facing left aolian angle, draw the bite of the eye line from the intersection of the central parallel line and the left side of the contour, slightly oblique to the right.
Rightward facing
In the case of the right-facing aorion angle, it is basically the same as how to draw a left-facing bite.
Draw the eye line bite from the intersection of the central parallel line and the right side of the contour, slightly above the left oblique line.
The front
For the aolian angle from the front, draw the line of the eyes above the central parallel line.
Since the face is not flat but spherical with a gentle curve, it is easier to draw the eyes in an arc to make them more three-dimensional.
Also, how much your face is turned up will change the bite.
The more you turn your head up, the more area of the chin and the more parts such as eyes are gathered upward to draw a bite.
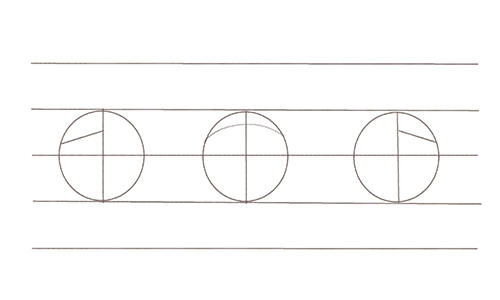
2. Features of each part
Once you have drawn the bite, it is time to draw the parts.
2-1. Points to keep in mind when drawing parts
It’s easier to understand if you think of it in terms of a rectangle, but in the case of the angle of the aoli, the bottom of the face is wider and further away from the top, so it becomes narrower.

In line with this, the upper parts of the face, such as the top of the head and eyebrows, are narrower.
Keep this in mind when drawing the parts.
2-2. Features of each part
[Eye]
When drawing the eyes, the point is to be aware that the face is spherical.
We tend to draw the eyes as a flat surface.
But the face is spherical, and the eyes are gently curved.
Therefore, if you draw the eyes as if you were attaching a sticker to the surface of the sphere, it will be easier to create a three-dimensional effect.
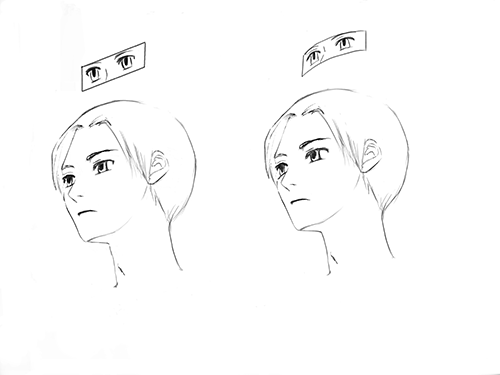
[Nose]
It’s easy to imagine the nose as a triangular cone.
The more you look up, the better you can see the bottom of the triangular cone (the part of the nostrils), and you can adjust it to fit the angle.
[Mouth]
The mouth, like the eyes, should be drawn along the curve of the face, keeping in mind the ribbon shape.
The more the face turns upward, the more it arcs upward.

[Jaw]
The angle of the chin is wider under the chin, depending on the direction and angle of the face.
The key to a more natural angle is to draw this area under the chin.
The area under the chin becomes wider as you look up, and the area above the chin is squeezed up and down.
Also, in the case of the frontal aorion angle, the more upward the face is, the more convex the chin becomes.
[Ears]
When drawing the ears, pay attention to their position.
In the case of Aori, the ears go down as the face turns to the front.
It’s also important to note that they become shorter in height as you turn the face up.
3. Summary
When you draw the angles of the aoli, it is easier to check the drawing techniques one by one than to draw them in a casual way.
You can also refer to photos and mirrors to see how the parts change according to the angle and practice.
\ We are accepting requests for articles on how to use /

