2021.04.28
[For Beginners] Let’s Draw a Rough Sketch (1) How to Draw a Basic Rough Sketch [For Smartphones]
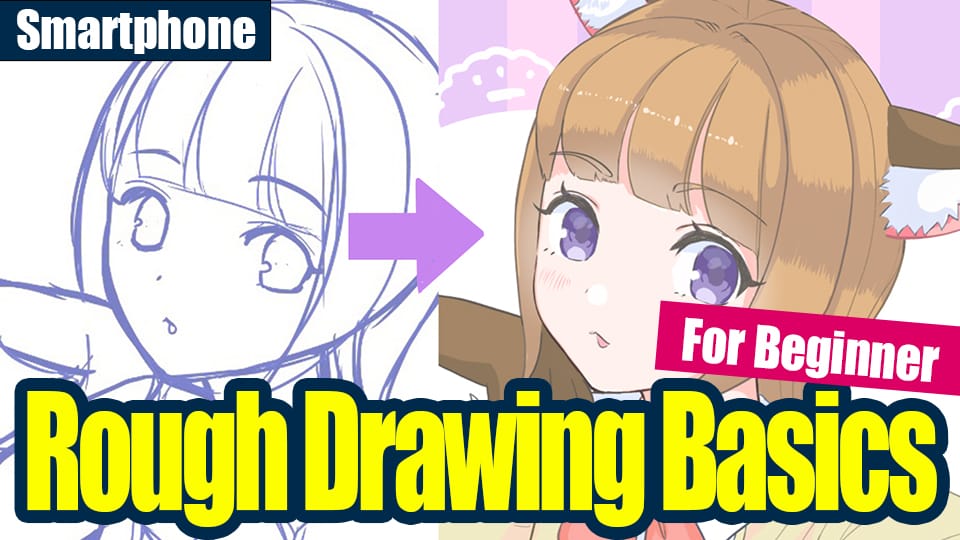
One of the processes of drawing illustrations is “roughing.
The word “rough” means “rough” in Japanese, and in the illustration process, it refers to “a rough, simple draft.
In the illustration process, it refers to a “rough, simple draft.
However, in fact, the rough draft is the framework of the illustration, and if drawn properly, it will improve the quality of the line drawing.
In this article, I’d like to introduce the basic way to draw a rough sketch and the points to consider when drawing it.

1. Prepare to draw rough: prepare a bite picture

Before drawing a rough sketch, you should first draw a bite to decide “what to draw where in the illustration” and “how to draw the person”.
2. Drawing a rough image (1): Draw the whole image simply based on the Atari

When the Atari is ready, create a rough layer on top of it and draw a rough image.
[Drawing the face and body parts]
First, draw the face and body parts.
If you have already drawn the Atari with the original body, draw only the face.
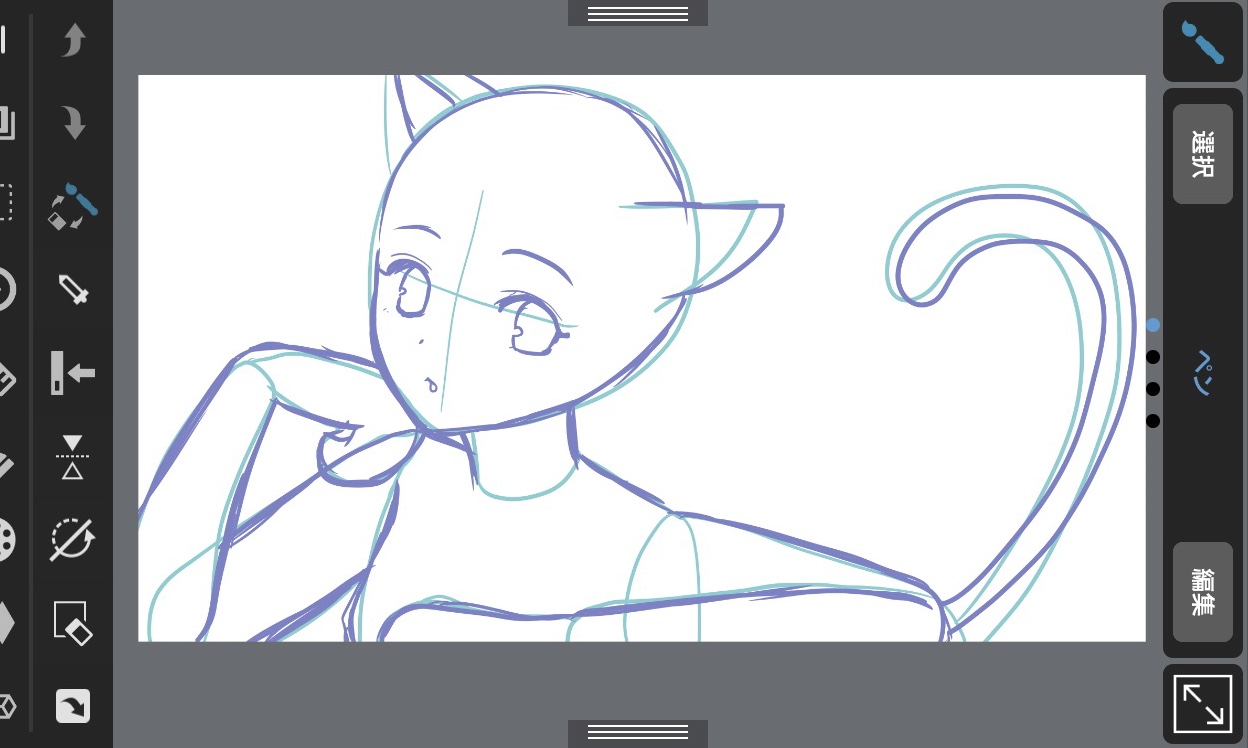
Choose a pen color that will not blend in with the Atari lines.
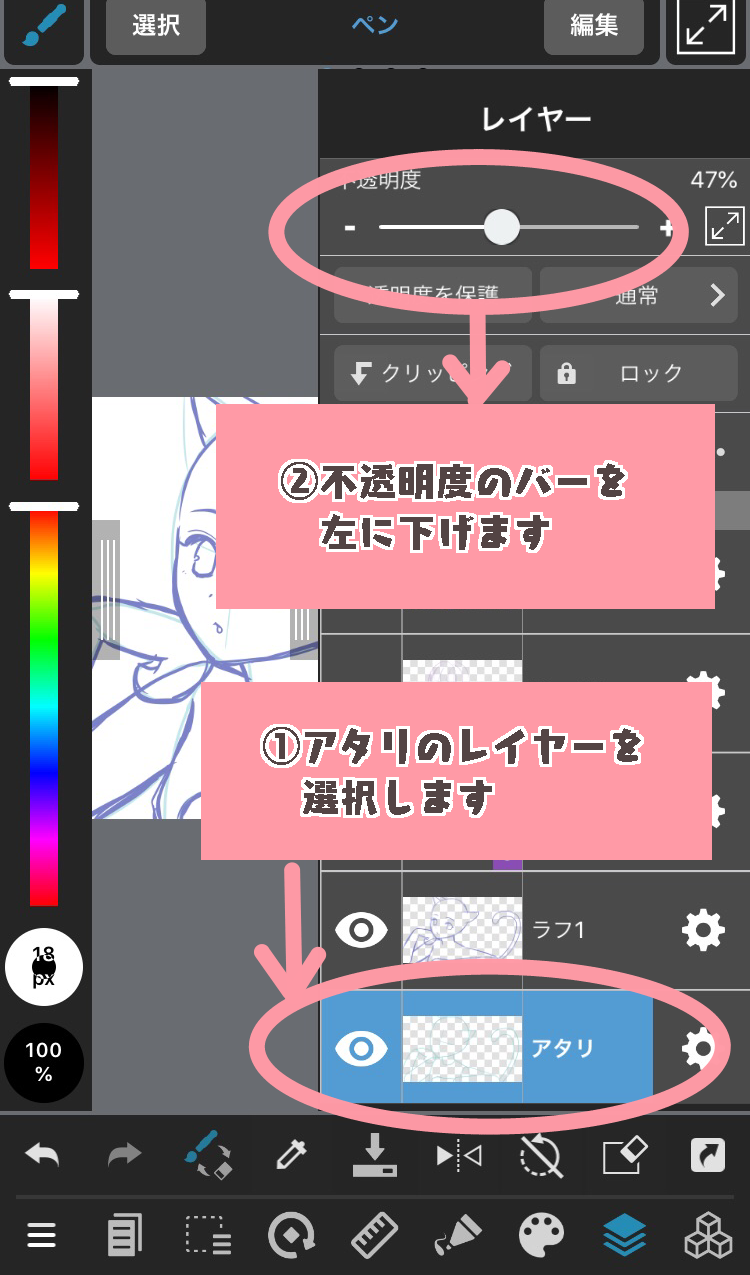
You can also lower the opacity of the Atari to make the rough lines more visible.
<How to reduce opacity>
[Draw facial expressions, clothes and hair]
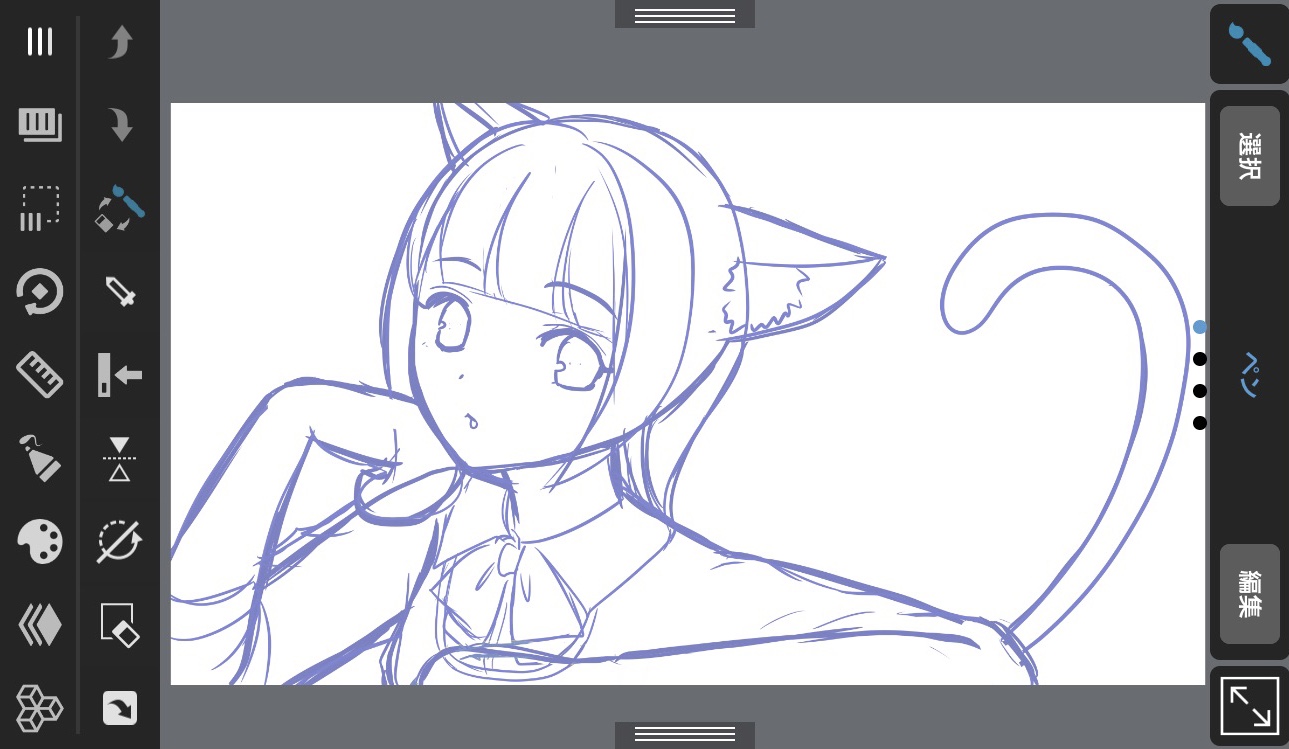
Once the face and body are drawn, you can decide on the facial expression, clothing, and hairstyle.
If the clothes and hairstyle are already decided, draw them on the same layer as the face and body.
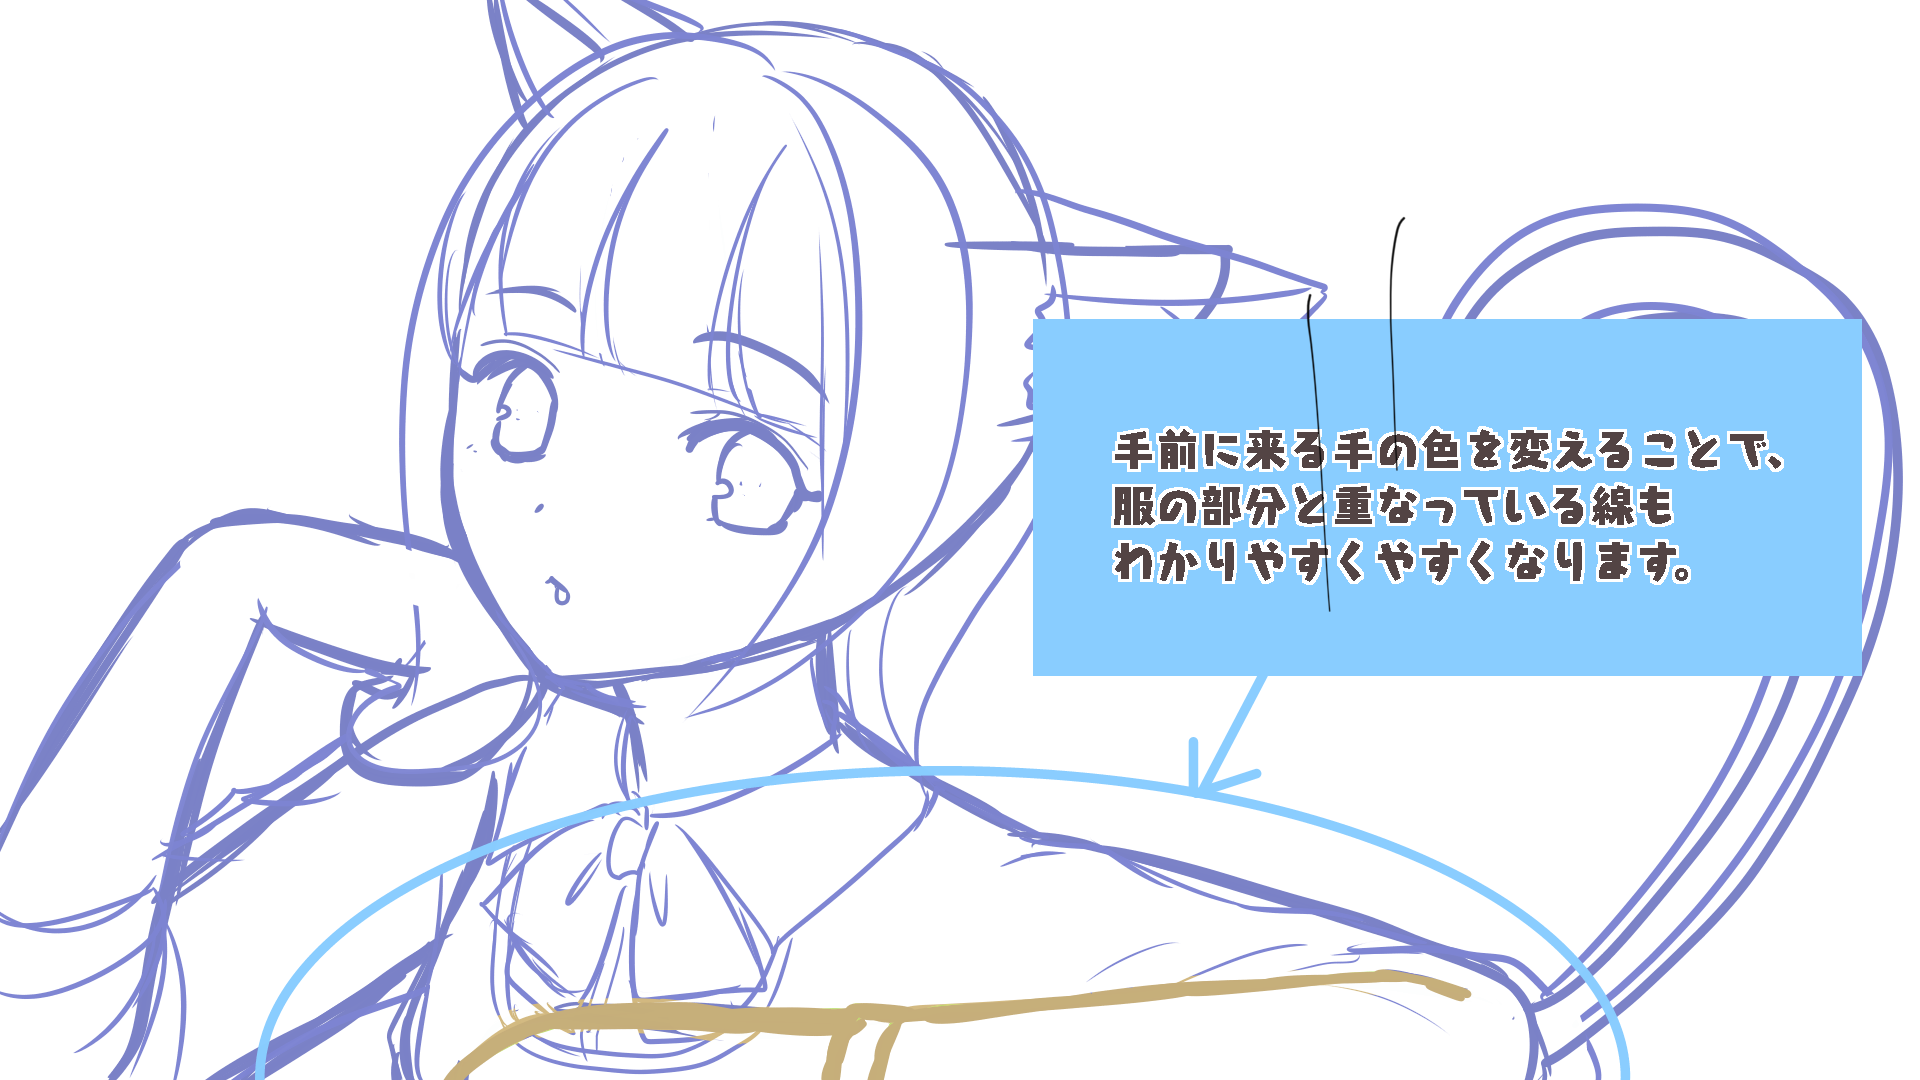
<Point1. Change the color where the lines are intricate.>
As is the case with Atari, it is easy to lose track of which lines are which in a rough drawing, since you may draw many lines in order to adjust the shape or draw parts that are not visible.
In order to draw a rough image that is easy to understand later, it is recommended to change the color of each part of the image where many lines overlap.
<If you want to experiment with different hairstyles and outfits.>
If you want to try out different hairstyles and outfits, it is recommended to draw them in separate layers for each pattern.
That way, you can try out different hairstyles and outfits by switching layers.
① Separate the layers and draw two patterns of clothing and hairstyles.
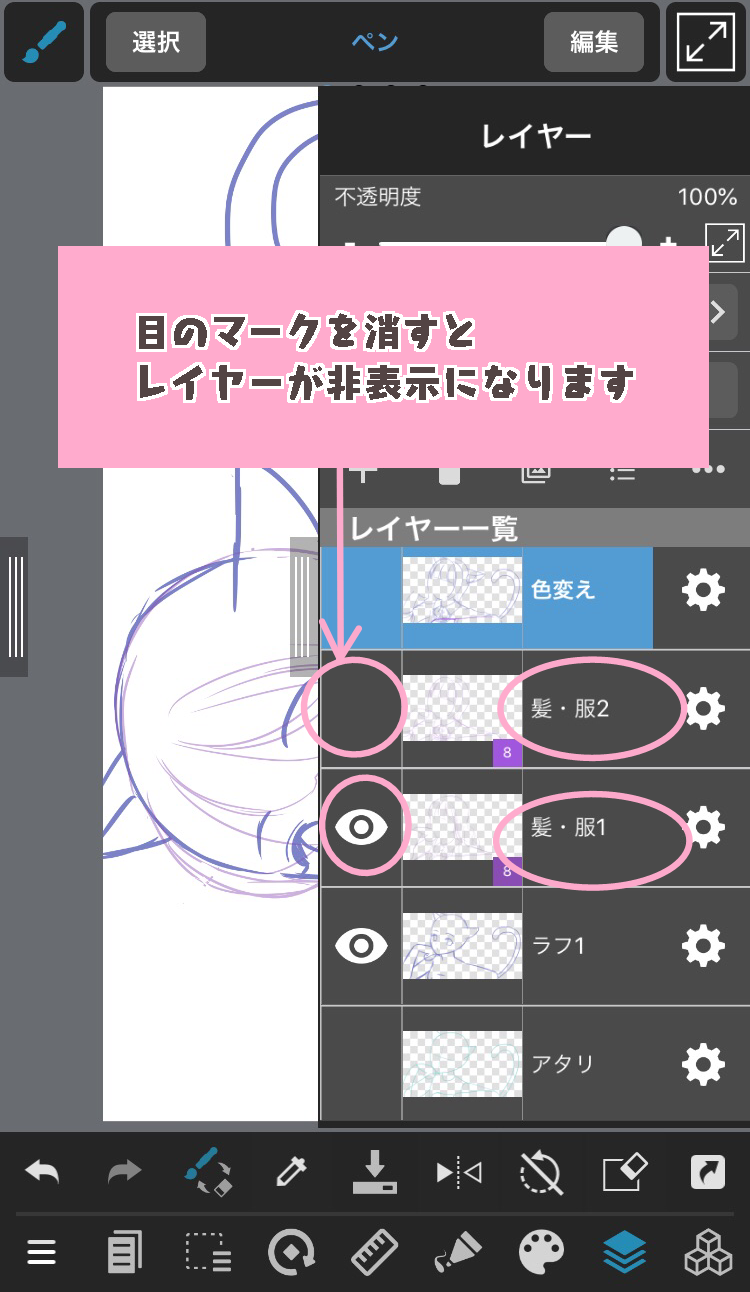
Use the eye symbol to the left of each layer to switch between layers.
For example…
Pattern 1: Shortcut + Knit
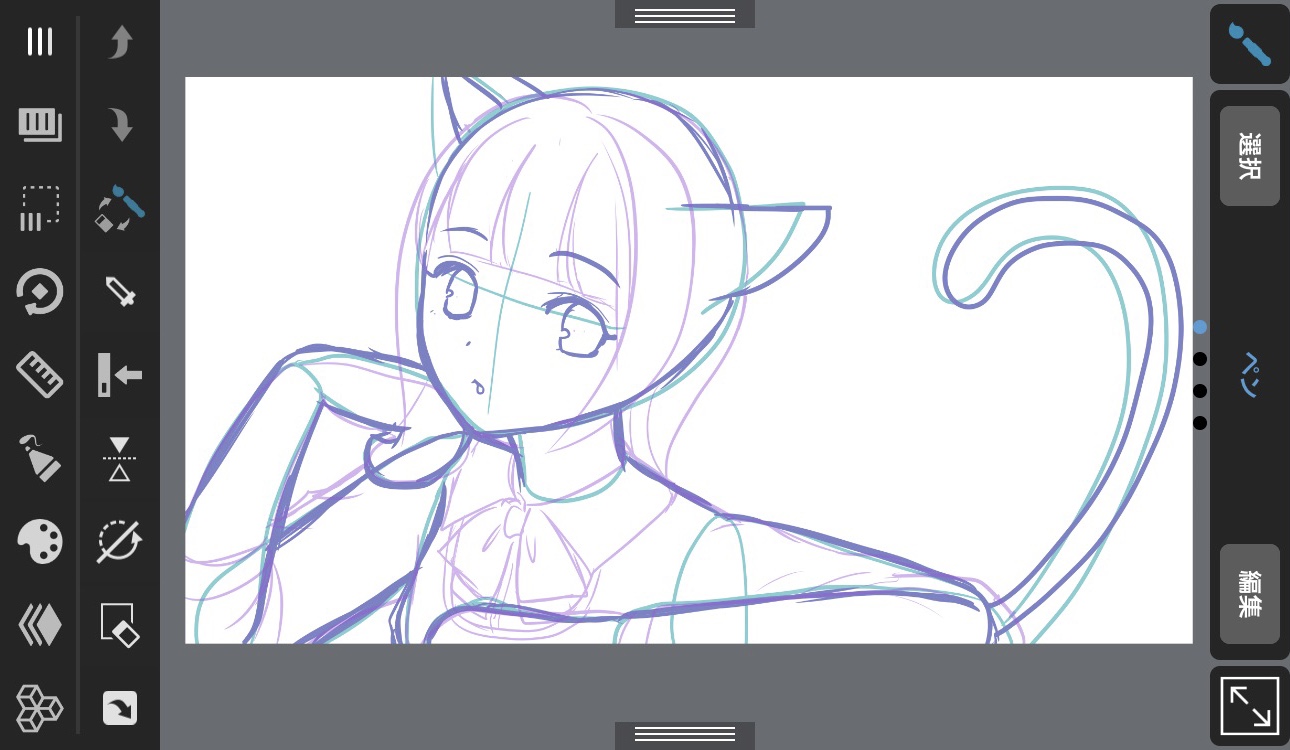
Pattern 2: Long + Blazer
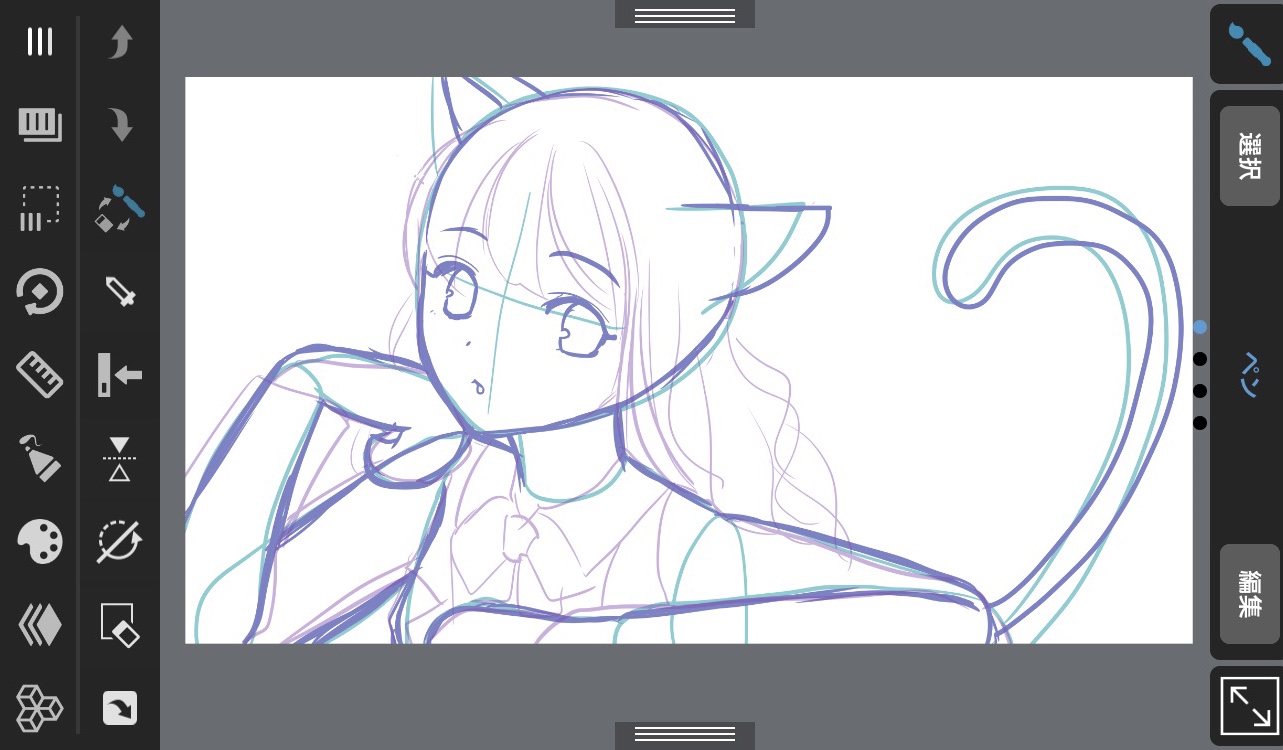
The purple line is what I drew on the layer for the clothes/hairstyle.
(*For the sake of clarity, I’ve changed the lines on the clothes/hair layer to purple, but I usually draw them without changing the color.
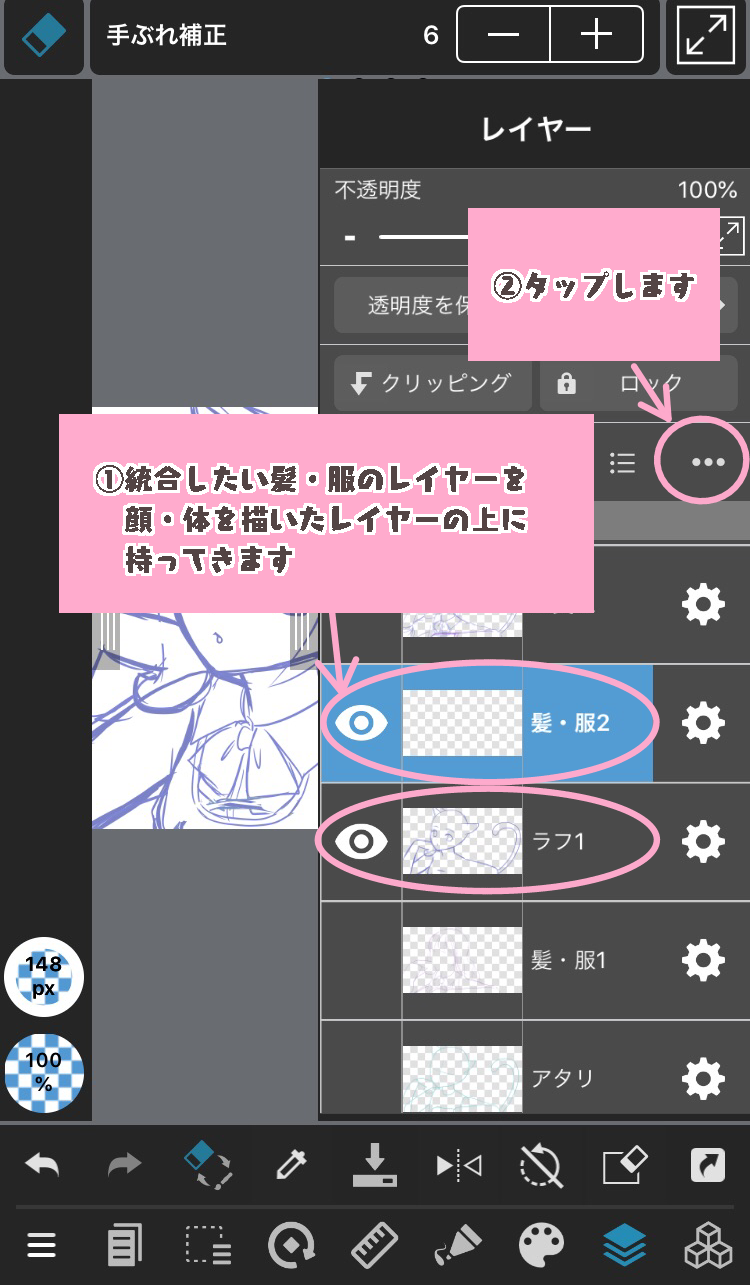
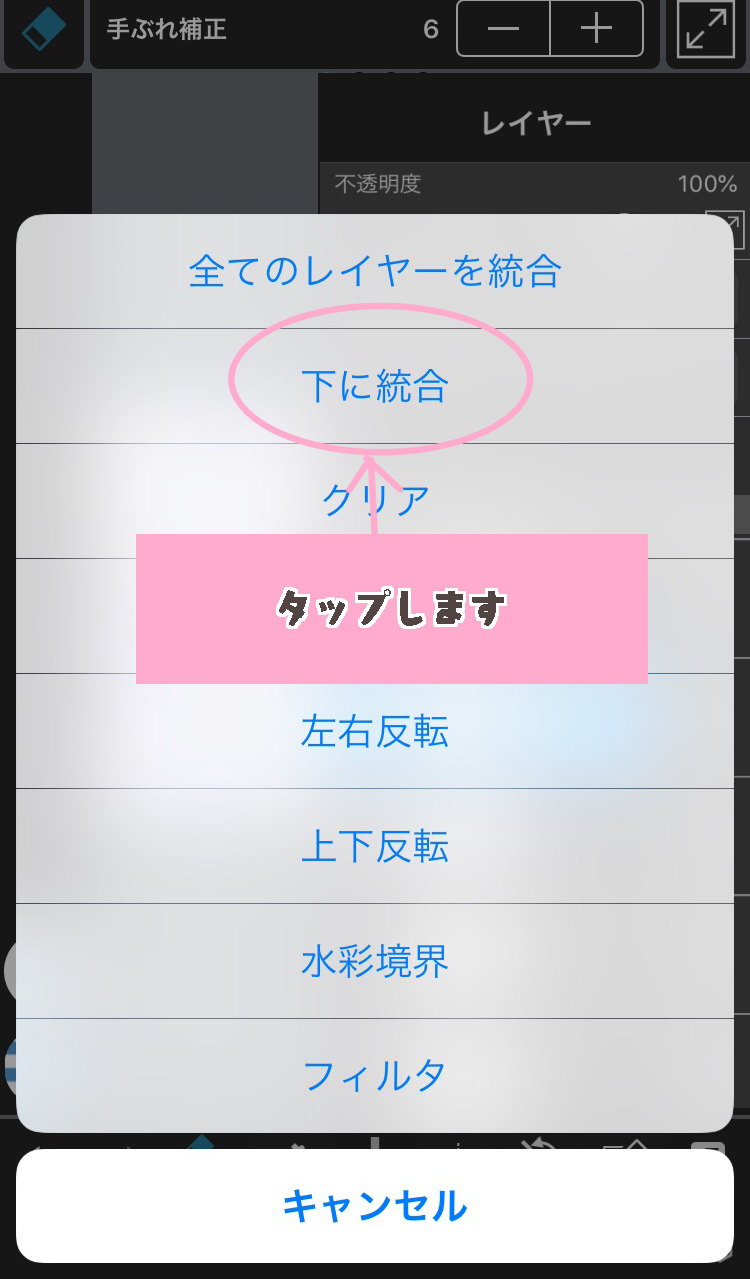
② Merge the pattern you like with the face and body layers.
Once you have created a clothing and hair pattern that you like, merge it with the face and body layers.
<Point2. You don’t need more than one rough draft.>
Many people may have the image that a rough sketch has to be drawn on a single sheet, but it is OK to draw as many rough sketches as you like.
However, you can draw as many rough pictures as you like. In fact, it is very difficult to correct a drawing after it has been made into a line drawing, so you should draw a variety of rough pictures and try out the images that come to your mind.
Also, as shown in the picture below, it is better to draw on different layers when you want to “draw roughly” and then “draw fine details by narrowing down the candidate lines.

3. Drawing the rough (3): Drawing in the details

Once you have the general shape of the clothes and hair, create a new layer to further refine the lines and shapes, and draw in the wrinkles and other details of the clothes.
This completes the rough drawing.
As the name suggests, a rough sketch is a simple drawing.
However, it is easier to turn a rough drawing into a line drawing if it is drawn to some extent, so I draw to some extent in detail.
The level of detail is different for everyone, so try to find the level of detail that suits you best.
4. Work after the rough
This is a bit of a ramble, but I’d like to briefly introduce the process after the rough.
Once you have drawn the rough, you can start the line drawing and coloring process.
[Line drawing]

▼
[Coloring]

Once the line drawing is done, color it and draw the background to complete the picture.
(Text and pictures by sakaki)
\ We are accepting requests for articles on how to use /

