2021.04.14
[For Beginner] Rough Drawing to Improve! ② Body Balance & Rough Drawing. [For Smartphone]
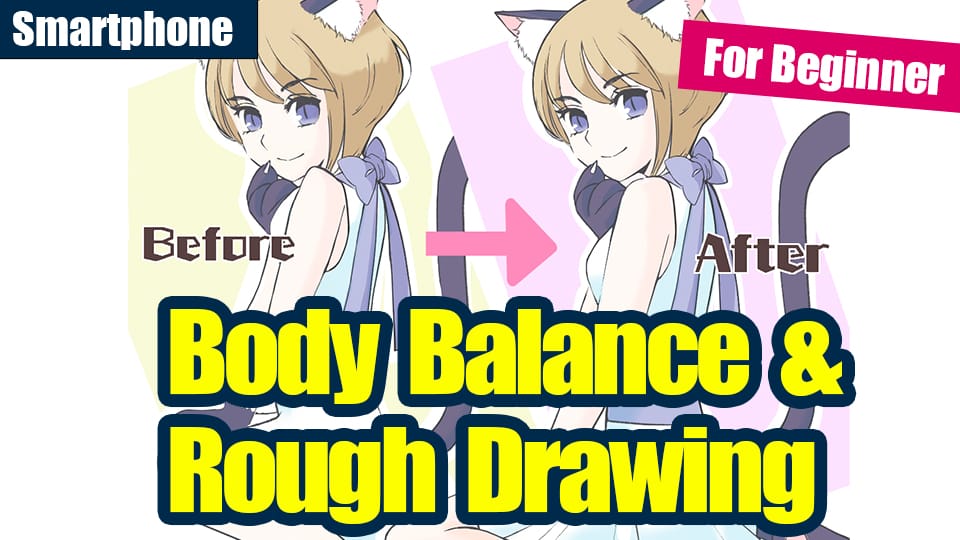
Atari, the framework of an illustration, is one of the most important parts of the illustration process.
If the Atari is distorted, the finished illustration will also be distorted.
In this article, I would like to introduce the basic way of drawing Atari and some points that you should know when drawing Atari.

1. What you need to know when drawing Atari
The first thing you need to know when drawing Atari of a human body is the balance of the face and body.
When it comes to body balance, there seems to be a lot to remember, such as “head and body”, which counts the balance of the body in terms of the size of the face, and the length of each part.
However, the bodies of middle school, high school students and adults have the same basic balance.
Therefore, for a 6 to 8 head figure, which is the height of a junior high school student or an adult, remembering this balance will allow you to draw the basic bite.
(*In the case of a large deformed character such as a chibi character, even an adult or a junior or senior high school student may have less than 5 heads. In that case, the balance ratio will change, so please be careful.)
So let’s check this basic body balance first.
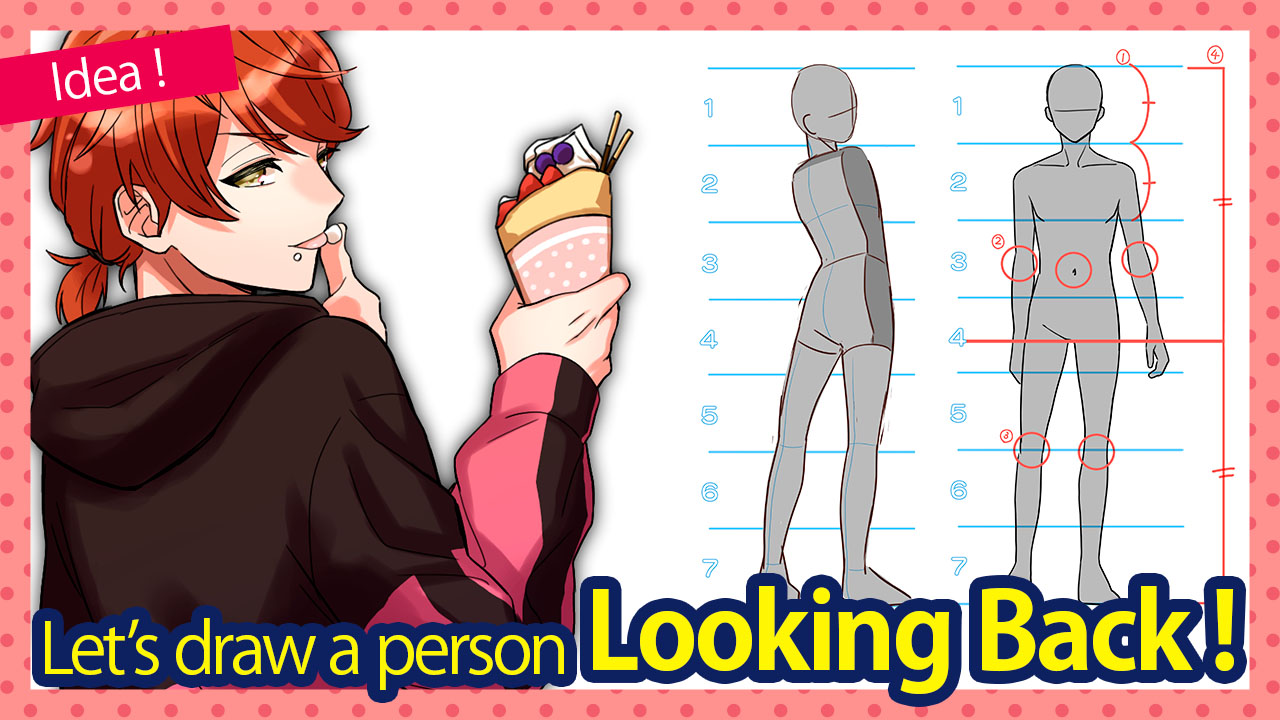
【★Basic body balance】
When drawing the basic body balance, there are eight points to keep in mind.
1) Inseam: Around the middle of the entire body.

2) Shoulder width: About 1.5 to 2 face widths.

3) Waistline: from the shoulder to slightly below halfway down the inseam.
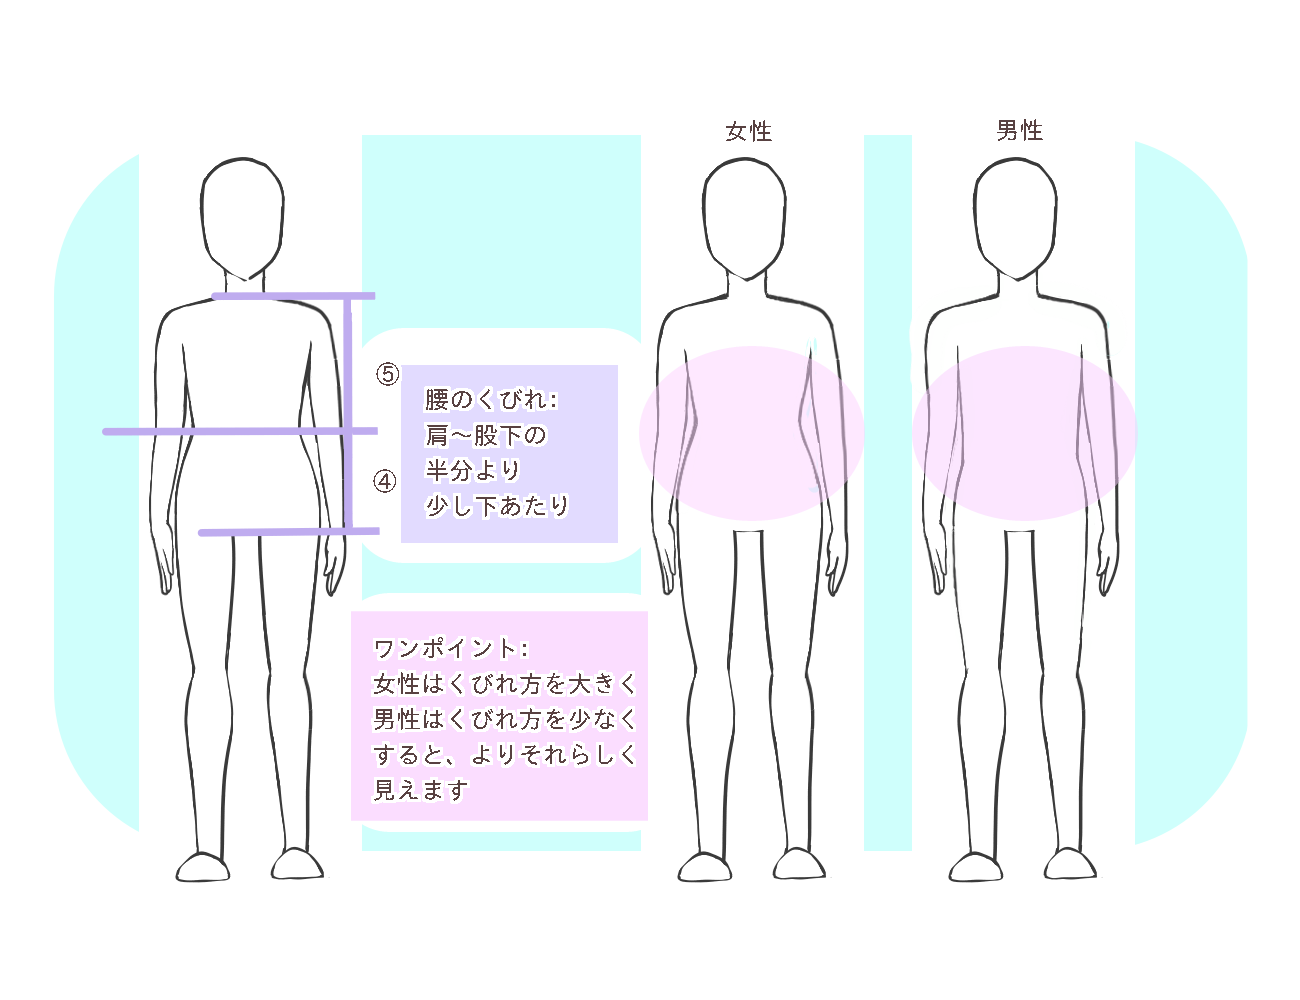
4) Knee: middle of inseam to ankle.
5) Ankle: About 1/3 of the length from the inseam to the knee.

6) Wrist: around the height of the inseam.
7) Elbow: halfway from shoulder to wrist.
8) Fingertips: slightly above the middle of the thigh.

Once you have these eight points, I think you will be able to avoid major imbalances.
Let’s start by learning this basic balance, and then actually draw the Atari.
2. Let’s actually draw the Atari!
Now, let’s actually draw the Ataris.
This time, I’d like to draw the “stickman type”, which is the most recommended for beginners among the four ways of drawing Ataris I mentioned in the previous article.
If you like, please get your phone ready and try drawing with me.
※This is the way I often draw Atari.
This is not an absolute way of drawing, so please refer to it as an example of how to draw.
【1. Prepare a new canvas】
First, prepare a canvas in the size you want.


【2. Create a layer for the auxiliary line】
Create a layer for the auxiliary line.

【3. Create an auxiliary line for the head and body you want to draw using the “Split” tool】
★Preparation for using the “Split” tool.
If the “Split” tool is not available in the Pen Tool, download it (free of charge).
→Tap on the pen tool in the order of “Select” > “+” in the upper right corner > “Add Brush” > “Split” > “Save” in the upper right corner.


1) Select “Split” in the pen tool.

2) Put the number of the head you want to draw in the “Height” field.
3) Put “2” in the “horizontal” field.

4) Tap “Edit Base Point” and drag it to the other side of the “Base Point” so that it crosses the area you want to draw.


5) The auxiliary line is now complete.

【4. Create a layer for Atari】
Once the auxiliary lines are drawn, create a new layer for the Atari.

【5. Drawing the head circle and Atari】
Draw the bite of the head part.

【6. Draw a marker for the length of the center line】
Using the vertical line of the auxiliary line as the center line, draw the landmarks for (1) inseam, (2) shoulder width, (3) waist neckline, (4) knee, and (5) ankle from earlier.

【7. Connect the landmarks and draw the parts】
Connect the landmarks and draw the parts of the neck, body and legs.

【8. Draw the landmarks for the wrists, elbows and fingertips】
Draw the markers for (6) wrists, (7) elbows, and (8) fingertips on both arms.
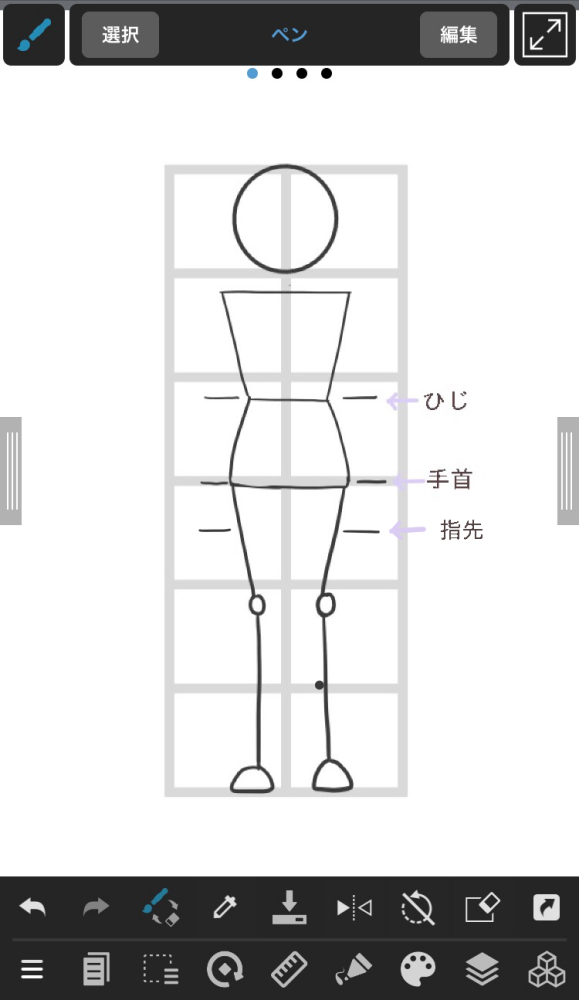
【9. Draw both arms by connecting the landmarks】
We will draw both arms and hands by connecting the landmarks.

The bite is now complete.

3. Summary
How was it?
If you can draw Atari well, you will be able to draw a person without losing balance, so please try drawing Atari in various poses.
At first, it is recommended to learn the first eight balances and practice from a straight-on angle.
Once you get used to drawing Atari from a head-on angle, try drawing various poses for Aori and Hukan.
(Text and pictures by sakaki)
\ We are accepting requests for articles on how to use /


