2021.04.30
[For beginners] Easy to use! A simple technique to make your line drawings three-dimensional
I’ve learned how to draw a face, balance a body, and other basic skills!
I’m getting good at drawing the illustrations I want to draw!
…but my drawings seem to be flat and monotonous…
Do you have such a problem?
Here are some techniques to make your illustrations more attractive and three-dimensional with a little skill.
They are all easy to learn, so even beginners can start using them right away.
Index
1. Consider the body as a three-dimensional object!
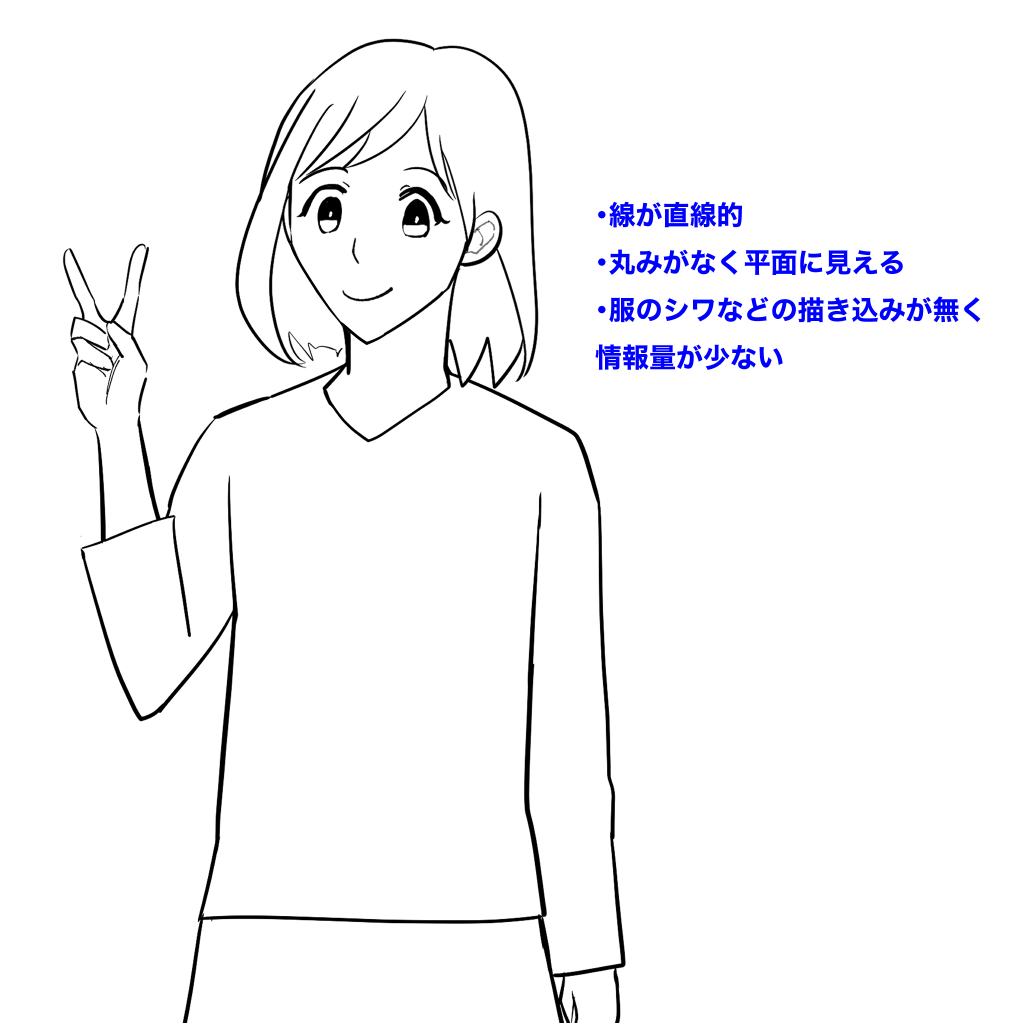
Take a look at this picture.
The lines on the face and body are all kind of straight, and there is no sense of depth or roundness.
In particular, if you are aware of the need to give a sense of “roundness” to your figures, you can greatly increase the sense of three-dimensionality.
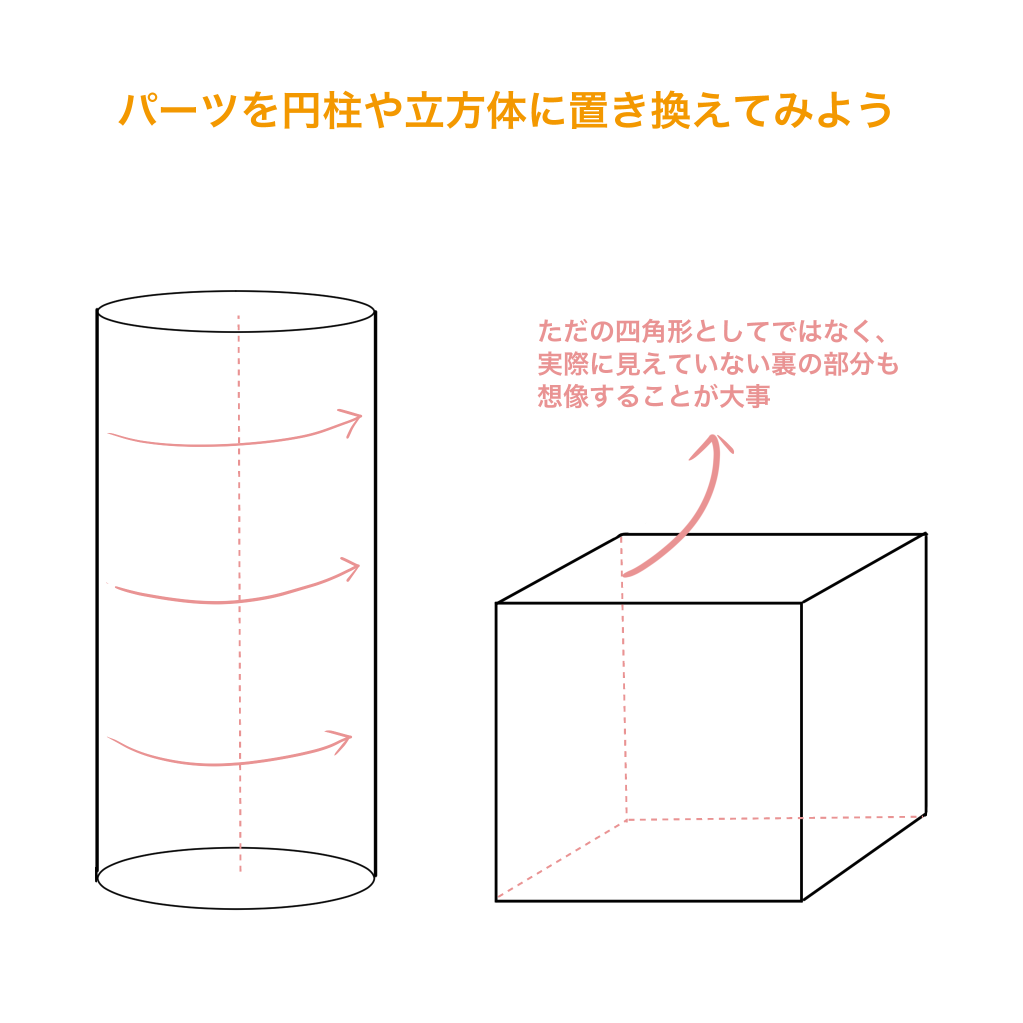
Not just people, but small objects, animals, backgrounds… everything can be replaced with these cylinders and cubes.
Not just a square, not just a circle, cylinders and cubes have depth.
By imagining what’s behind the scenes, hidden from view, you can capture even a line drawing in three dimensions.
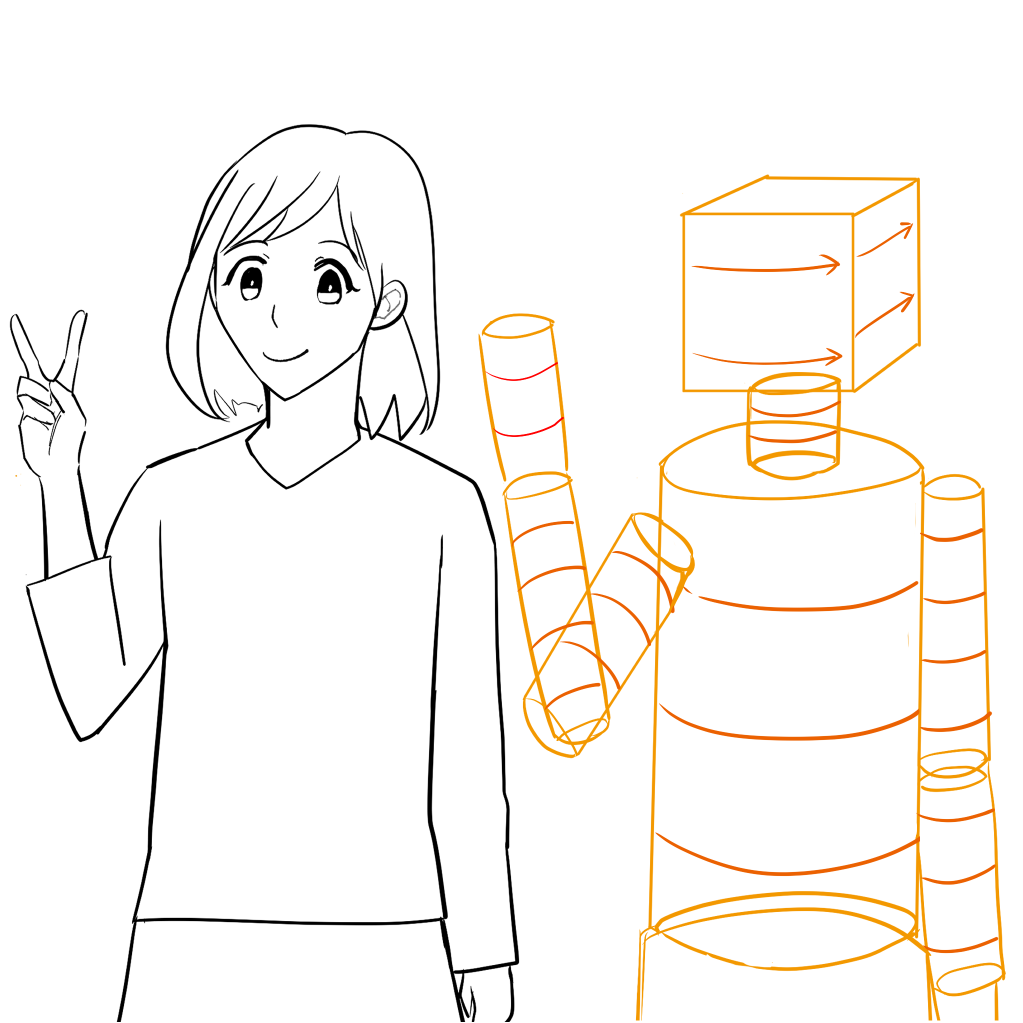
I replaced the previous illustration of the girl with a cylinder and a cube.
I also used red lines to show the roundness of each part.
Even though it is just a collection of cylinders and cubes, doesn’t it look much more three-dimensional than the picture on the left?
Let’s use these guidelines to improve the original picture.
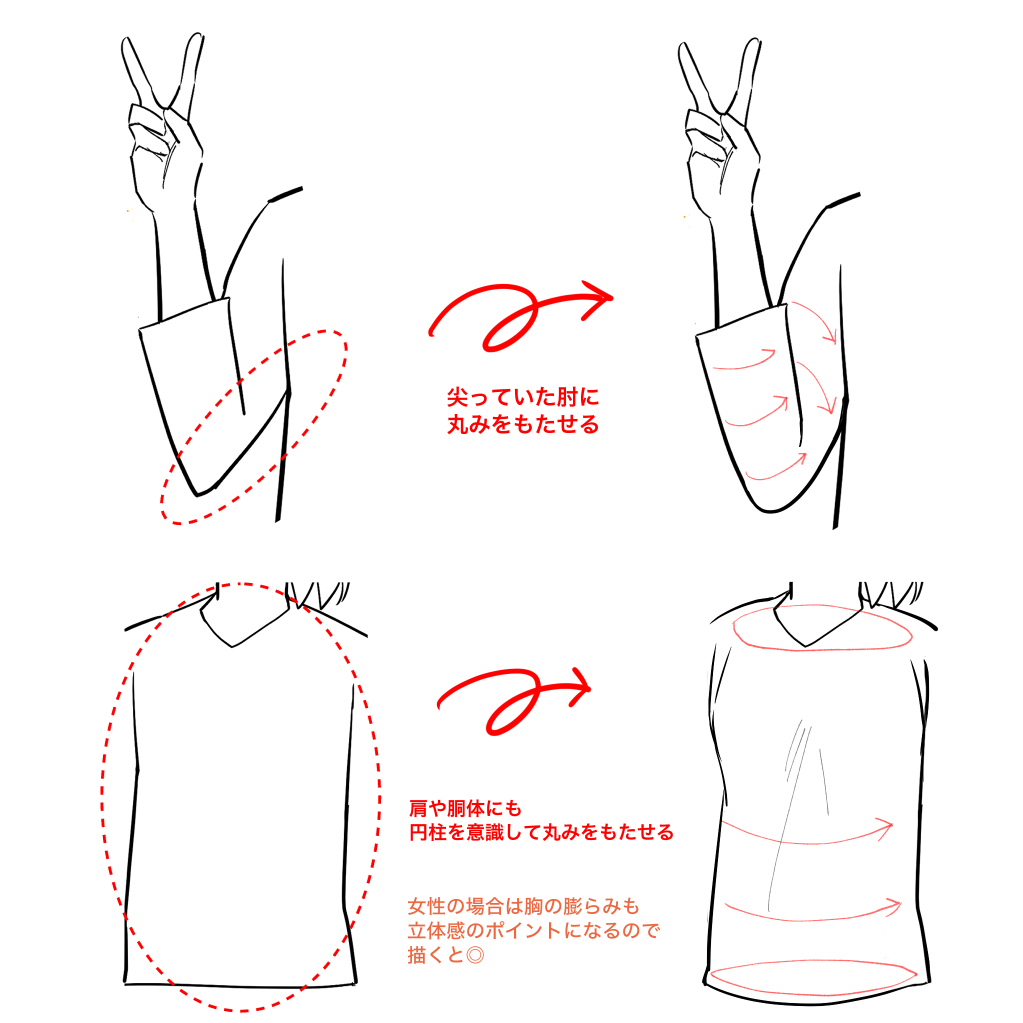
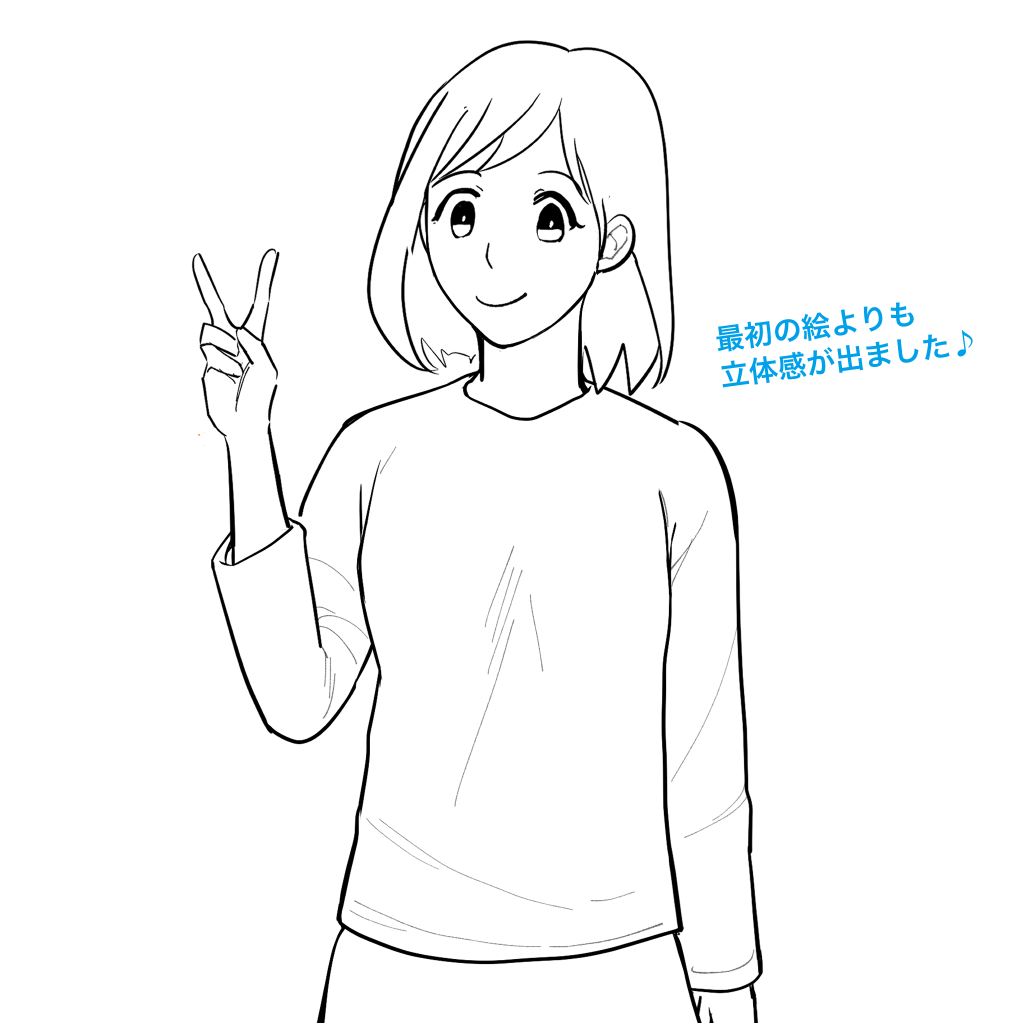
The arms and legs are particularly easy to see, but by making them more rounded with a cylinder in mind, I was able to improve the 3D effect quite a bit despite the small difference.
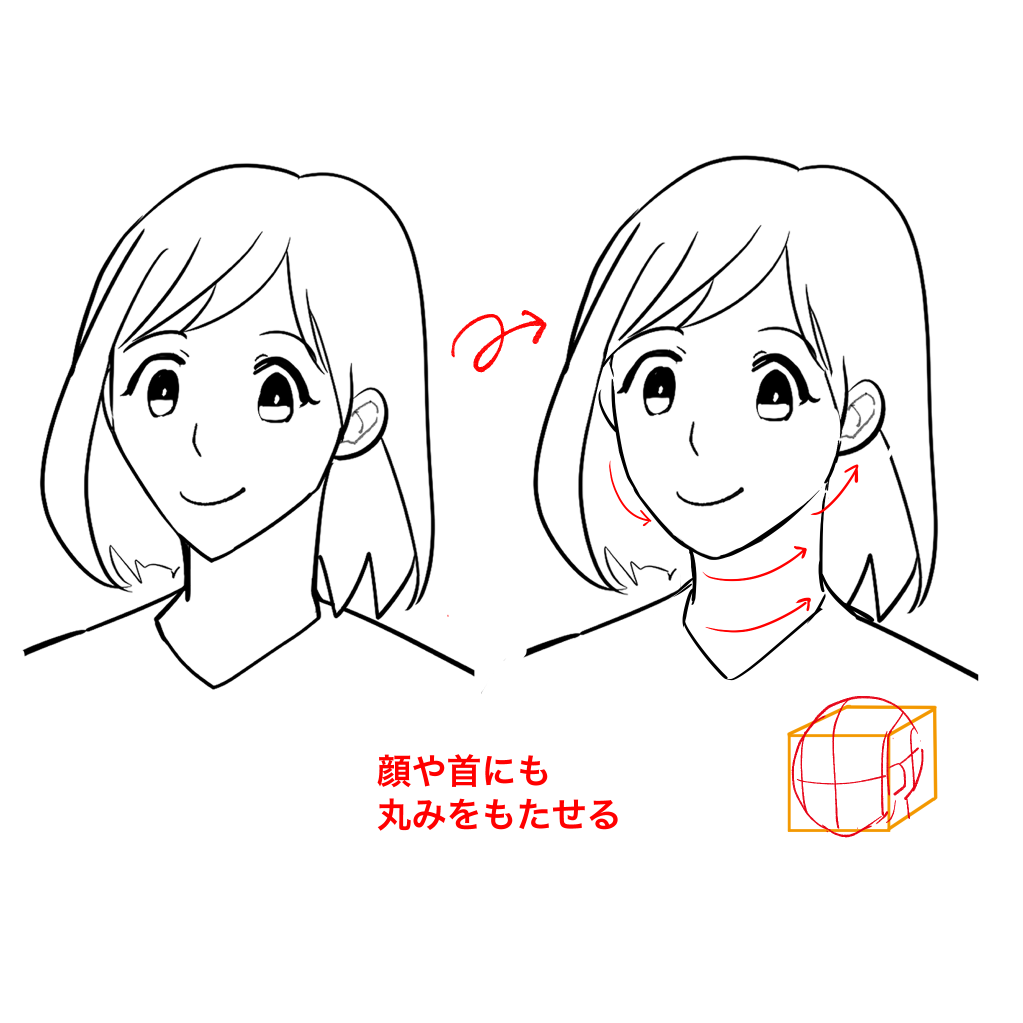
The same goes for the face, rounding out the chin and face lines that are too sharp.
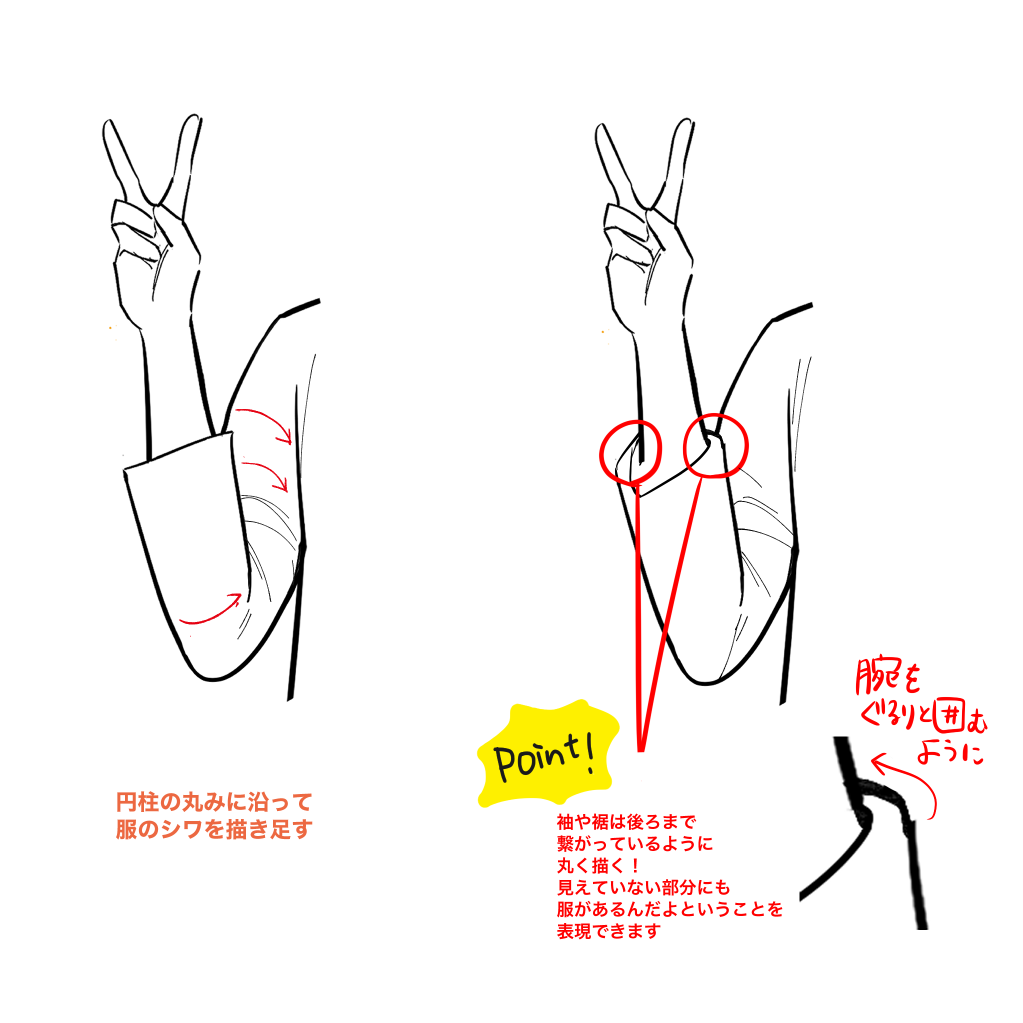
The hem and cuffs should also follow the same cylindrical lines to give the clothes a thicker and more three-dimensional look.
For the cuffs in particular, since the cloth actually goes around the arm even when it is not visible, drawing a line that goes around the back of the arm to show that the clothing continues in the back will add a very three-dimensional effect.
2. The closer they are, the thicker the line!
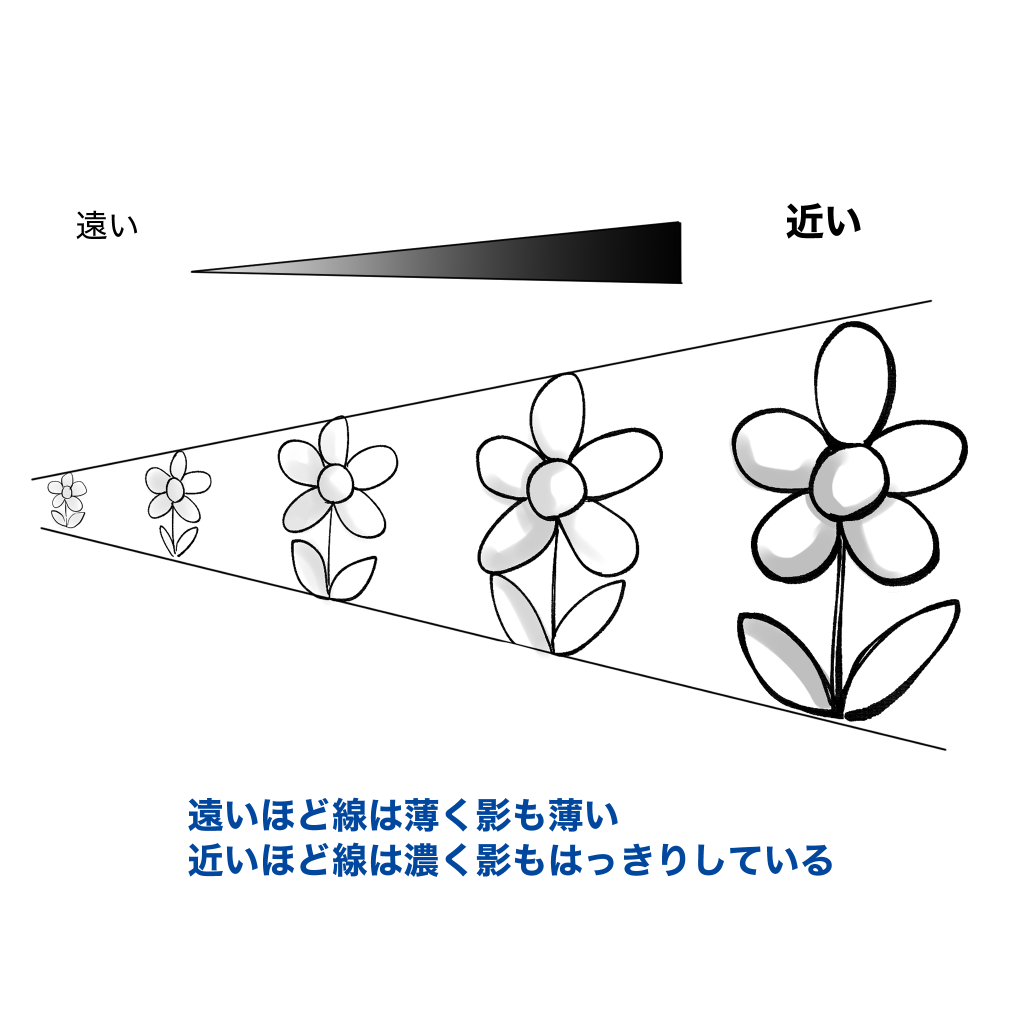
In illustrations, you can create a sense of perspective by drawing thicker lines for near objects and thinner lines for far objects.
It is best to make the lines thicker for objects in the foreground and nearer to the screen.
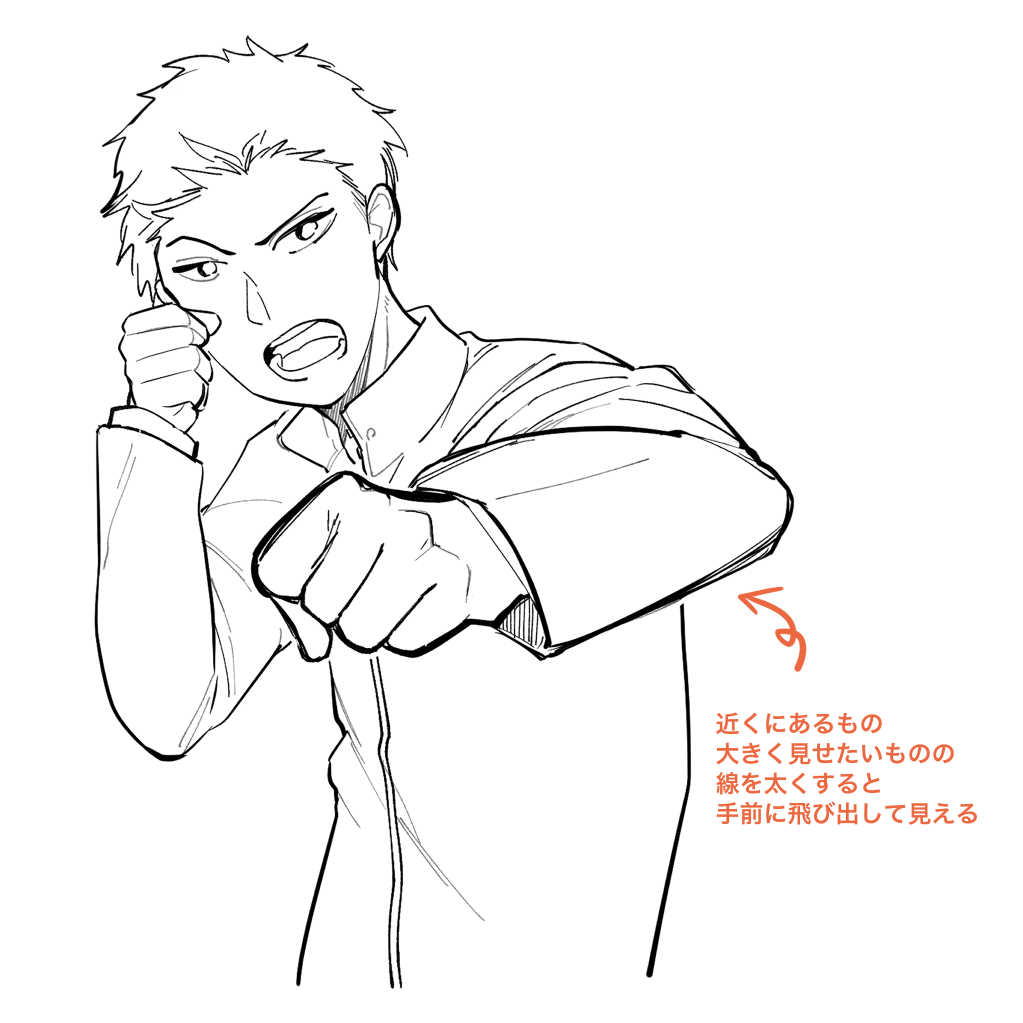
In particular, if you want to draw a composition with parts that you want to stand out, such as a pose with hands out, a guts pose, or a pose with legs kicking up, it is recommended to make the lines so thick that you think they are a little over the top, so that the illustration will quickly catch the eye.
3. “Dare not draw in” technique!
The face, hair, body, and accessories are often drawn with the same effort and care, but this is a technique where you dare not draw or omit them.
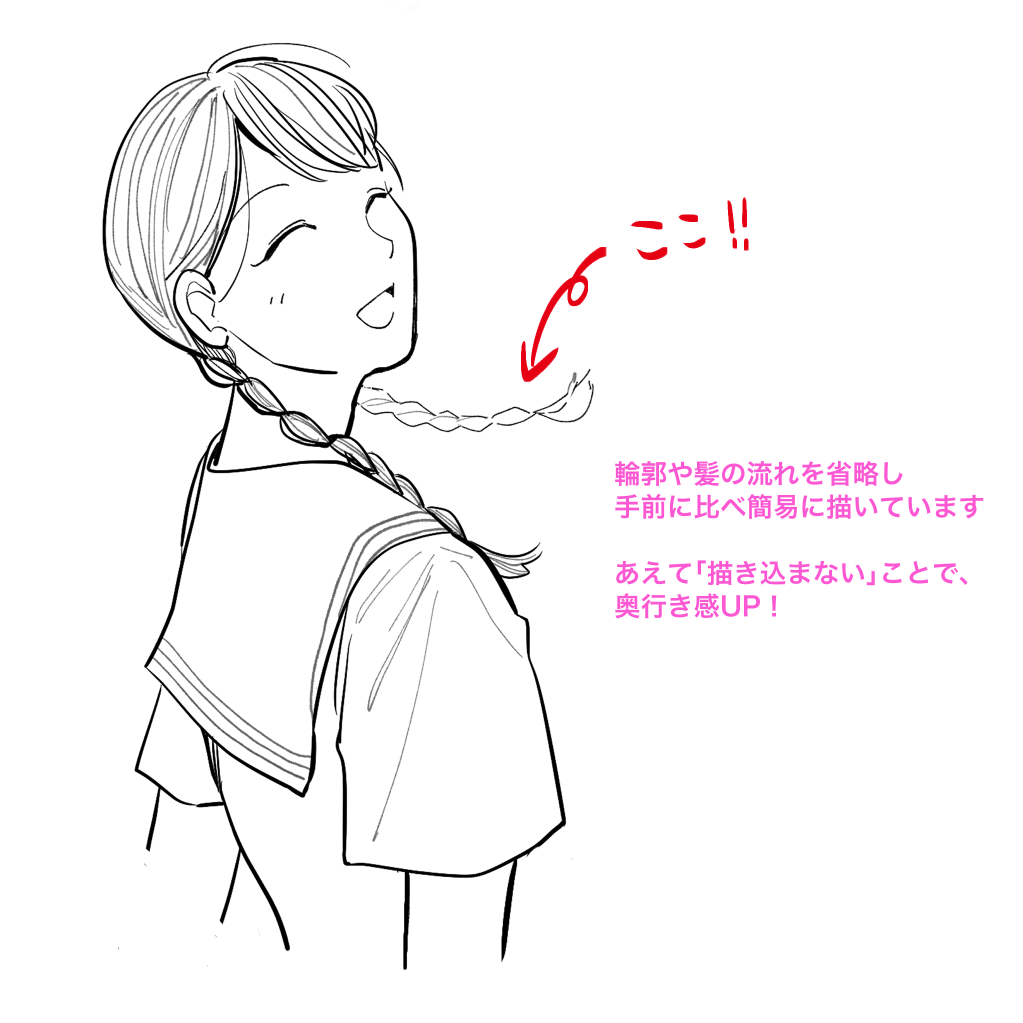
In this picture, I didn’t “dare” to draw the hair bundle in the back of the hair braid.
(1) The one at the back, the one far away
(2) Things that I don’t want to stand out (there are other parts that I want to stand out)
In these cases, by using thinner lines and not drawing in the hair bundles, the hair bundles appear to be farther away, creating a sense of depth.
In addition, it can be used as a complement to the heavily drawn part, and focus the eye on the drawn part.
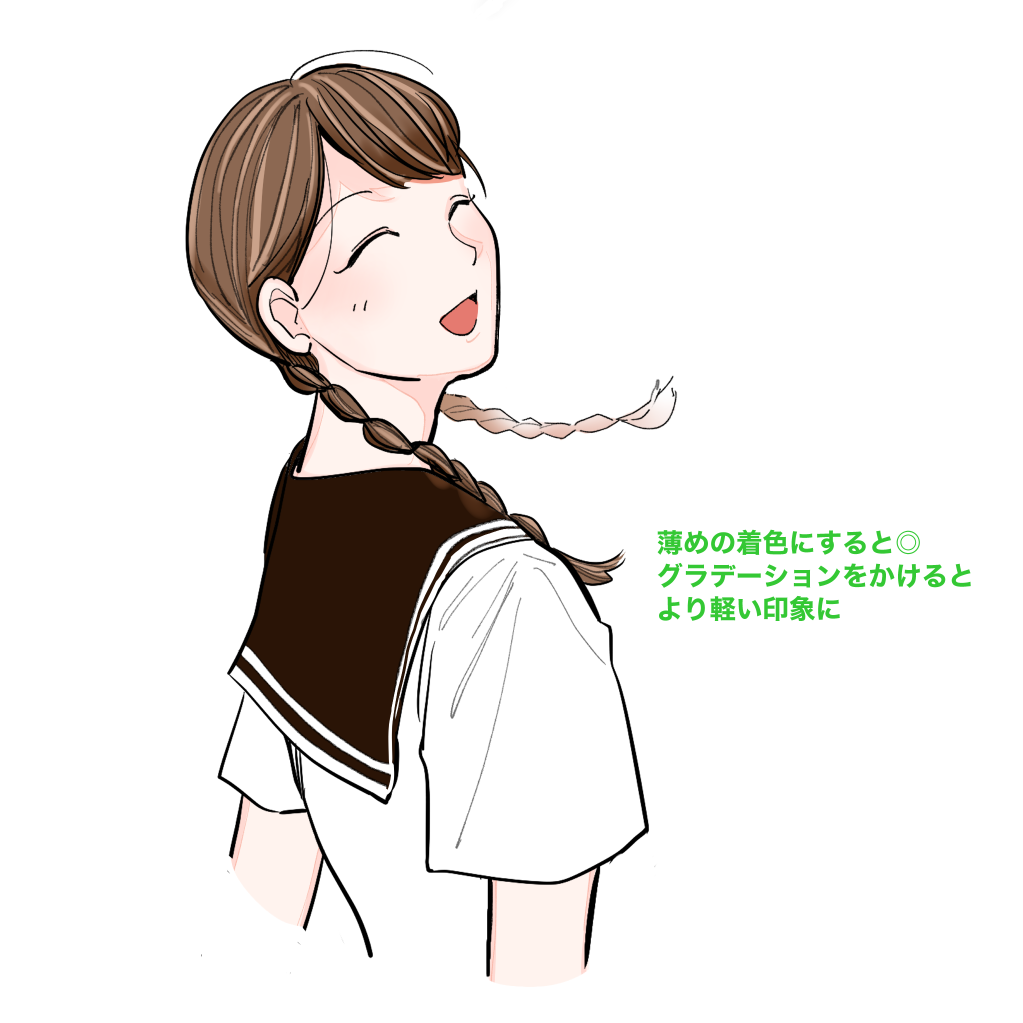
When applying color, you can create a more distant, three-dimensional effect by using a lighter color like this.
A gradation would also be beautiful.
It takes a lot of courage not to paint, as it may seem like cutting corners.
But if you use it as a technique, it can be very effective.
4. Use different types and strengths of lines!
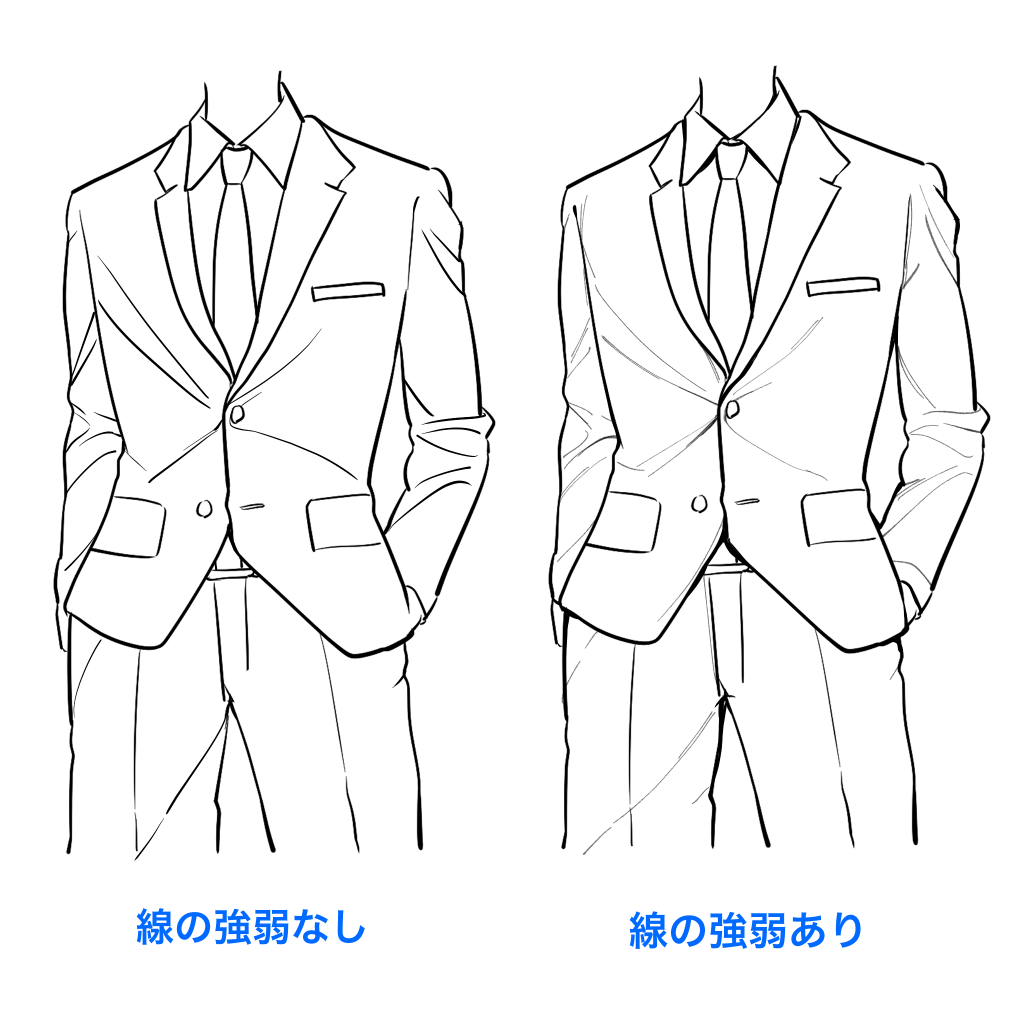
This is a picture of the exact same composition, but doesn’t the right one look more crisp and clean?
The left picture is drawn with the same pen tool and the same thickness, while the right picture uses different line thicknesses and pen types for different parts.
★Bold and strong lines
・The outline of the face and body
・Shadows, overlapping hair and clothes
★Thinly drawn areas
・The flow of hair
・Wrinkles in clothes
・Drawing in small objects
Specifically, in the illustration on the right, the outlines and shadows are drawn with the pen tool, while the wrinkles in the clothes are drawn with the pencil tool.
In particular, I recommend drawing the wrinkles of the clothes thinly in relation to the lines of the outline to express the softness of the clothes.
It is also a technique to use more than one type of pen in a single illustration.
These are just a few examples.
A small difference can make a line drawing look different and three-dimensional.
These are all simple techniques that you can start using today, so if you’re having trouble with your line drawings, please give them a try!
(Text and drawing by Naoko Hara)
twitter:@nao_comic
\ We are accepting requests for articles on how to use /

