2021.05.14
Let’s Draw Arm-Folding Pose
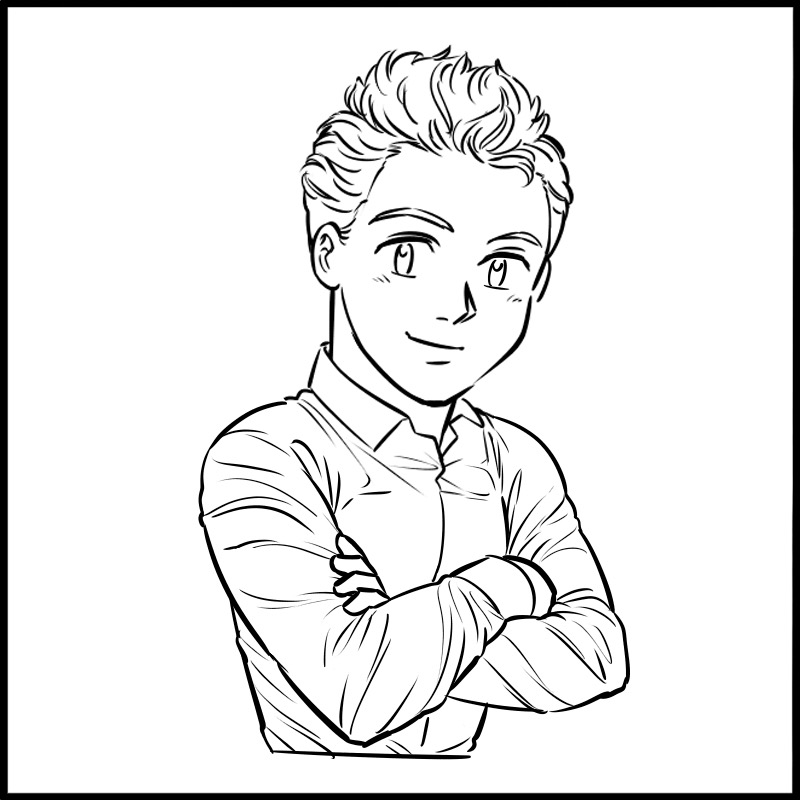
If you have a lot of scenes where you draw people, it’s not weird, but it’s kind of lacking…
It’s not weird, but it’s not enough.
If you can draw a pose with folded arms, you can increase your repertoire of poses for people.
You can also express an air of confidence and thoughtfulness.
It may seem difficult when you start drawing it, but if you follow the pattern, it’s surprisingly easy.
So let’s start drawing!
1. Folded arms in front
First, let’s draw a pose with the arms folded facing forward.
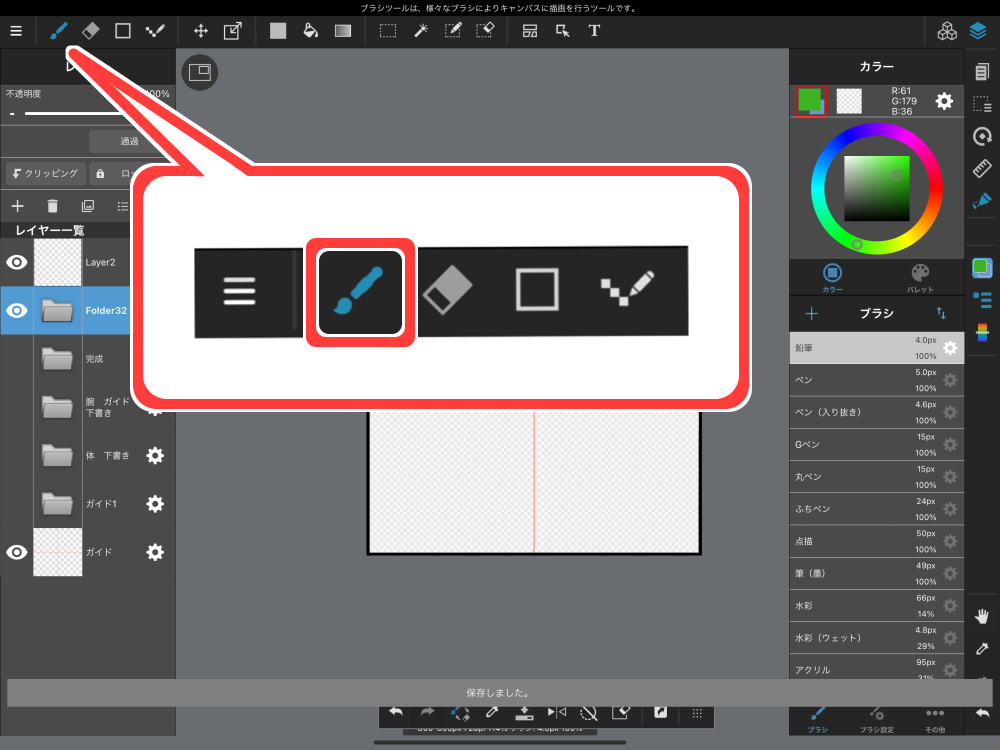
On a new canvas, draw a rough sketch of the person using the pencil brush.
To select the pencil brush, select the brush icon from the tool icons.
(Image: iPad version)
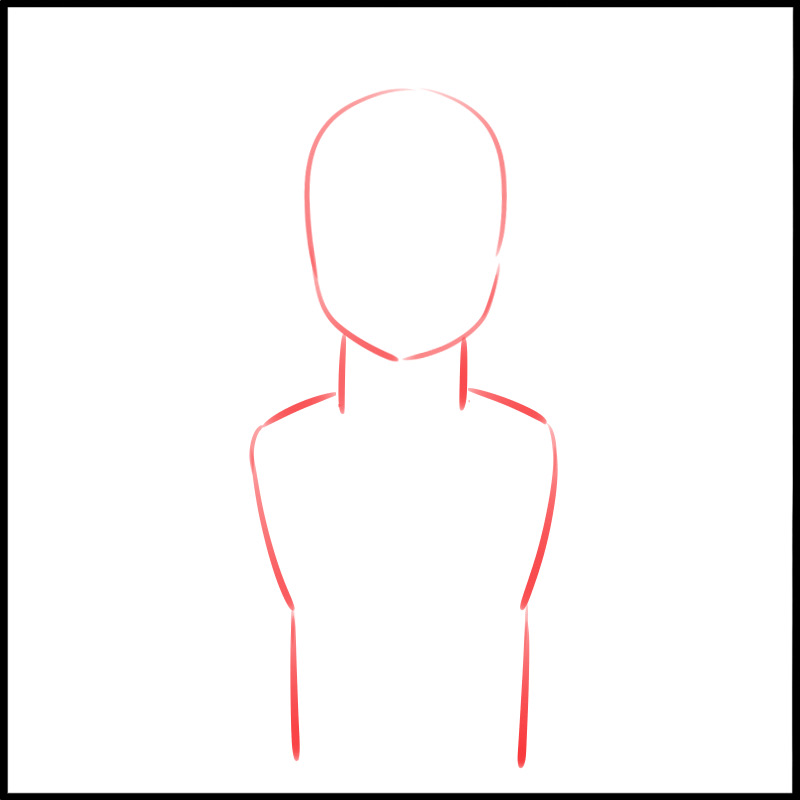
Draw the head and torso, except for the arms, facing forward.
In this case, I chose to compose the upper body only.
Now let’s add the arms to this.
Let’s start with the elbows.
The angle will vary depending on whether the arms are crossed tightly or not, and how meaty the arms are, but I decided to draw them slightly inward this time.
If you are not particular about the angle, you can draw it almost vertical.
Erase the overlapping parts of the torso.
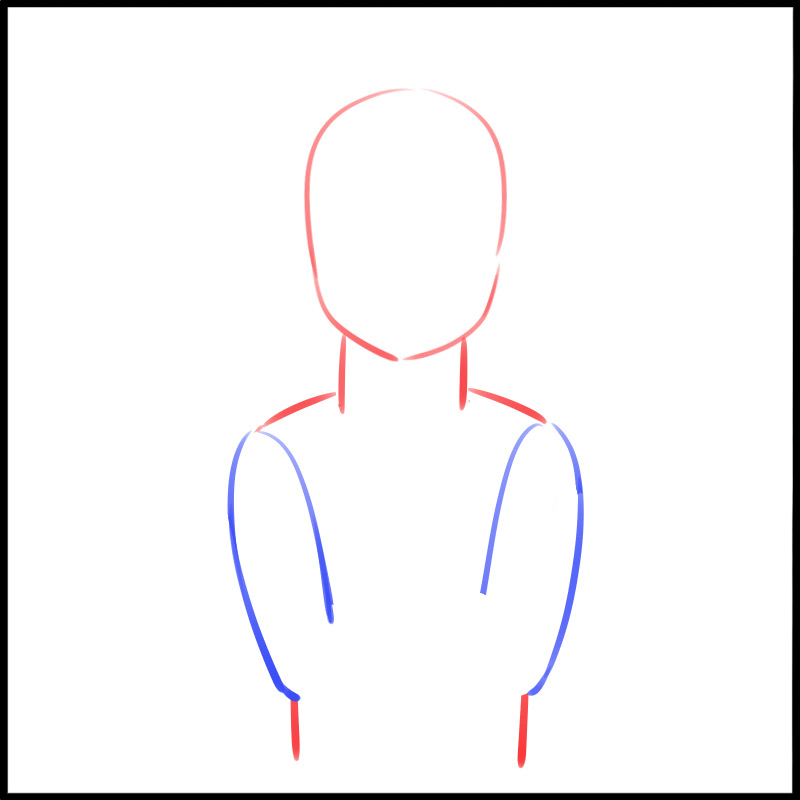
Next, decide which arm you want to be on top.
In this case, we decided to put the left arm on top, so we’ll draw the left arm first.
Draw the right arm toward the inside of the elbow, so that the wrist is folded in.
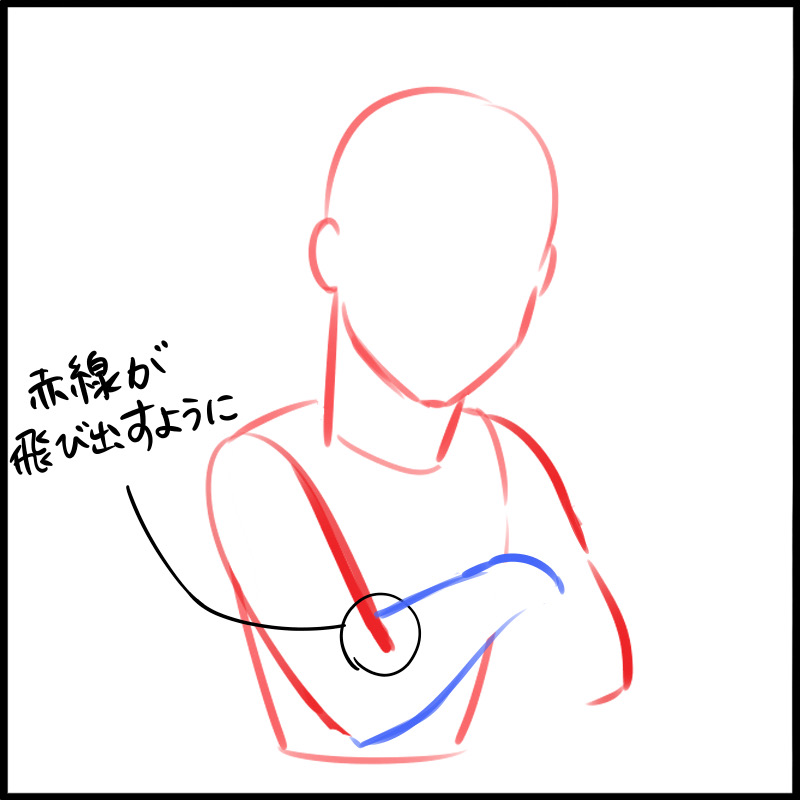
The point is how to draw the left elbow.
If you draw it as if the lines in the figure are sticking out, the whole arm will have a 3D effect.
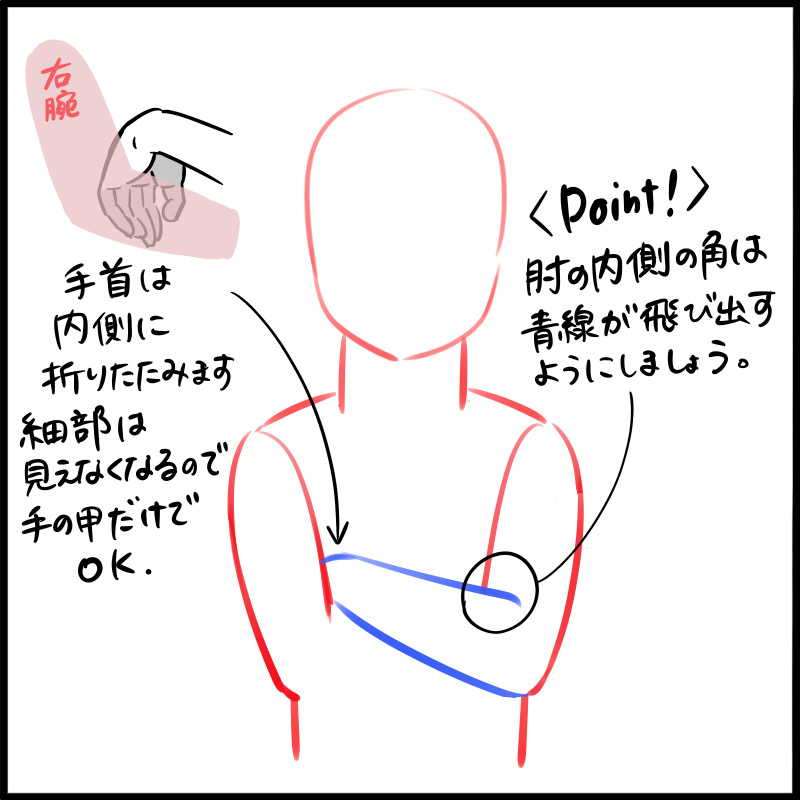
Now draw the right forearm towards the inside of the left elbow.
You only need to draw the light blue part if you want it to be more accurate, since it will be ducking underneath!
Now draw the red line so that it sticks out more.
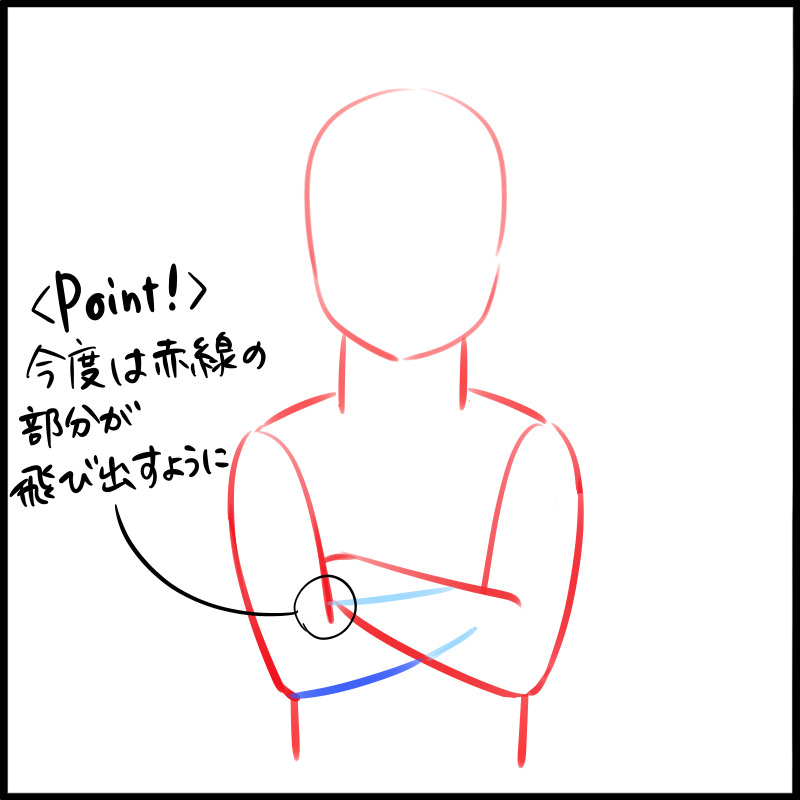
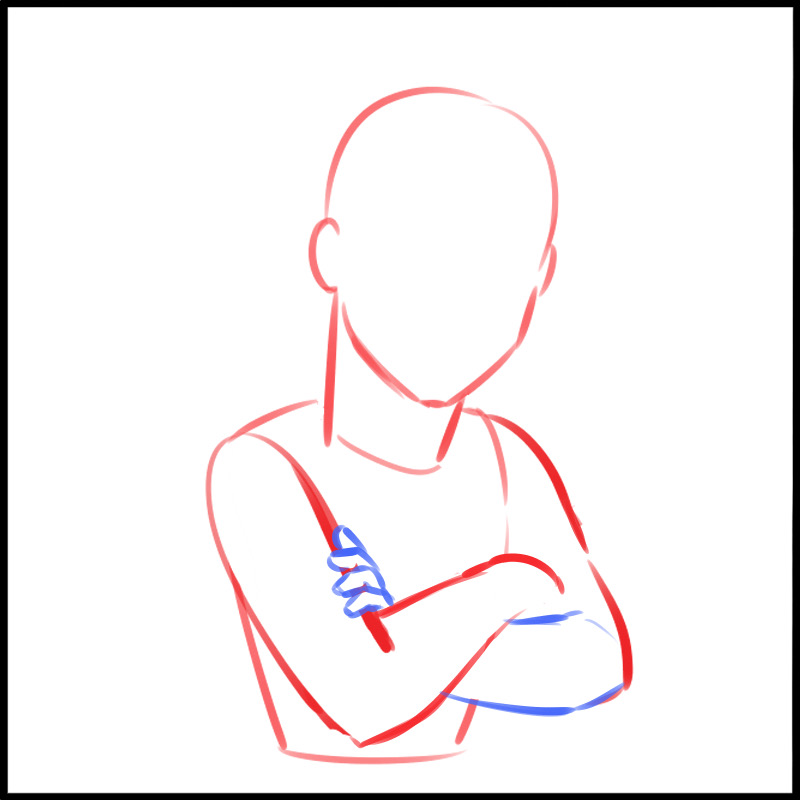
Finally, draw the tip of the right hand.
Draw the tip of the right hand as if it is hooked onto the left arm.
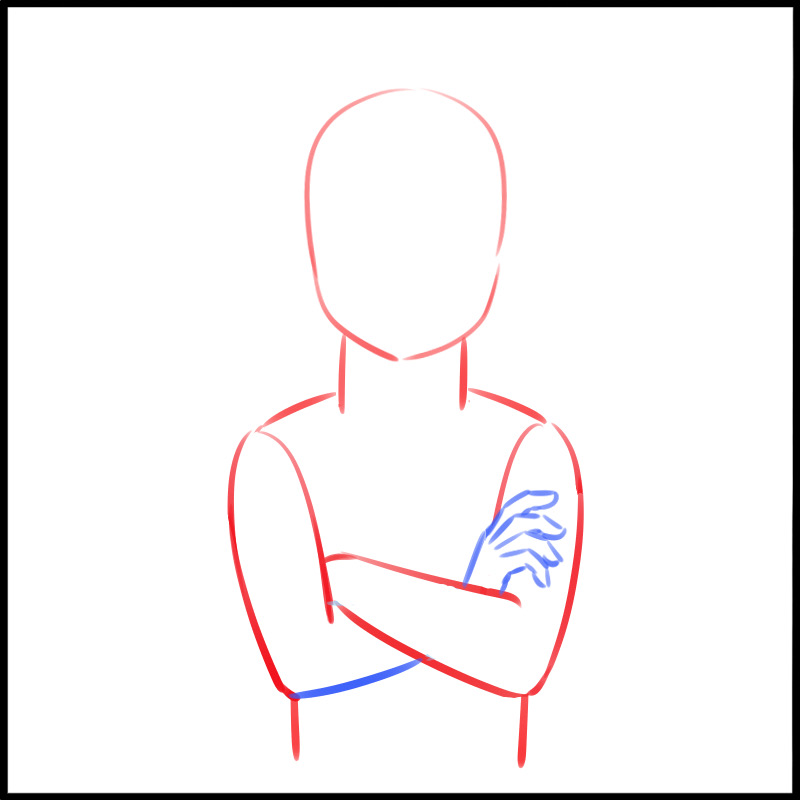
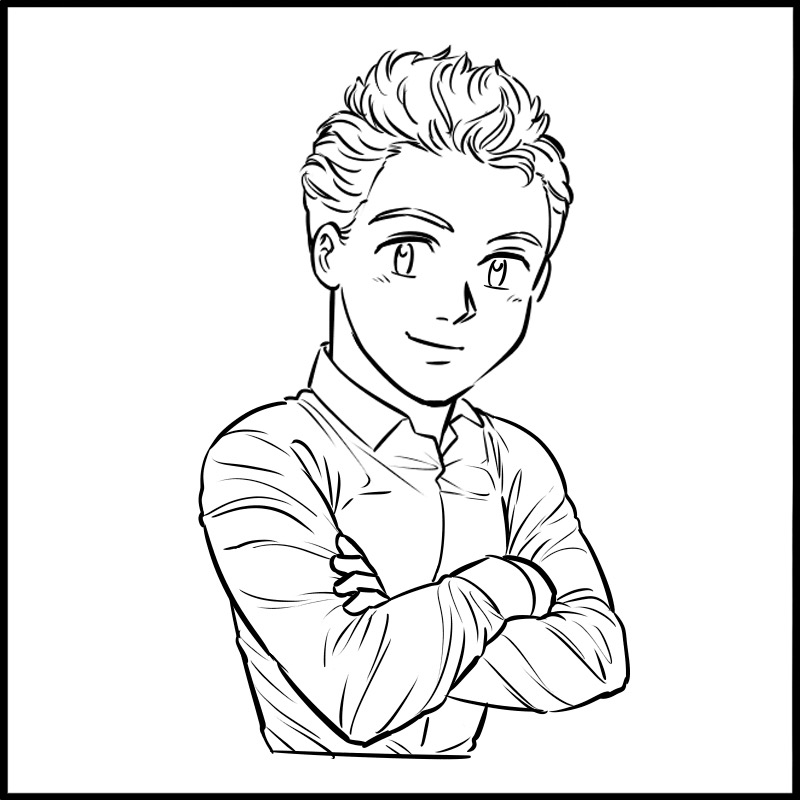
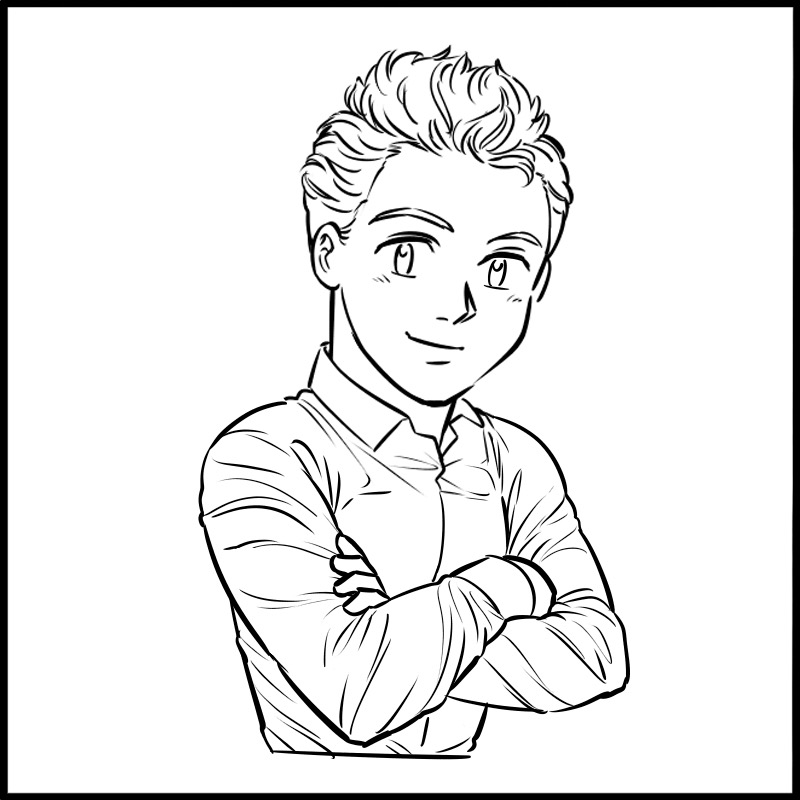
Now that you have a rough draft, you can use a pen to draw the lines.
You can use the wrinkles on the clothes to give it a 3D look, just for reference!
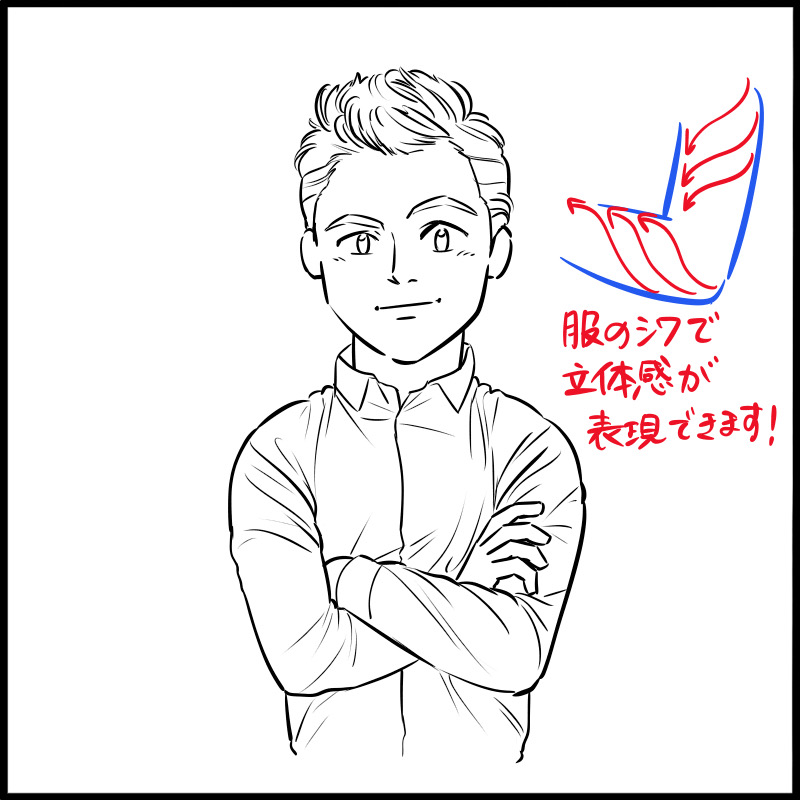
To make the right arm up, simply flip the steps left and right.
2. Diagonal arm fold 1 (left arm up)
In the same way, let’s draw a diagonal arm pose.
First, draft the head and torso on a new canvas.
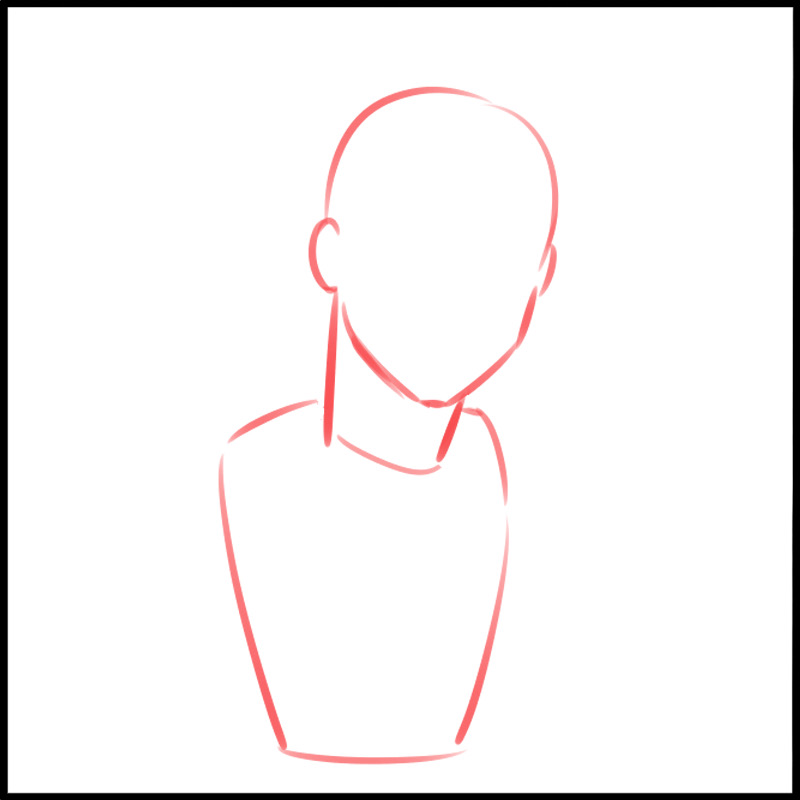
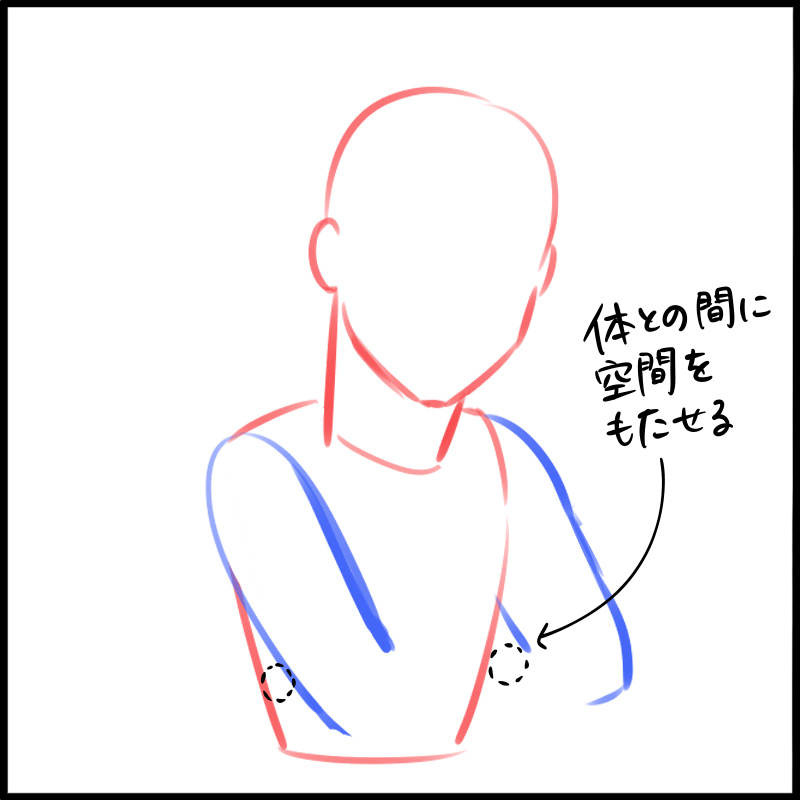
Next, draw both arms up to the elbows, but you can’t cross your arms if they are tight against your body.
If they are too close to the body, you cannot cross your arms.
Now, again, continue drafting so that the left arm is on top.
It’s almost the same as the front, but with a slight curve in the figure.
The viewer’s eye will notice the roundness of the right arm.
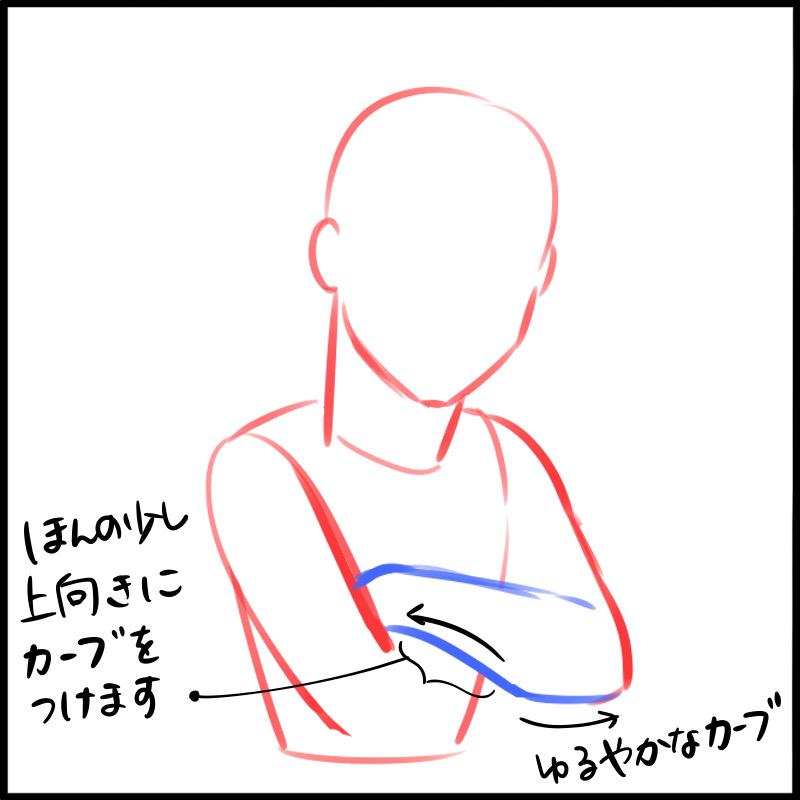
After that, draw the right forearm and wrist, erase the unnecessary parts, and you are done.
The tips of the hands should be facing the back of the hand rather than the front.
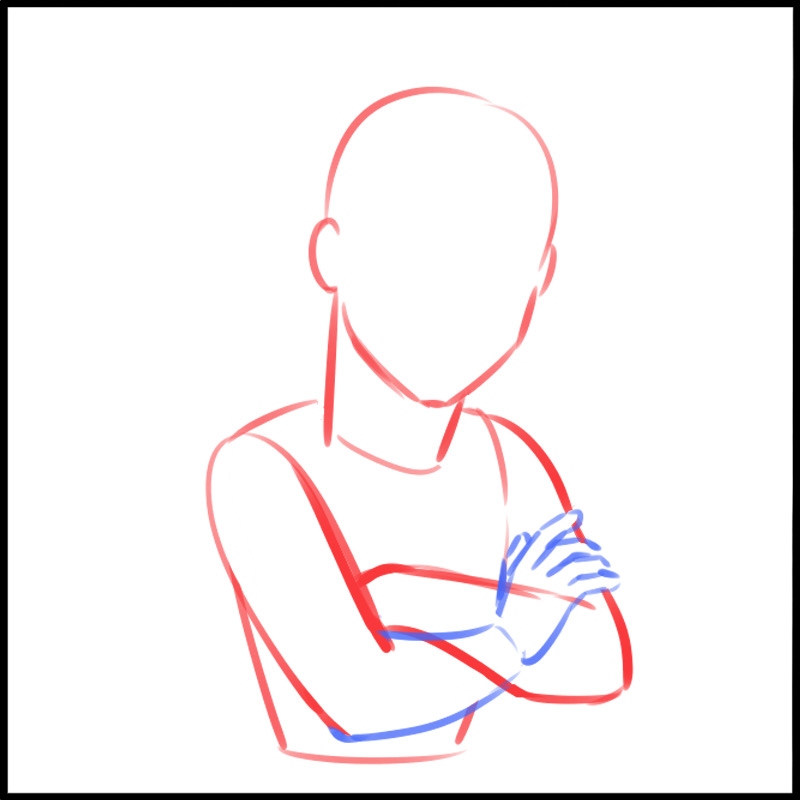
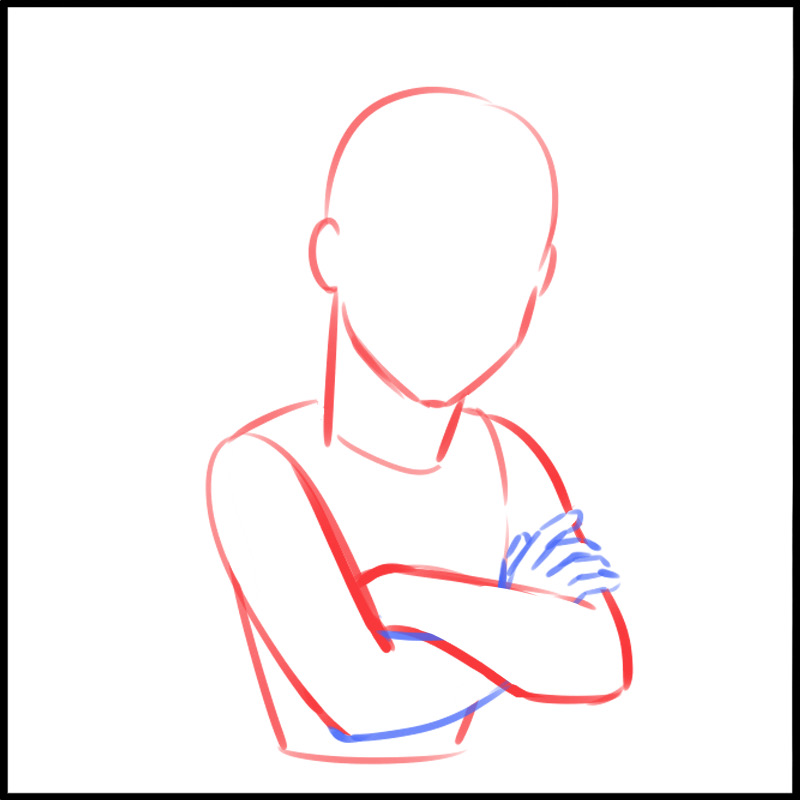
Pay attention to the wrinkles in the clothes here too when you are penning.
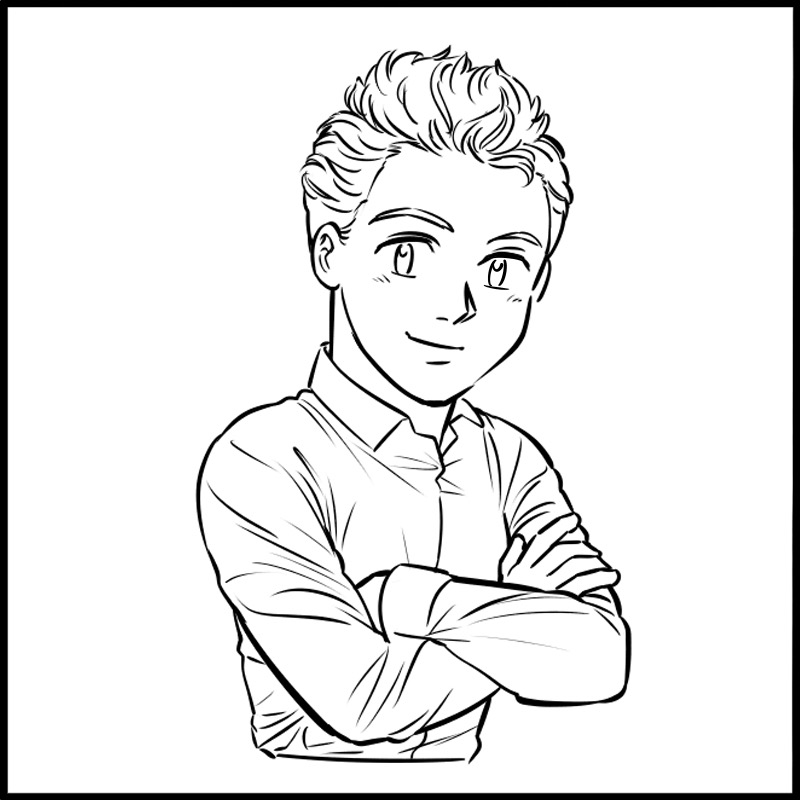
3. Diagonal arm fold 2 (right arm up)
In landscape orientation, when changing the upper arm, it is not possible to draw it in reverse.
It is the same up to the point where you draw the body and upper arm.
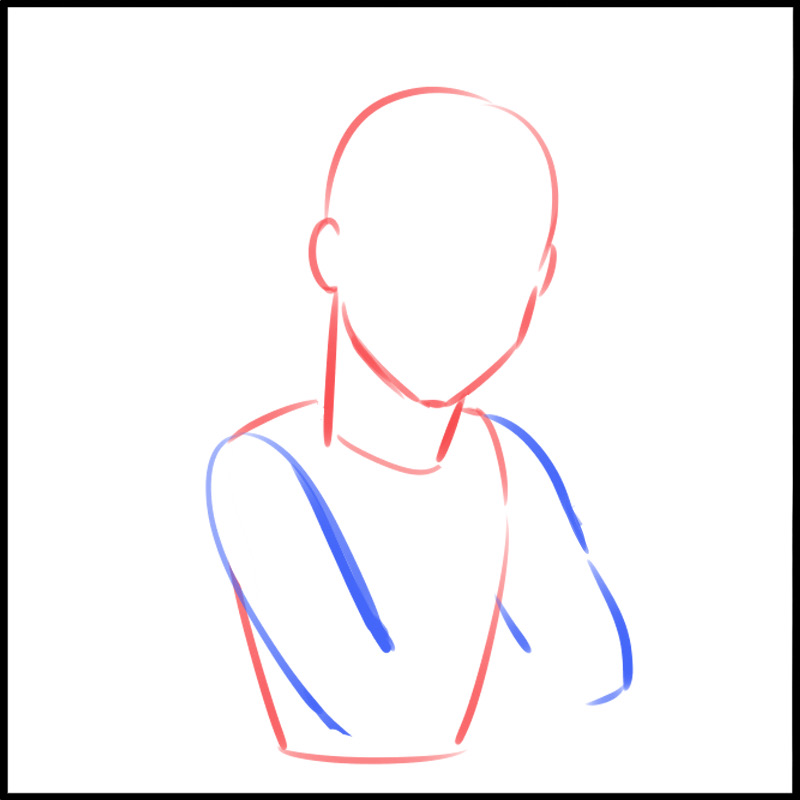
Now draw the right forearm first.
This time, draw it so that the red line in the diagram pops out, so that the position of the arm is clear.
The tip of the hand will be hidden by the left arm, so just draw the back of the hand in a circle!
Now do the same thing, duck the left forearm from underneath, draw the tip of the hand, and erase the unwanted part.
In this case, you can’t see the back of the hand, only the fingertips, so be careful about that.
4. Let’s draw more realistically
What did you think?
Posing with arms folded may have been easier than you think.
You can make it even more realistic by looking at actual photos and studying how to draw the clothes!
Please try to use it in various scenes.
(Text and pictures by Hiroshi Takeuchi)
\ We are accepting requests for articles on how to use /

