2021.11.21
【It’s easy with this Maple Leaf Brush!】FALL Season Illustrations
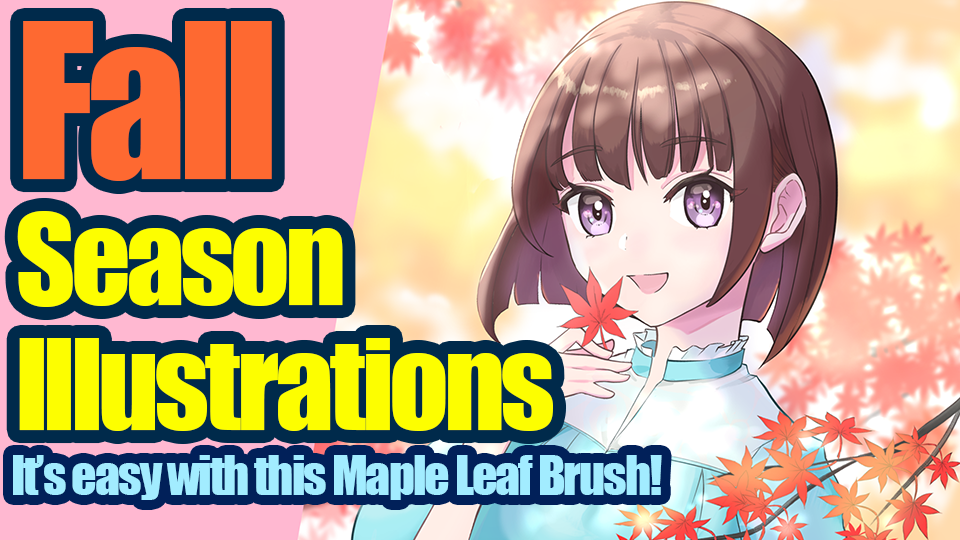
Autumn leaves such as maple and ginkgo can bring out the autumnal atmosphere when drawing illustrations.
I have seen maple leaves and other natural objects before, but when it comes to drawing them, it is surprisingly difficult.
So here I would like to show you how to draw simple autumn illustrations using Mediban Paint’s “Autumn Leaves Brush”!

1. How to get started
1-1. Draw the character
This time, I want to see how to draw the maple leaves that will be the background of the character, so I will skip the rough – drawing the character.

Before drawing the background, draw the character to some extent like this.
1-2. Check out on what creates perspective
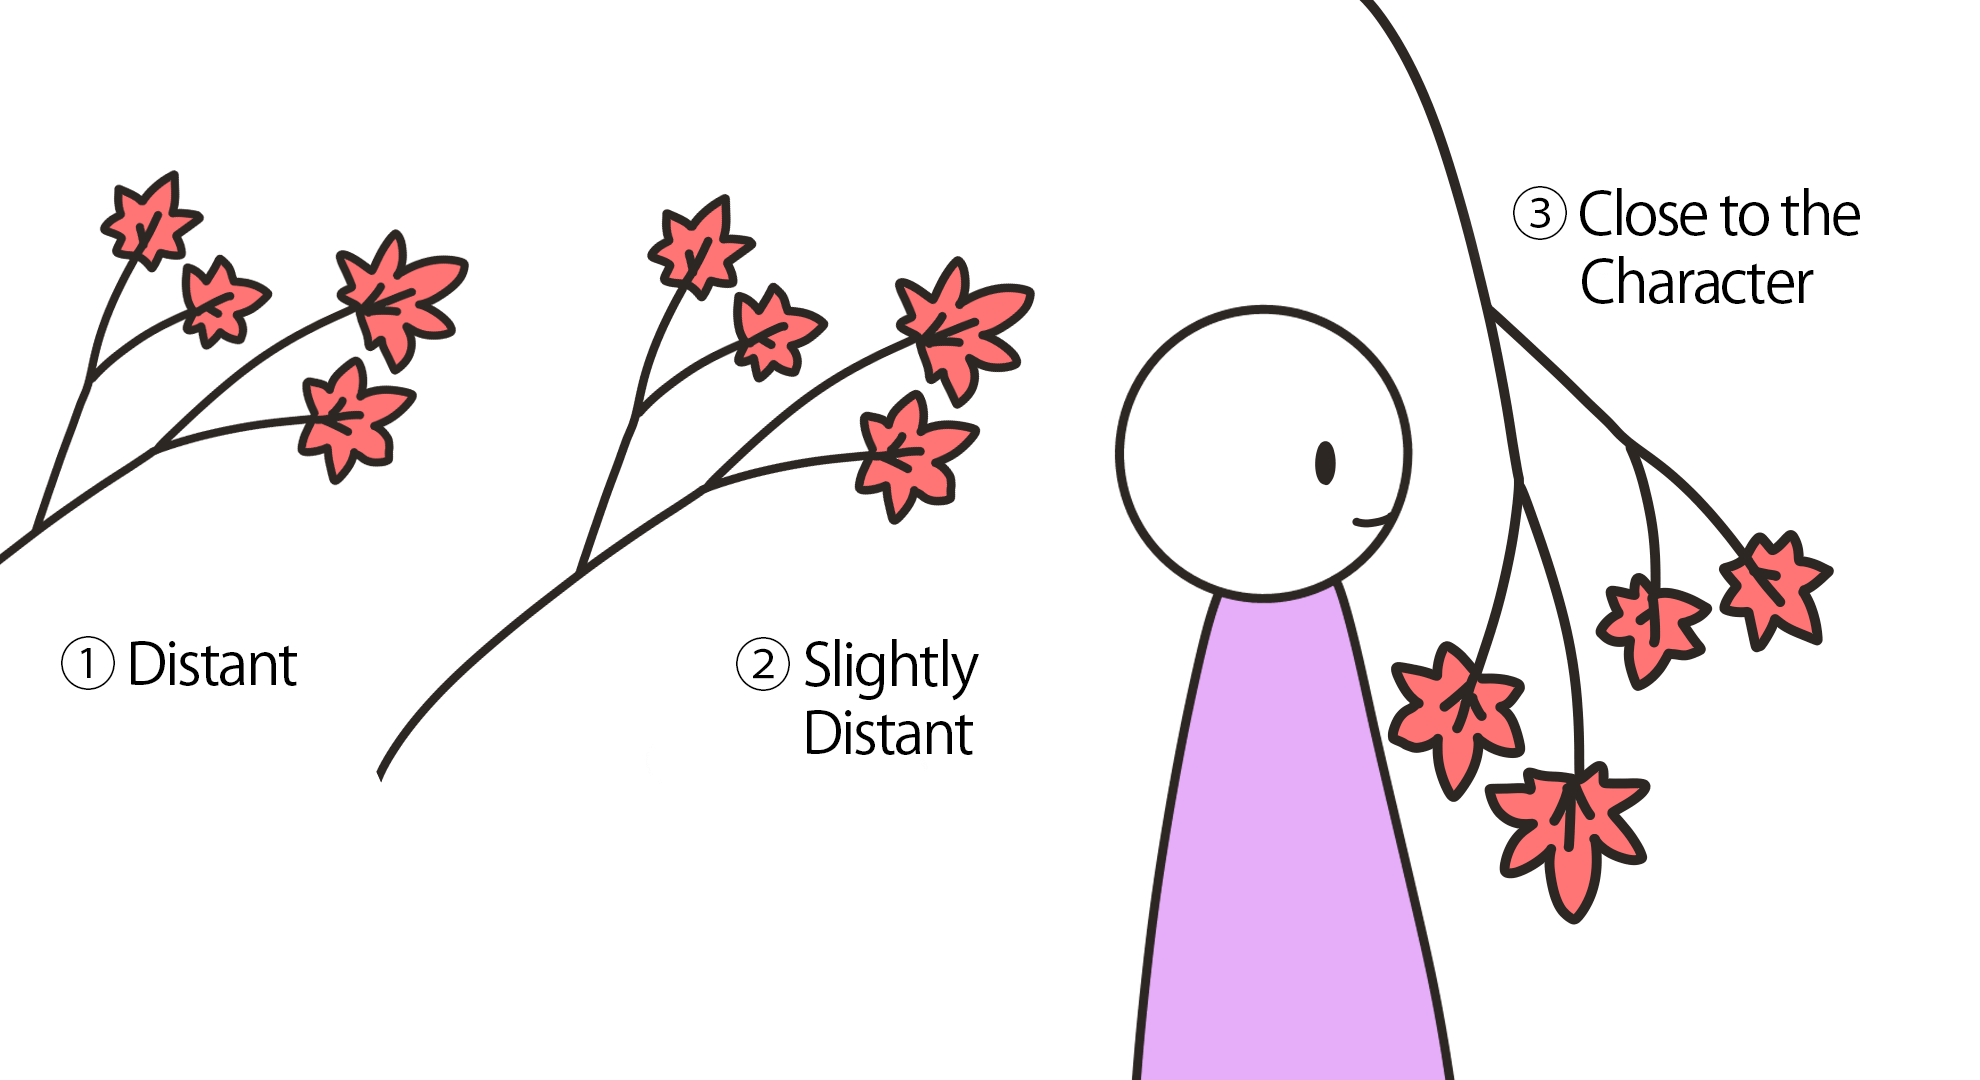
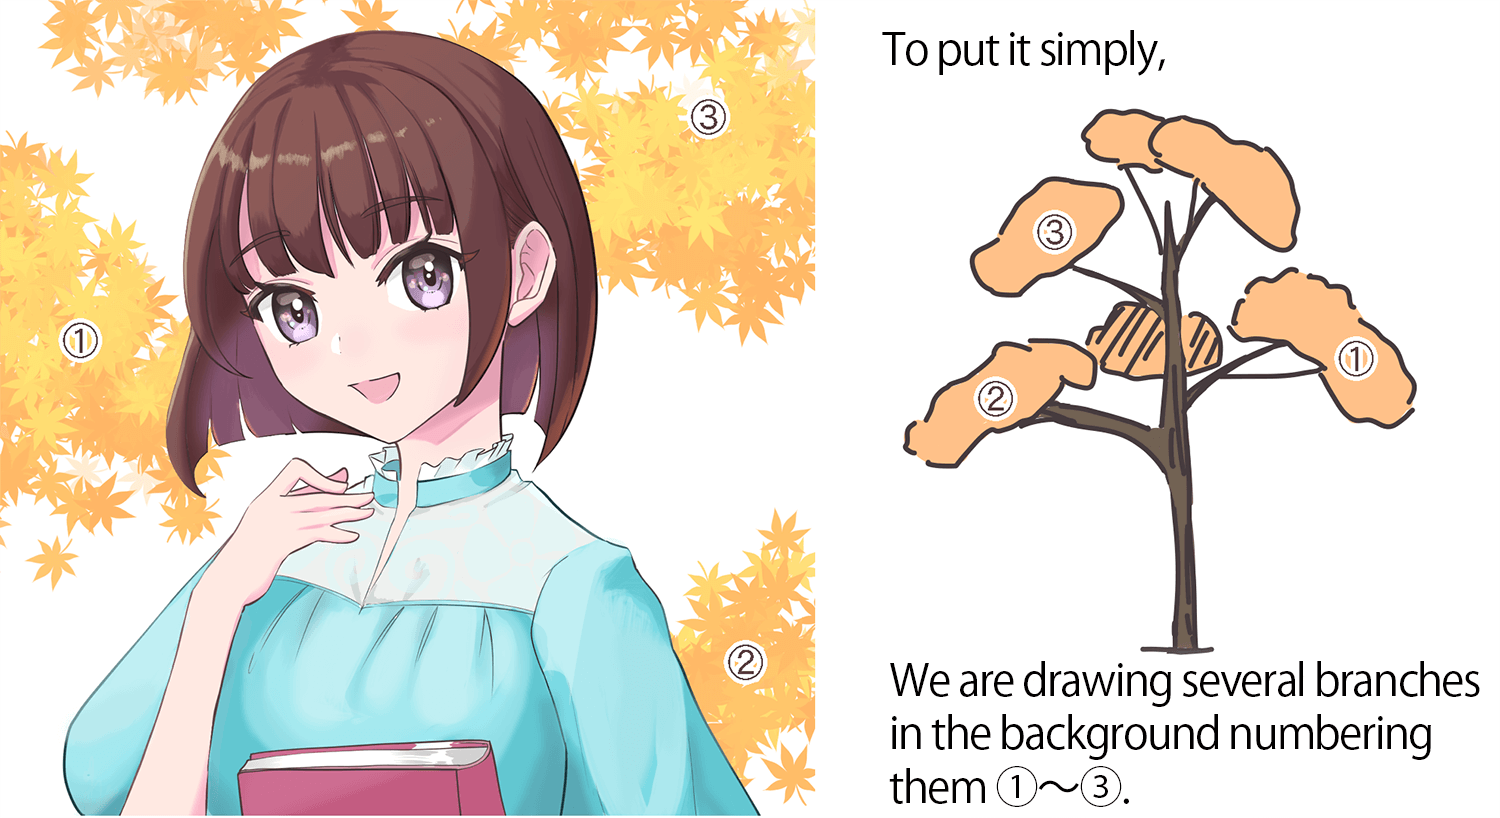
This time, I would like to draw (1) a maple tree in the distance, (2) a maple tree a little closer, and (3) a maple tree on the side of the character as a background.
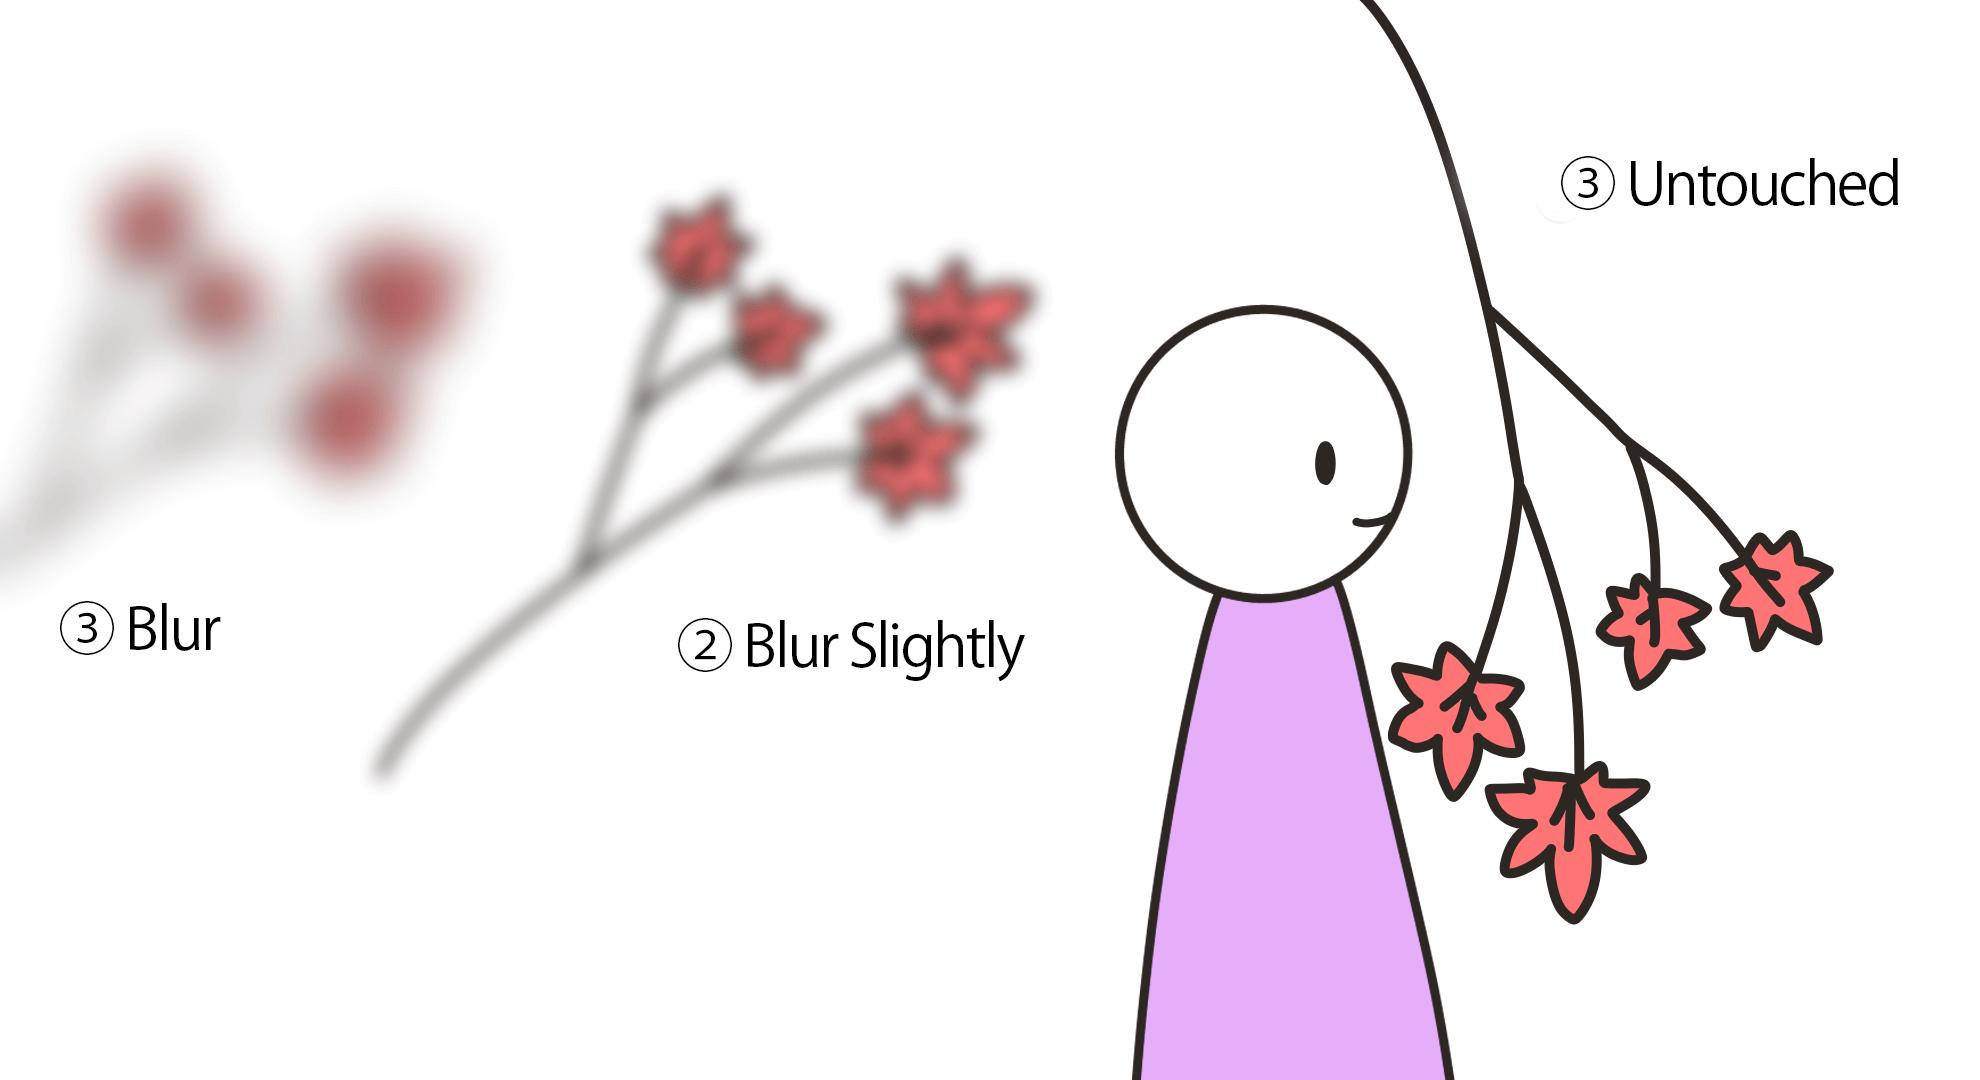
The key to creating a sense of perspective is to blur both parts of the image with an intensity of 1>2.
If you blur (1), which is the farthest away, and blur (2), which is closer than (1), only a little, you can create a more perspective effect.
2. Painting distant Maple leaves
Let’s start with (1) drawing the autumn leaves in the distance.
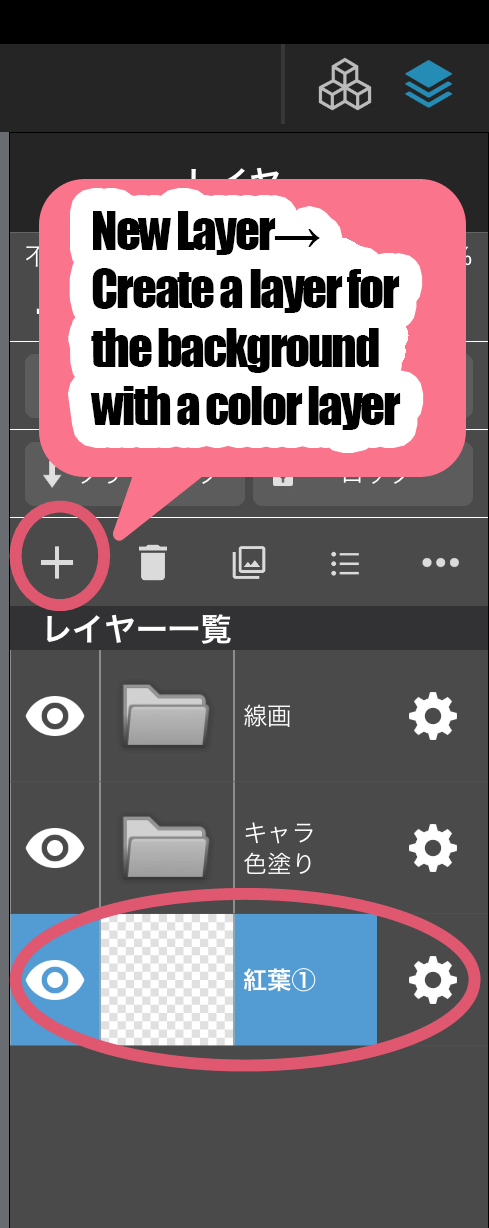
(1)Create a new layer for the background under the character layer.
First, create a layer for the background.
(2)Adjust the parameters of the Autumn Leaves brush.
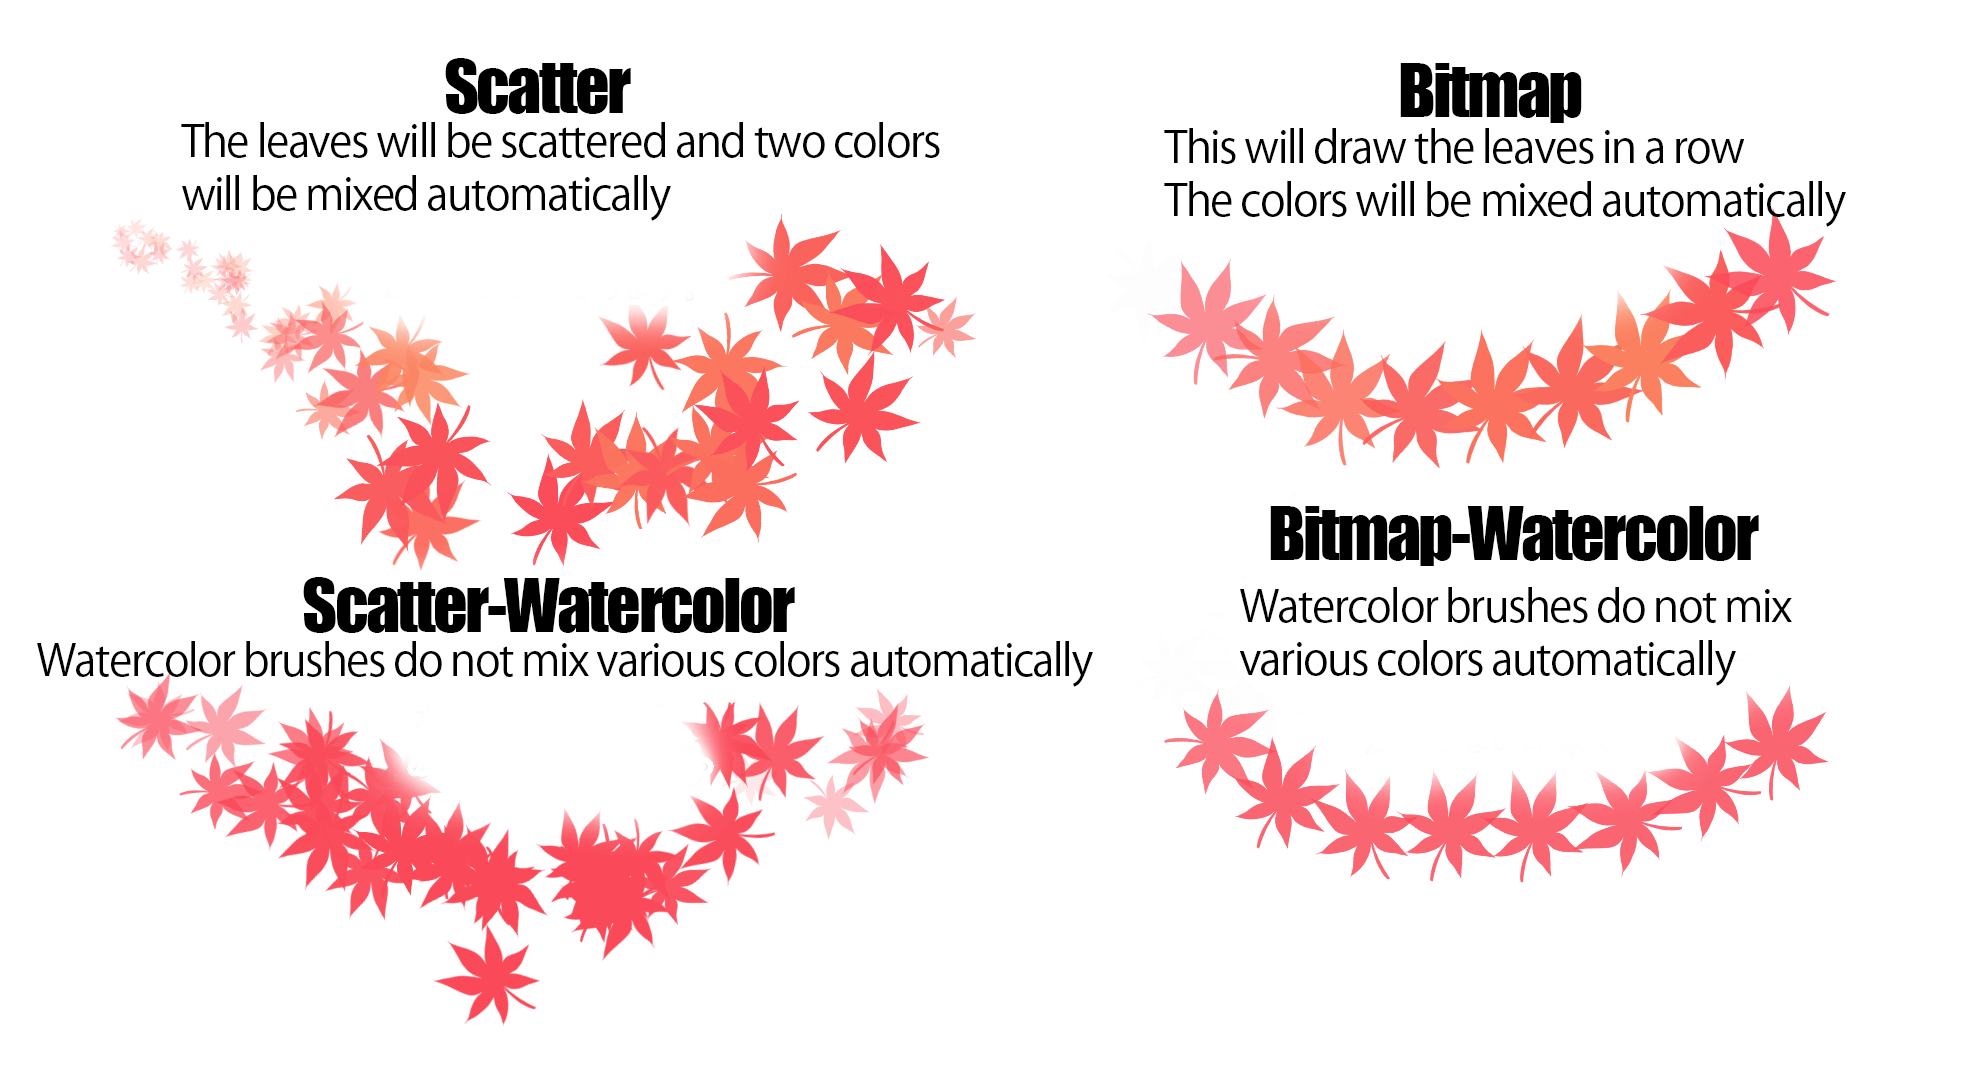
Before you actually paint the autumn leaves, go to Autumn Leaves Brush > Brush Settings > Type and select “Scatter” or “Scatter Watercolor”.

?”Features of “Scattering” and “Scattering Watercolor?
The “Scatter” and “Scatter Watercolor” types are uneven in size and can be used to draw autumn leaves in a scattered manner.
Two colors are automatically mixed in the upper square of the color circle, so you can draw autumn leaves without monotony.
On the other hand, “bitmap” can be drawn in a row.
(3) Draw the Maple Leaves
Once the brushes are ready, start painting the autumn leaves.
Here, we’ll paint a portion of the leaves and branches.
Don’t worry about the details, because you’ll be blurring it quite well later.
This time, I also added yellow autumn leaves on top of the orange ones to make the lighted areas more yellow.
(4) Let’s blur it
Once the autumn leaves are roughly drawn, use Filter > Gaussian Blur to blur them more firmly.

Now you can draw “(1) Autumn leaves in the distance”.
I use the autumn leaf brush because it is easy to draw the color blend and the ragged edge, but I think this process can be done with an airbrush.
3. Painting slightly distant Maple leaves
Now we will draw the autumn leaves a little farther away from (2).
(1) Draw the branches
Use an acrylic brush to draw the branches.
I don’t want to go into too much detail because I will blur it a little later.

(2) Adjust the parameters of the Autumn Leaves brush.
Next, we will adjust the brush parameters to paint the leaves of the autumn leaves.
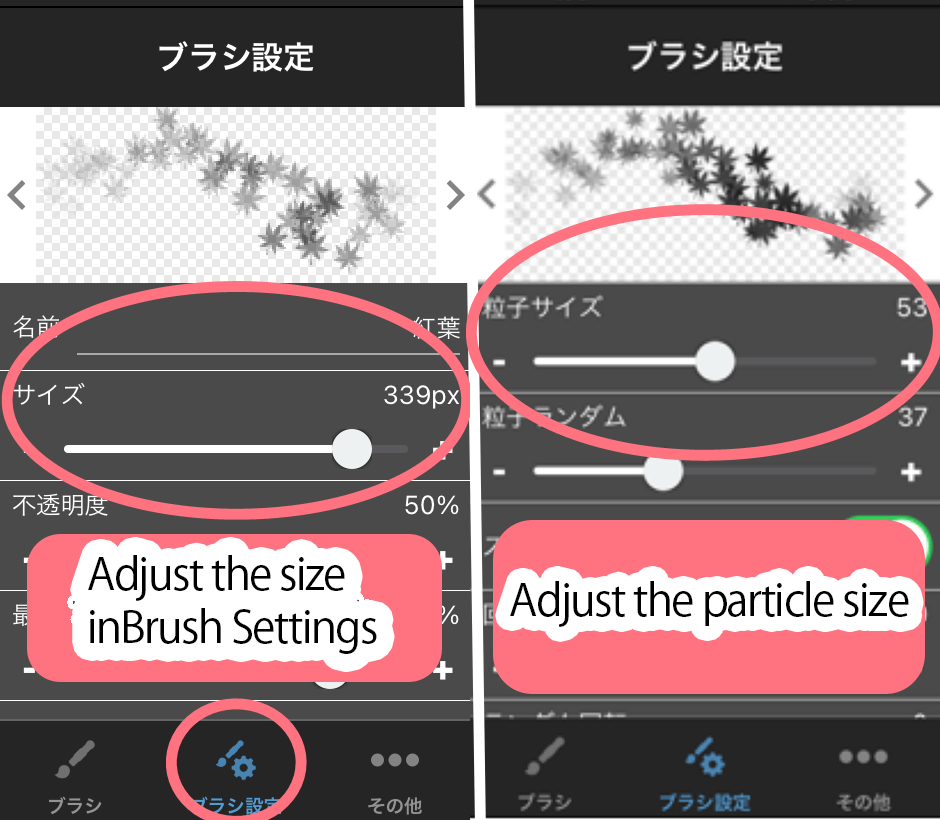
This time, we want to make the size of the leaves smaller than the leaves in the distance, so we will reduce the particle size and brush size numbers in the brush settings.
In addition, we want the orientation of the leaves to be somewhat aligned, so we will set “Random Rotation” to 0.
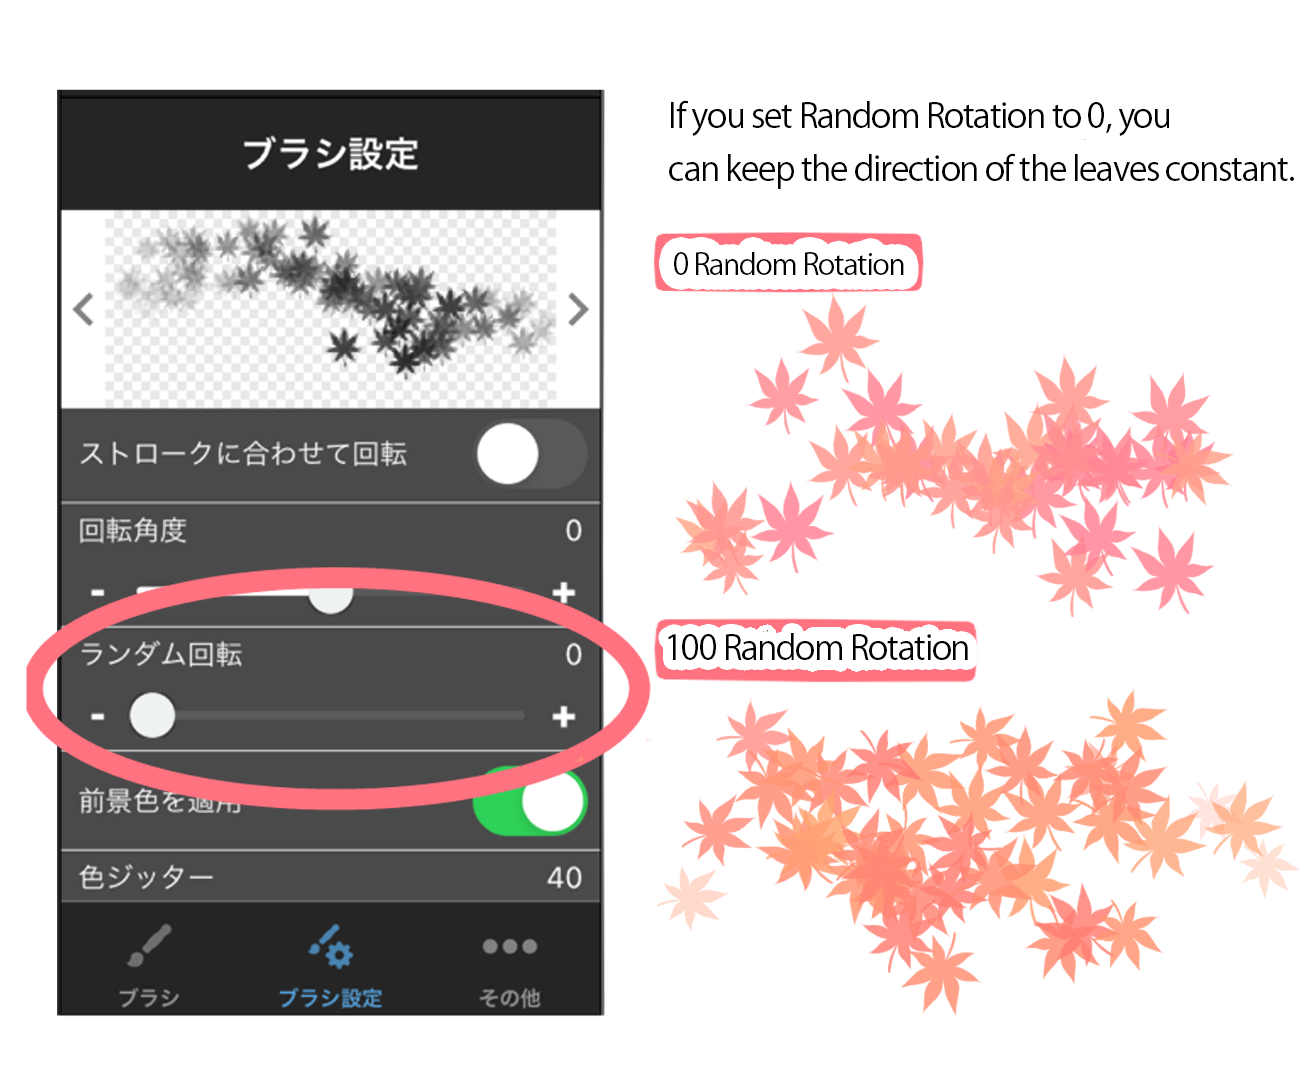
(3) Draw the Maple leaves
Once the branches are drawn, draw the autumn leaves along the branches.
The direction in which you run the pen will change the top and bottom of the leaves, so run the pen in the direction you want to draw.
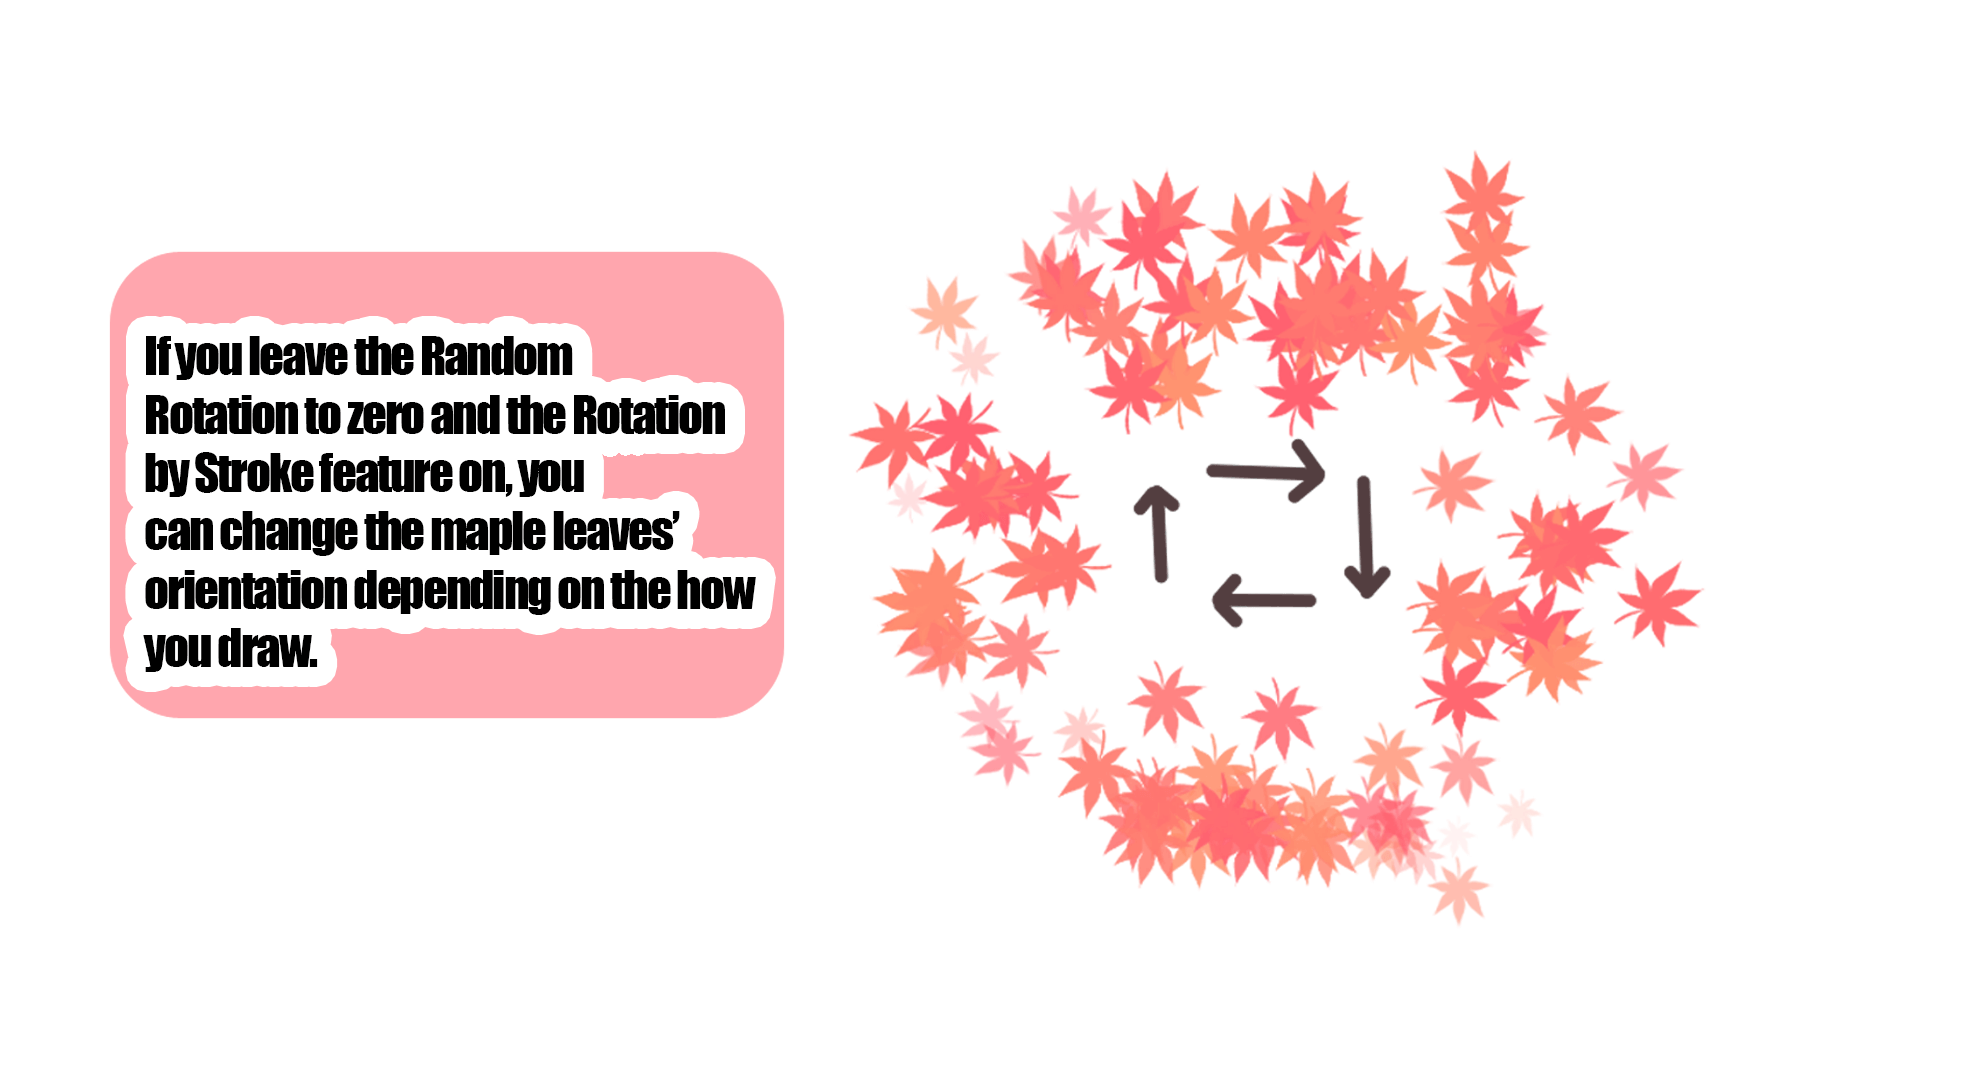
You can also add a layer of autumn leaves with slightly lower saturation and opacity to add depth.
(4) Blur it a little
Once the autumn leaves are drawn, blur them a little weaker than the leaves in the distance.

This completes “(2) Autumn leaves in a little distance.
4. Draw Maple leaves in front of the character
Lastly, draw the autumn leaves on the side of the character.
(1) Adjust the parameters of the Autumn Leaves brush.
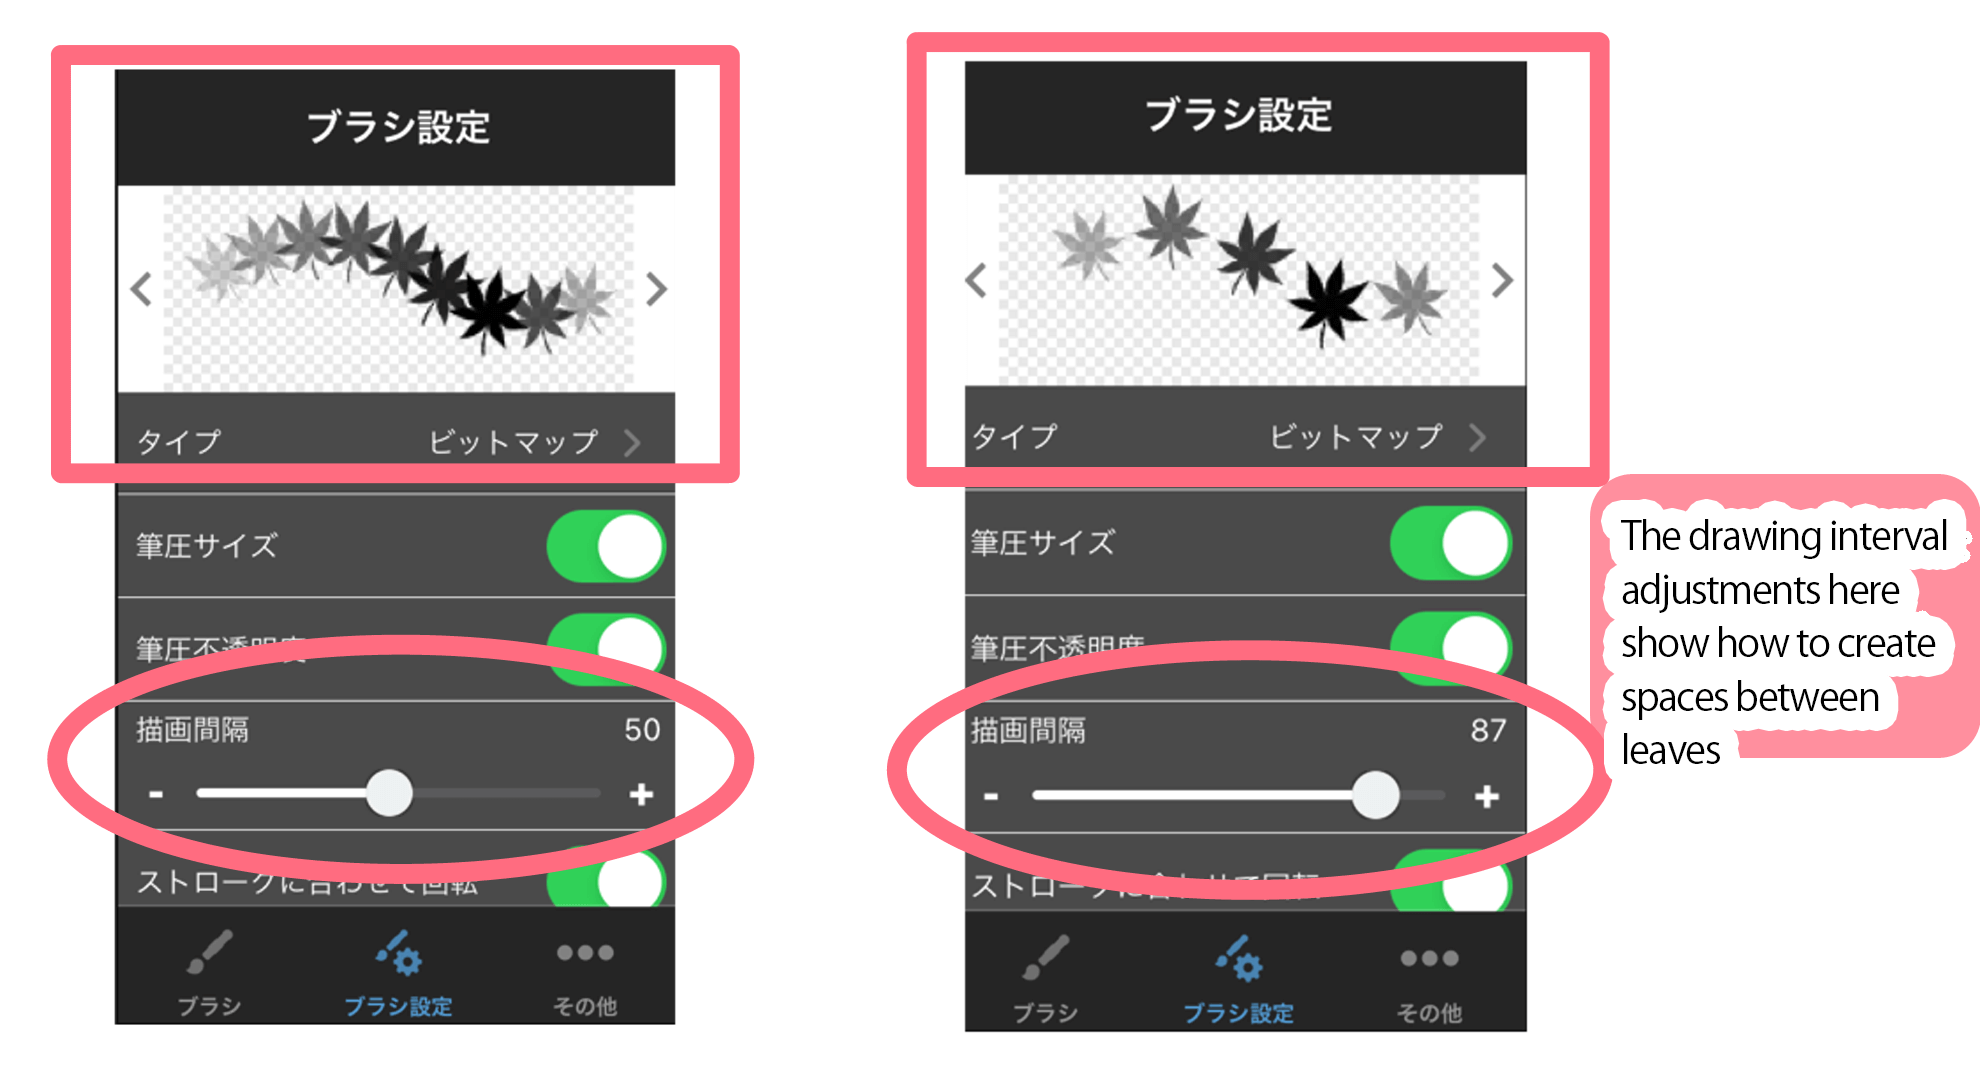
Adjust the size of the leaves so that they are (2) slightly larger than the leaves that are slightly farther away.
In addition, go to Brush Setting > Type > Bitmap and adjust the drawing interval to be wider.
(2) Draw autumn leaves near her mouth.
Slide the pen slightly to draw only one autumn leaf, and adjust the angle with the Transform tool.
At this point, erase the branch so that it is behind your finger to avoid forgetting to erase it.

(3) Draw the branches around her shoulder.
Now draw in the branches around the shoulders more firmly than before.

(4) Draw the Maple leaves
Once the branches are drawn, draw the leaves along the branches.
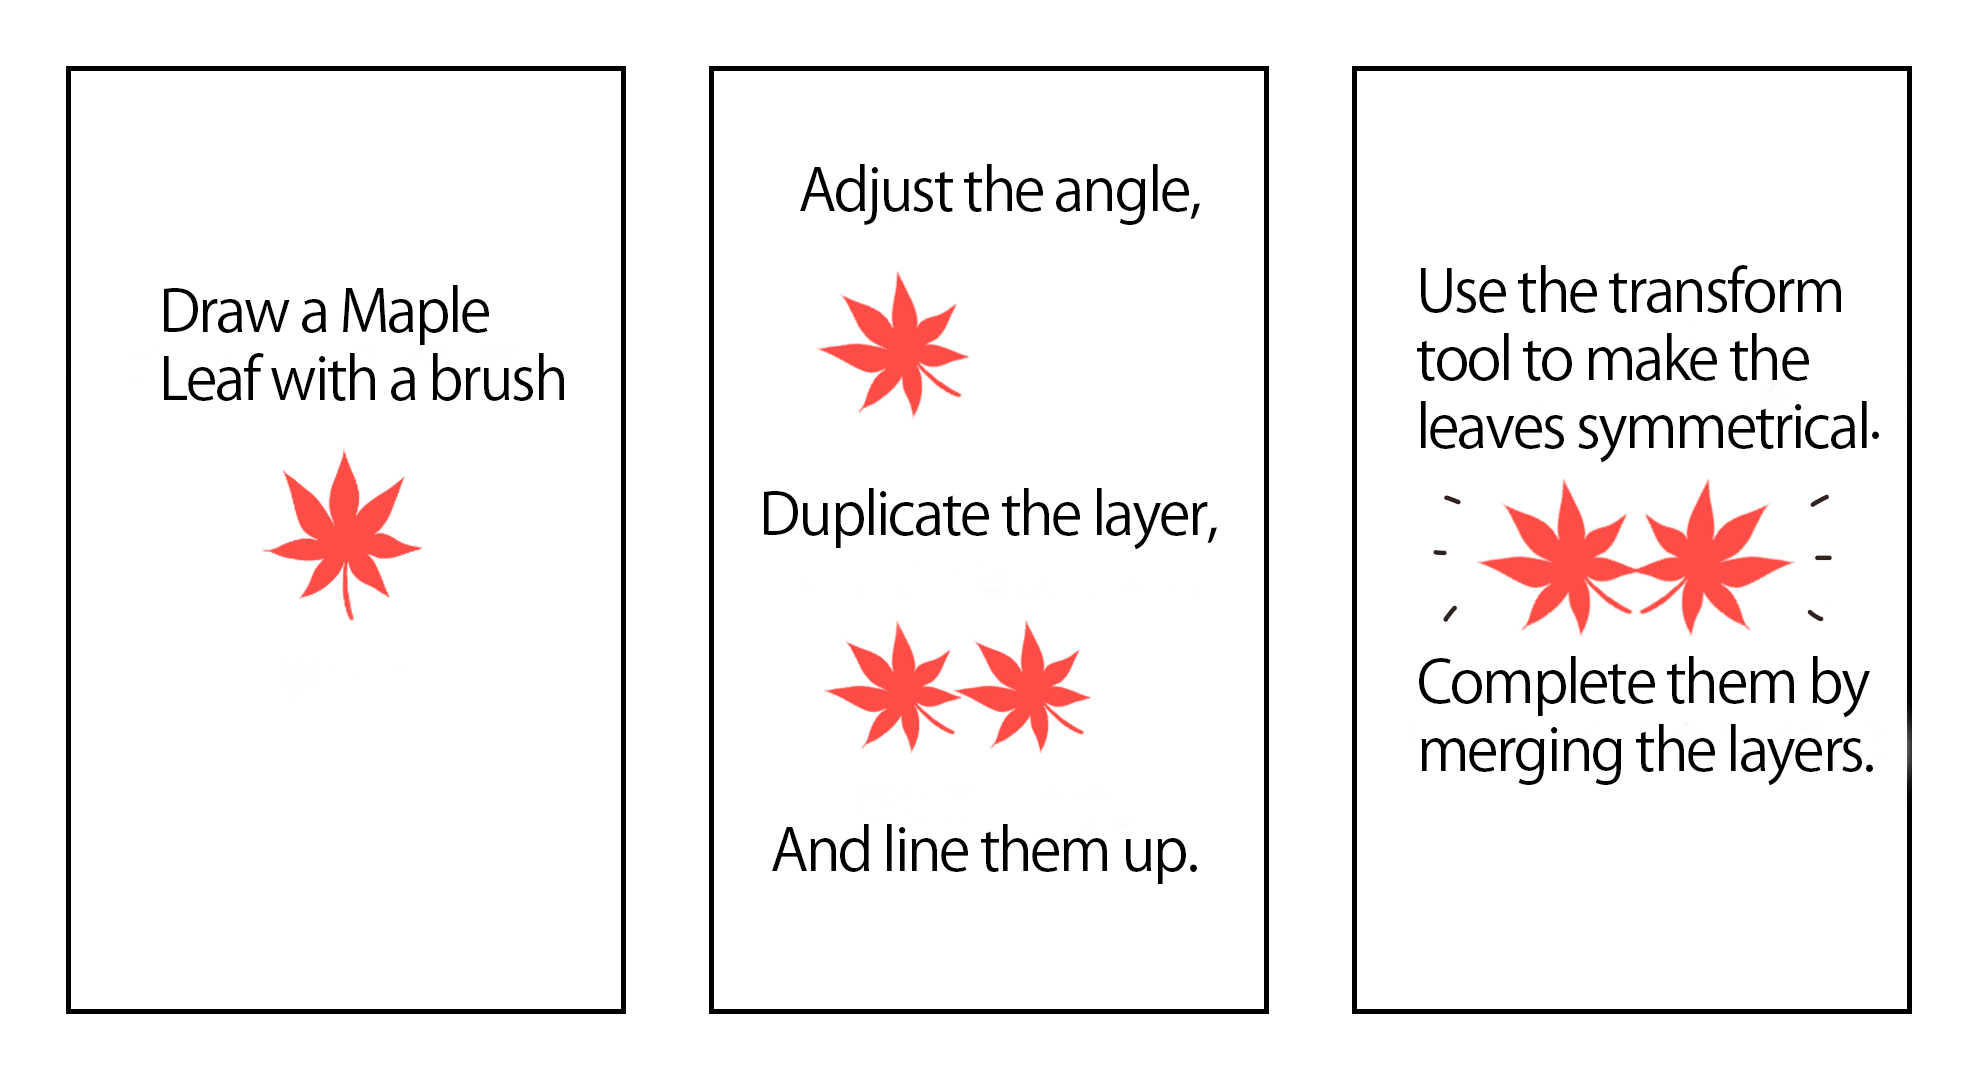
?1. Painting pairs of Autumn leaves?
First, draw a pair of autumn leaves on a new layer, since they are attached to the branch in pairs.
?2. Duplicate and adjust the shape?
Duplicate the previous pair of foliage and add leaves by adjusting the angle and size with the Transform tool.
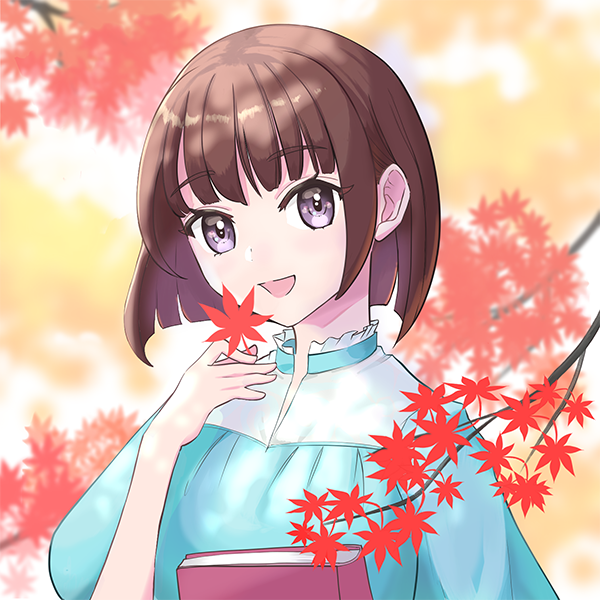
?This time, I wanted to add line drawings to the close autumn leaves, and I also wanted to adjust the way the leaves grow, so I drew them in a slightly tedious way, but I think it would look good if I drew them roughly by spraying or something.
5. Adjust and Complete it
Finally, adjust the shape and light to balance the whole image.
The light is painted using the airbrush, and the layer blend is set to add (luminous), screen, etc.

And it’s complete!?
(Text?Picture/Amane)
\ We are accepting requests for articles on how to use /

