2022.07.07
MediBang News Vol.11. The road to a Brush Creator.~ The first lesson ~
Index
MediBang News Vol.11. The road to a Brush Creator.~ The first lesson ~
Hello everyone. This is Takahashi, also known as the crappy brush creator of MediBang.
MediBang news has been focusing on conducting surveys lately, so I want to talk about something different, which is script brush.
I added “The first lesson” to the title just because I felt like it, so I don’t really have any plan to hold “The second lesson”. lol
What is script brush?
I guess many of you are wondering, “What the heck is script brush?”, so I will explain it simply for you! It is a wonderful function on MediBang Paint that will draw a line as you command by loading a file that has your command.
We call this command “Brush Script” or “Script”.
What is Command?
If MediBang Paint would draw lines following my command, I will just command “Draw a super cool line”. You might have thoughts like this, but MediBang Paint is not that smart, so we need to make more detailed command. (I wish we could make MediBang Paint that smart…… )
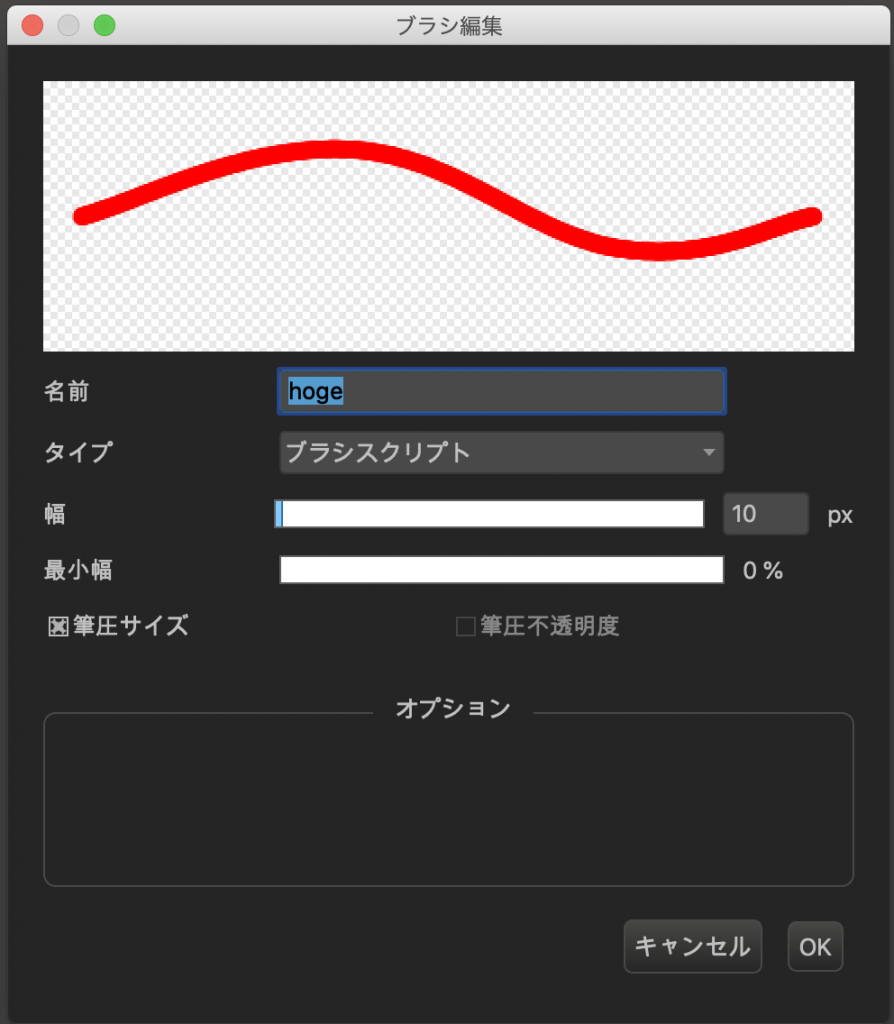
Detailed command is like “Draw red dots with a diameter of 10px on where the brush cursor is placed. (When stroking)”. It becomes like this↓ if you write it in the way MediBang Paint can understand.
function main( x, y, p )
  bs_ellipse(x, y, 10, 10, 0 , 255, 0, 0, 255 )
  return   1
end
Command like this that MediBang Paint can understand is called brush script.
The brush I gave as an example here is certainly crappy and useless. But I think it showed you how MediBang Paint follows such a simple command admirably and draws red dots with a diameter of 10px. (If you have time, please try it!)
How do we create it?
Well, I believe you are getting interested in creating brush scripts more and more, right? …RIGHT?
In order to create brush scripts, you need to use an app called “Text Editor”. “Notepads” is installed on Windows, and “Text Edit” is installed on Mac as default applications, and you can use these to create brush scripts. (You should be able to do the same thing on Android and iOS. If you would like to, please get a Text Editor on the eligible app store.)
Then,
- Start Text Editor.
- Enter the script of a cool line.
- Set the filename extension as “.bs” and save the file.
You can create your original brush just by following these three steps.
Don’t you think it’s really easy?
That is not what you want to hear. I know you want to know how to create a cool script. I feel you.
It’s so difficult to create a script that draws a cool line and this is why I’m being a crappy brush creator…….
I can’t provide you with a cool script so easily, but I’d like to explain a bit about the script that only draws in red color so that you can get closer to brush creators.
function main( x, y, p )
  bs_ellipse(x, y, 10, 10, 0 , 255, 0, 0, 255 )
  return 1
end
To begin with, I will talk about
function main( x, y, p )
  -- The process within here will be executed every time the brush moves while stroking.
end
The part that is surrounded here will be called every time the brush moves while stroking. (x and y refers to the placement of the brush and p refers to brush pressure.)
Nextly,
bs_ellipse(x, y, 10, 10, 0 , 255, 0, 0, 255 )This is a command that draws an oval. The numbers inside the parentheses decide the brush size and color.

The meanings of each part are as follows.
- Sets the area you want to draw. Here it uses x and y from
main(x, y, p), so you can draw an oval where the brush is placed. If you set it like 10, 5, it will be drawn on 10px from the left side of the canvas, and 5px from top, regardless of where the brush is placed. - Sets the diameter. The first number is the parallel length and the latter one is the vertical height. If you set it like 10, 5, horizontal oval will be drawn.
- Angle. (Unit used here is Radian. Therefore, you can’t draw an oval that is 30° tilted even if you set the number 30.)
- Sets the color with the color code of RGB. The reason why there are three numbers is because each color decides the strength of red color, green color and blue color. You set the strength from 0 to 255. It becomes black if you set all of the number 0, and it becomes white if you set all of the number 255.
- Sets the opacity. 0 is transparent and 255 means opacity 100%.
If you are interested, try with different numbers and see how it changes the movement of the brush. By doing so, I think you will be able to understand how it works. (For example, you can switch the numbers of x and y.)
Regarding return 1, it is decided to be “return 1” if something is depicted when main(x,y,p) is called, and to be “return 0” if nothing is depicted by the rule, so it is set as “return 1”.
That’s it for “The road to a Brush Creator.~ The first lesson ~”. I hope this article will lead more people to be brush script creators.
Hope to see you again!
By the way, I usually use a text editor called “Visual Studio Code”.Talking about a specific text editor that I like in a place that is open to everyone might cause some arguments, so I won’t go any further into this topic. :p
Past MediBang News Letter
- MediBang News Vol.10 We took a survey on the way painters hold their pens!
- MediBang News Vol.9 Staff inside MediBang will introduce themselves by using the Self-Introduction template!
- MediBang News Vol.8 Research on the drawing environments of artists!
- MediBang News Vol.7 Research on the drawing posture!
- MediBang News Vol.6 The secret to staying motivated…!
- MediBang News Vol.5 Inside MediBang Premium 4-Koma Manga
- MediBang News Vol.4 Featuring apps that motivate you to draw!
- MediBang News Vol.3 Top 10 Recommended Working BGM on YouTube!
- MediBang News Vol.2 ART street Posts Sharing Techinques!
- MediBang News Vol.1 Introducing MediBang Development Team Members
\ We are accepting requests for articles on how to use /


