2022.10.26
Let’s create a perspective guide using the Snap Tools! How to draw rooms you can use for the background
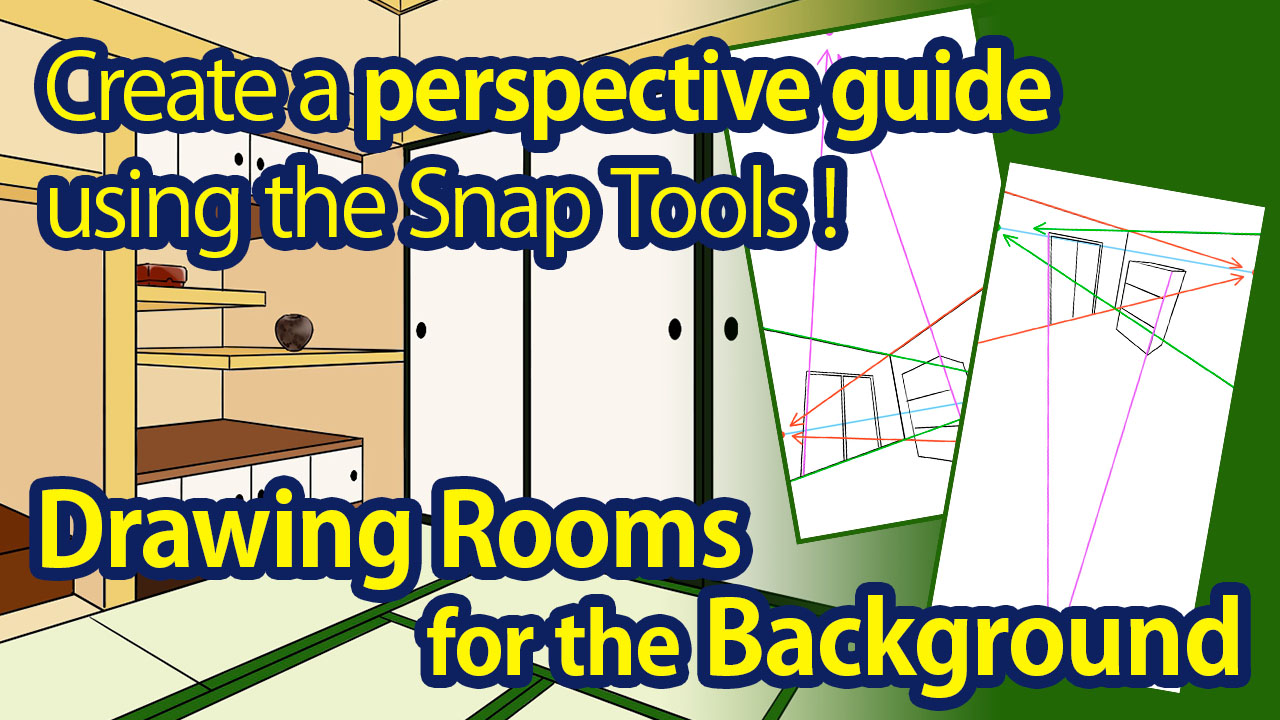
Do you know what it means to “draw perspectives”?
Maybe you’ve seen them on books or the internet but you are still confused with how to actually do it.
In this tutorial, I will be using the easily switchable “Snap Tools” inside the MediBang Paint app to explain the steps for drawing a Japanese room you can use as backgrounds for your illustrations!
You can also learn how to draw a perspective too♪
Drawing Perspectives
First, let’s start off by looking at how we should draw perspectives.
Please refer to the image below.
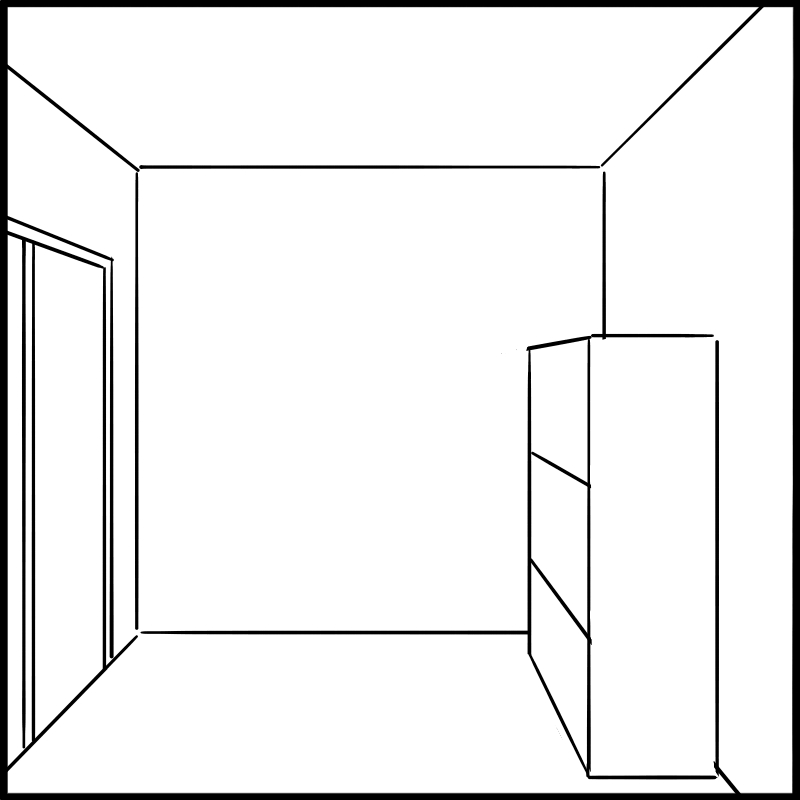
This background illustration consists of…
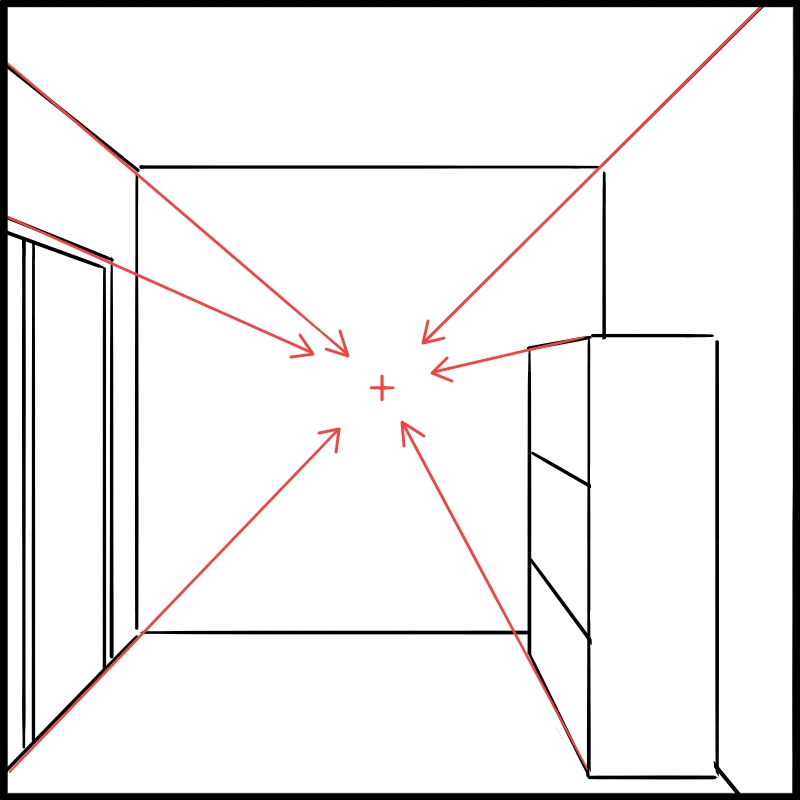
horizontal lines, vertical lines in addition to the lines pulled towards the cross mark in the center.
This perspective drawing method is called the “one-point perspective”.
There is also the “two-point perspective” method.
For this method, you need to first draw the horizontal “eye level” line on the canvas.
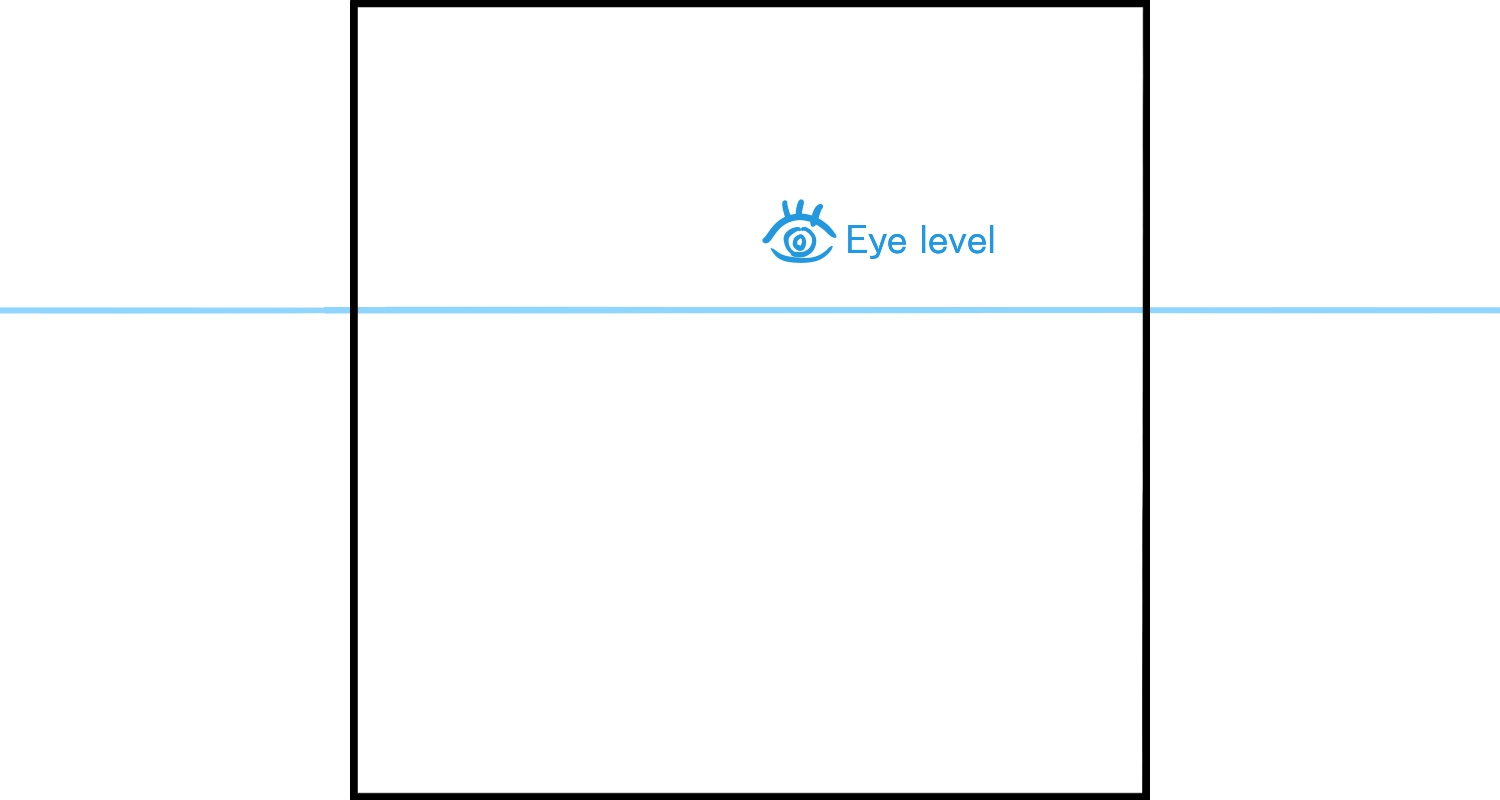
If you draw this line high, the illustration will be a high-angle shot and vice versa (if drawn low, it will be a low-angle shot).
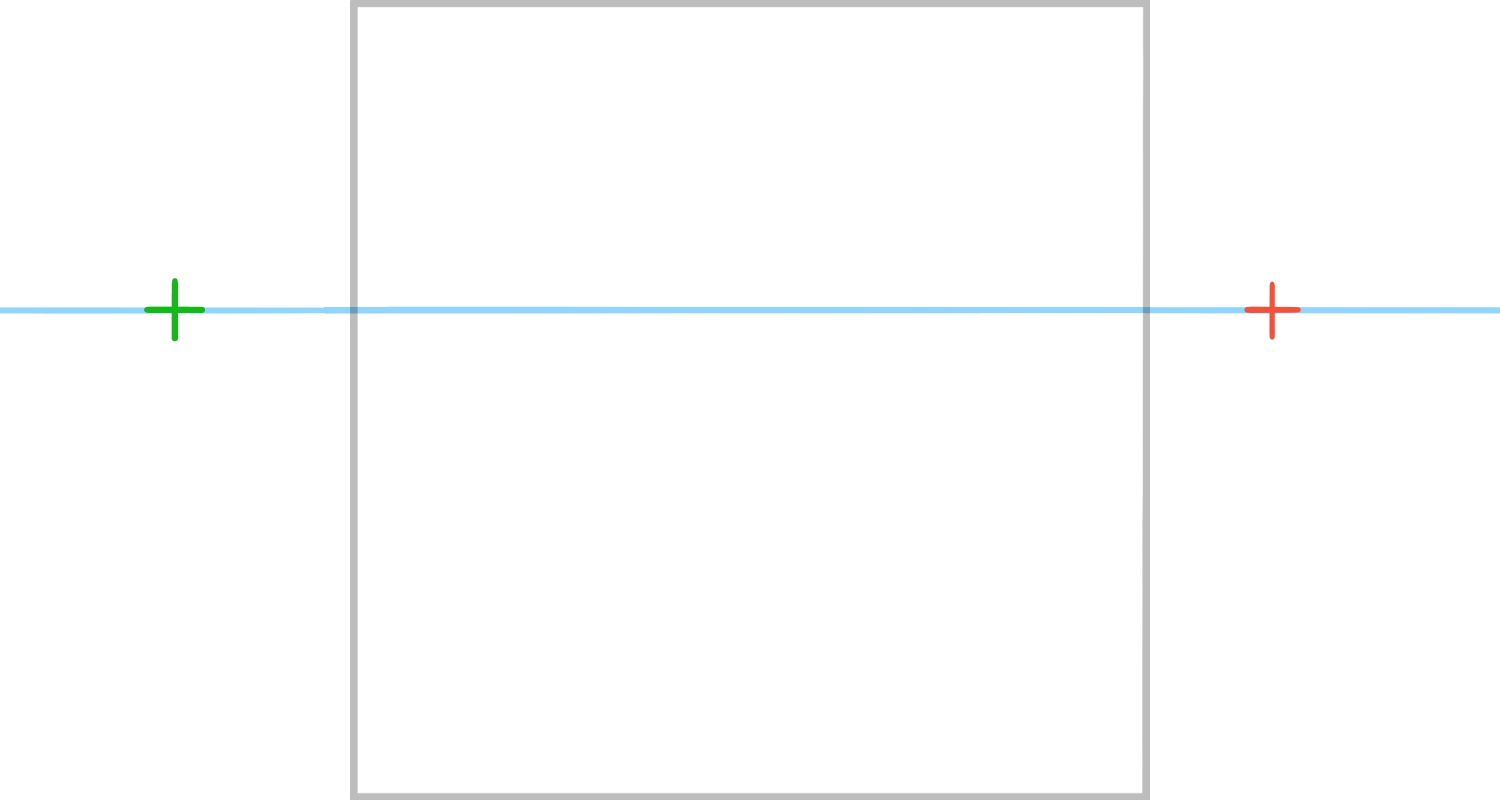
With the two-point perspective drawing, you need to place two points on the eye level line.
Most times the two points are chosen outside of the size of your illustration (in this case, the center square box) as you can see with the green and red points.
And you can start drawing the background illustration by drawing the focus lines toward these two points, together with the horizontal and vertical lines.
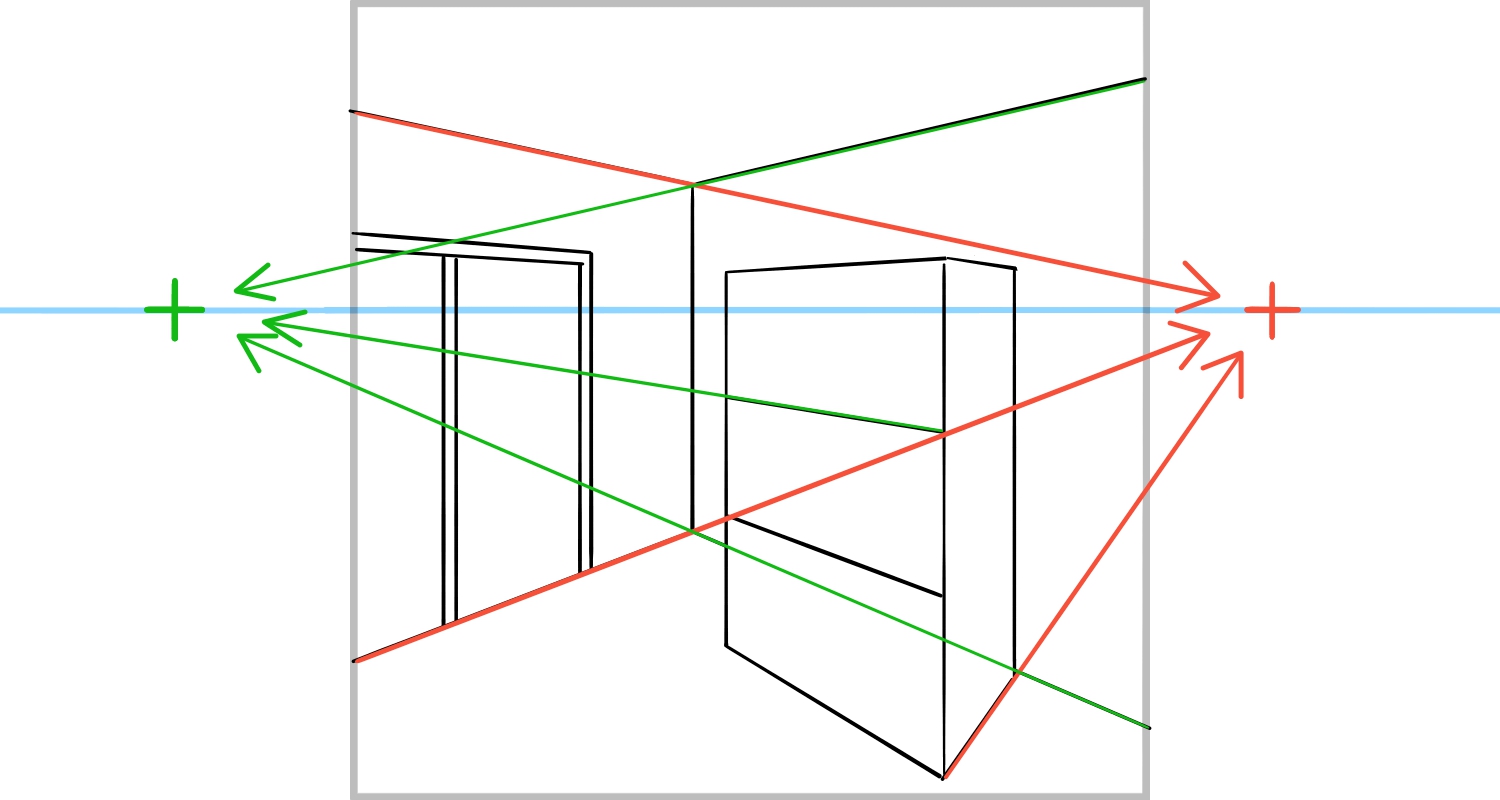
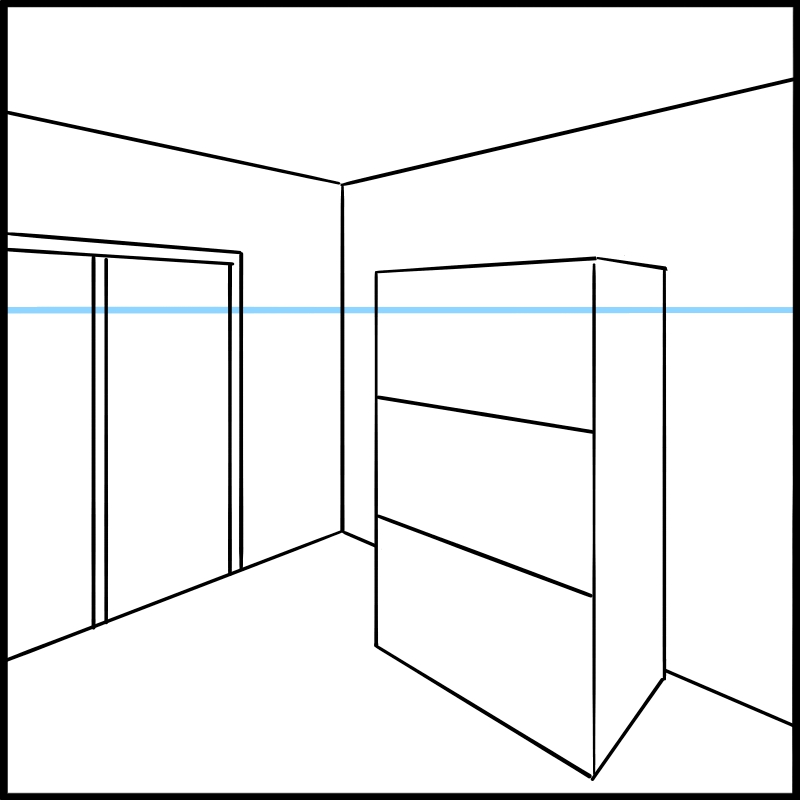
This is the basics of perspective drawing.
If you are standing in front of the back wall, your room needs to be drawn with the “one-point perspective” method but otherwise (standing in the corner etc.) the room needs to be using the “two-point perspective” method.
The most common method is the latter “two-point perspective”.
There is also a “three-point perspective” method where you take the third point above or below, in addition to the two other points placed on the eye level.
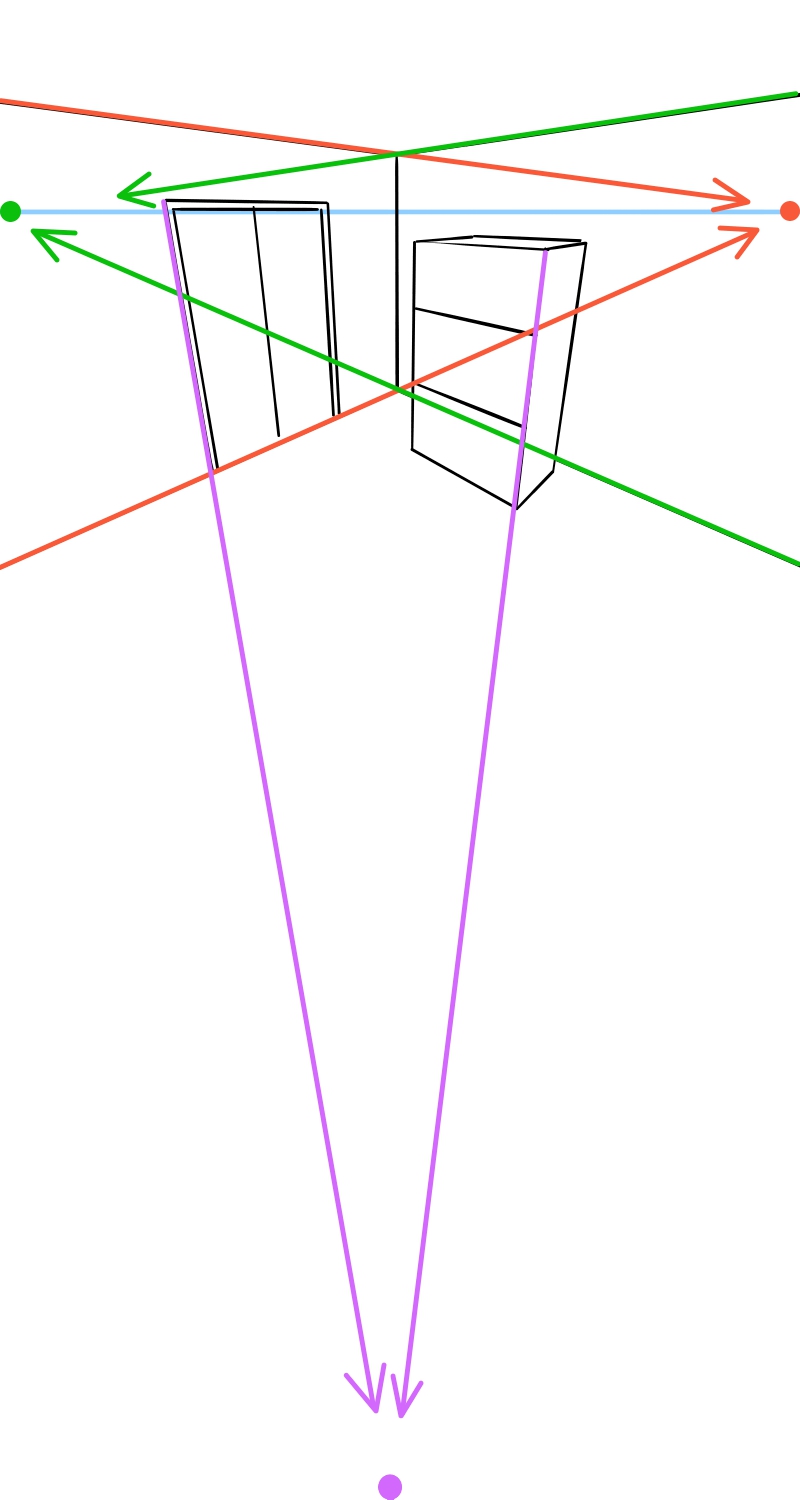
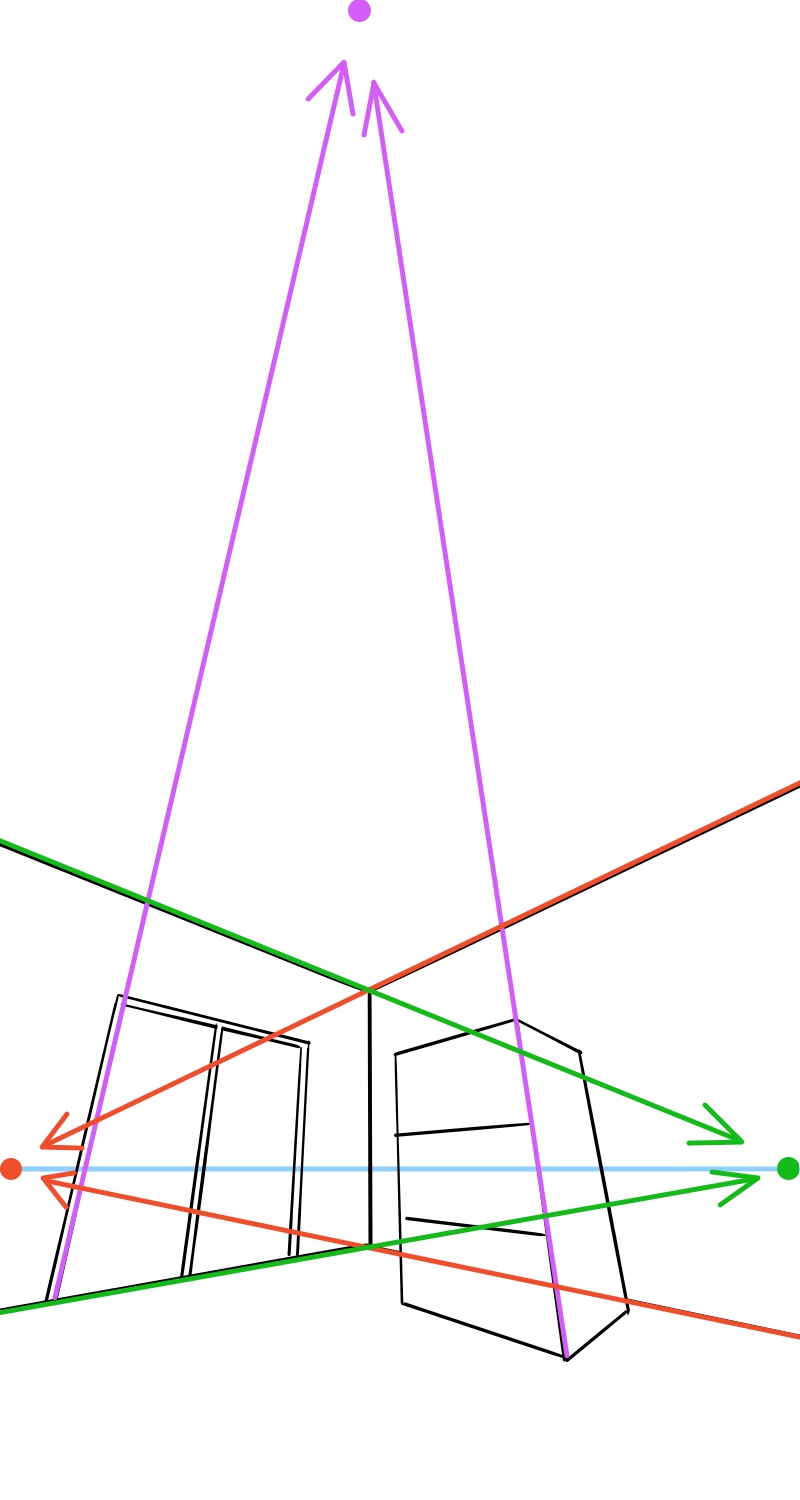
For a high-angle shot, place the third point below and for a low-angle shot, place the third point above.
If you want to make a perspective drawing even more lively and realistic, I recommend using the three-point perspective method.
Using the Snap Tools
Next, I will explain how to use the Snap Tools.
If you open the MediBang Paint app, there is a “Snap” tab inside the top menu bar.
From here you can select various types of snaps.

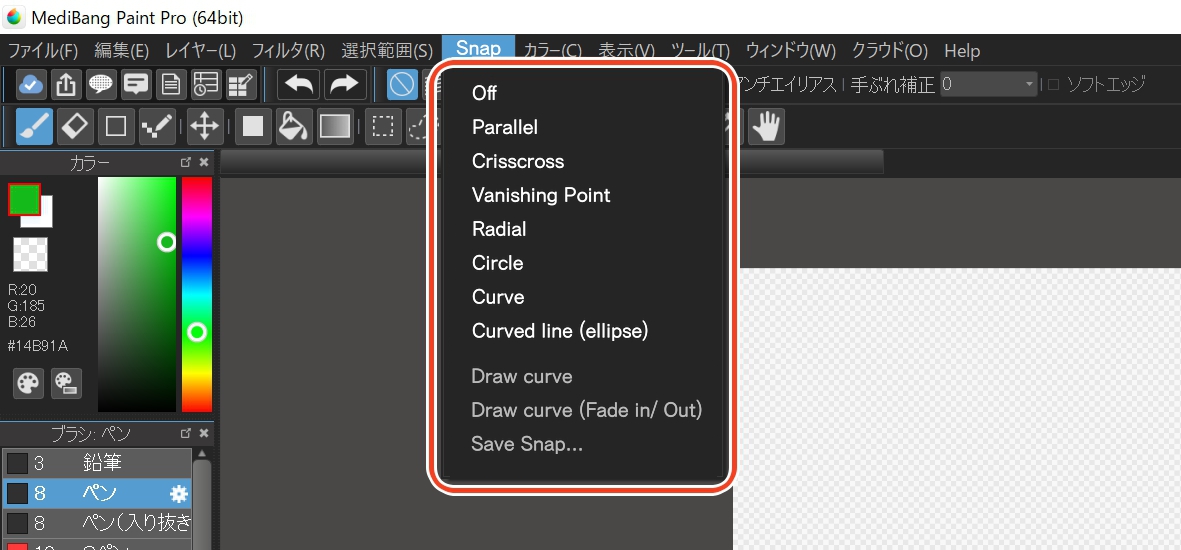
I will be using two snaps, “Vanishing Point” and “Crisscross”.
Use the “Vanishing Point” snap for when you are drawing focus lines and use the “Crisscross” snap for when you want to draw the horizontal and vertical lines.
If you click on “Vanishing Point”, a cross mark will appear for you to decide on the starting point.
- Click a point on the screen you want as the starting point then click on another point (these two points will create a line)
- Next, click on the starting point again and click somewhere else other than the point you chose earlier (this will create another line)
The app will judge the intersection of these two lines as a vanishing point, creating a perspective guide on the canvas.
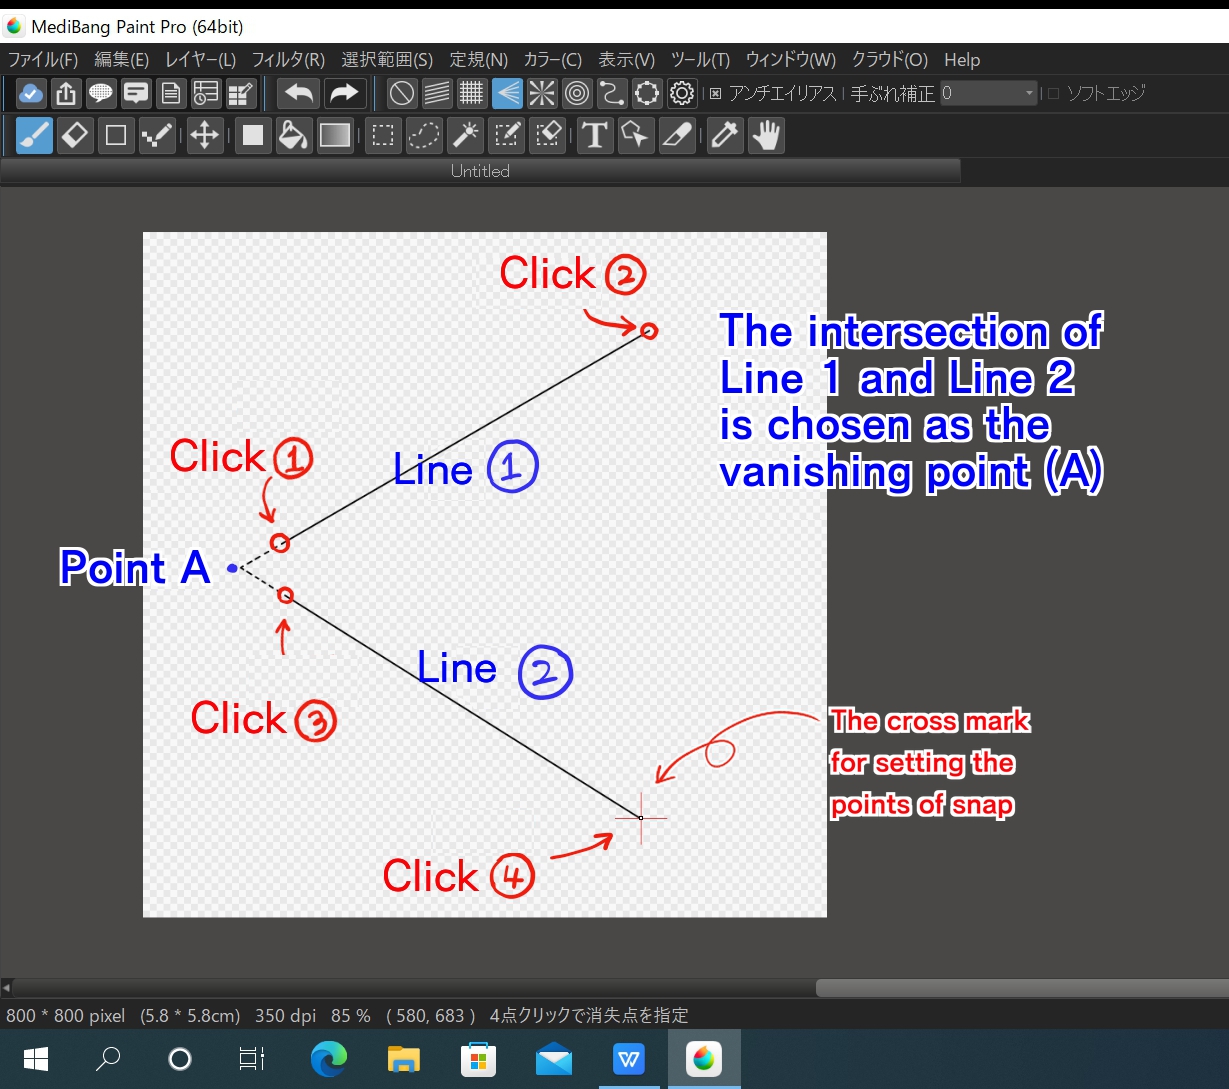
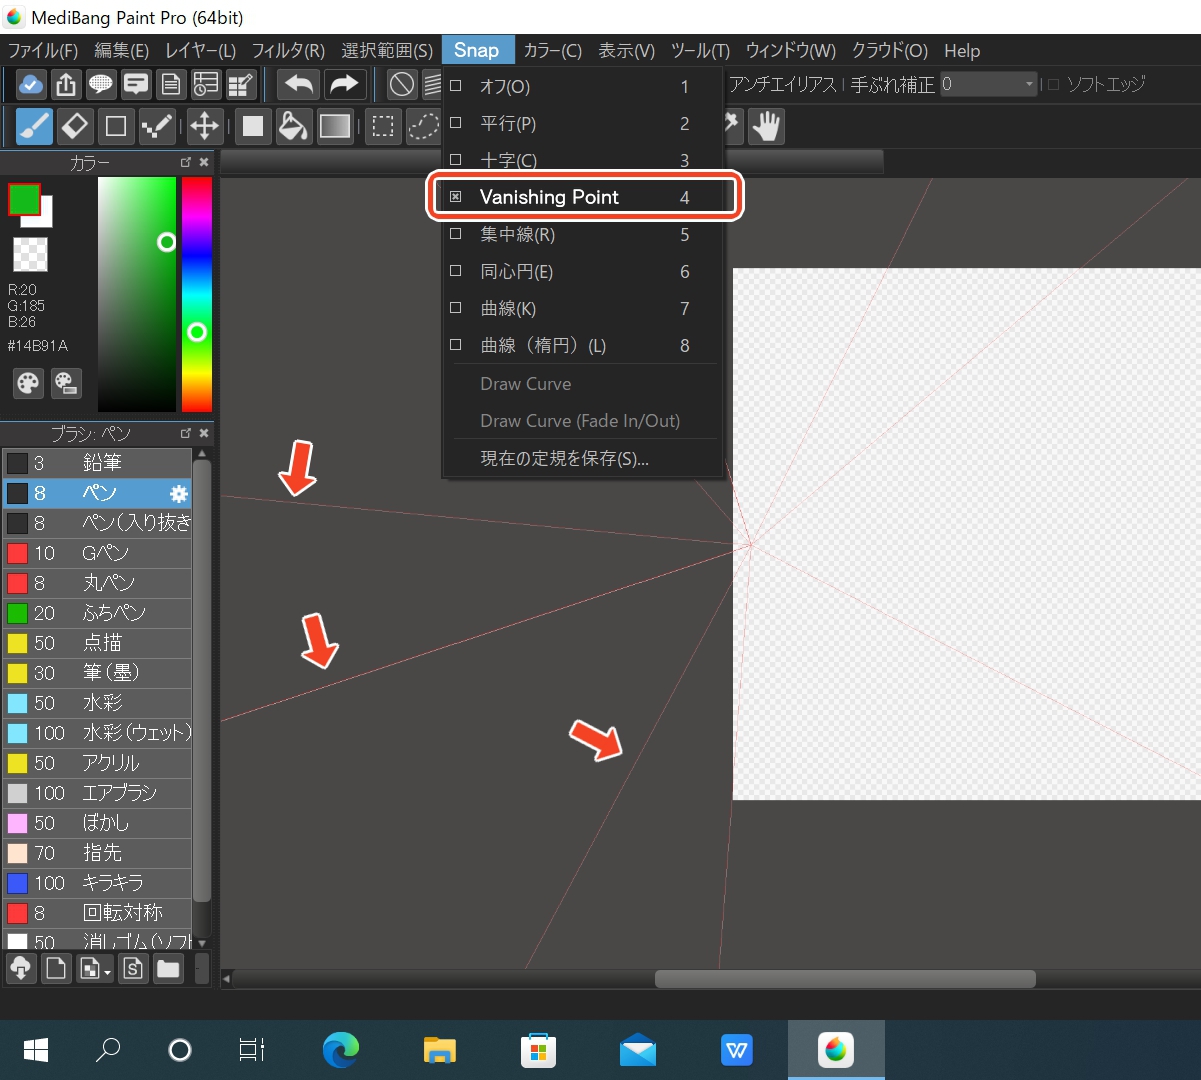
This part looks a little confusing.
But once you try them a couple of times, you will master them right away.
The Snap Tools can be selected from these icons as well!
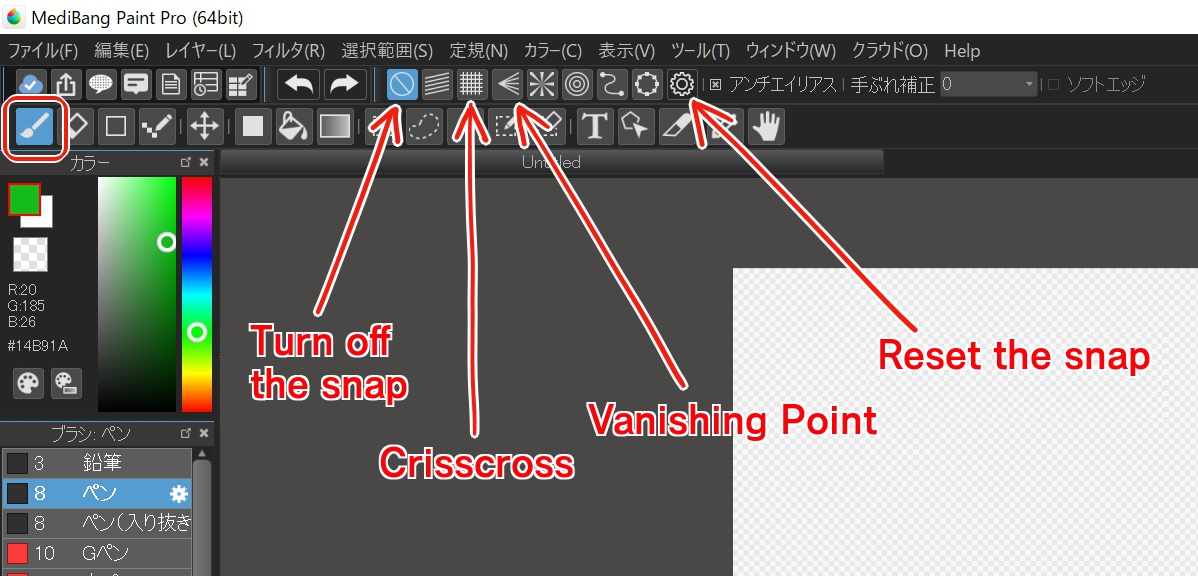
The icons appear when you select the Brush Tool.
If you want to turn off the snap, click the leftmost icon, if you want to reselect the settings for the vanishing point, click the rightmost icon.
Drawing a Japanese Room!
It will be difficult to just learn how to use the tools so let’s move on to drawing an actual background illustration.
Once you create a new canvas with a wide width, start by setting the eye level.
Select the Brush tool and click on the “Crisscross” snap to draw a horizontal line in the center of the canvas freehand.
Since you have the snap chosen, you will be able to draw a clean horizontal line like you used a ruler.
Then draw a small mark on both ends of the line.
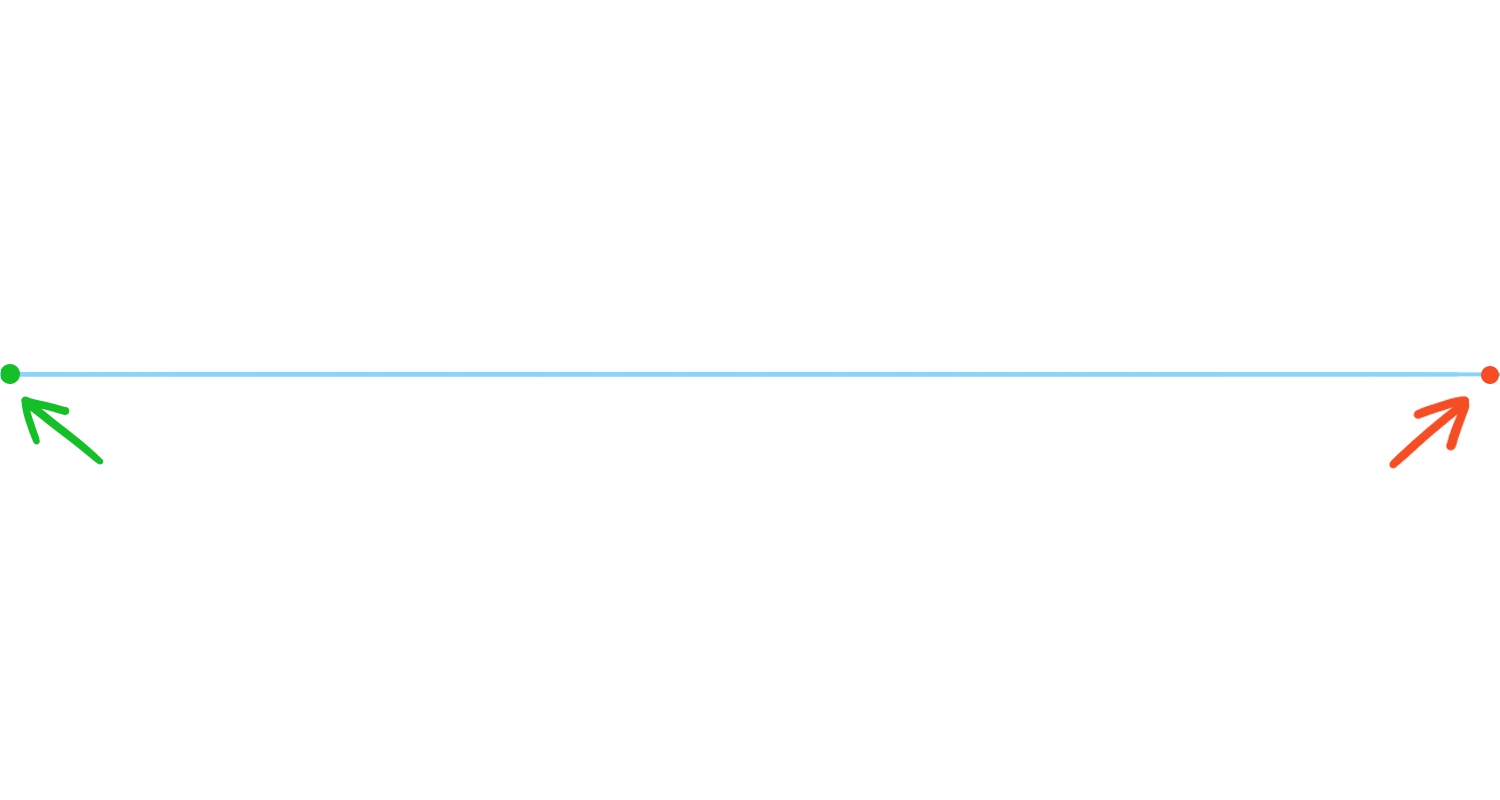
Choose the “Vanishing Point” snap and follow the steps I explained earlier to set the right mark as the vanishing point.
This will create a perspective guide like the one below.
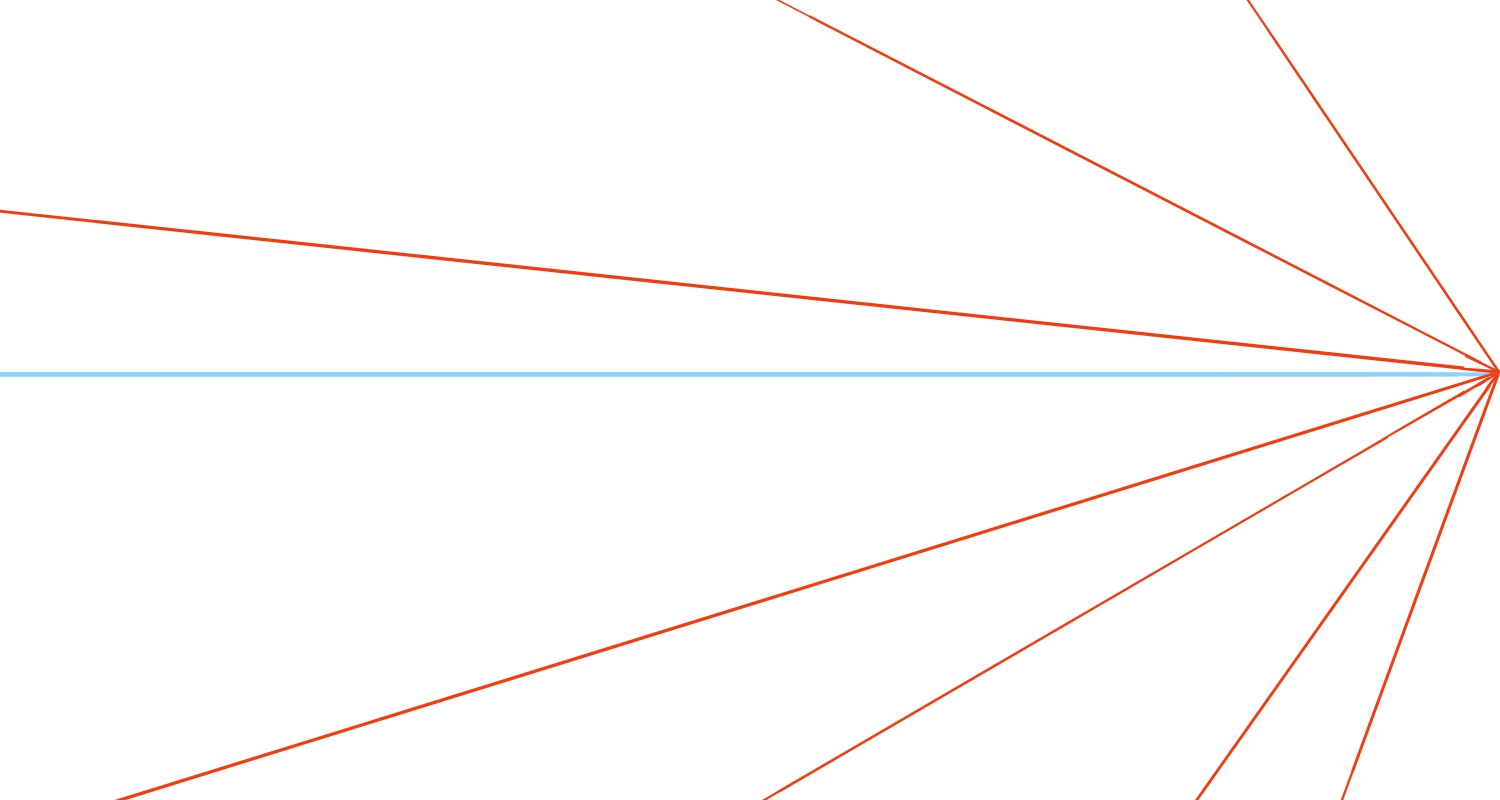
As long as this snap is displayed on the screen, you will be able to draw a straight line towards the vanishing point regardless of where you start to move the cursor.
You will want to reuse this perspective guide again so I will introduce the useful saving function!
Keep your snap displayed on the canvas and select “Save Snap…” from the bottom of the Snap tab of your menu bar.
There will be a small pop-up window to set the name for saving this snap so enter “Right”.
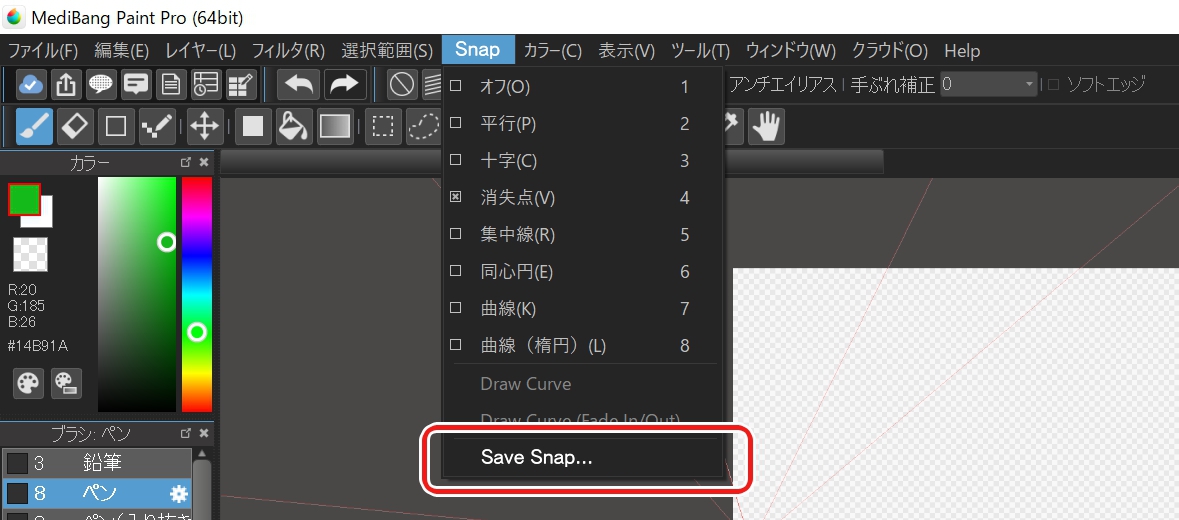
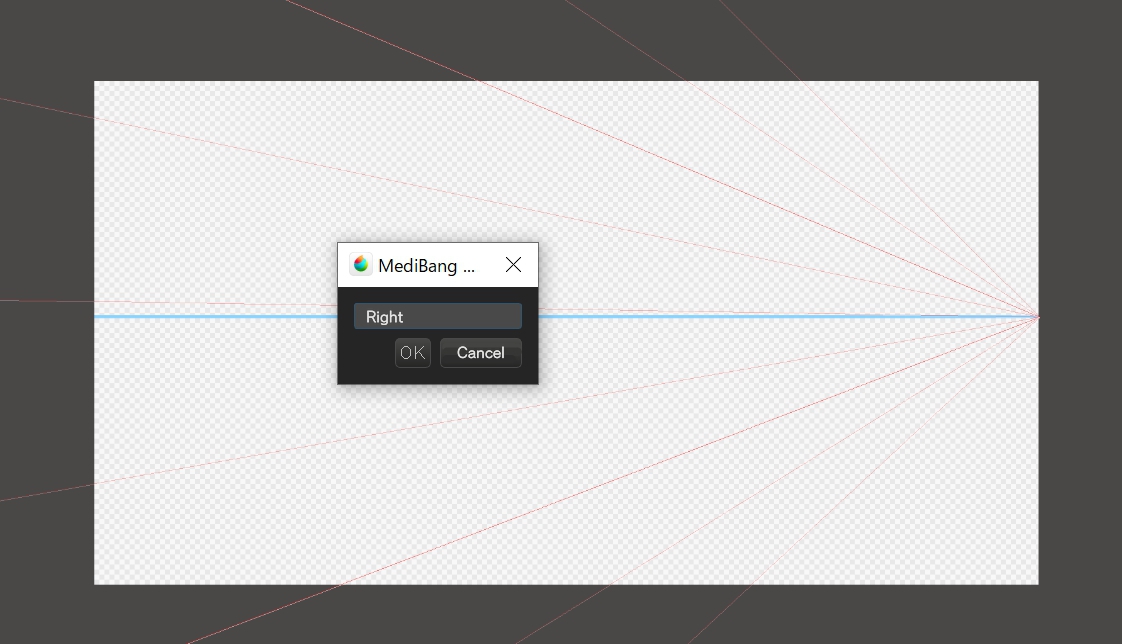
Then your newly saved Snap will appear inside the Snap tab, so click Off if you want to hide the snap and click your saved Snap from inside the Snap tab when you want to recall it.
Do the same for the “Left” vanishing point.
Then create a new layer and switch the snap to “Crisscross”.
Draw a vertical line in the center of the canvas as shown below.
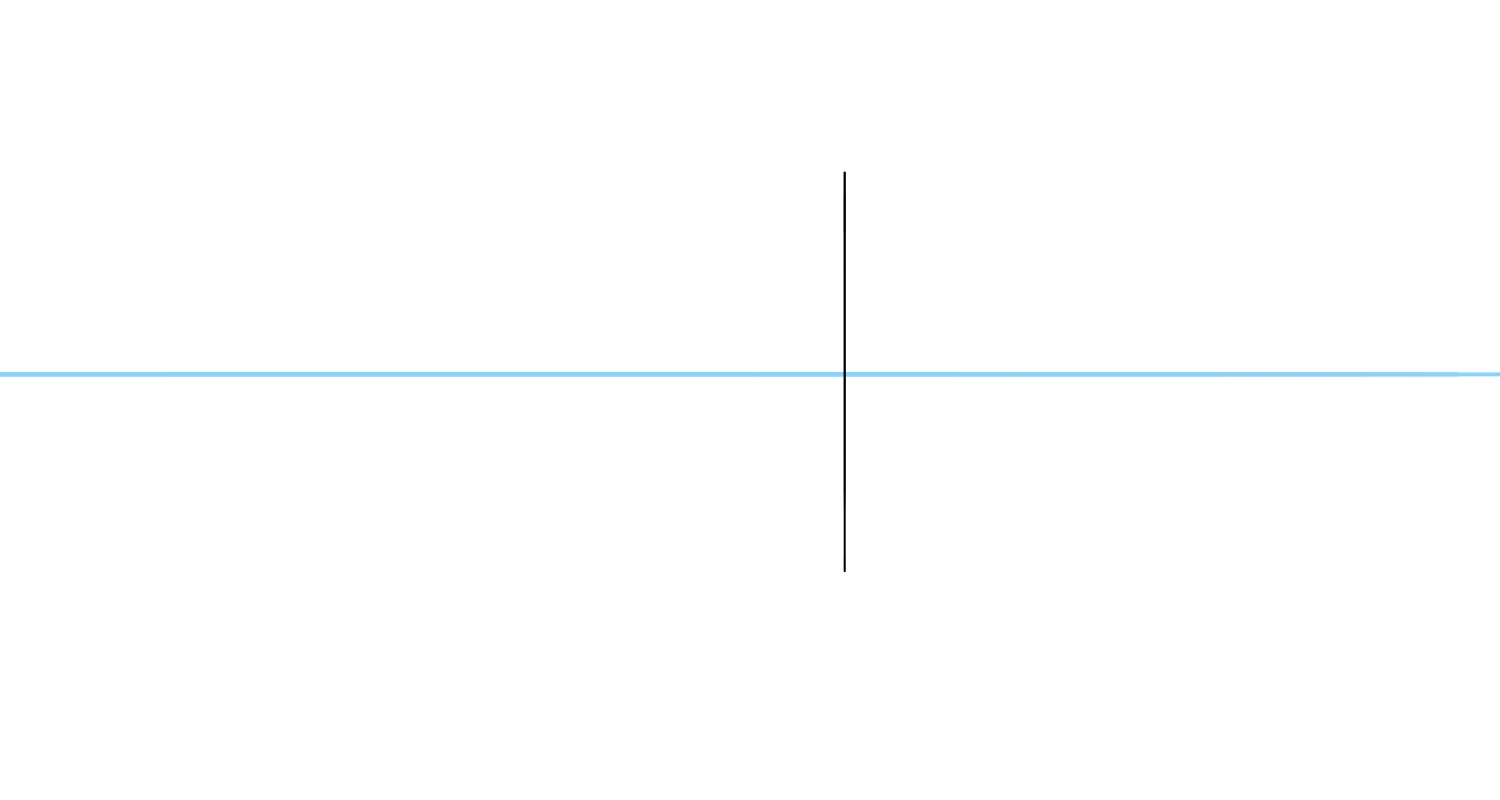
Call the “Right” snap back on your canvas.
From both the top and the bottom ends of the straight line, draw two lines towards the left.
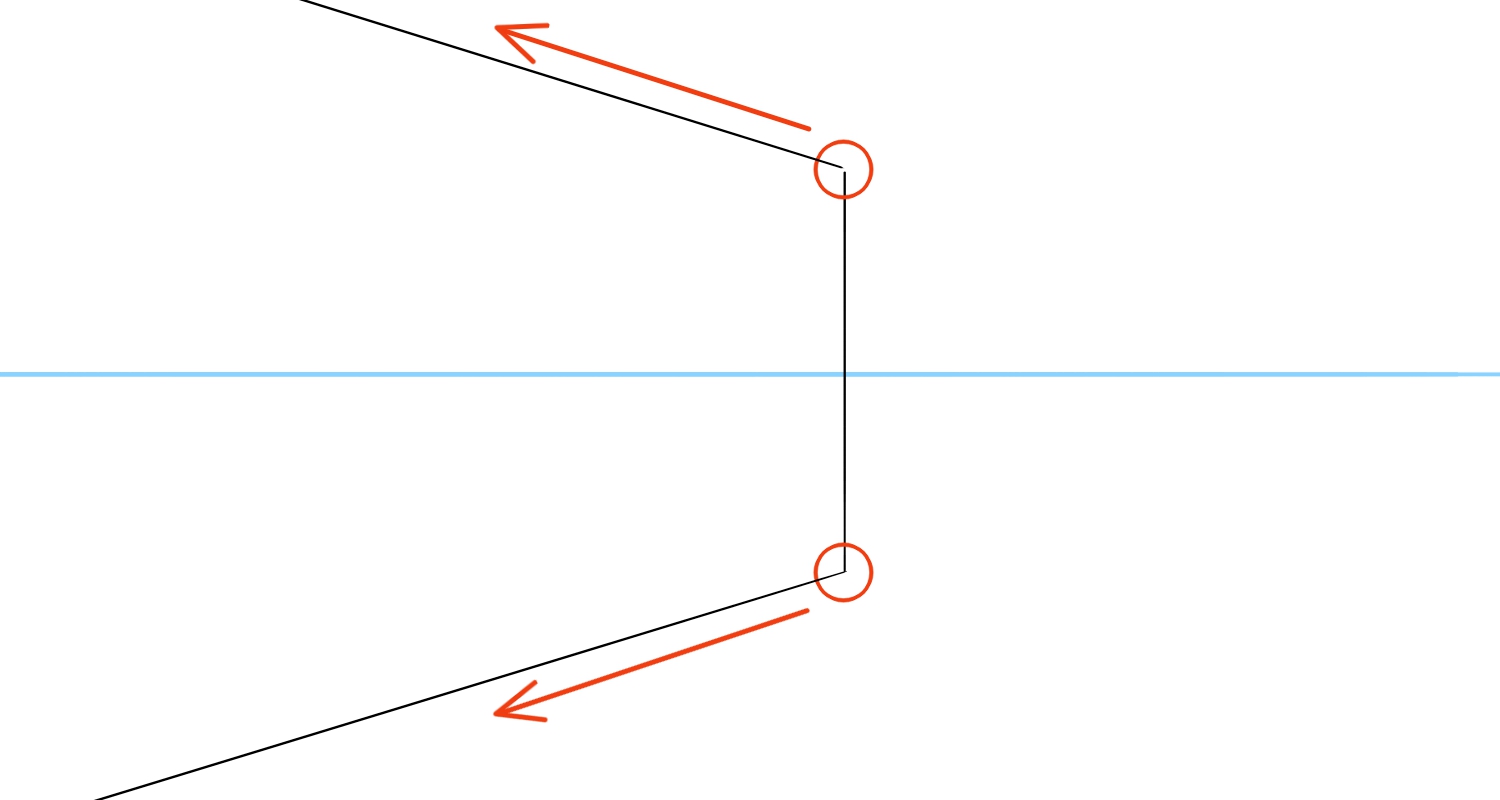
Call back the “Left” snap and draw the two lines now towards the right.
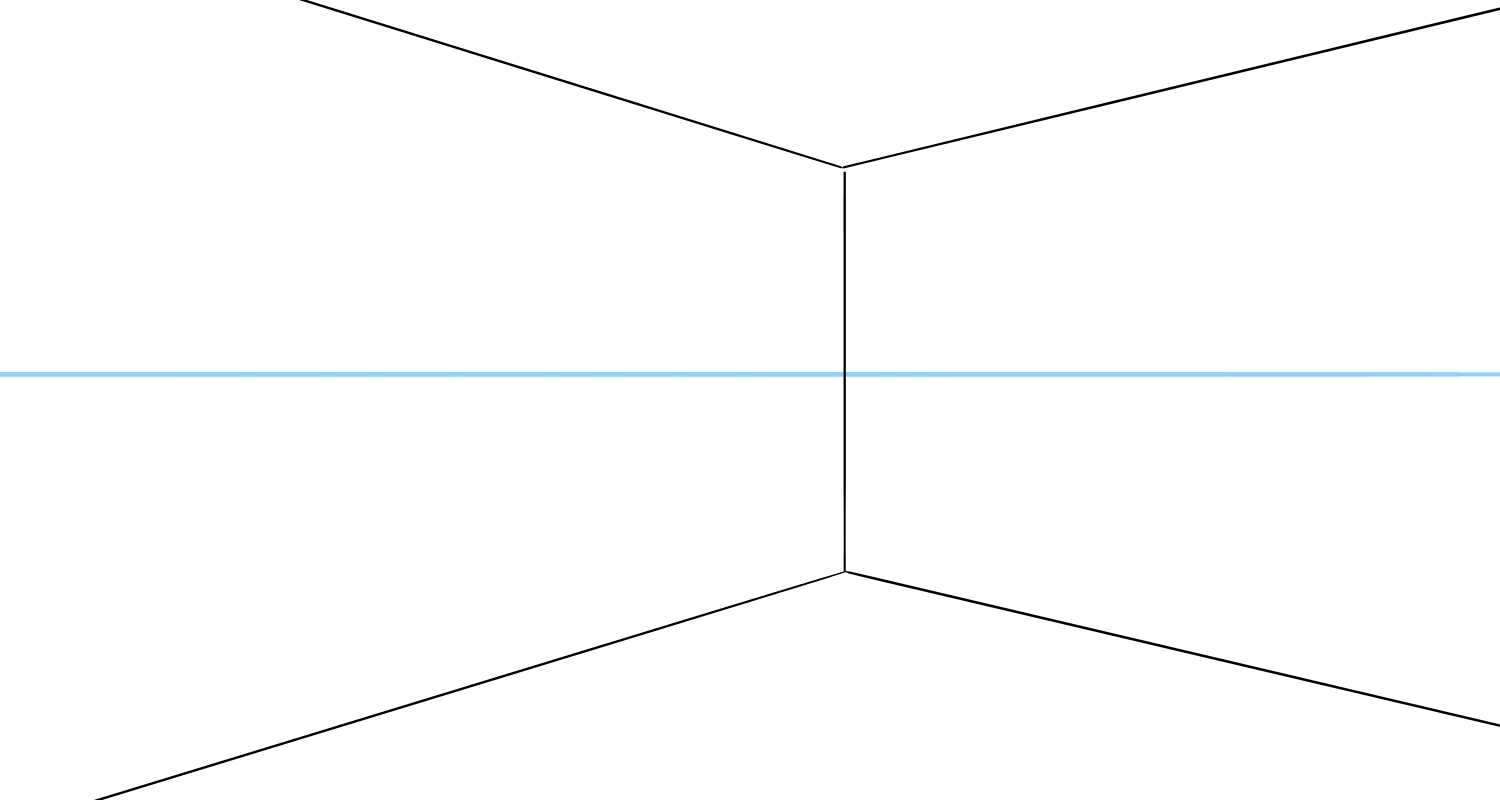
Now I have the walls ready.
I will then create another space on the left wall and a partition.
Let’s start with the latter.
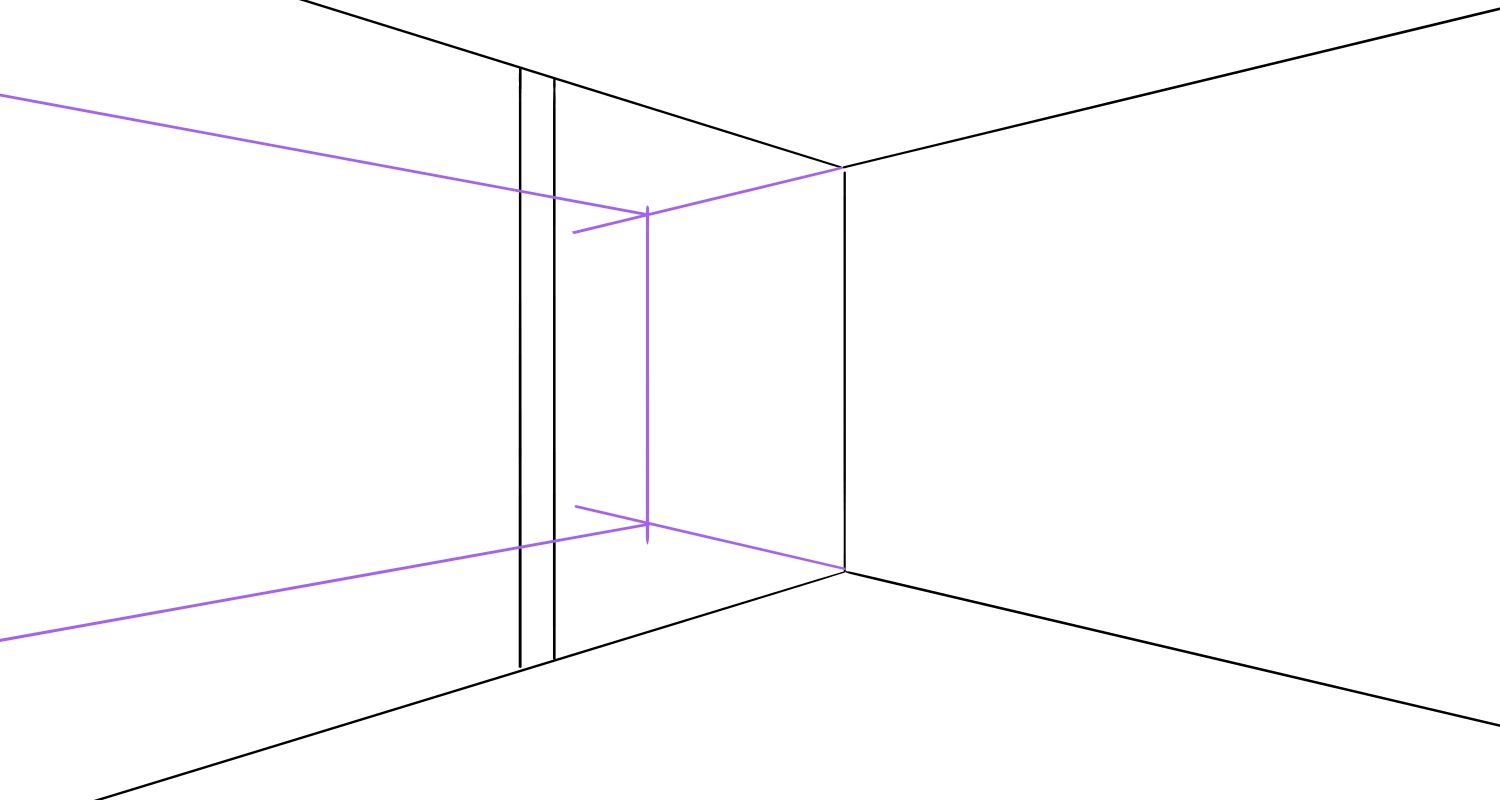
Switch the snap to “Crisscross” and draw two lines around the center of the left wall, where you want to divide for another space.
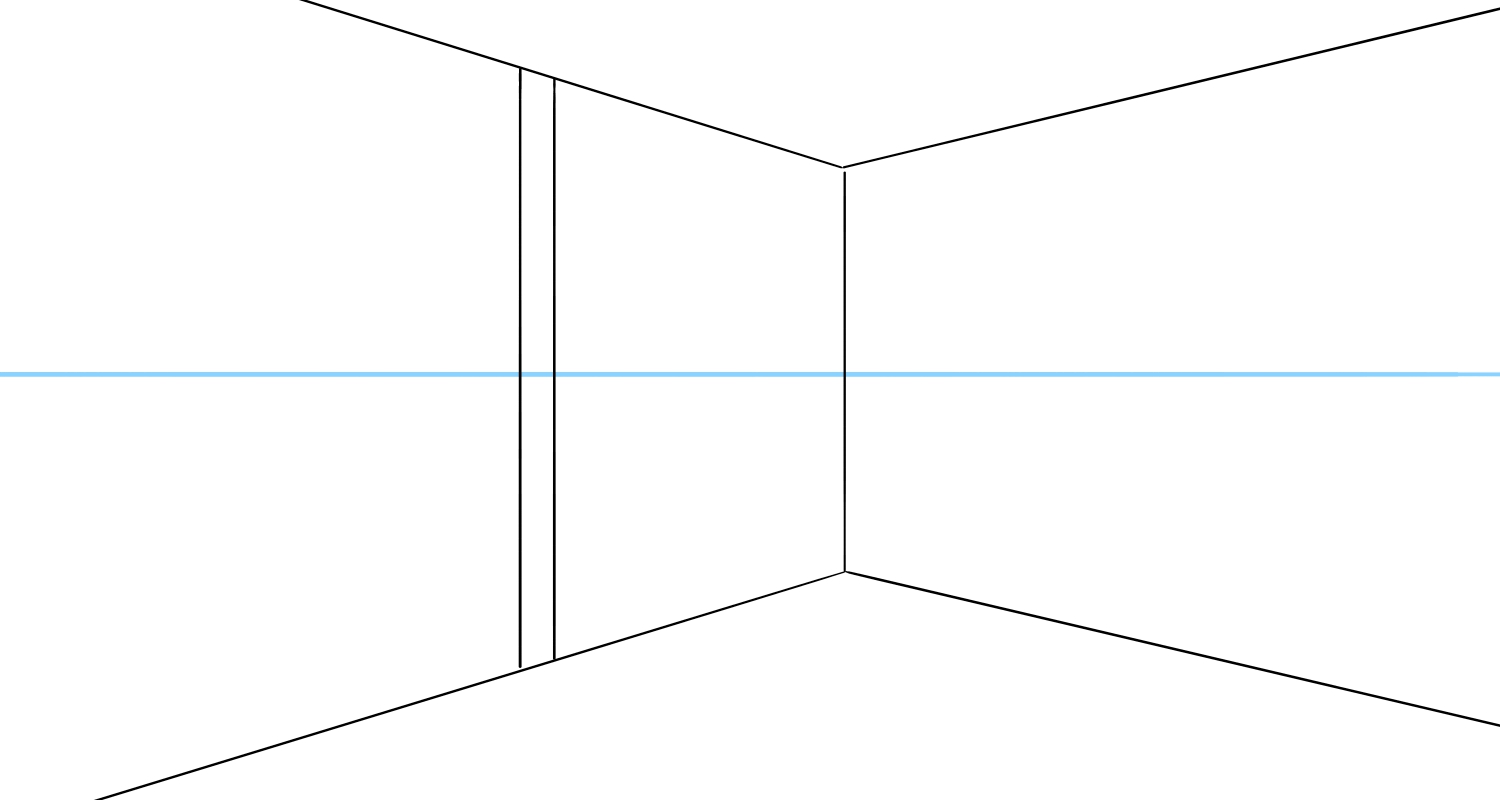
Next create a new layer and change your snap to “Left” to extend the two diagonal lines I drew earlier.
(I used a different color since this is a rough sketch on a new layer.)
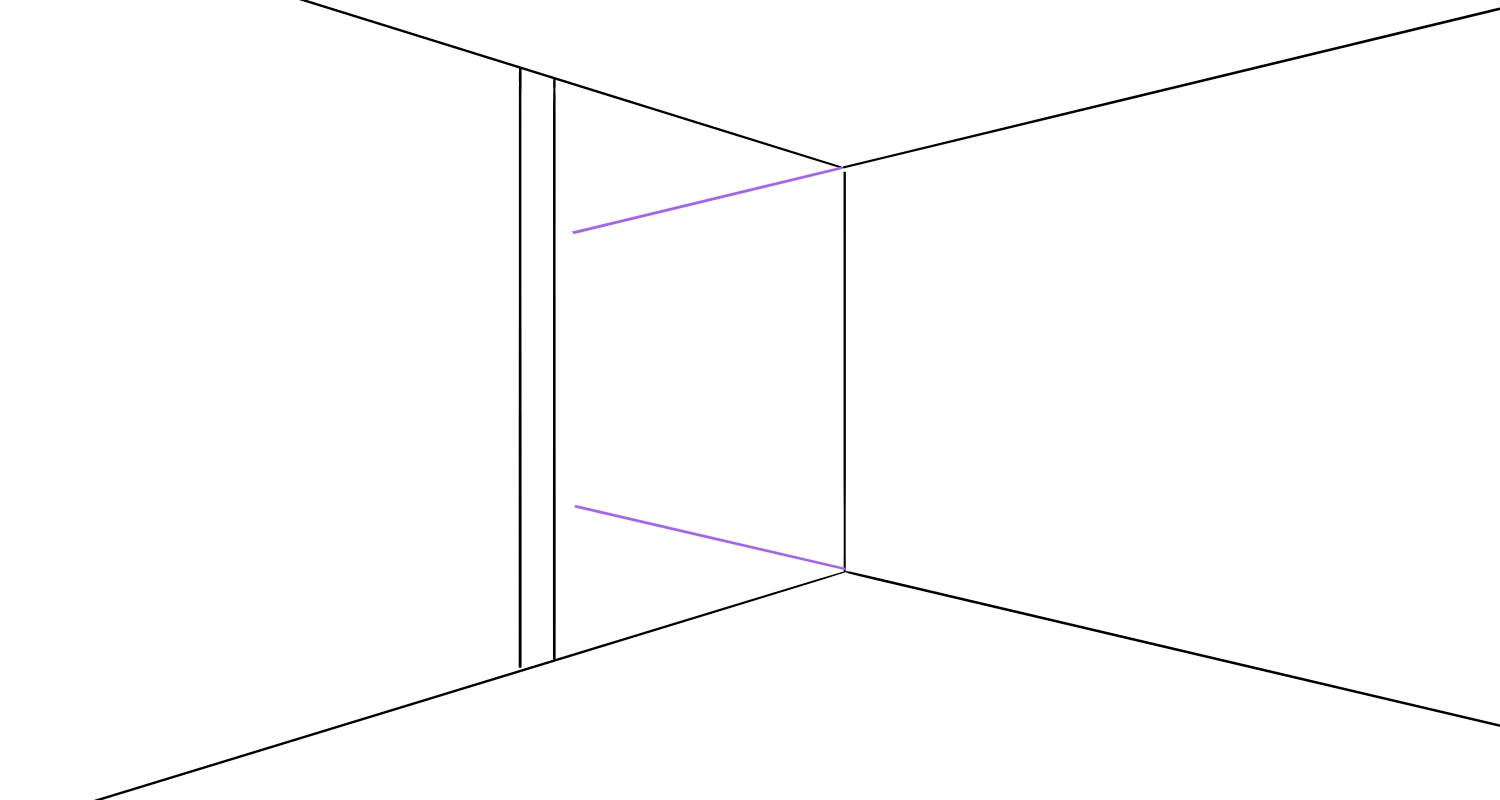
I’ve hidden the layer with the eye level so you can see each line clearly.
Use the “Crisscross” snap to draw a vertical line connecting the two extended lines from the two intersection points, use the “Right” snap to draw two lines toward the left.
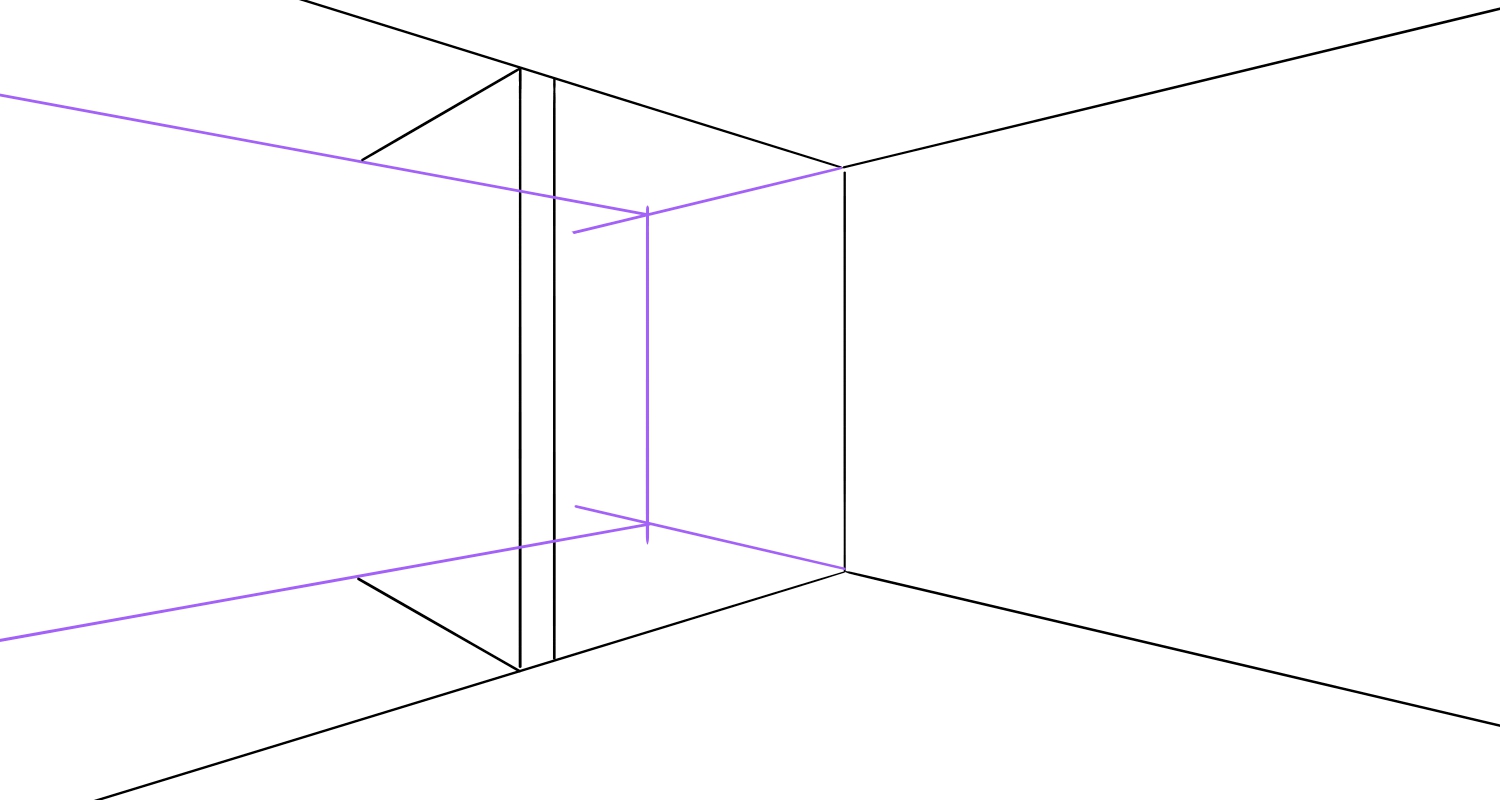
Return to the previous layer (with lines drawn in black).
Set your snap to “Left” and add two diagonal lines toward the purple lines as you can see below.
Now from these two intersections, use the “Crisscross” snap to draw a single vertical line across.
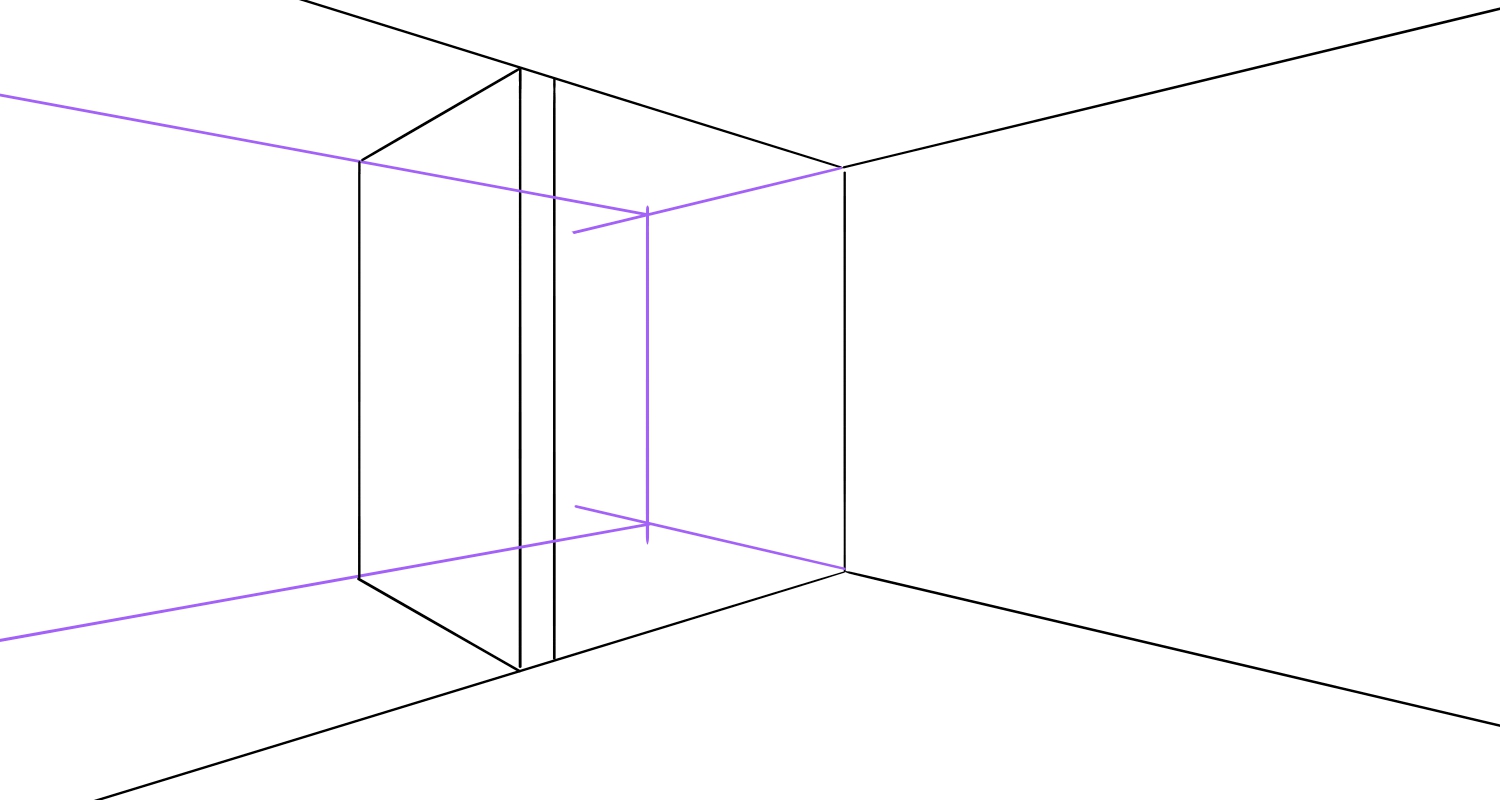
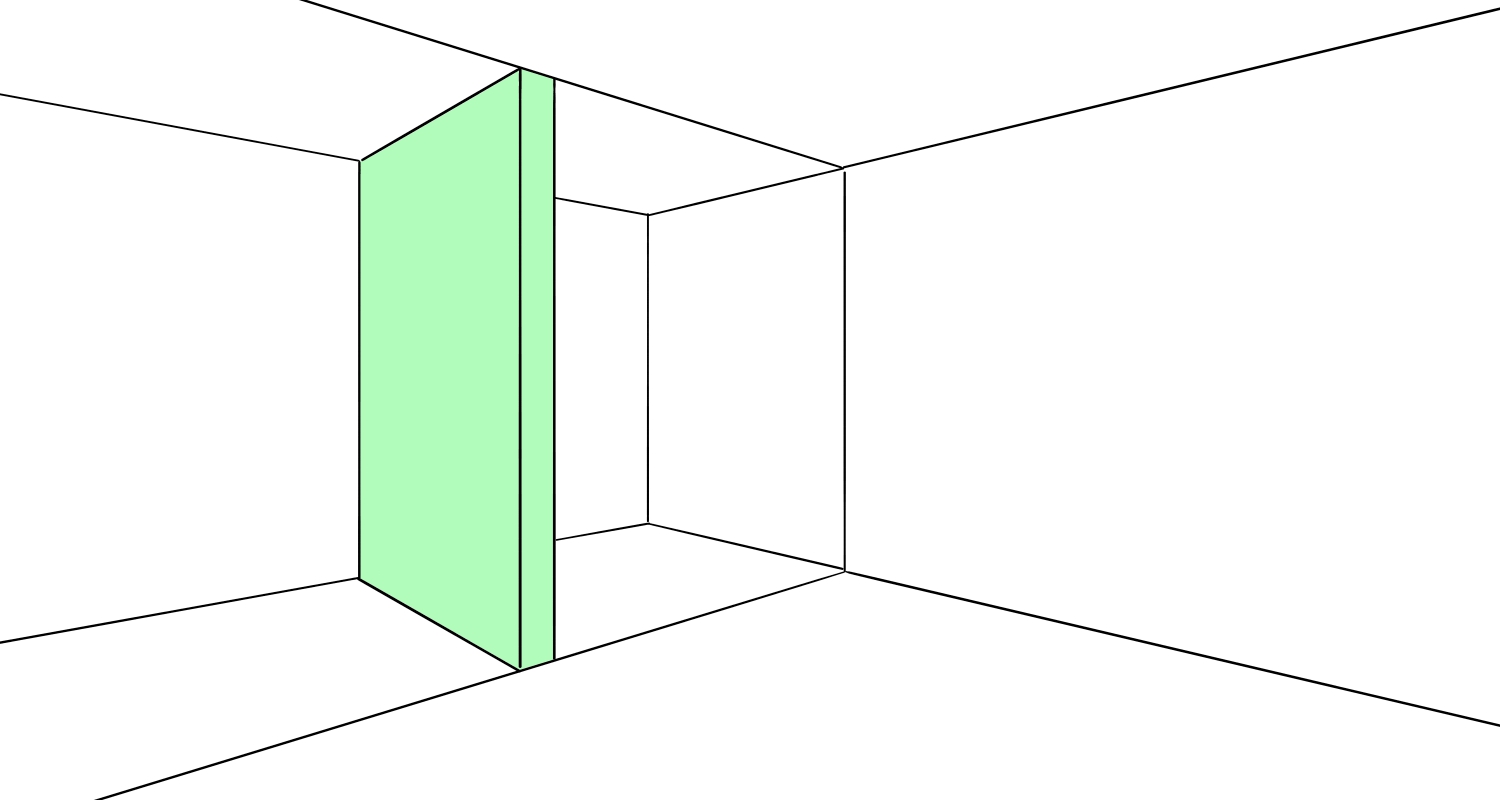
I’ve now created a partition wall (the green part below).
Once you trace the sketch lines, excluding this partition wall, the approximate layout of this room is complete!
Don’t forget to switch the snaps.
Now I will create a staggered wall shelf and a closet.
Draw the rough sketch again.
Return to the sketch layer and extend the two lines a bit, to draw in the sketch inside the partition wall from the intersection point.
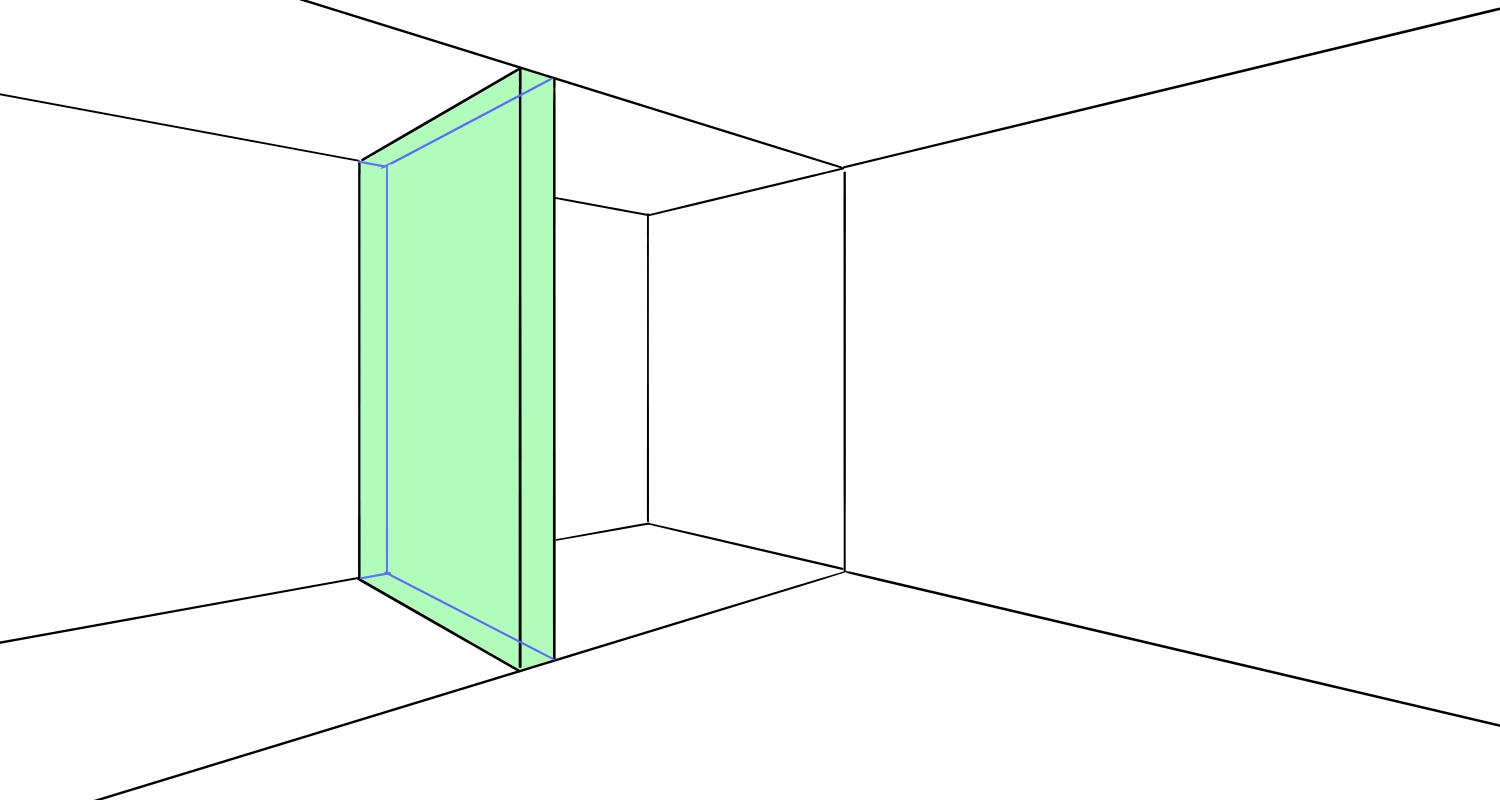
Now you can see that the partition wall looks like a transparent acrylic board.
Select the “Crisscross” snap again and draw a vertical line just as I did below.
The position doesn’t have to be exactly the same.
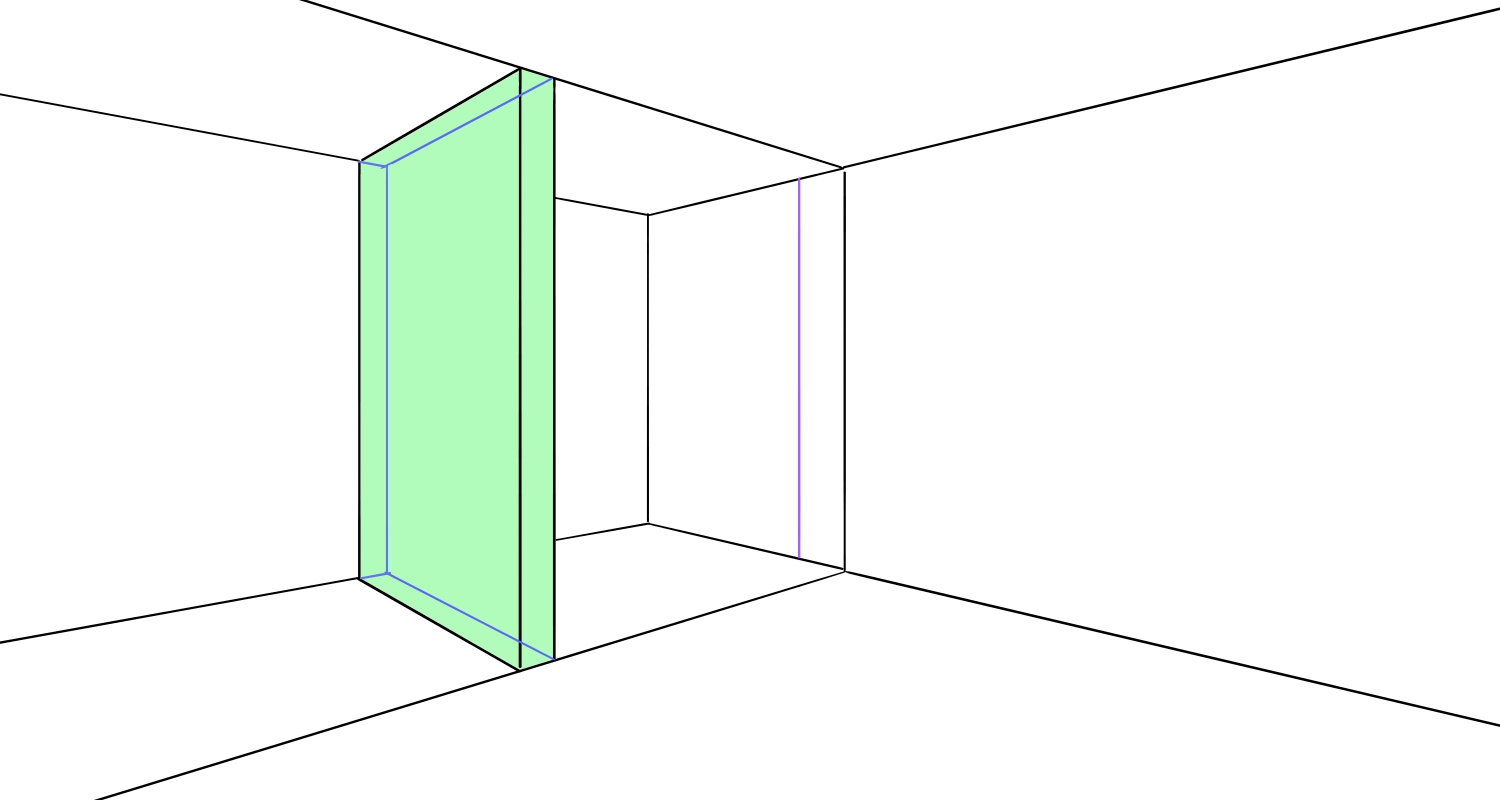
Using the “Right” snap, draw 8 lines from the vertical line as done in the image below.
You don’t have to be particular about the width here either.
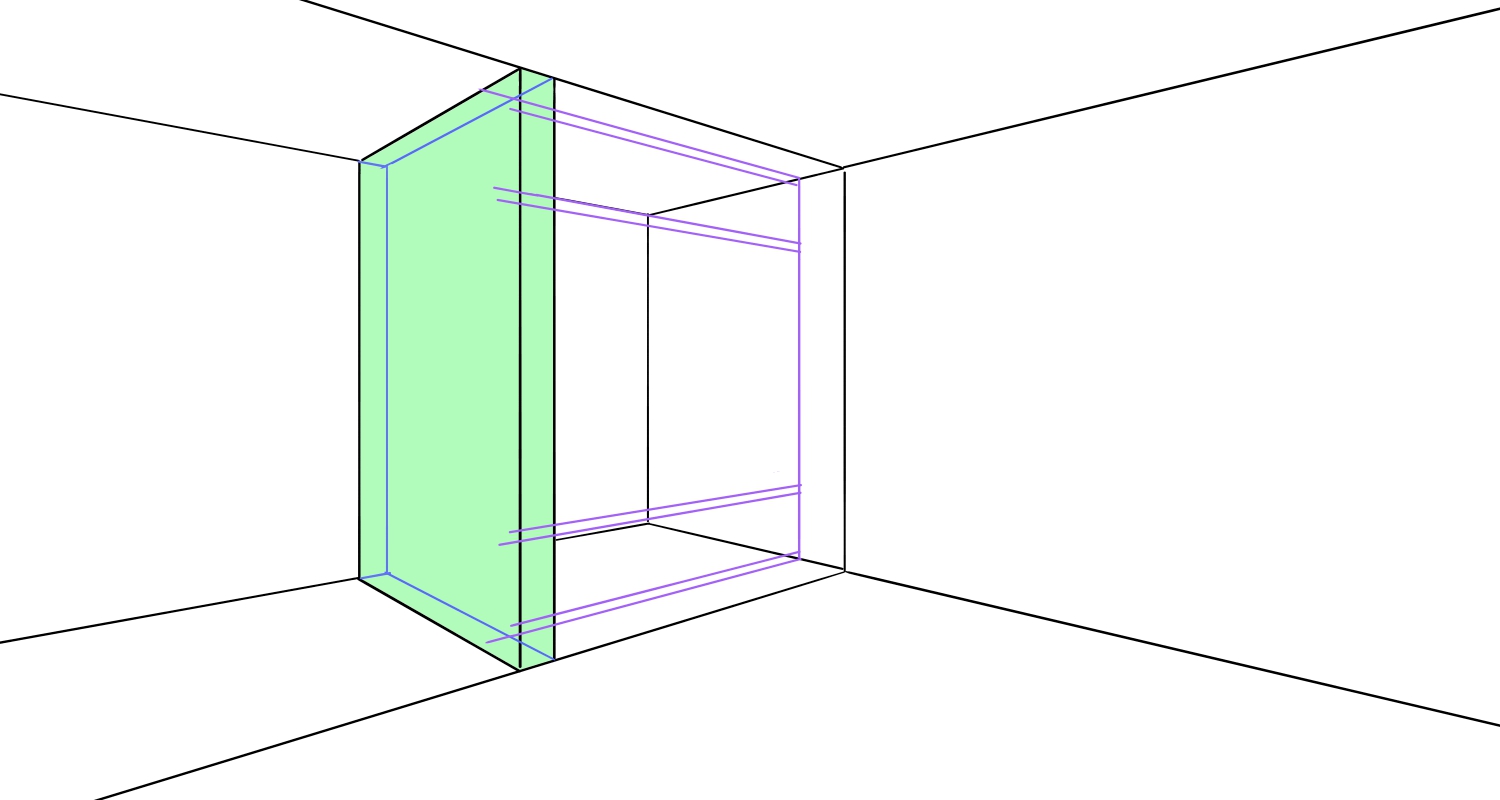
Draw a single vertical line from where the topmost of the 8 lines intersect with the sketch line on the partition wall, to where the bottommost line intersects with the same line.
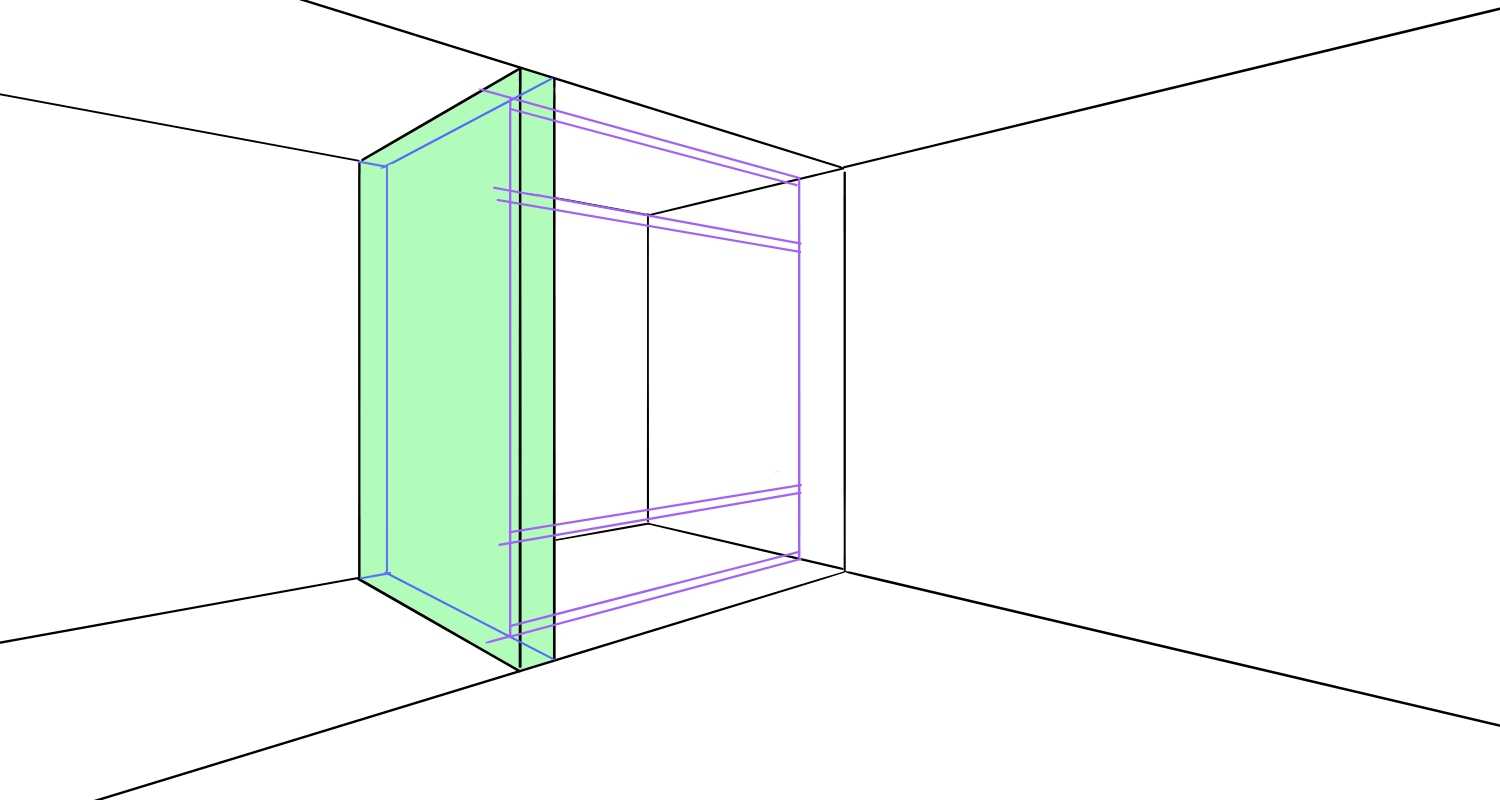
Use the 8 lines as the starting point and select the “Left” snap, use where these two touch the corner of the room as the starting point for lines to be drawn using the “Right” snap.
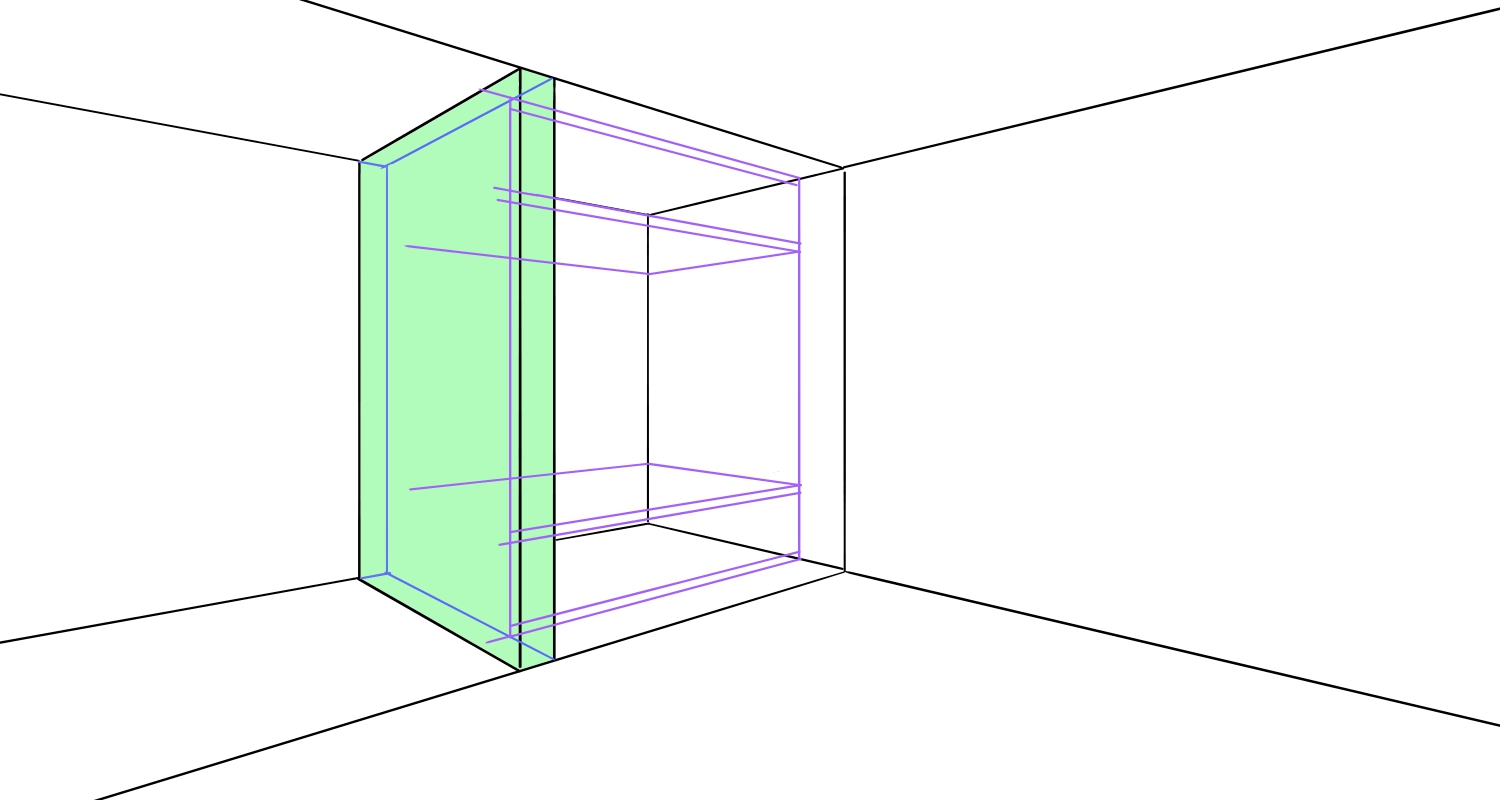
Now, use the “division” method to separate the blue parts into four.
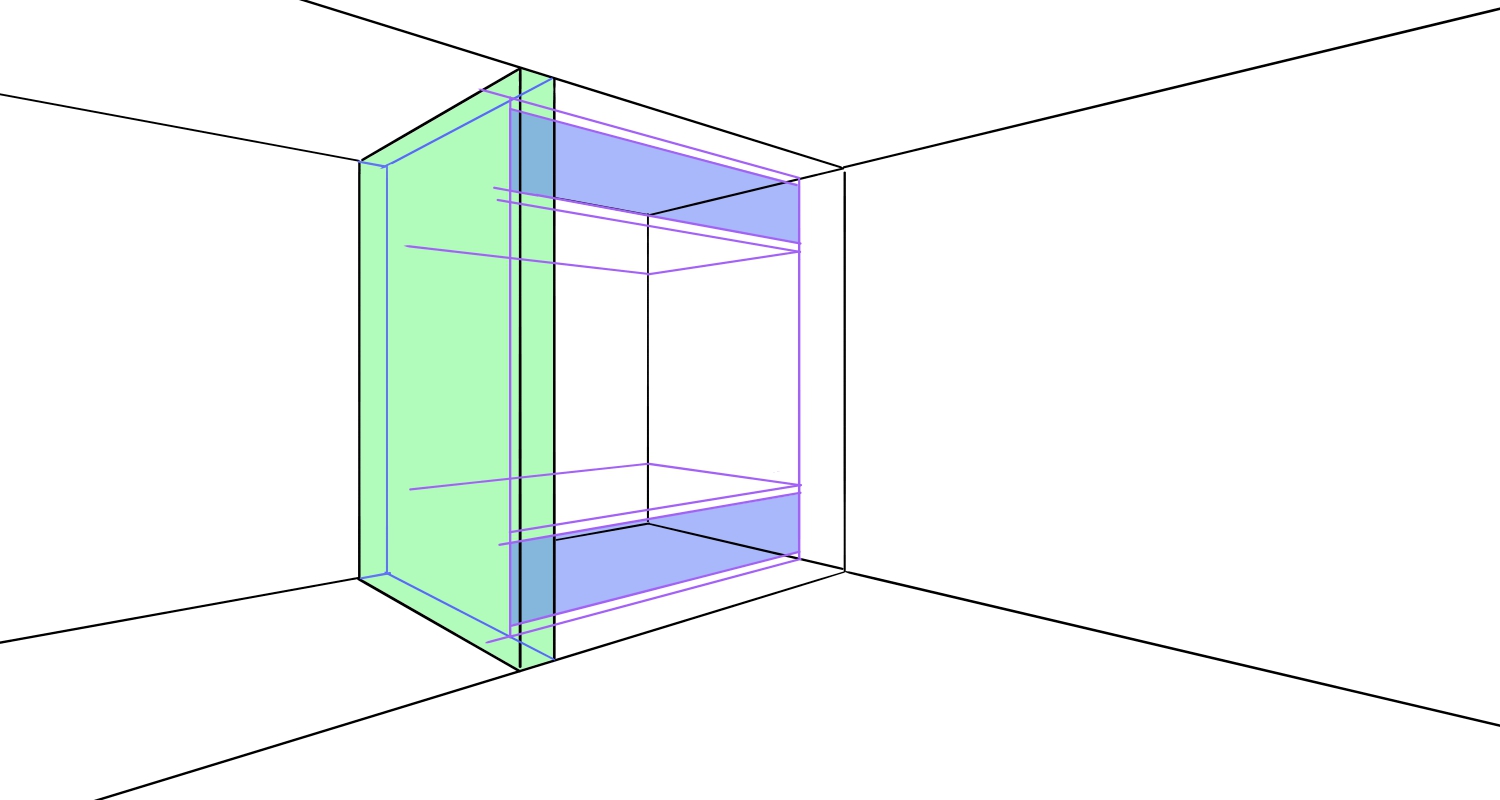
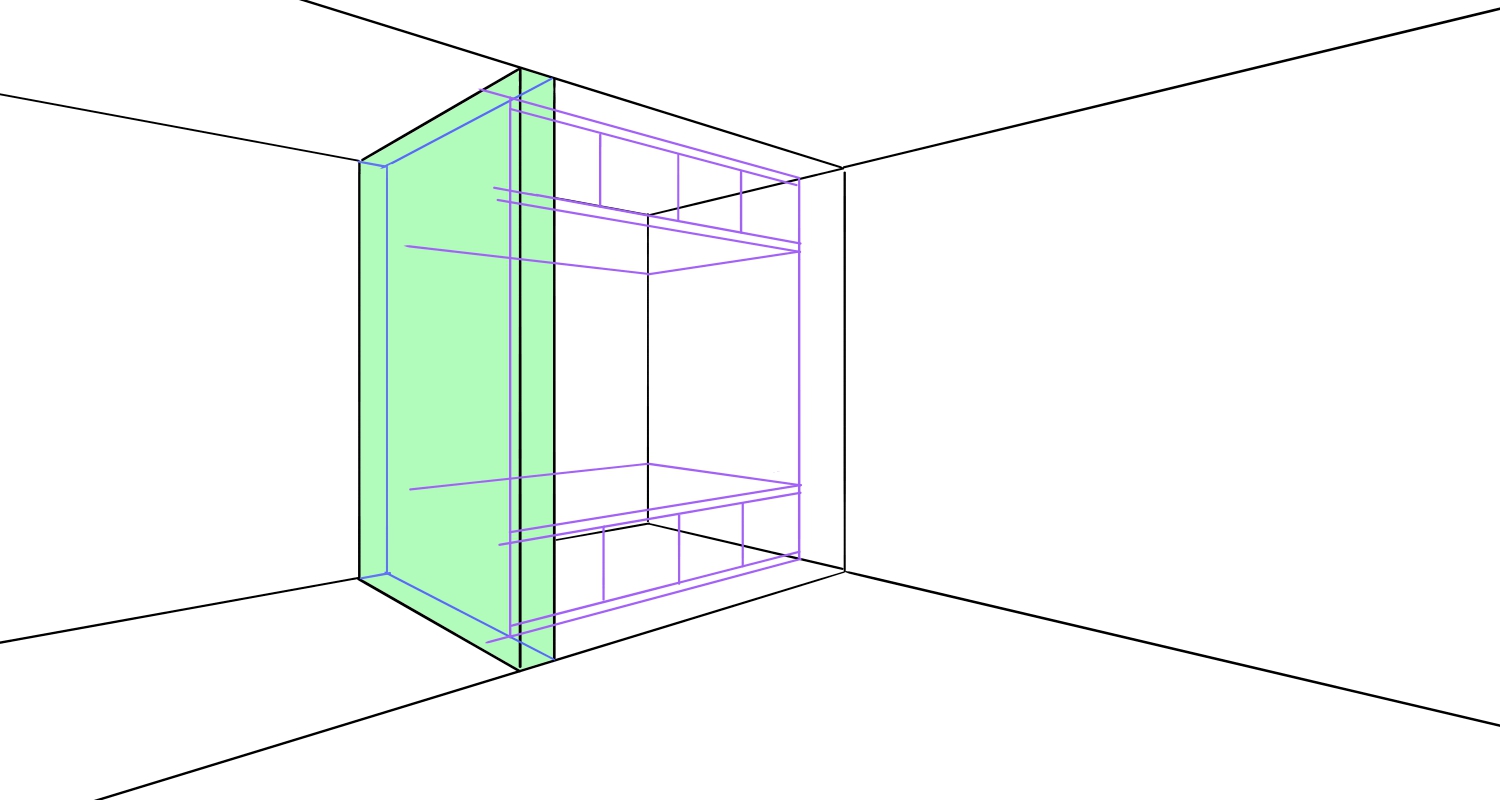
《What is the “Division” Method?》
【Basic】How to split a shape using the Division Method
https://medibangpaint.com/en/use/2021/12/how-to-split-a-shape/
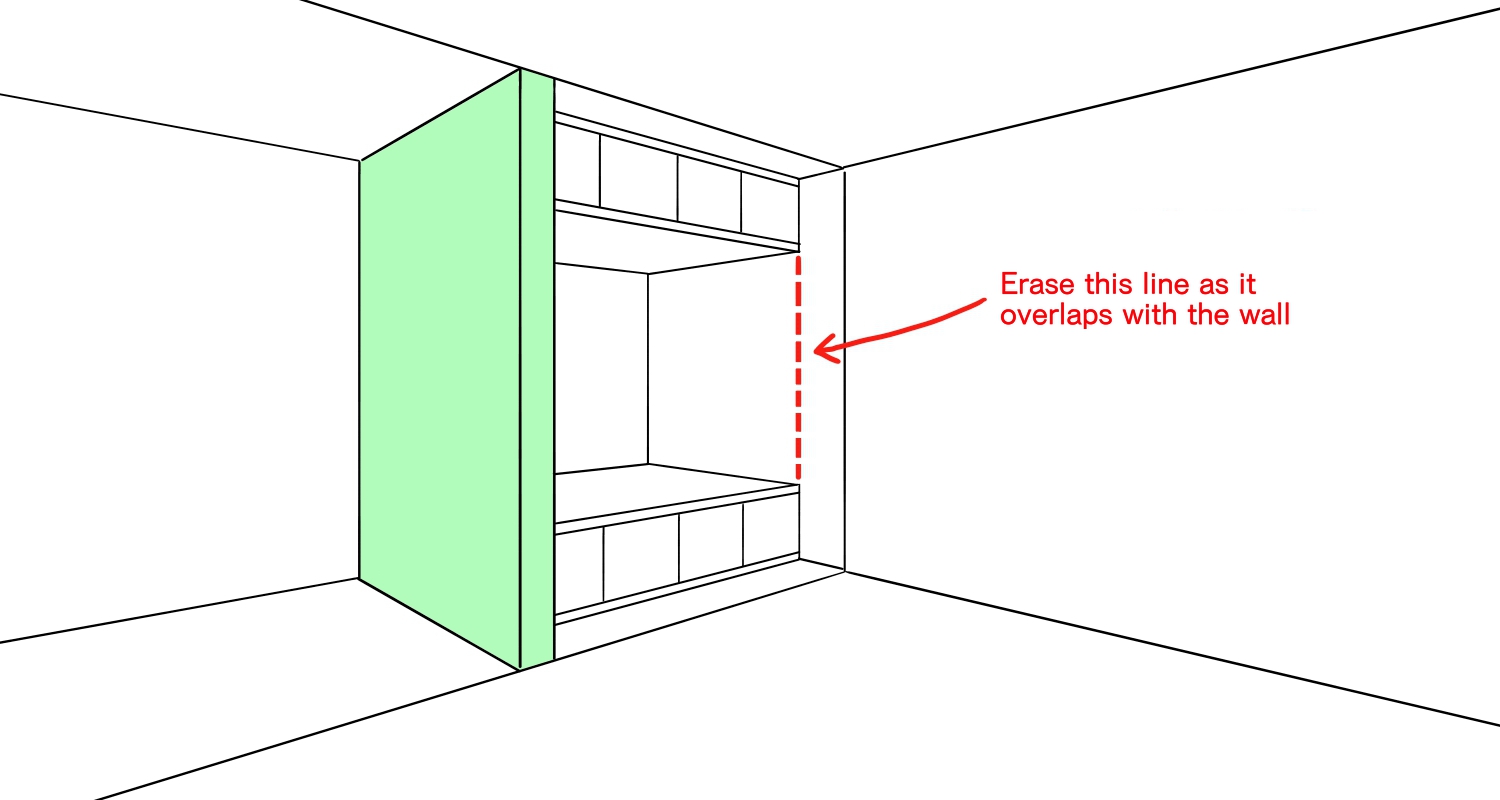
Then create a new layer again to trace the lines cleanly, except for the green parts on the partition wall.
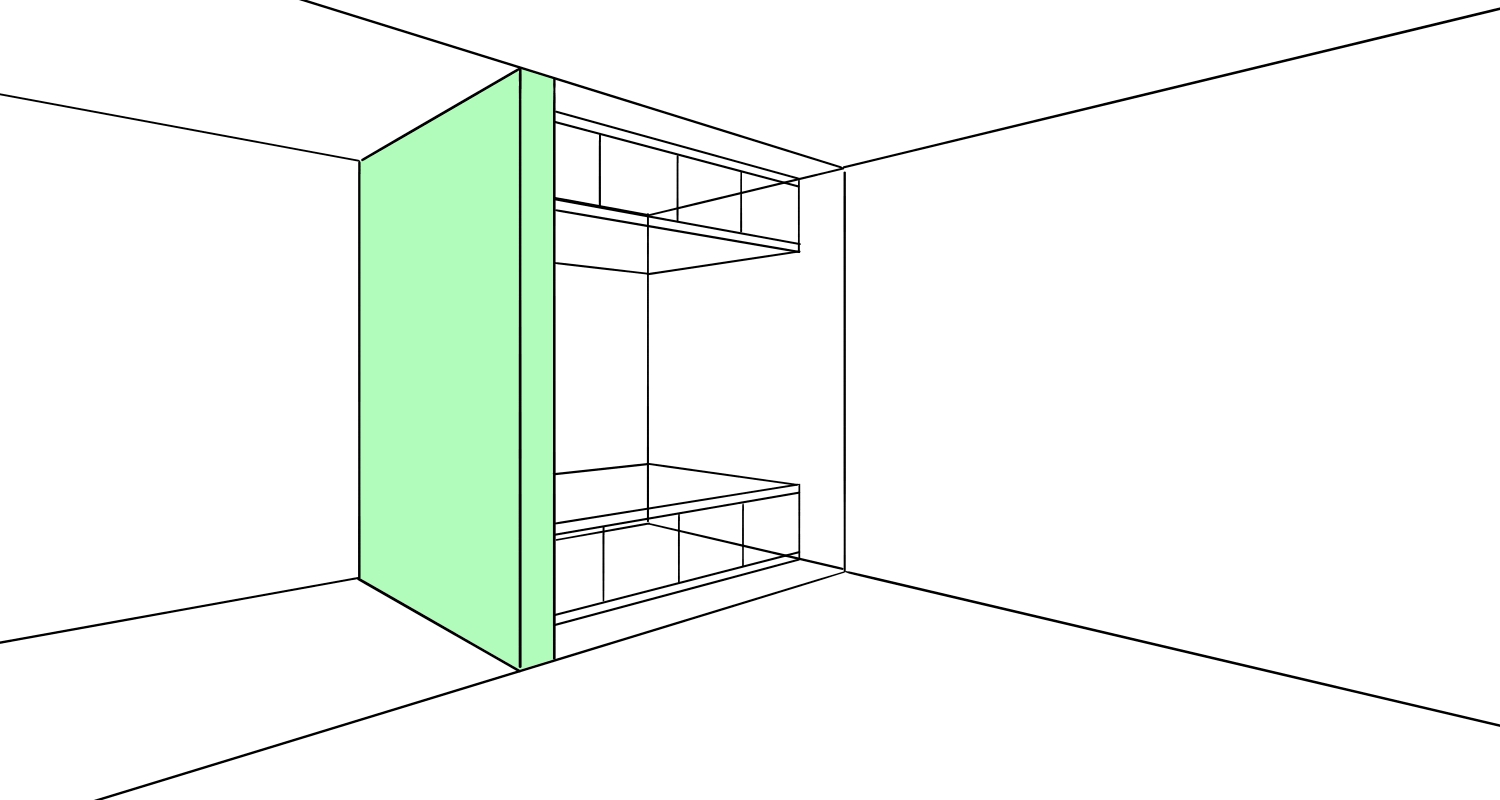
This is how it looks when I erase the line (inside the layout layer) overlapping with the closet.
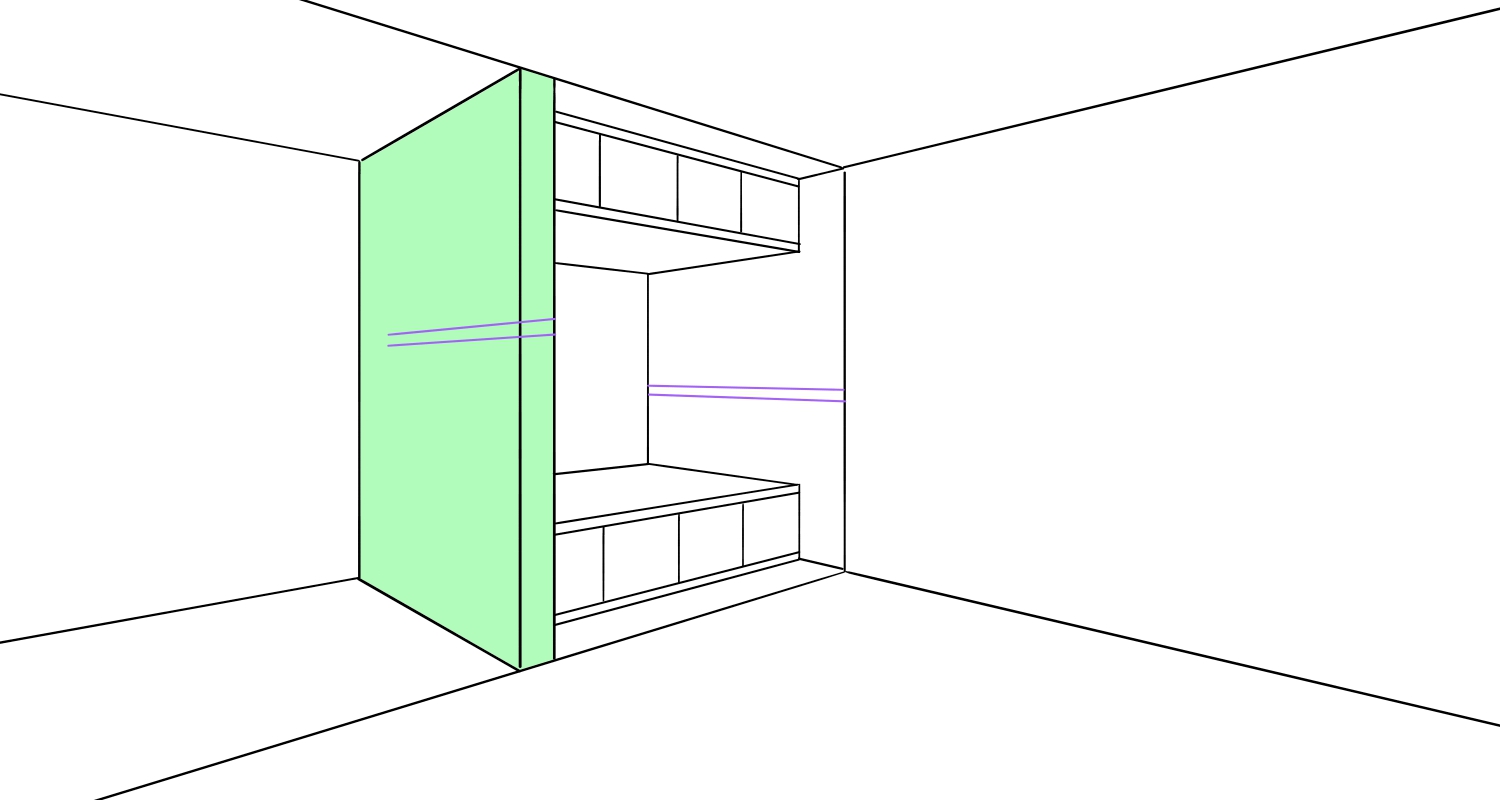
Next is the staggered shelf.
Go to the rough sketch layer again and use the “Left” snap to draw four diagonal lines as shown below.
The position and the width do not have to be accurate.
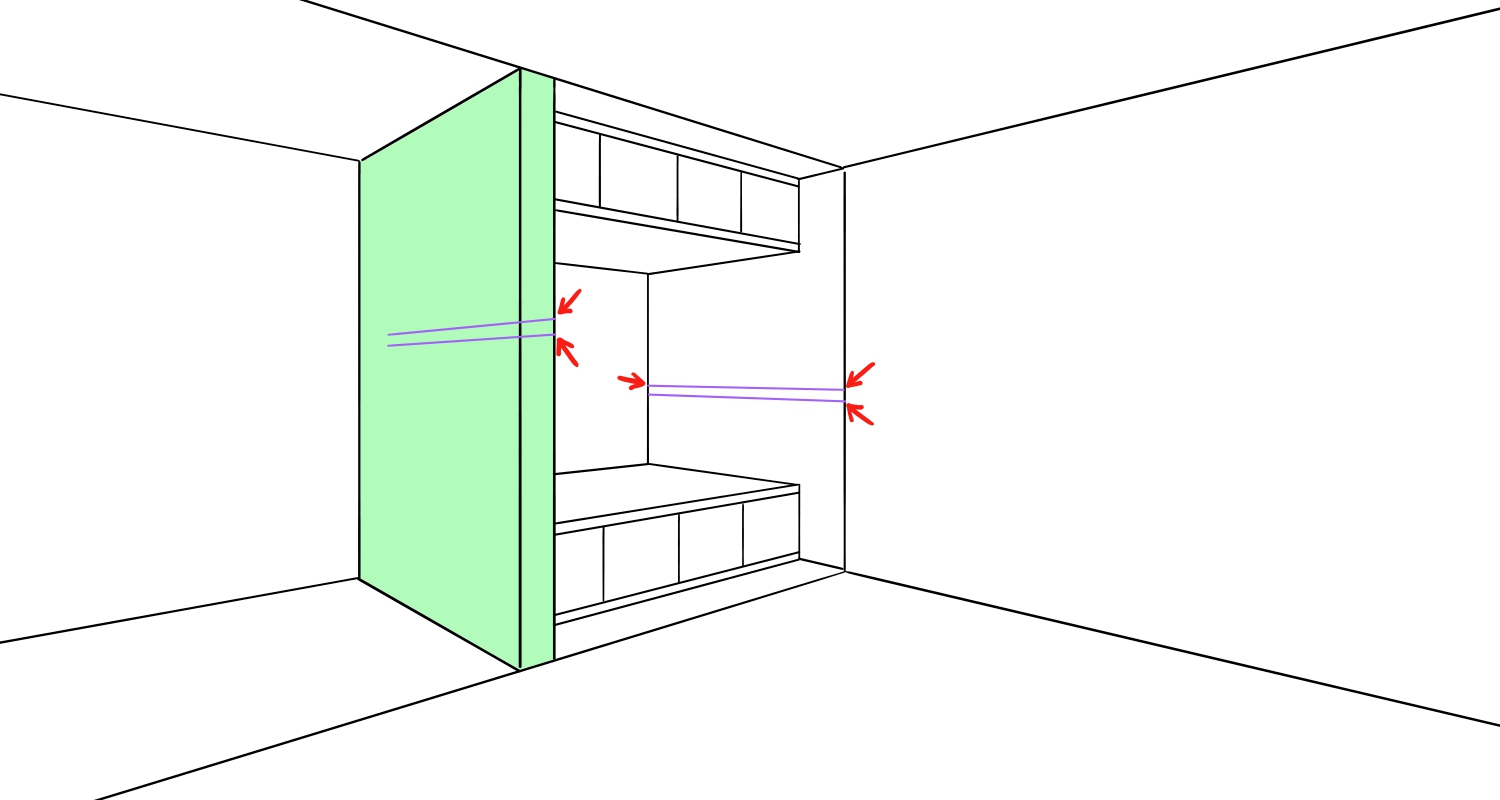
Switch your snap to “Right” and draw five lines starting from the points guided by the red arrows. The length doesn’t matter.
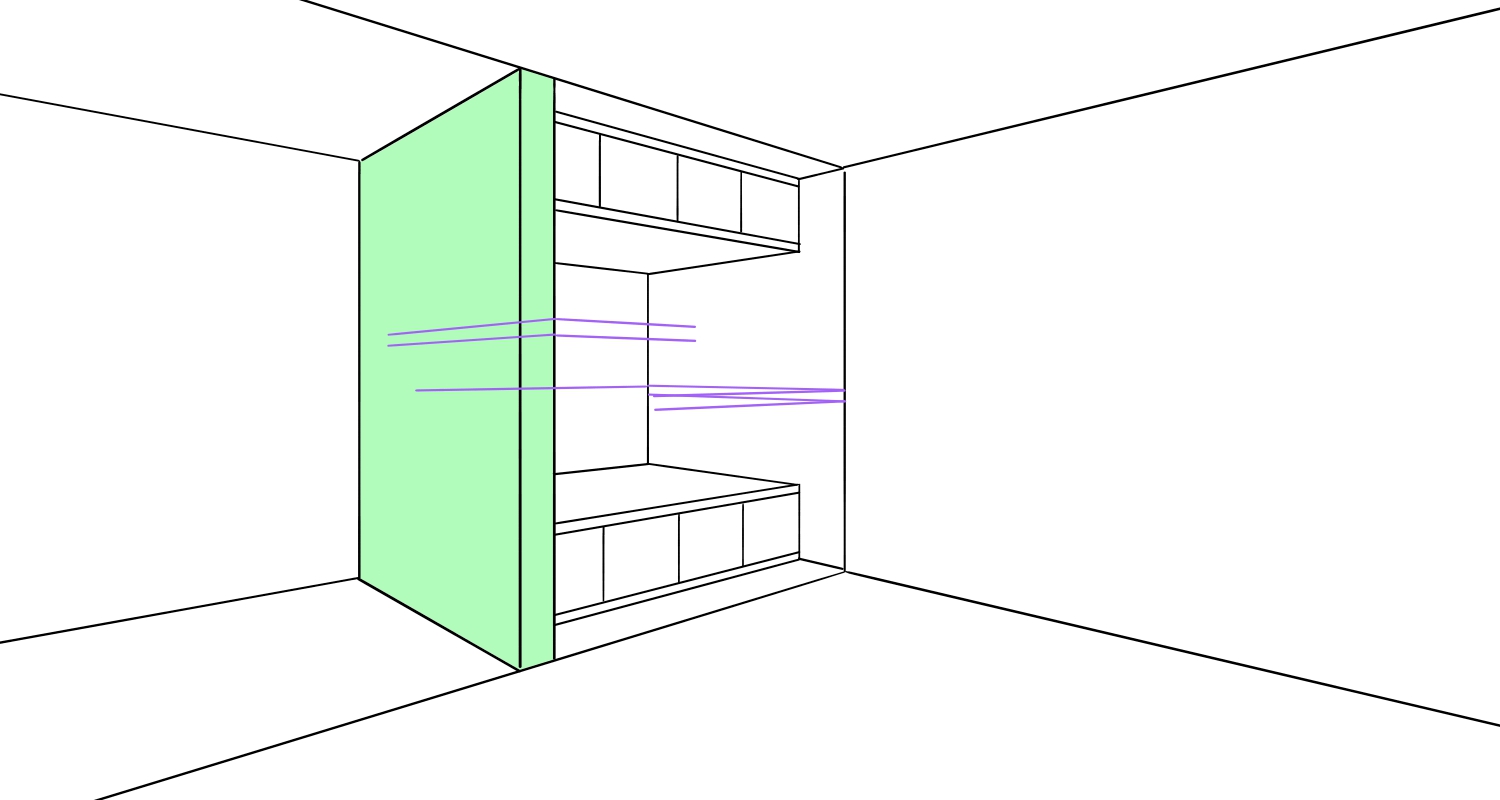
I don’t know if you can see it clearly but draw a short vertical line inside the part enclosed in the red circles.
Use the “Crisscross” snap once again.
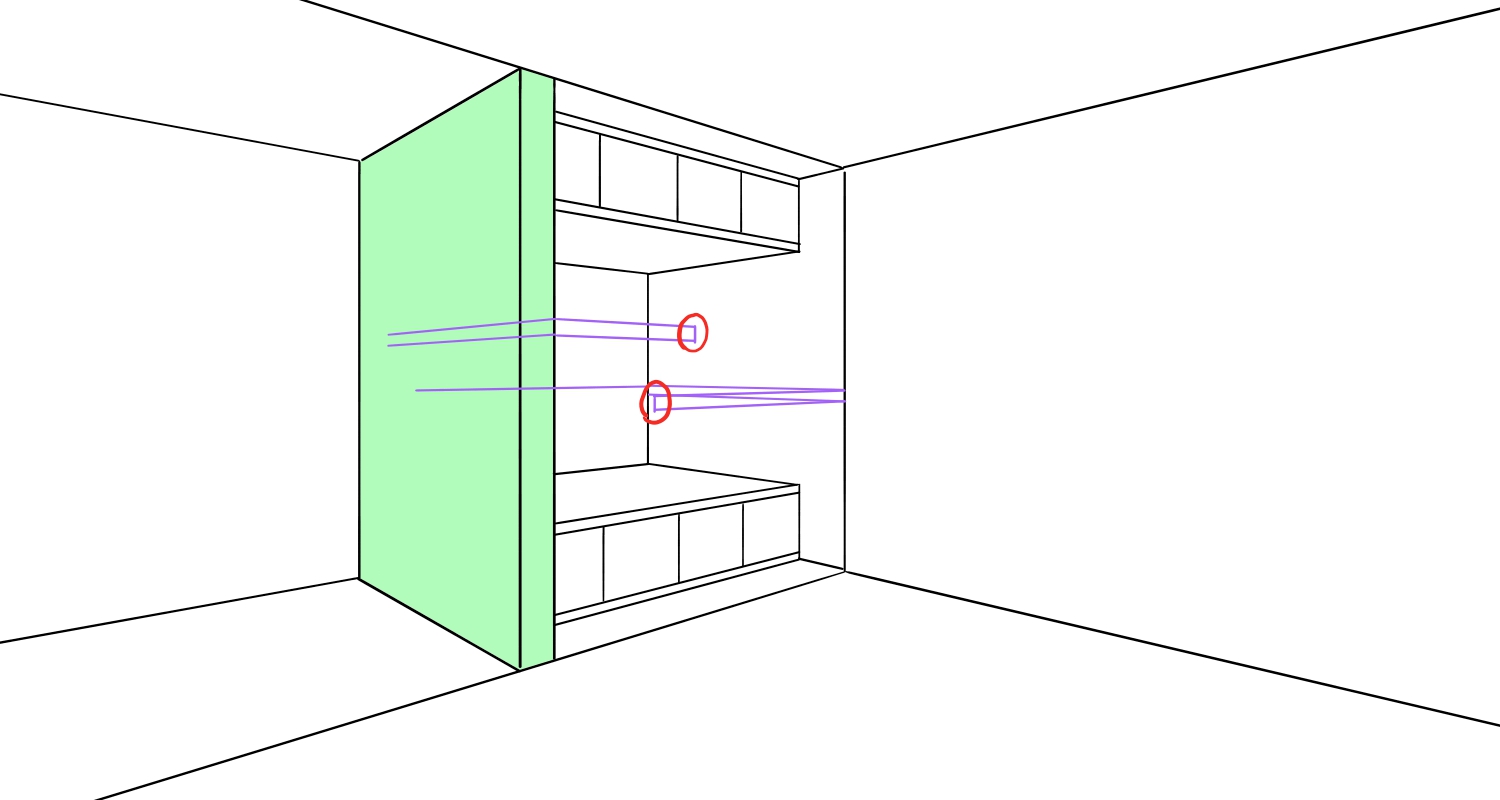
Switch to the “Left” snap and draw three lines from the corners pointed by the red arrows.
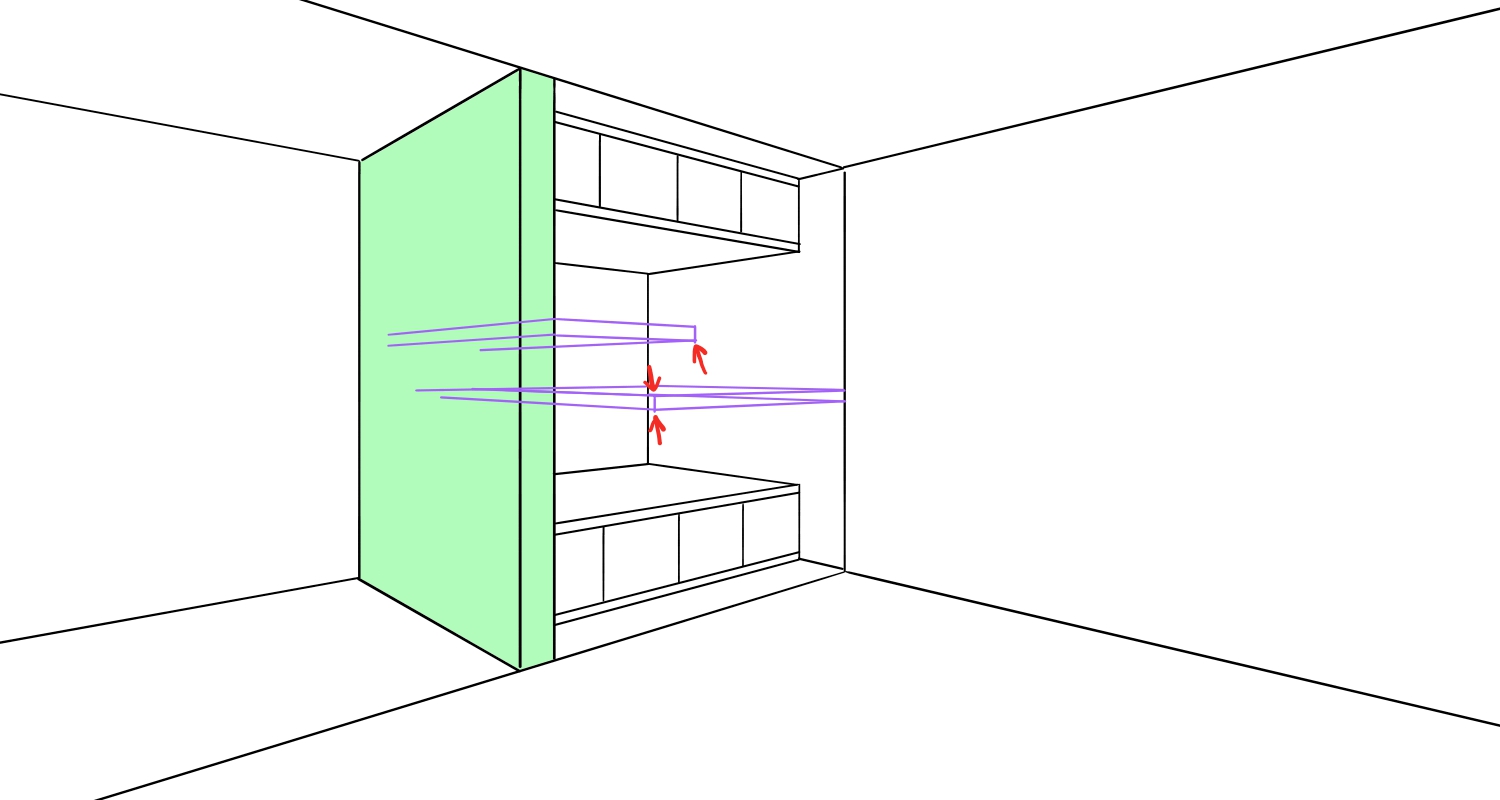
The rough sketch is done so start inking in the new layer.
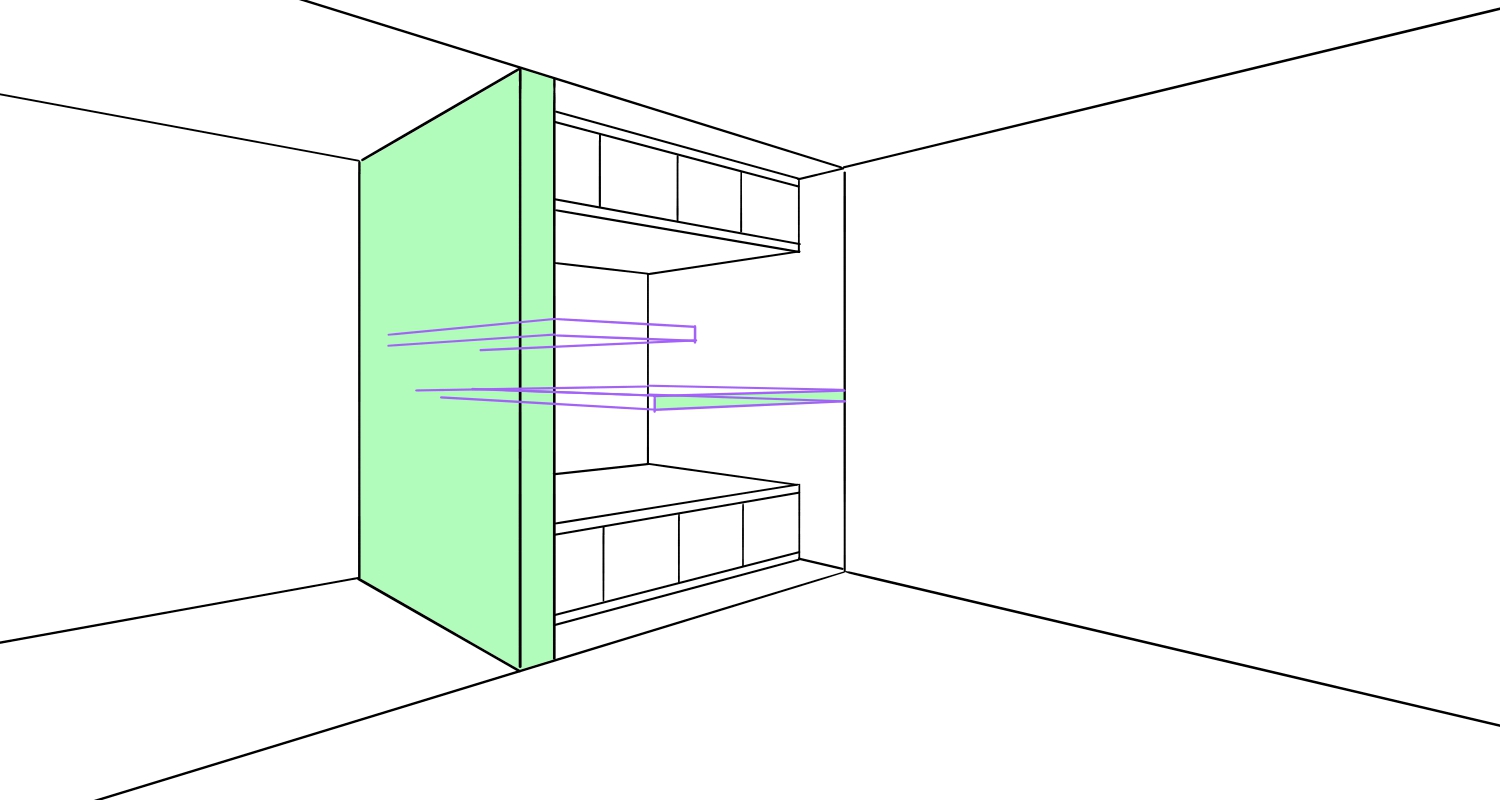
Excluding the inside of the green partition wall above, trace your rough sketch.
Return to the sketch layer and erase the overlapping parts.
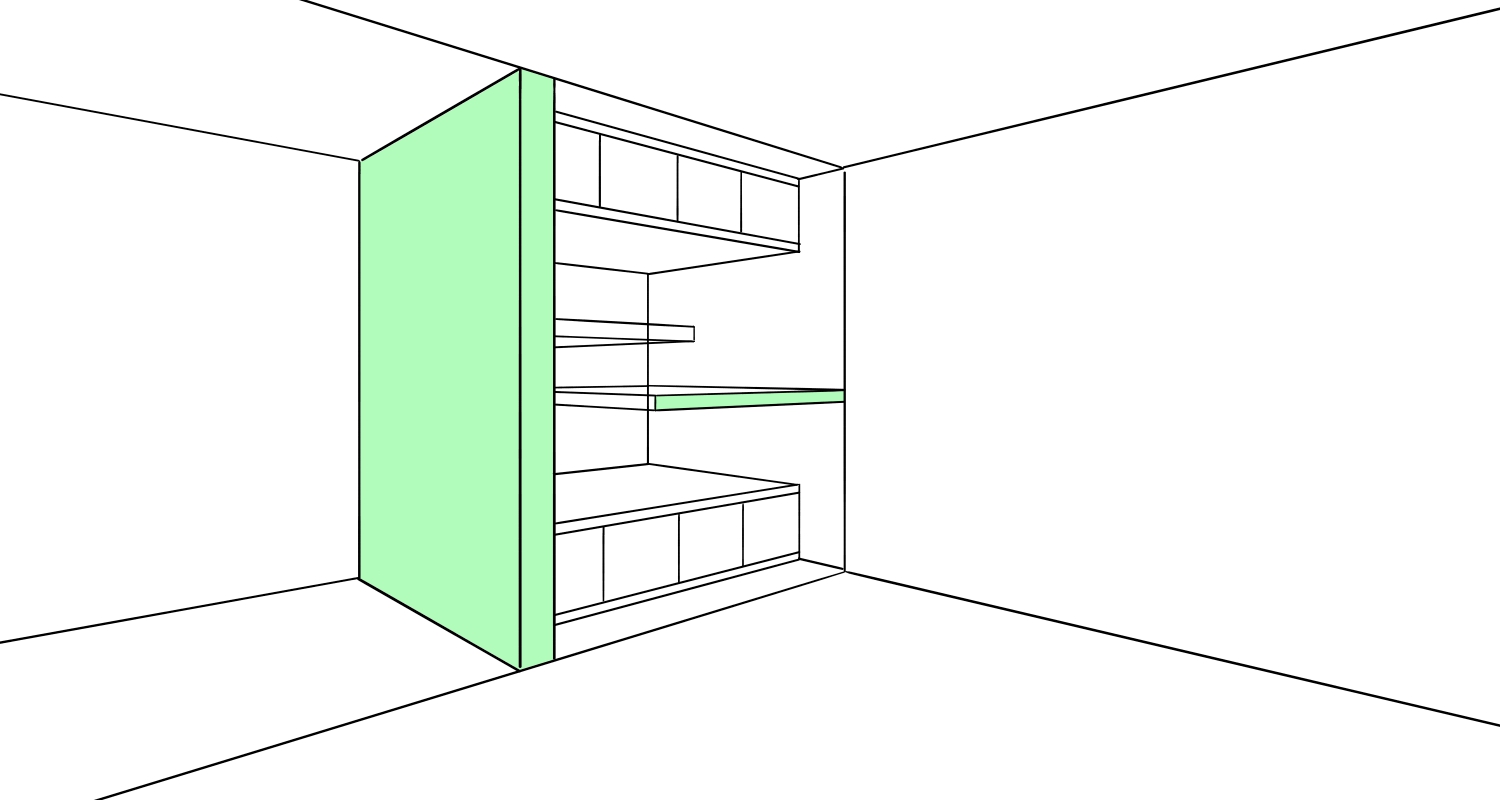
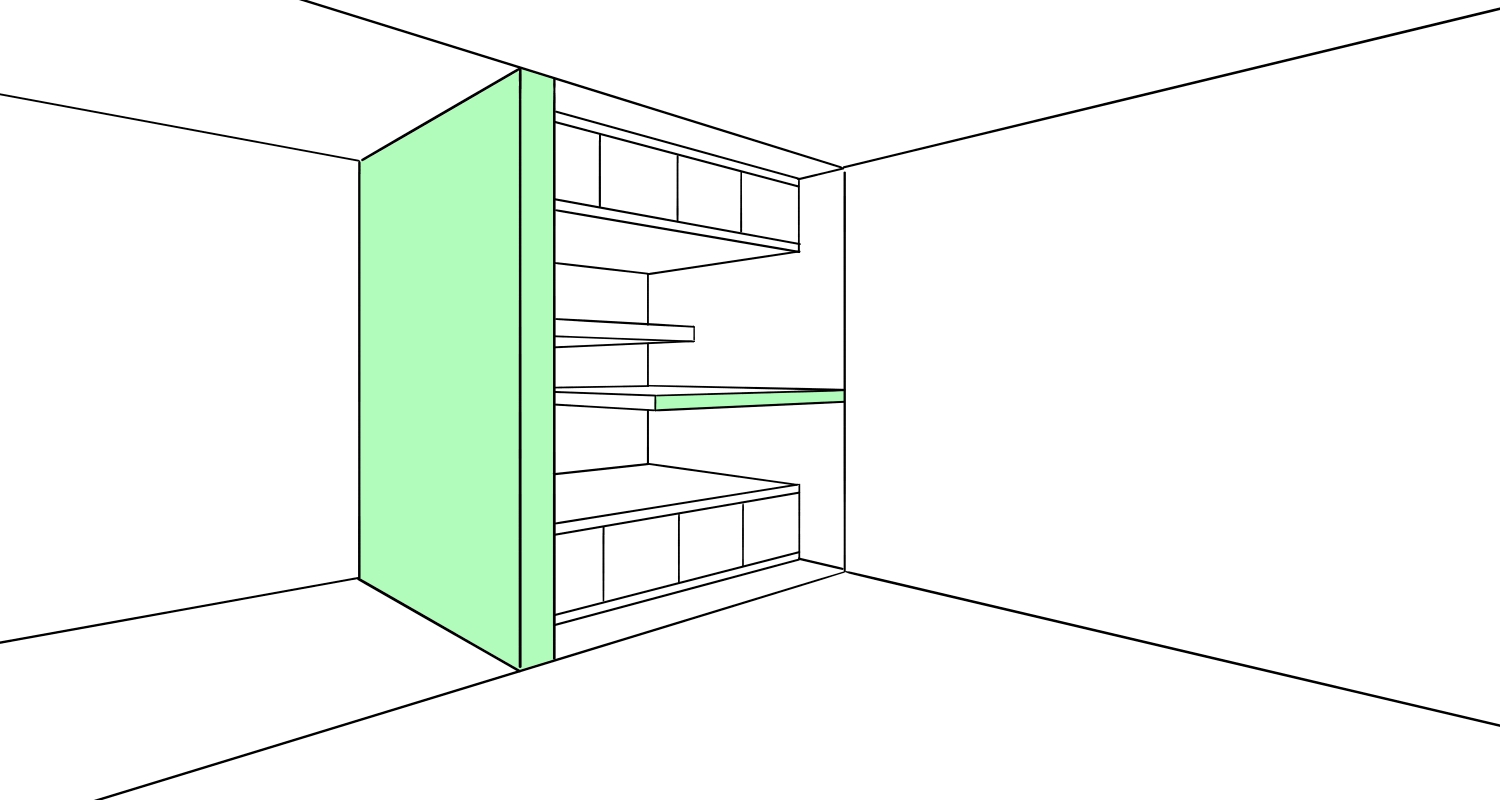
In the frontal space, add a level.
Create a new rough sketch layer now and draw a short vertical line as I do below.
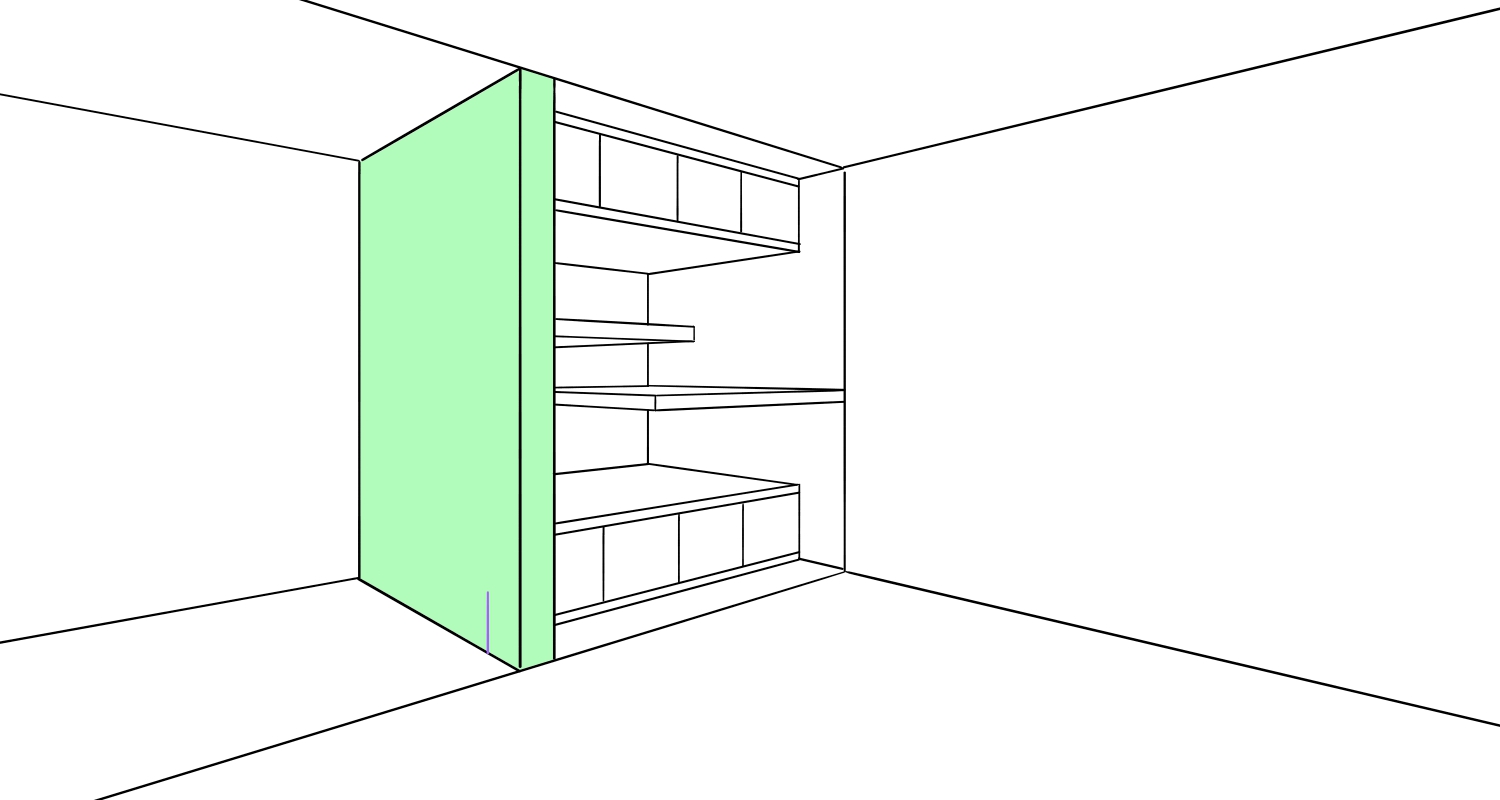
Use the “Right” snap again and draw two lines toward the left.
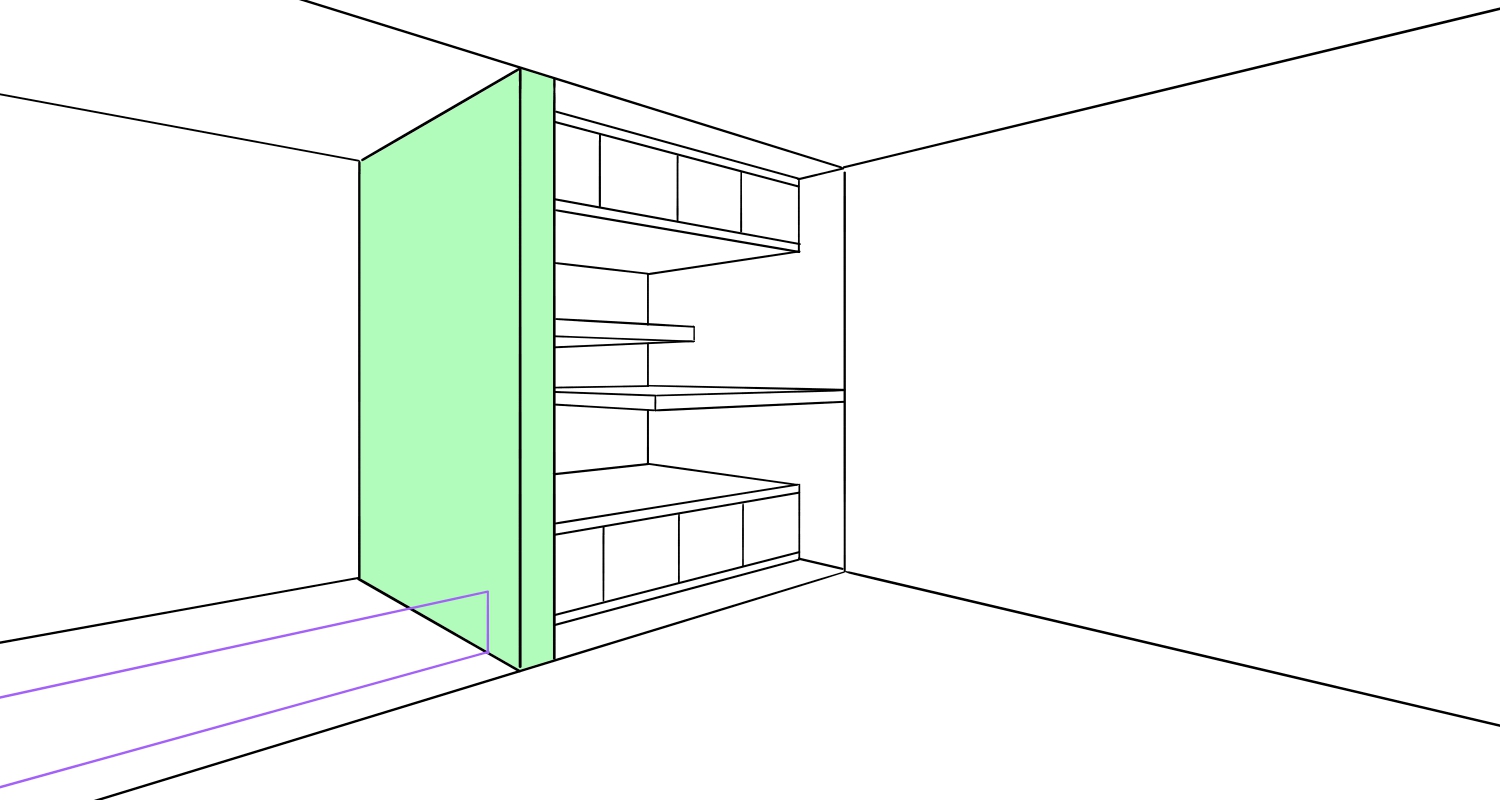
Switch to the “Left” snap (①) and draw a line from the top of the short vertical line until the corner of the walls then switch to “Right” (②) again to draw a line until the end of the screen.
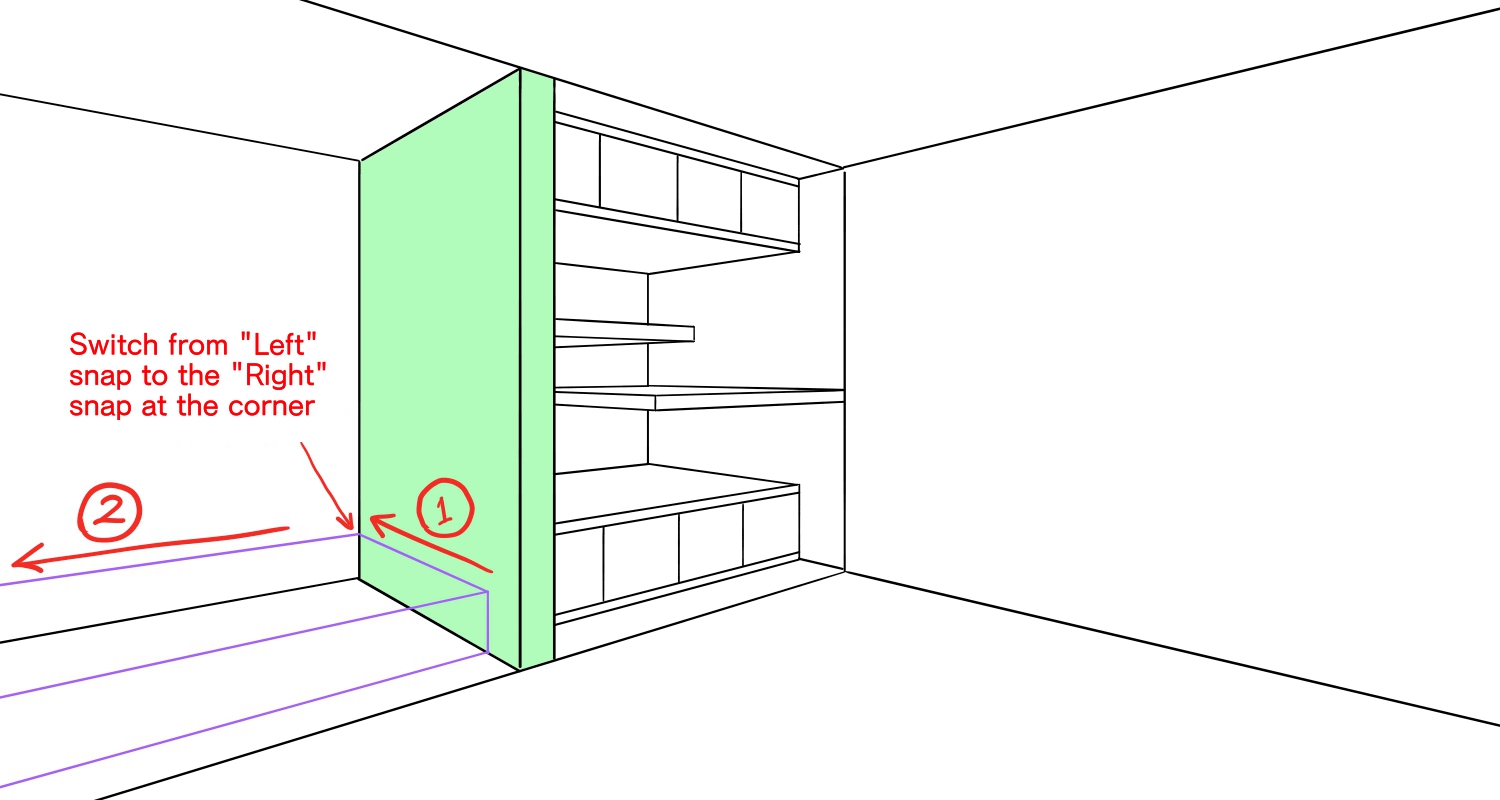
Ink these lines in a new layer and erase the overlapping lines again.
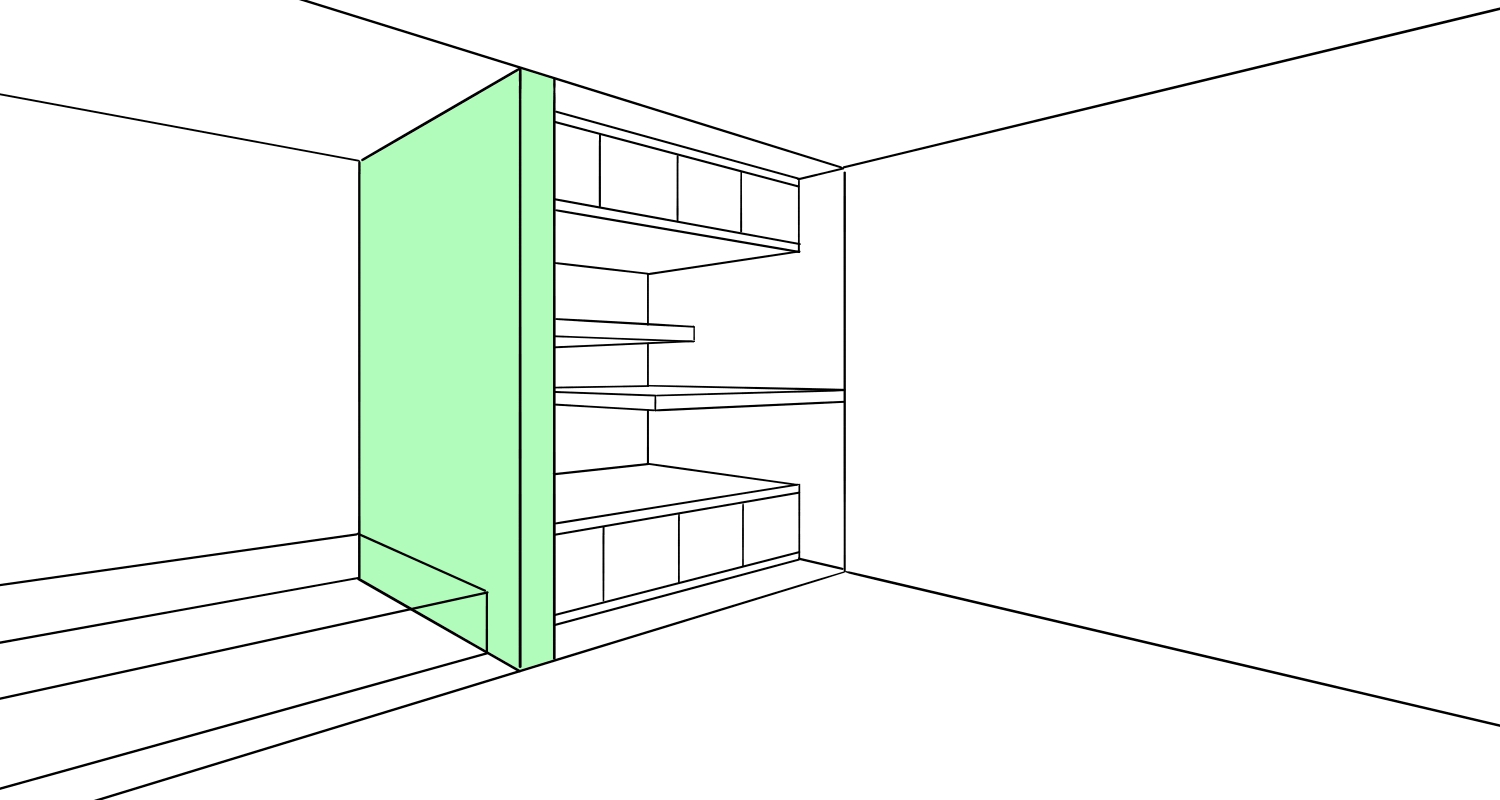
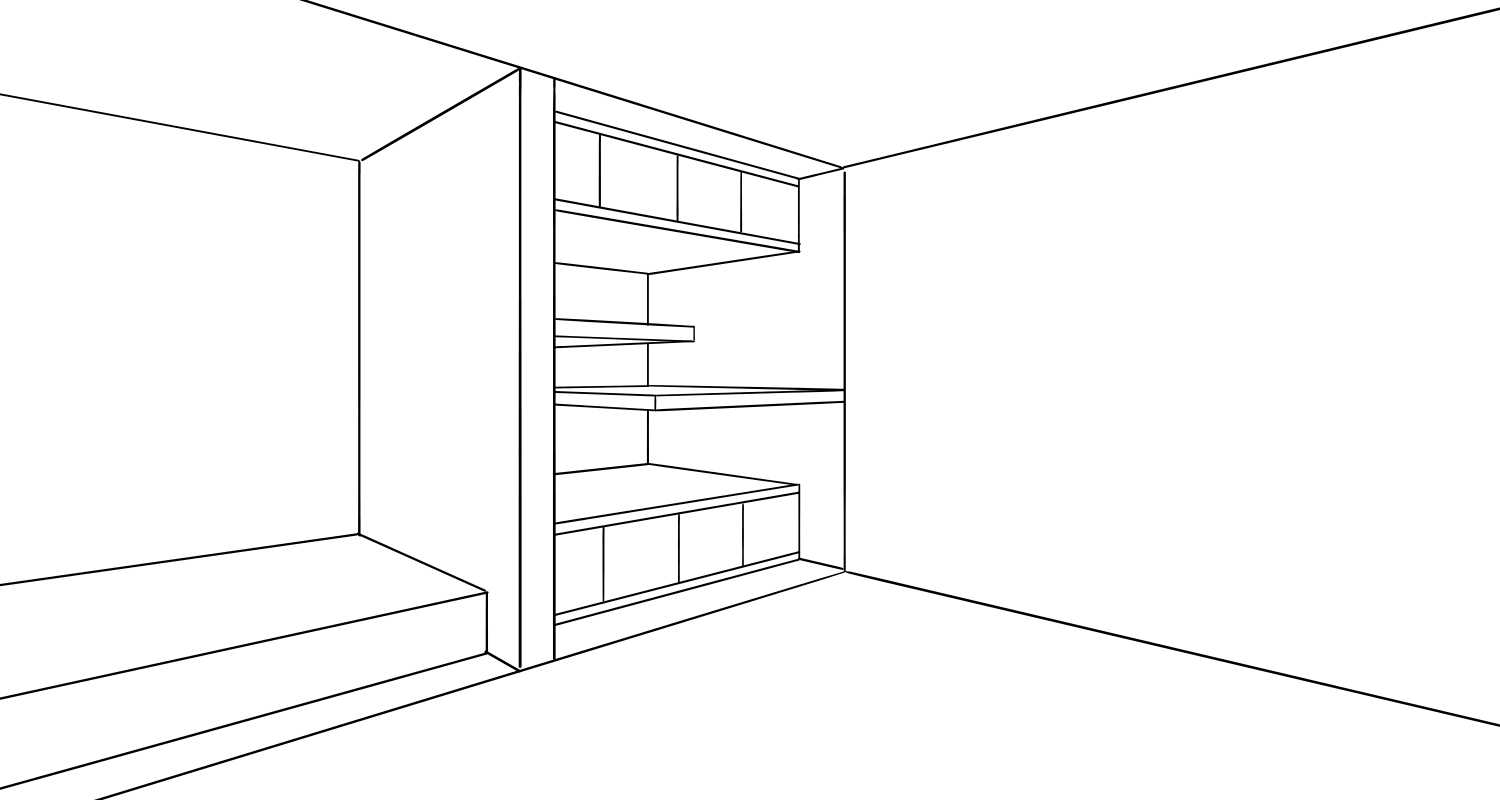
This will be a nice place for a hanging scroll and a flower vase.
Lastly, divide the right side of the wall to create the fusuma.
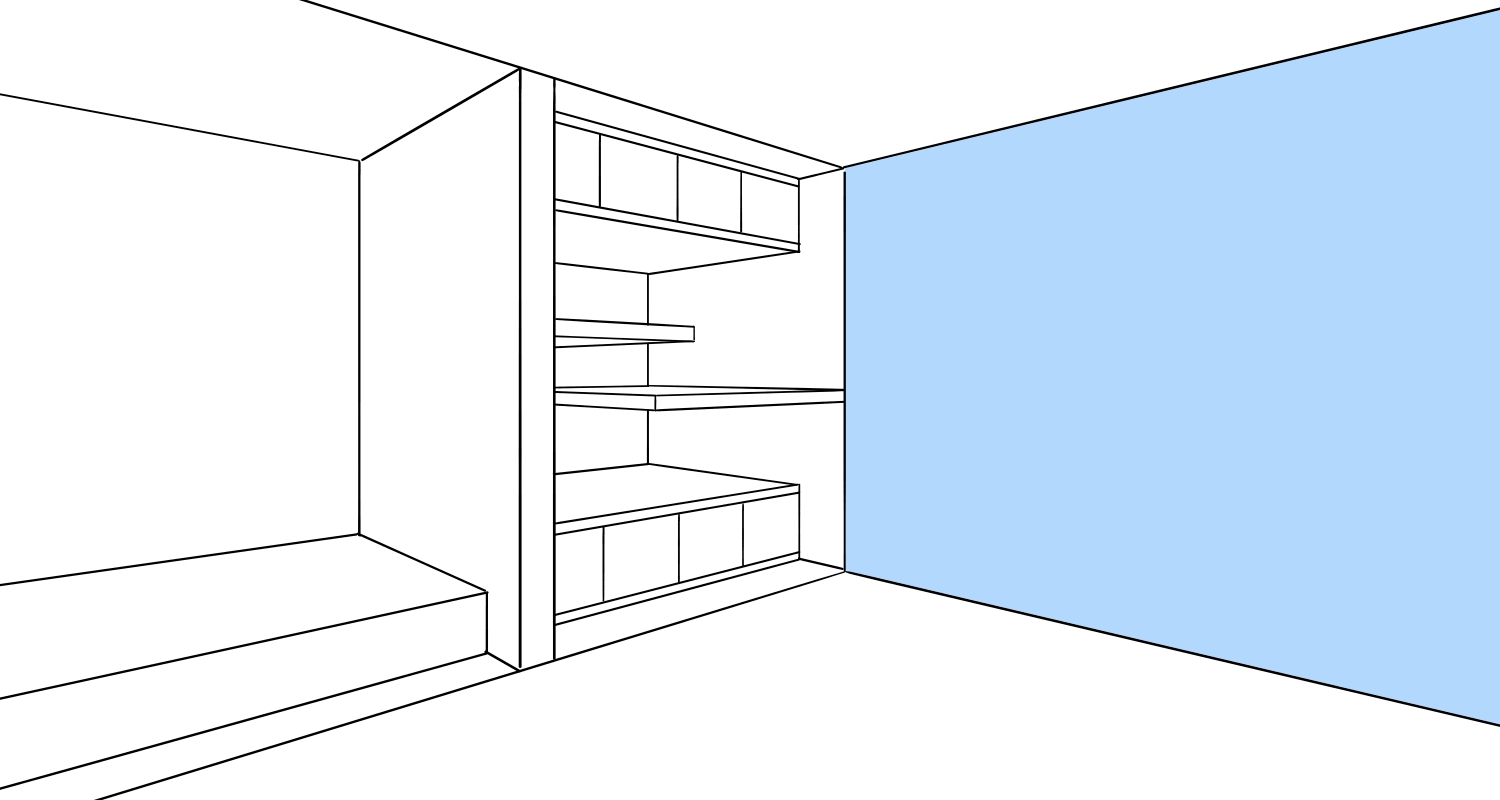
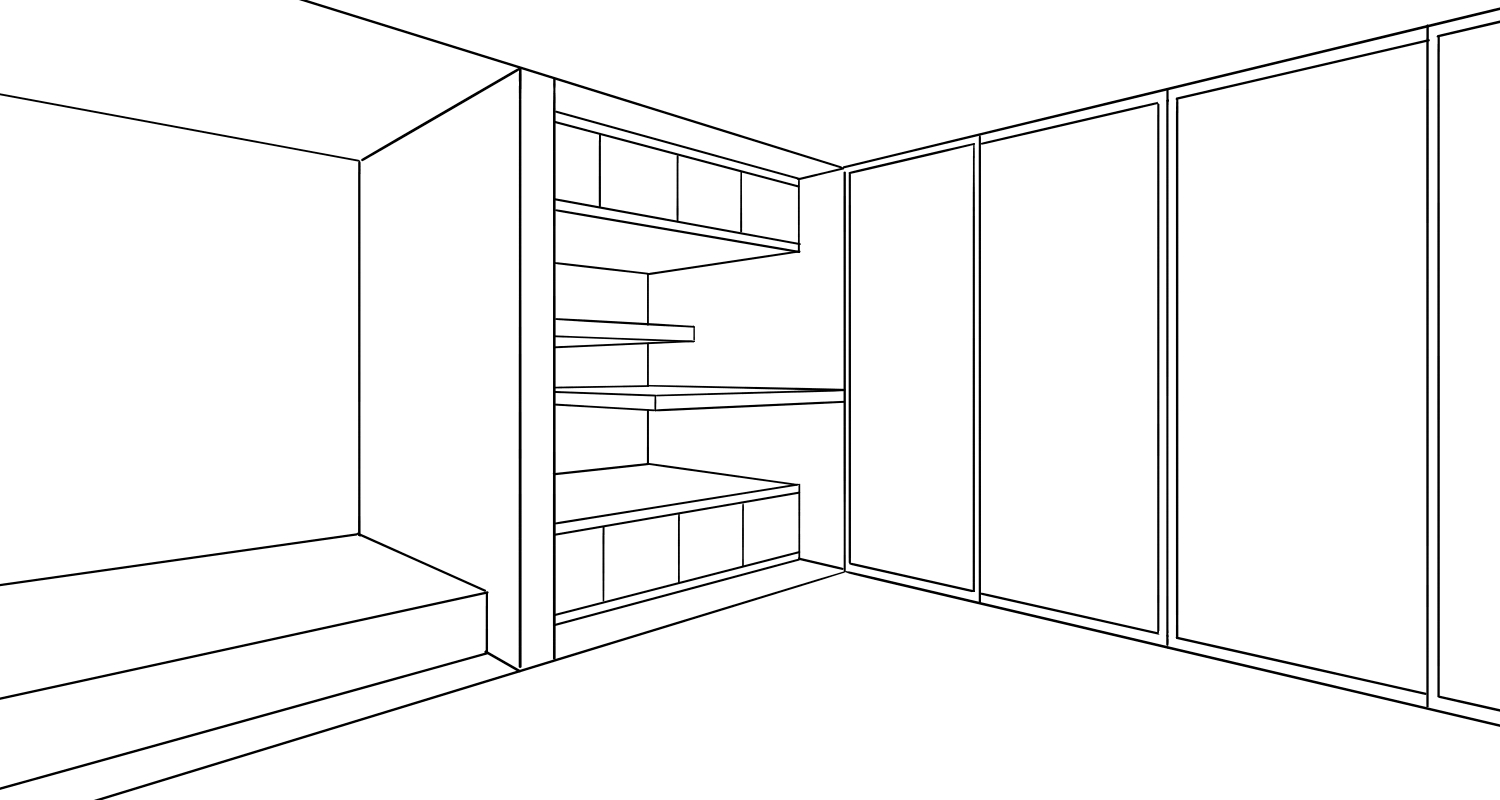
These lines can also be drawn by making use of the “Crisscross” and “Left” snaps.
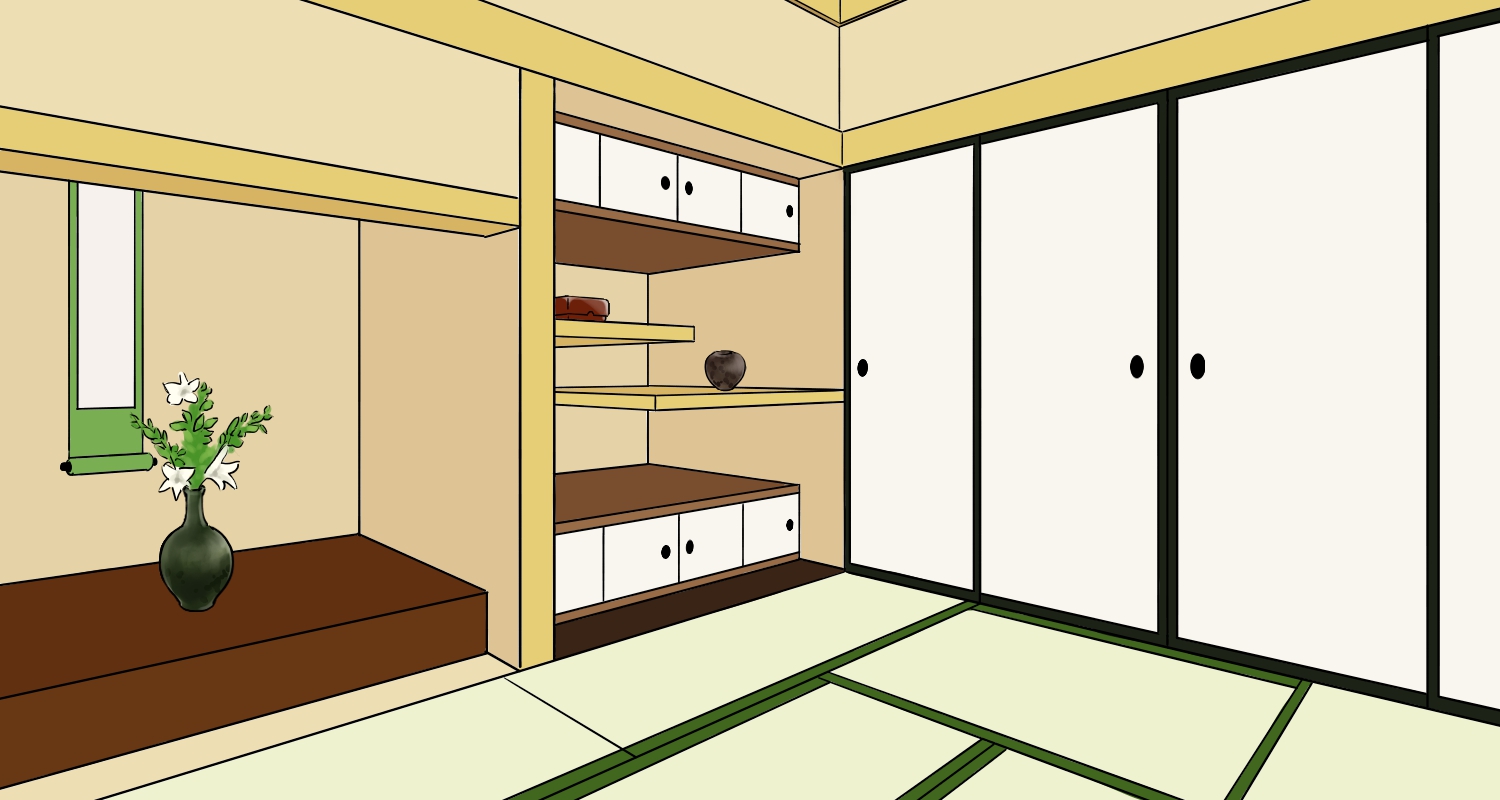
Now the basic Japanese room is complete!
Arranging the Room
I’ve painted the line drawing as you can see below.
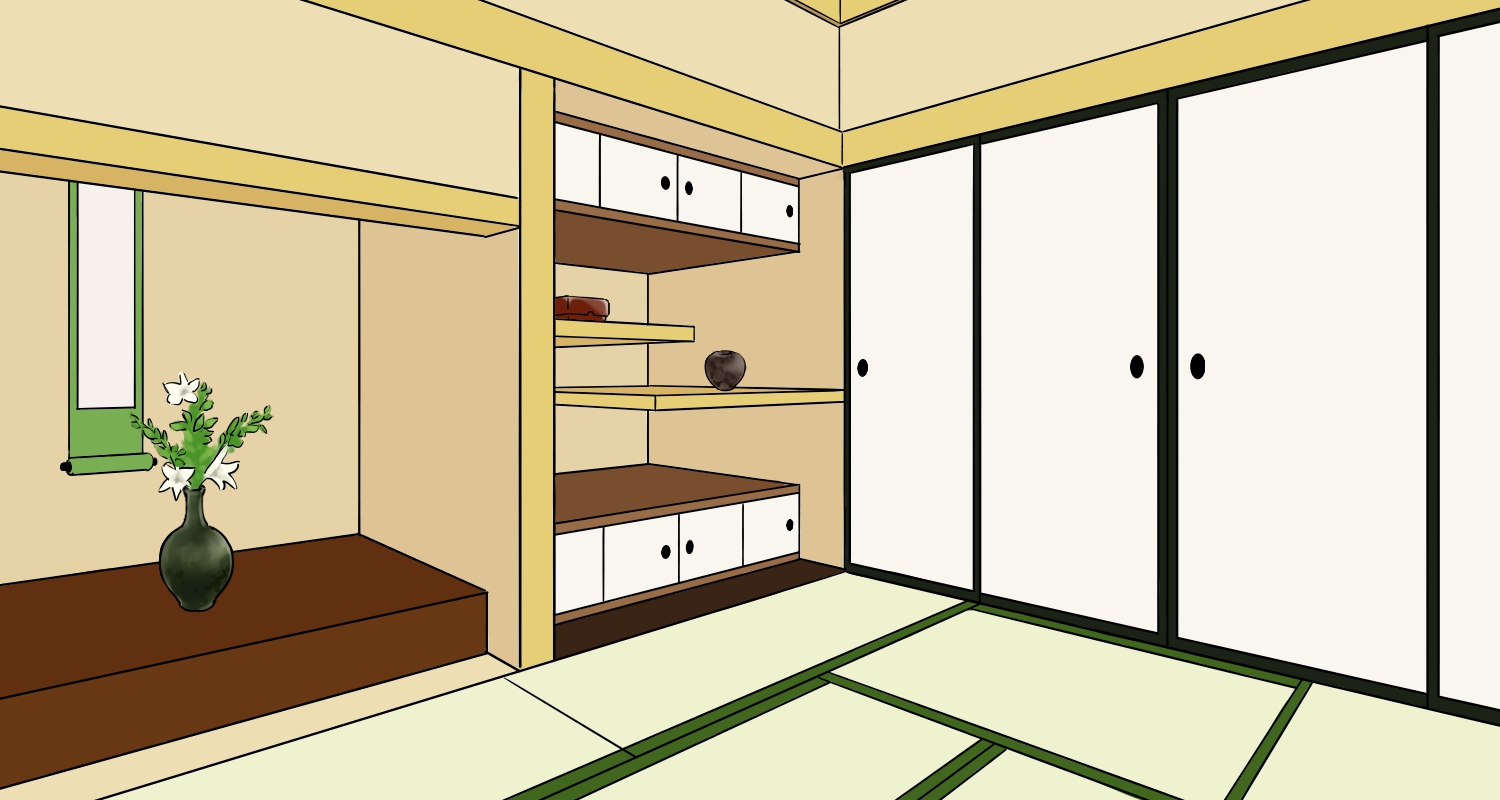
I placed some objects and drew tatami on the floor.
I also made the ceiling taller but the line drawing from earlier is good enough for a background.
I switched between the “Right” and “Left” snaps to draw the flooring. Once you get used to it you can draw it in about a minute or so.
Another version with the shouji instead of the fusuma.
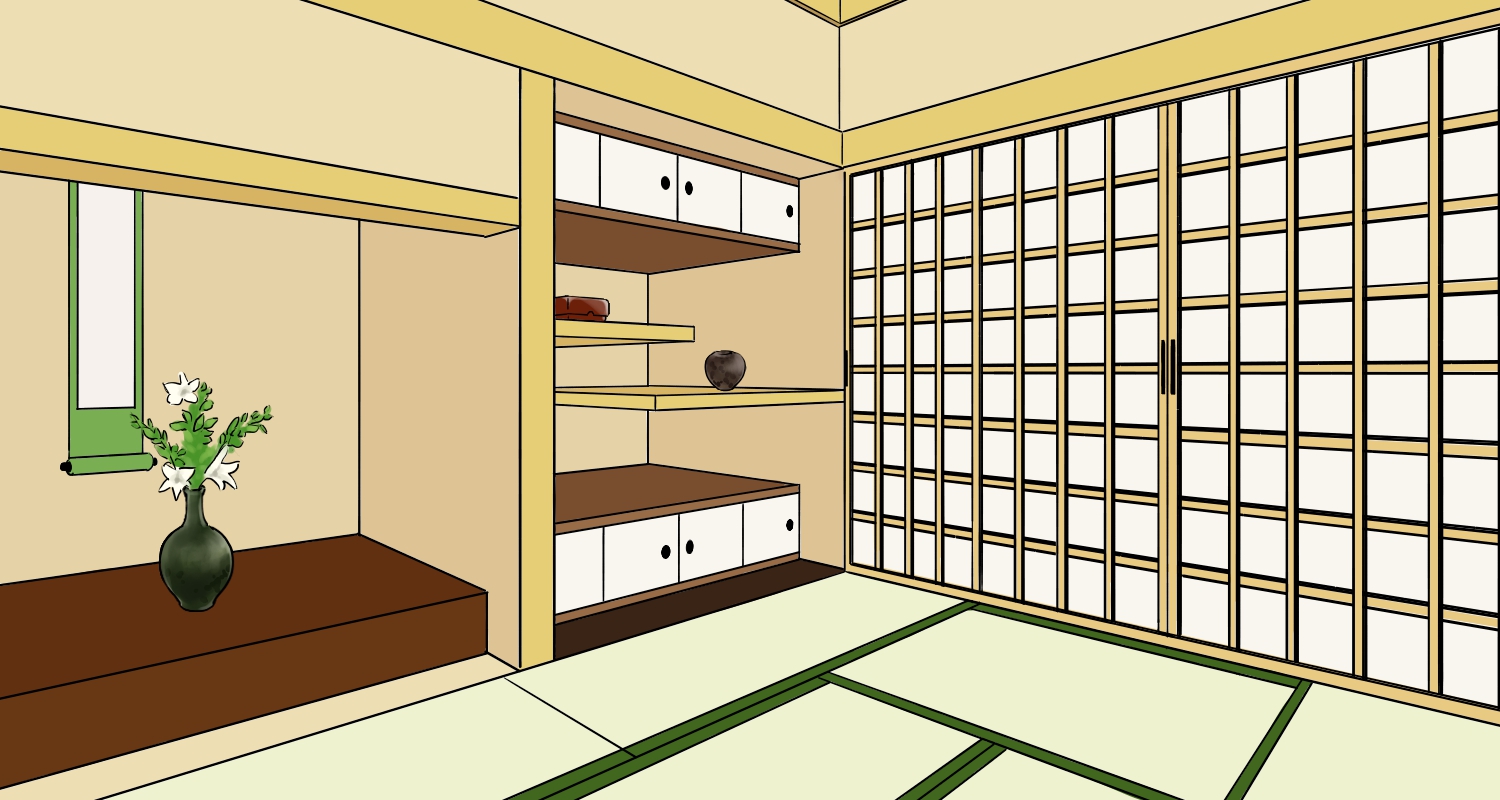
It looks super confusing with the lattice design but it’s just more lines drawn with the same steps I used for the fusuma.
To avoid erasing mistakes, make sure to separate into multiple layers.
How was this tutorial?
Hopefully you learned that backgrounds can be drawn easily by switching between three types of snaps back and forth.
Unless you are drawing an extremely unique building, you can follow the same steps to draw any type of room (as long as the door/windows/floor is rectangular).
① Decide on the eye level
② Determine the two points
Once you get these two steps right, you can draw the lines using a snap so perspective drawings will be easy.
I needed the canvas to be wide since the two points had to be far from the illustration but you can crop these parts later.
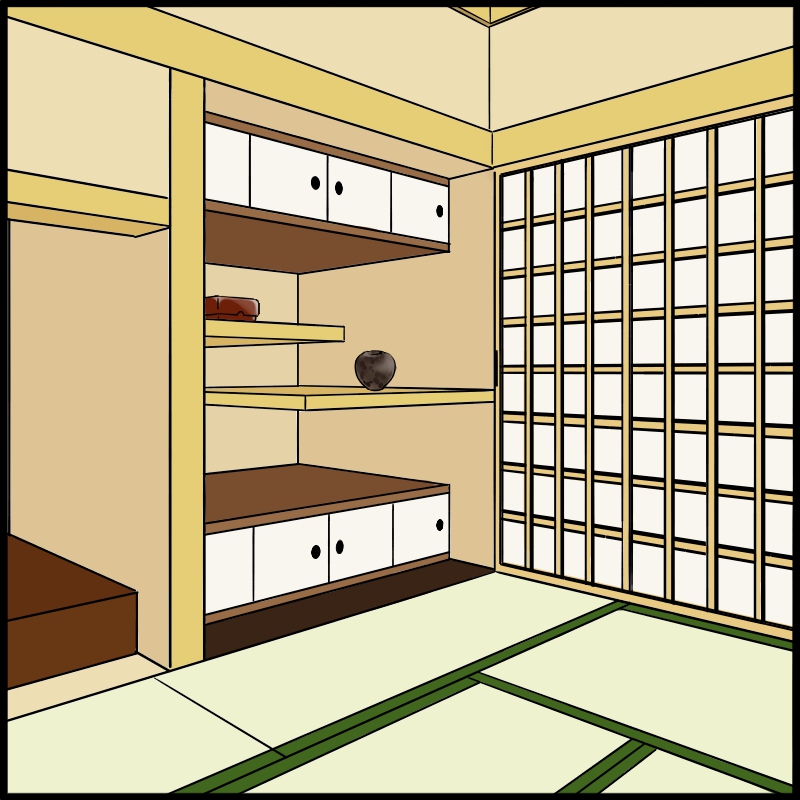
Make use of the Snap Tools in MediBang Paint to draw gorgeous backgrounds ♪
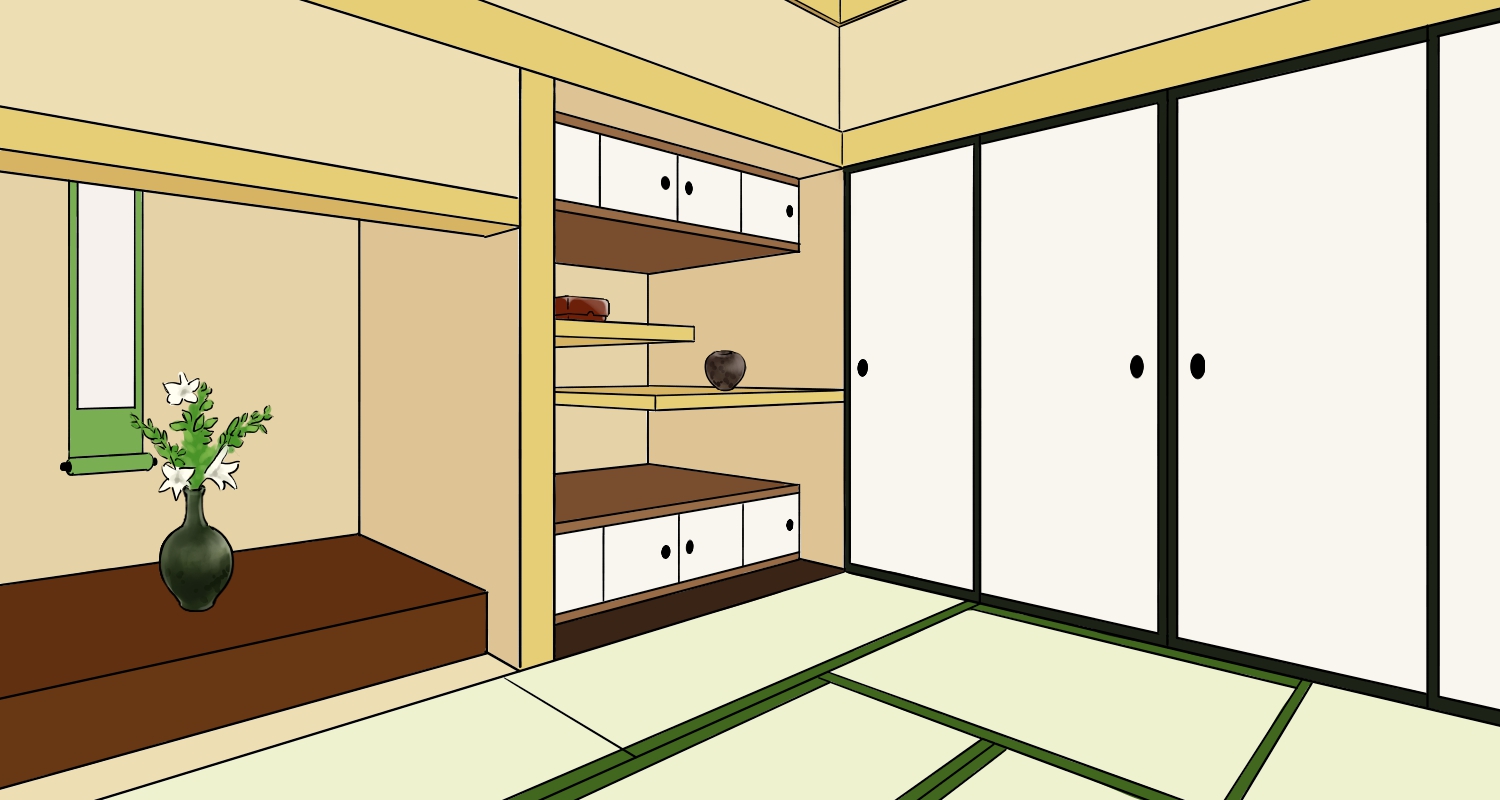
(Text・Illustration/竹内 洋)
\ We are accepting requests for articles on how to use /

