2022.10.21
How to draw clothes and fabric folds!
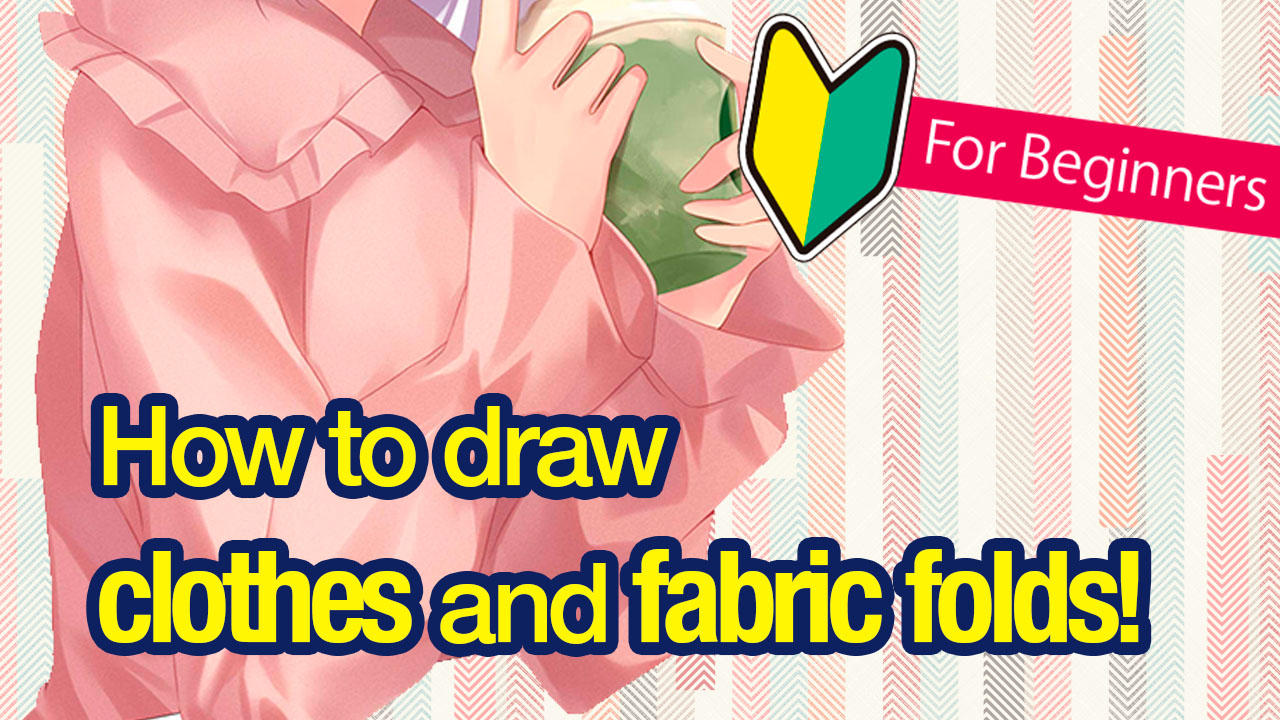
The folds on clothings change depending on multiple elements including the body movement and the surrounding environment.
However, all clothing folds are created by “forces”, from internal force or external force.
I will be explaining how to draw such folds and wrinkles on clothes step by step to those of you who struggle with drawing them.
Even if you are still confused with the logic, don’t worry I will introduce the “1277 Method” tip as well.

Let’s first start off by looking at the common mistakes made by beginners.
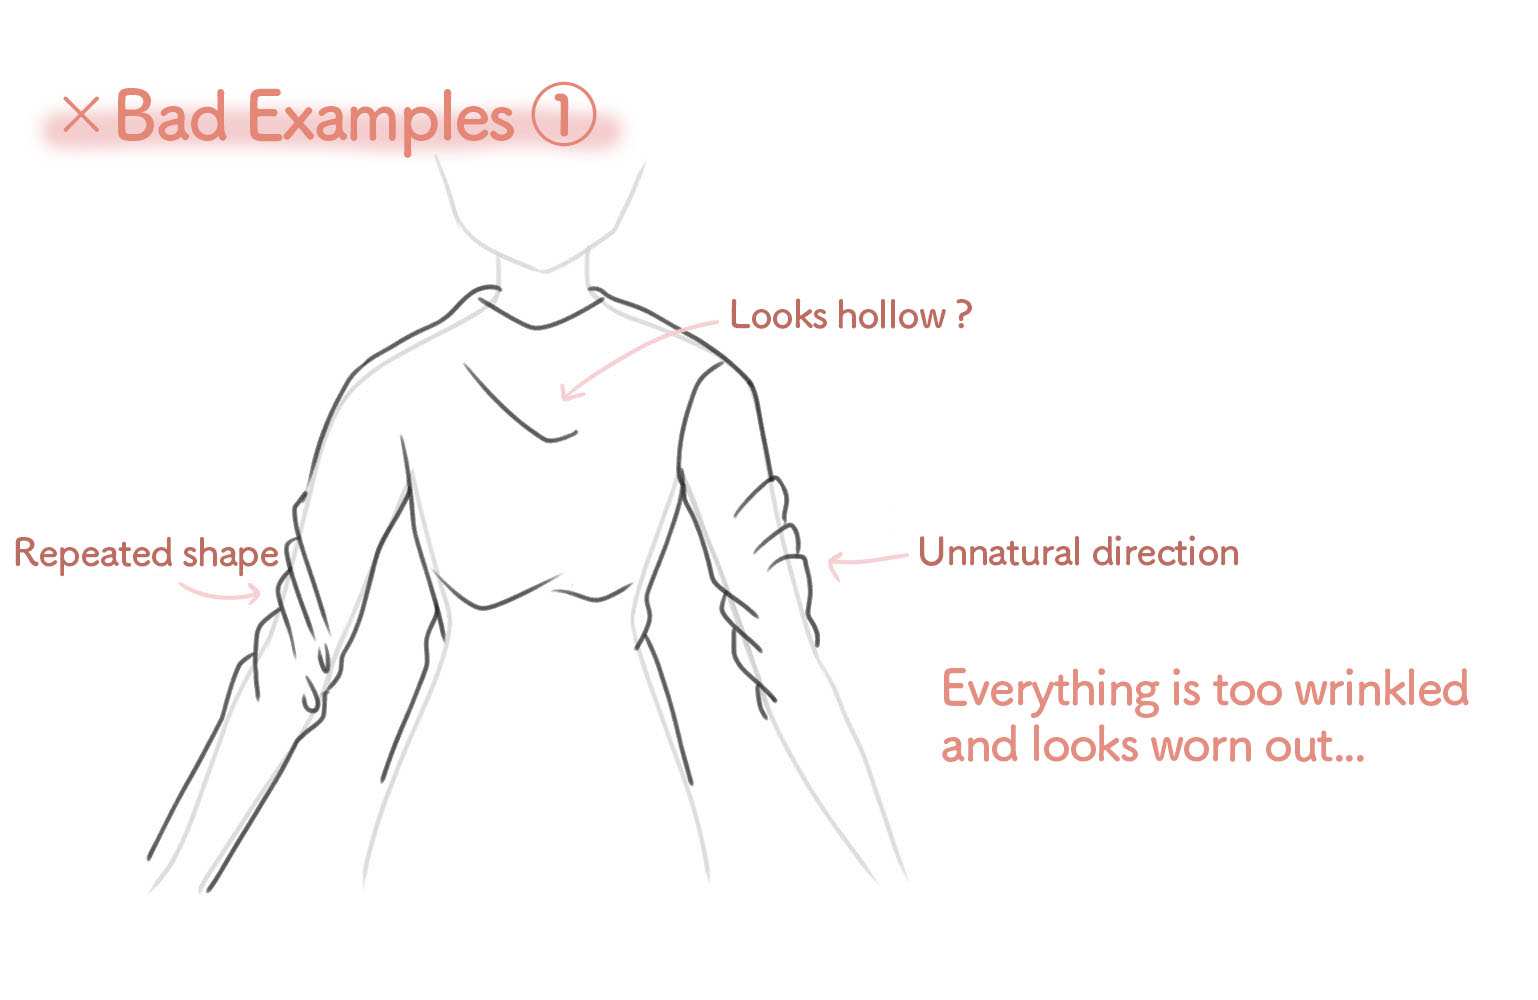
Adding unnecessary clothing folds to make the illustration look detailed
It is not the best to add unnecessary folds without thinking properly.
This is because the clothing may end up looking worn out from too many wrinkles or some parts of the body may look weirdly shaped.
Always keep in mind that clothing folds are made by “forces”.
This means that drawing folds in the direction of forces will make them look natural.
I will explain the details later.
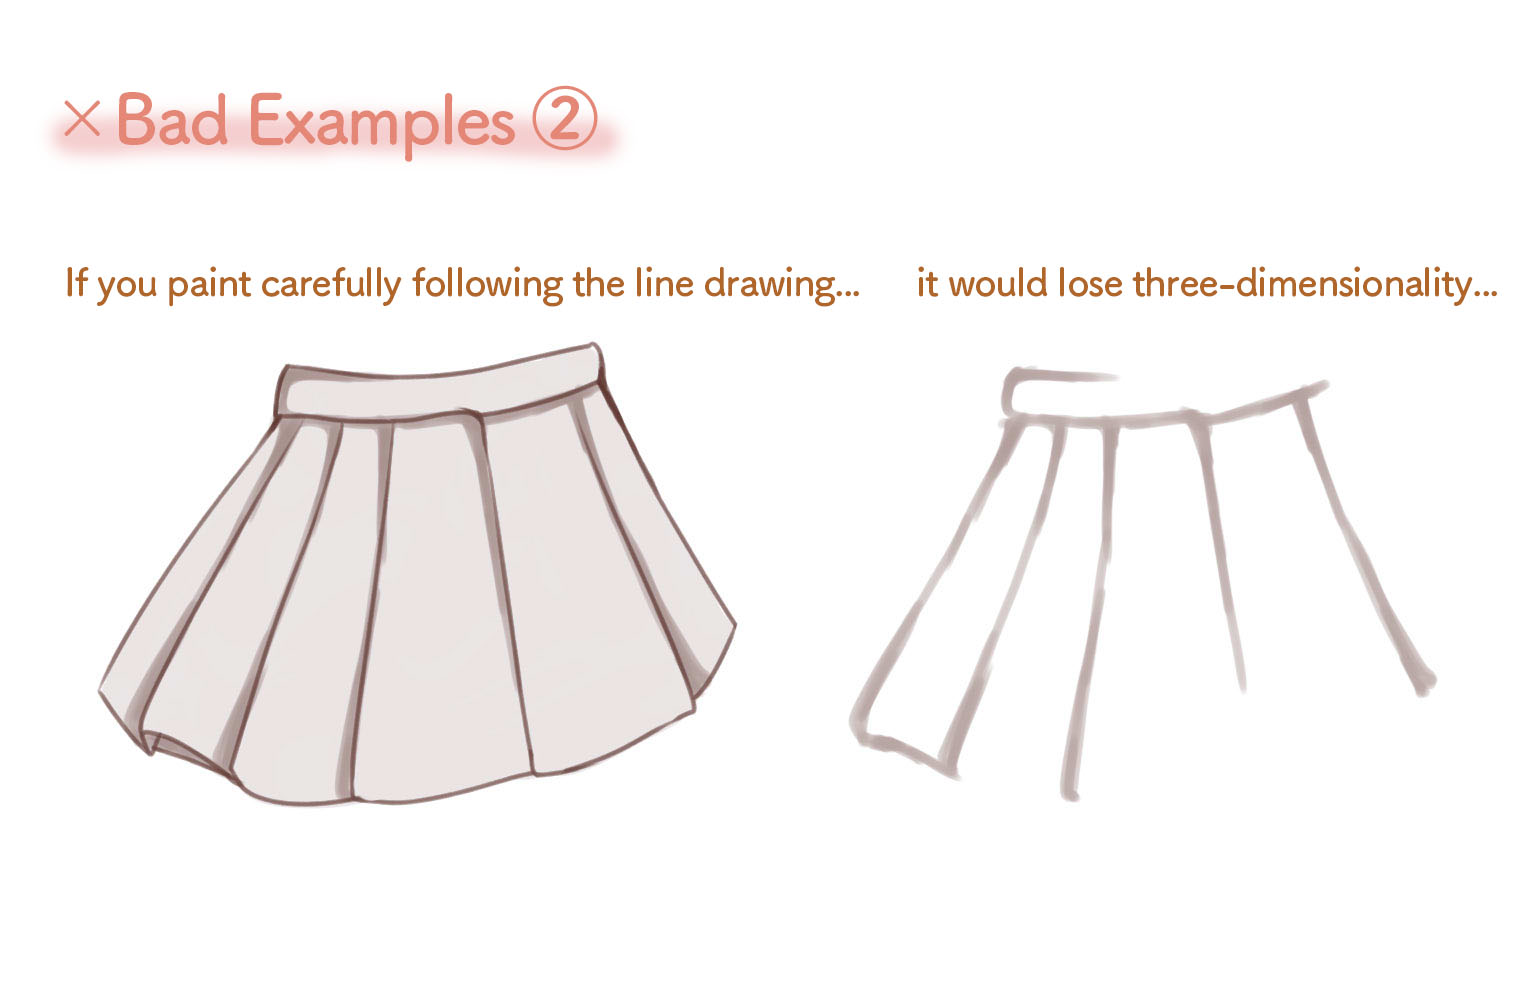
Painting only a small area of shadows along the line drawing of folds
When you are painting colors, it is of course necessary to be careful and follow the line drawing but when repeated, it will lose three-dimensionality.
I think the key to painting shadows is to be bold.
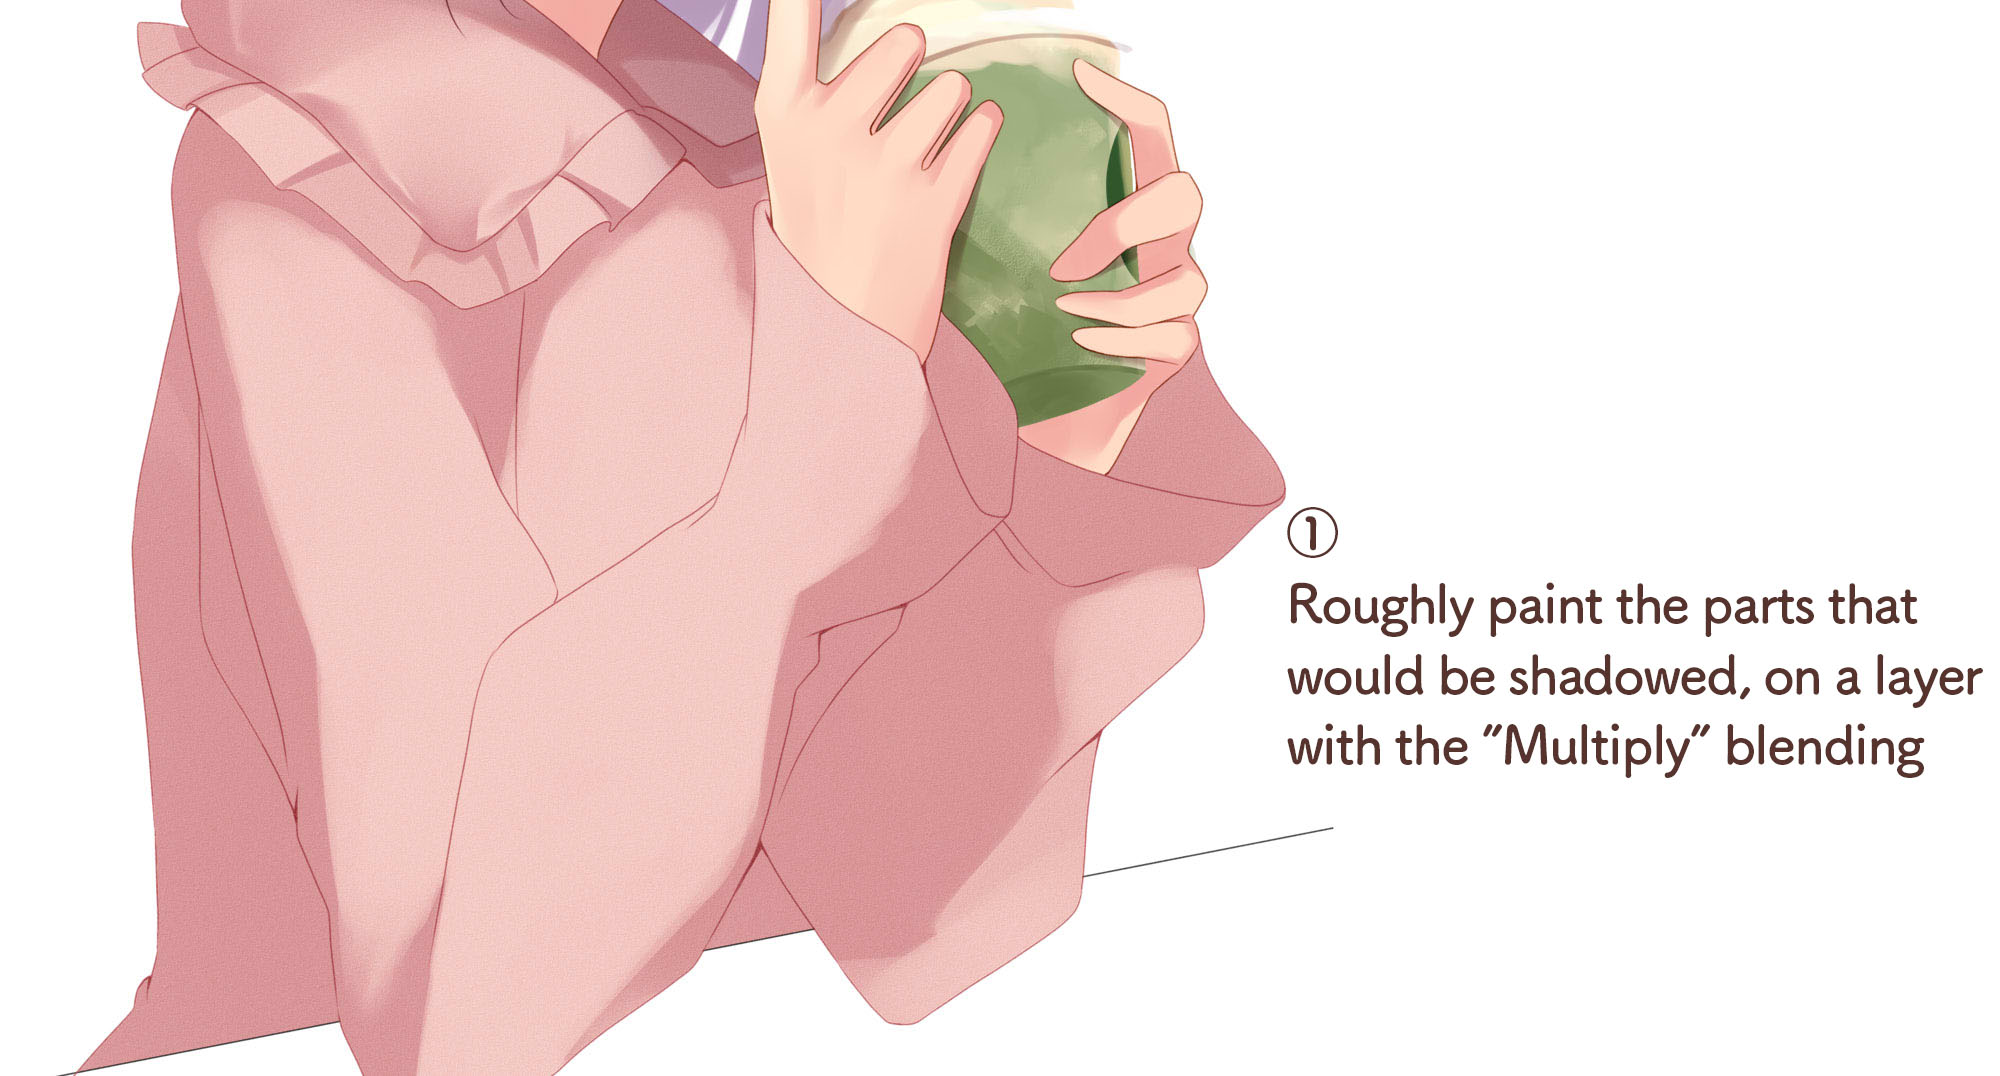
Once you have decided on the light source, paint all the parts that do not receive any light as shadows.
I personally try to keep the ratio of light and shadow to 2:8 (8:2) or 3:7 (7:3).
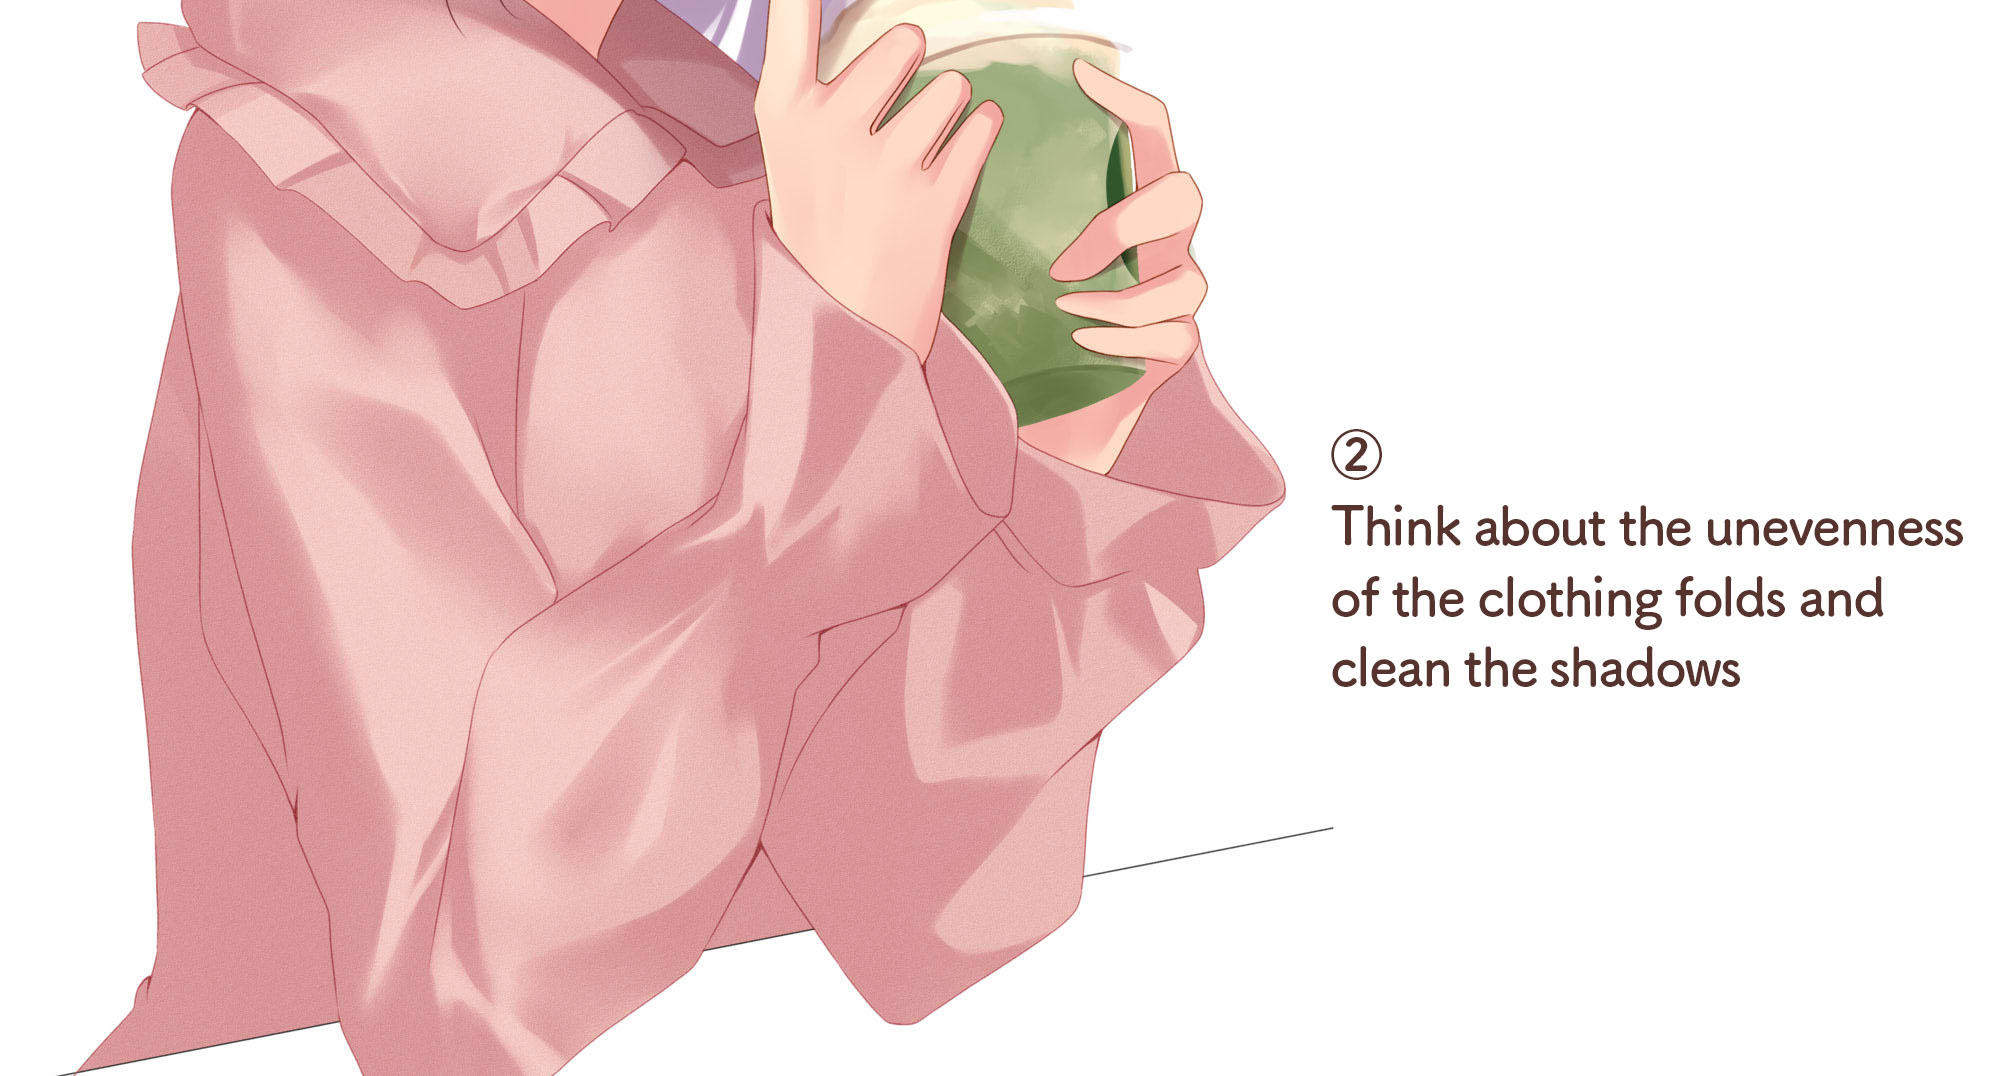
I recommend painting all the shaded parts first, then look at the unevenness of clothing folds to draw in where the detailed shadows would be.
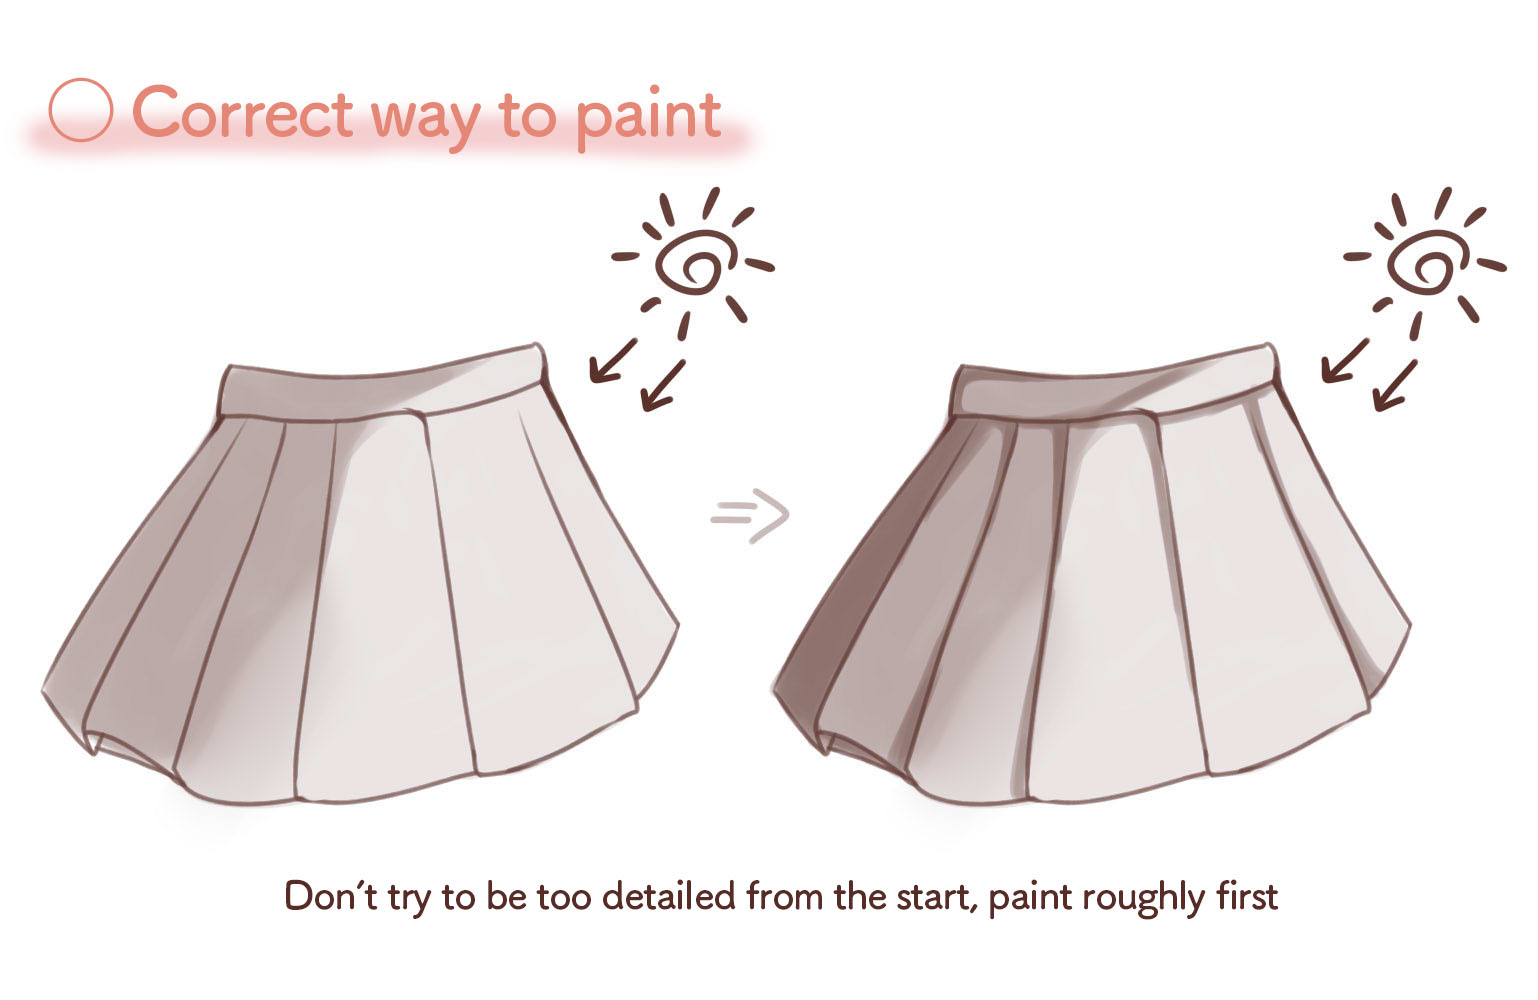
Correct way to paint
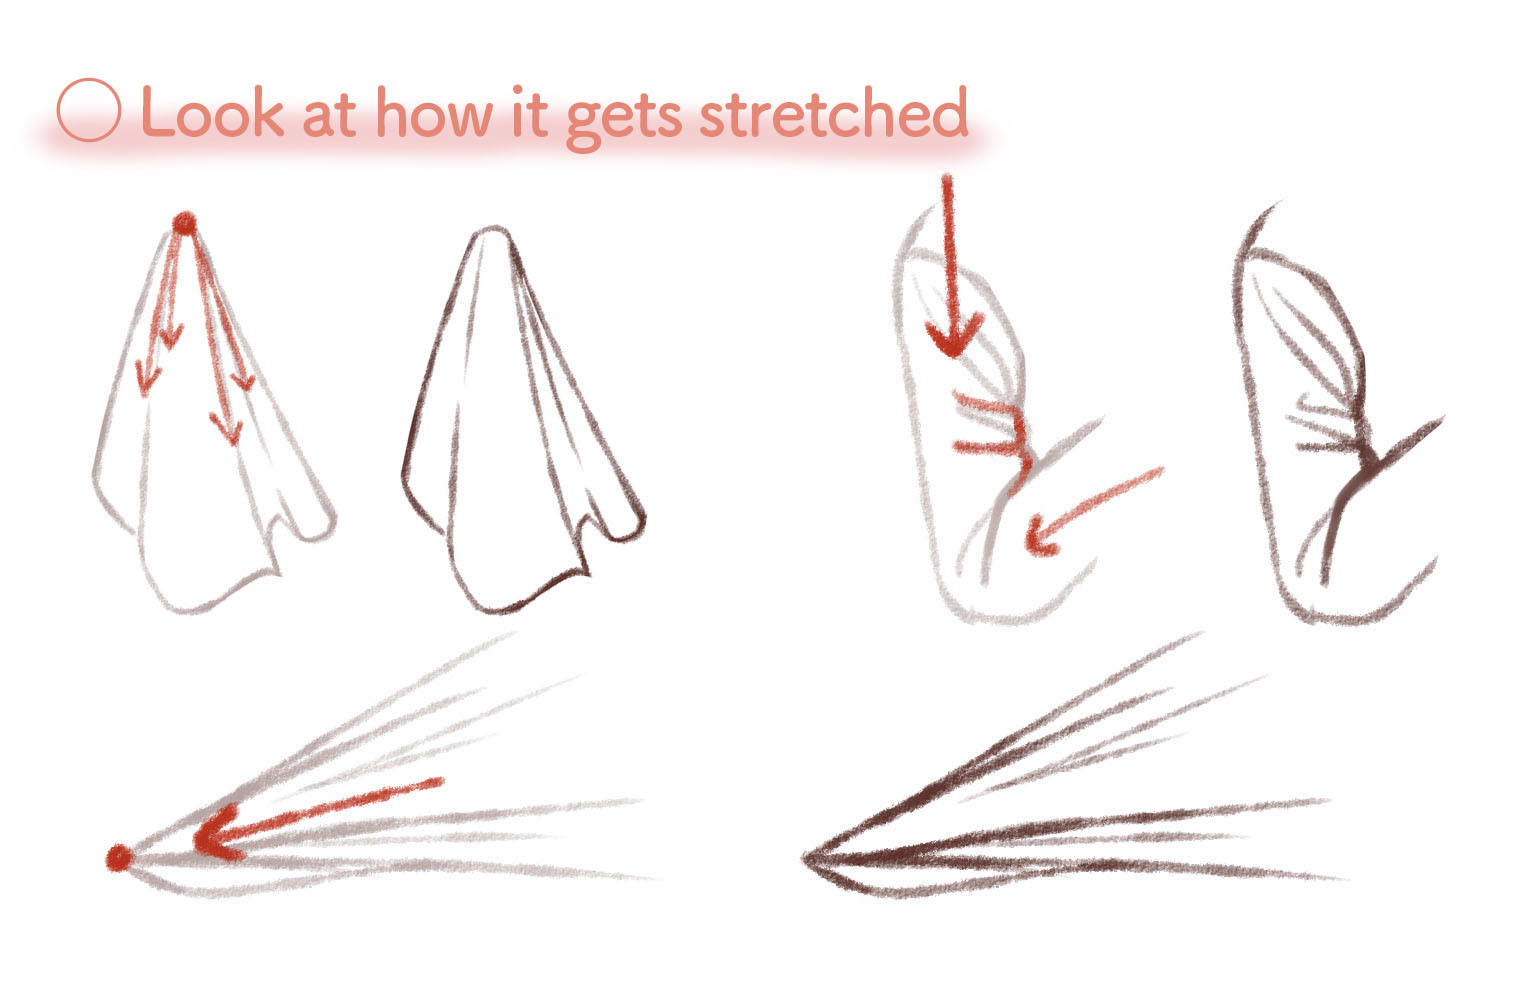
Pay attention to the parts tugged when drawing clothing folds
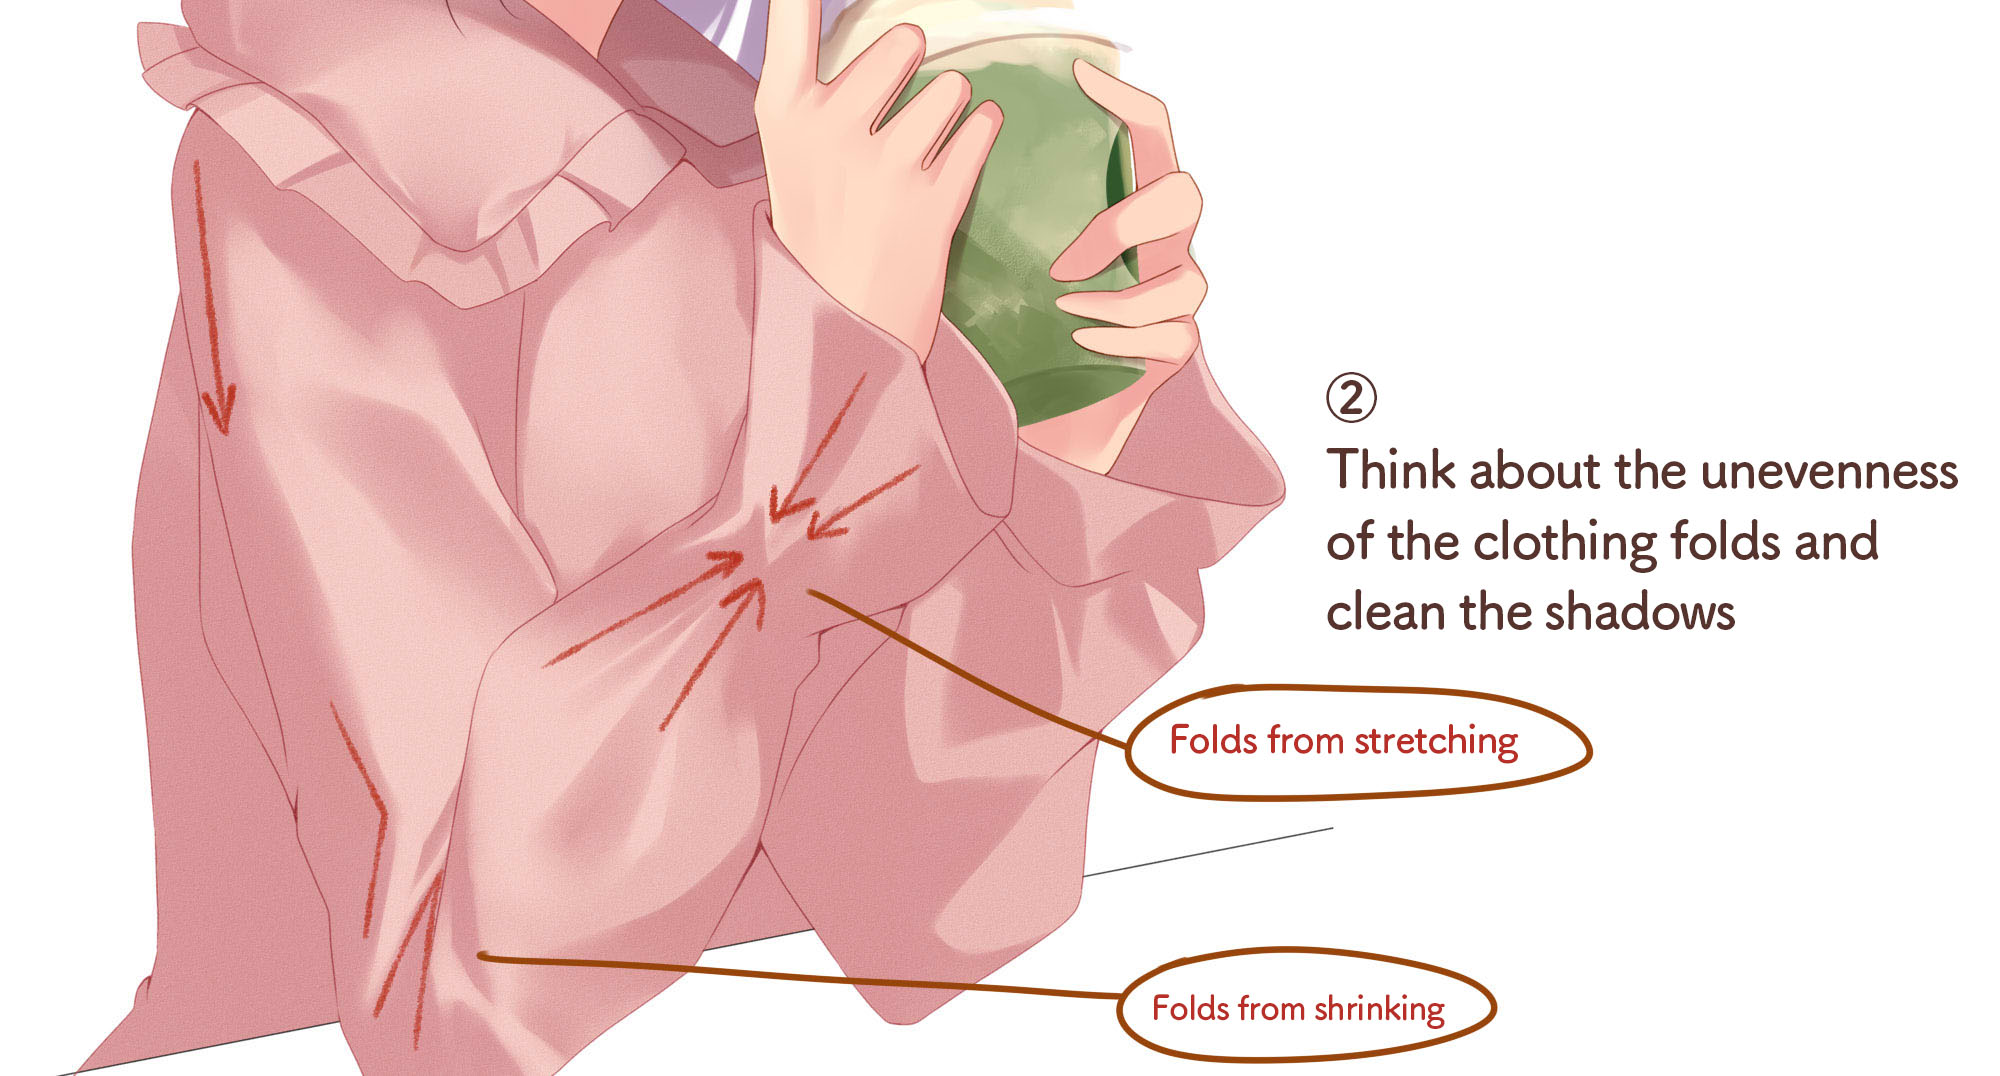
By thinking about which parts get tugged or stretched, you can draw natural folds.
The stretched parts fold in the direction of its force but as you can see around the elbow in the images below, the cloth shrinks and creates a different shape of folds when there are two forces from different directions at the same time.
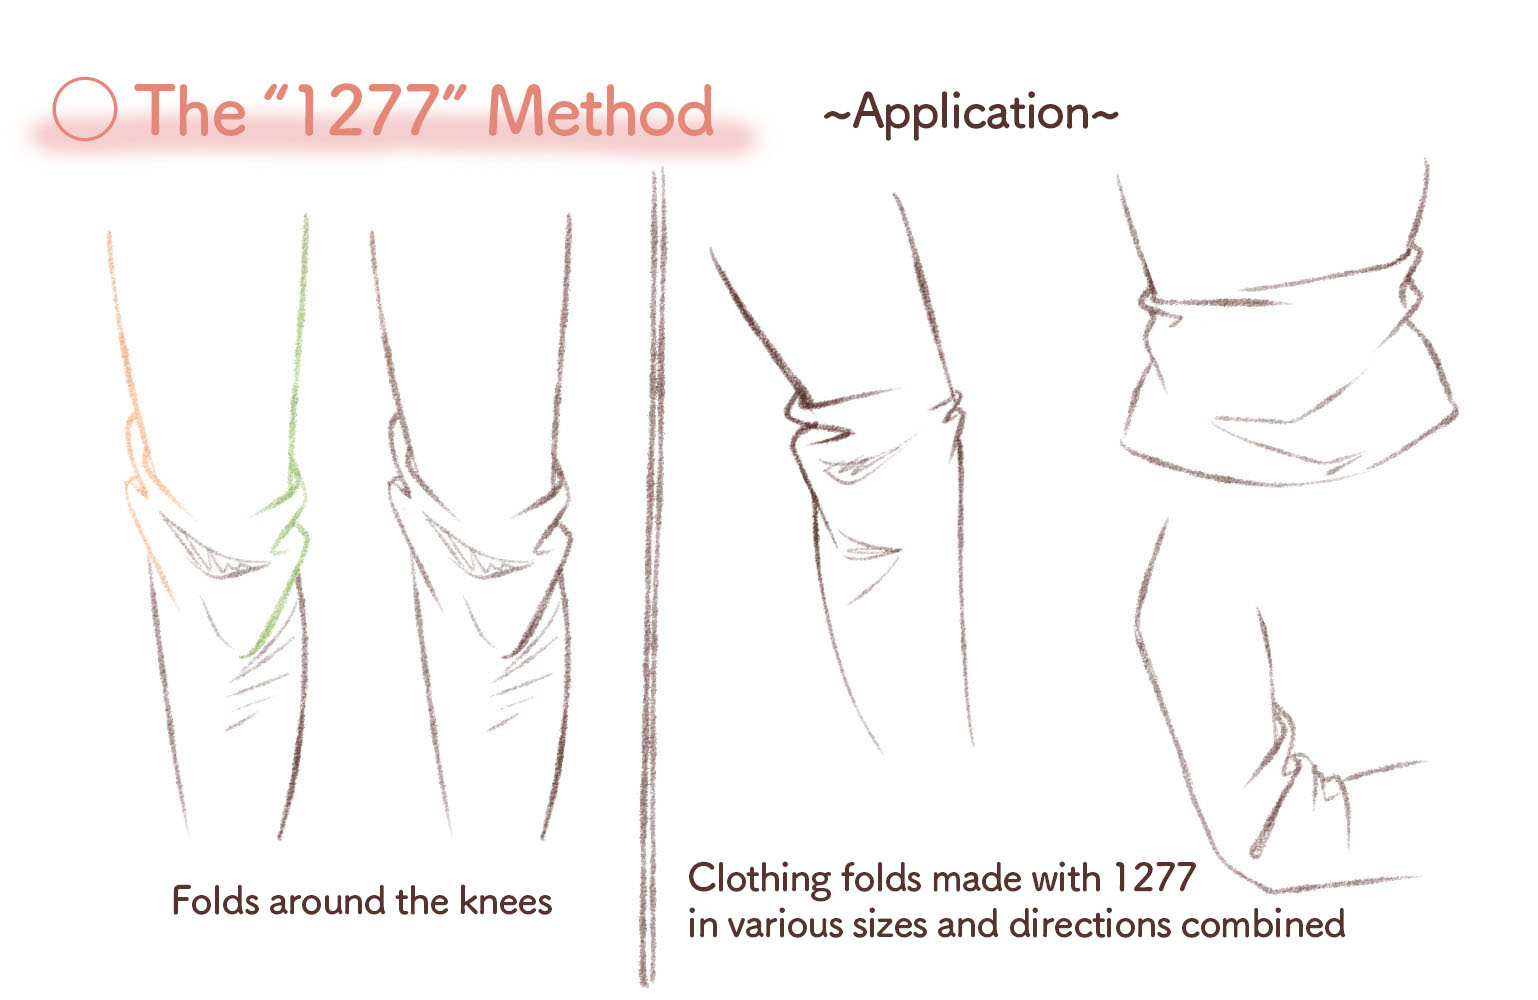
The “1277” method for beginners
If you don’t like the physics stuff like analyzing forces and movements of shapes etc. or if you simply want to work on a sketch without thinking about the difficult stuff, I recommend this easily applicable method of drawing clothing folds. (Although it’s not perfect)
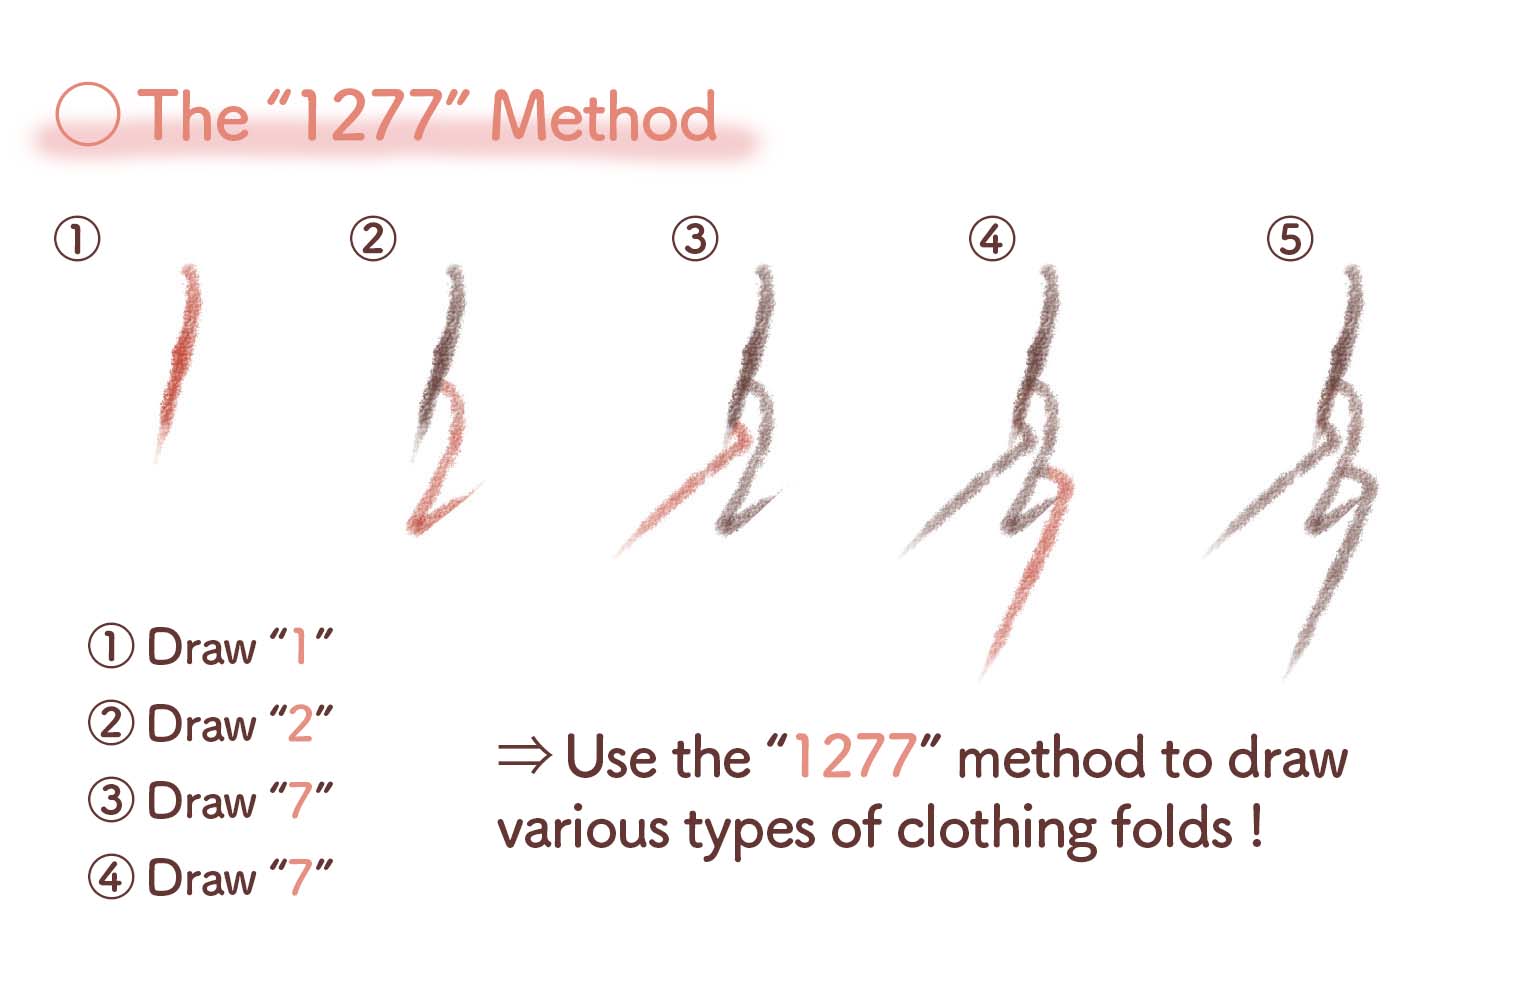
You can draw simple folds easily by combining the shape of three numbers; 1, 2 and 7.
I use this method for when I draw folds around the joints like the elbow or the knee.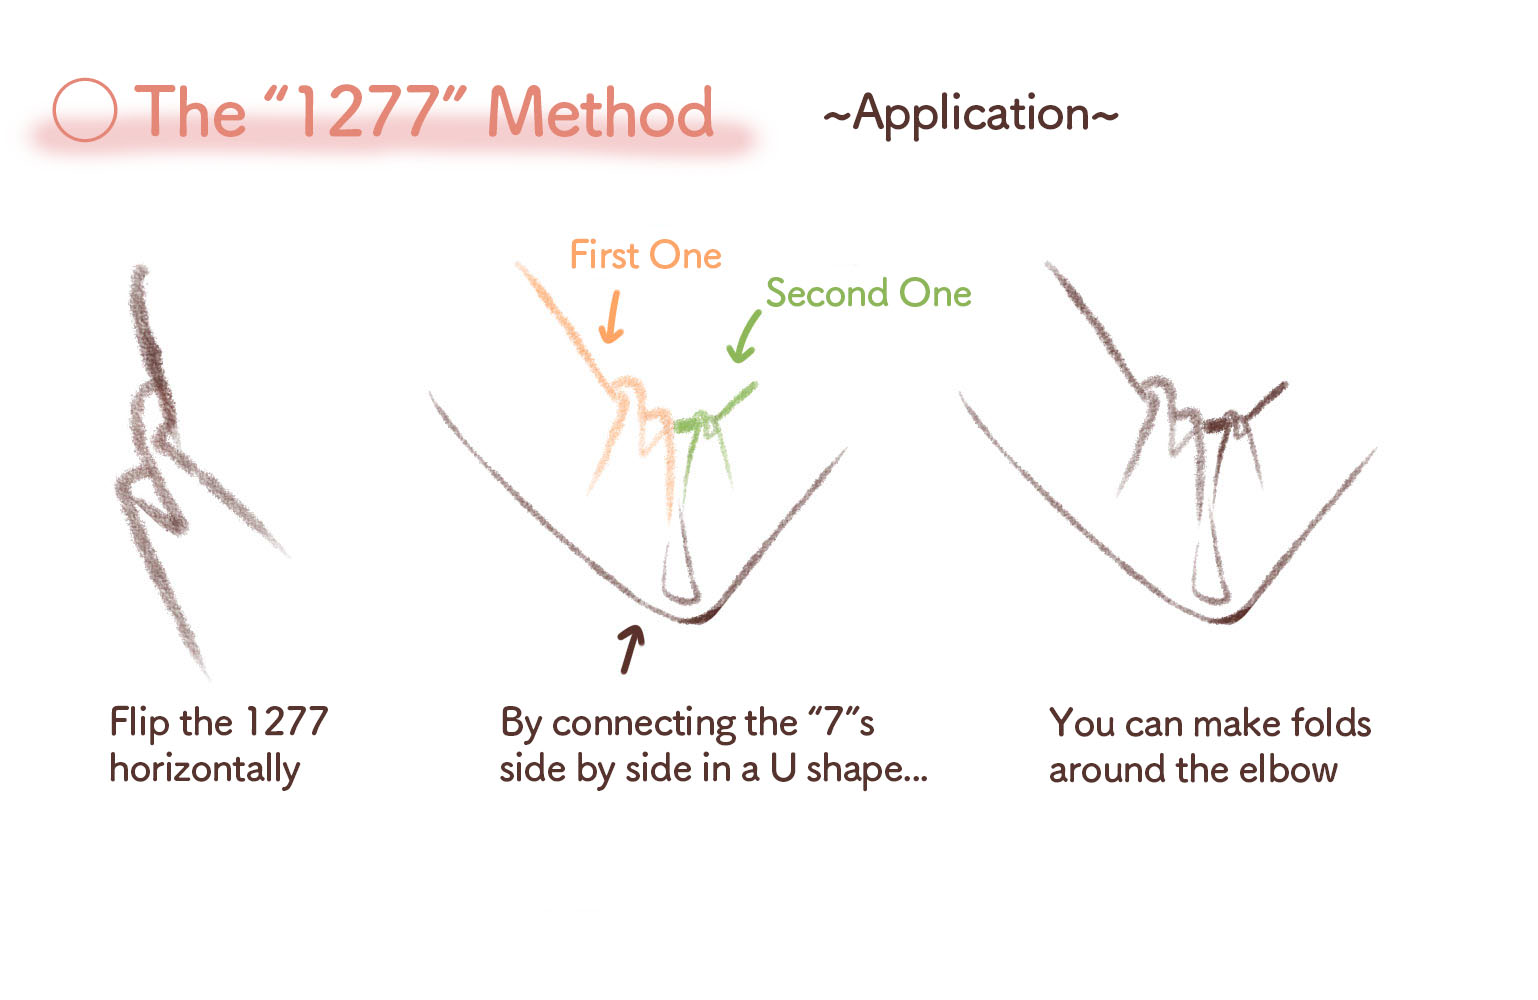
Paint the clothing folds
Lastly, I will introduce the steps to coloring the folds.
As I explained earlier, first start off by distinguishing the light and shadow.
Next, clean the shape of the shadows by imagining the shape of clothing folds.
If you find it difficult to imagine, I recommend making a line drawing of folds prior to this step.
Now add a darker shade to portray depth.
This is for the parts that receive the minimum amount of light, only along the line drawing.
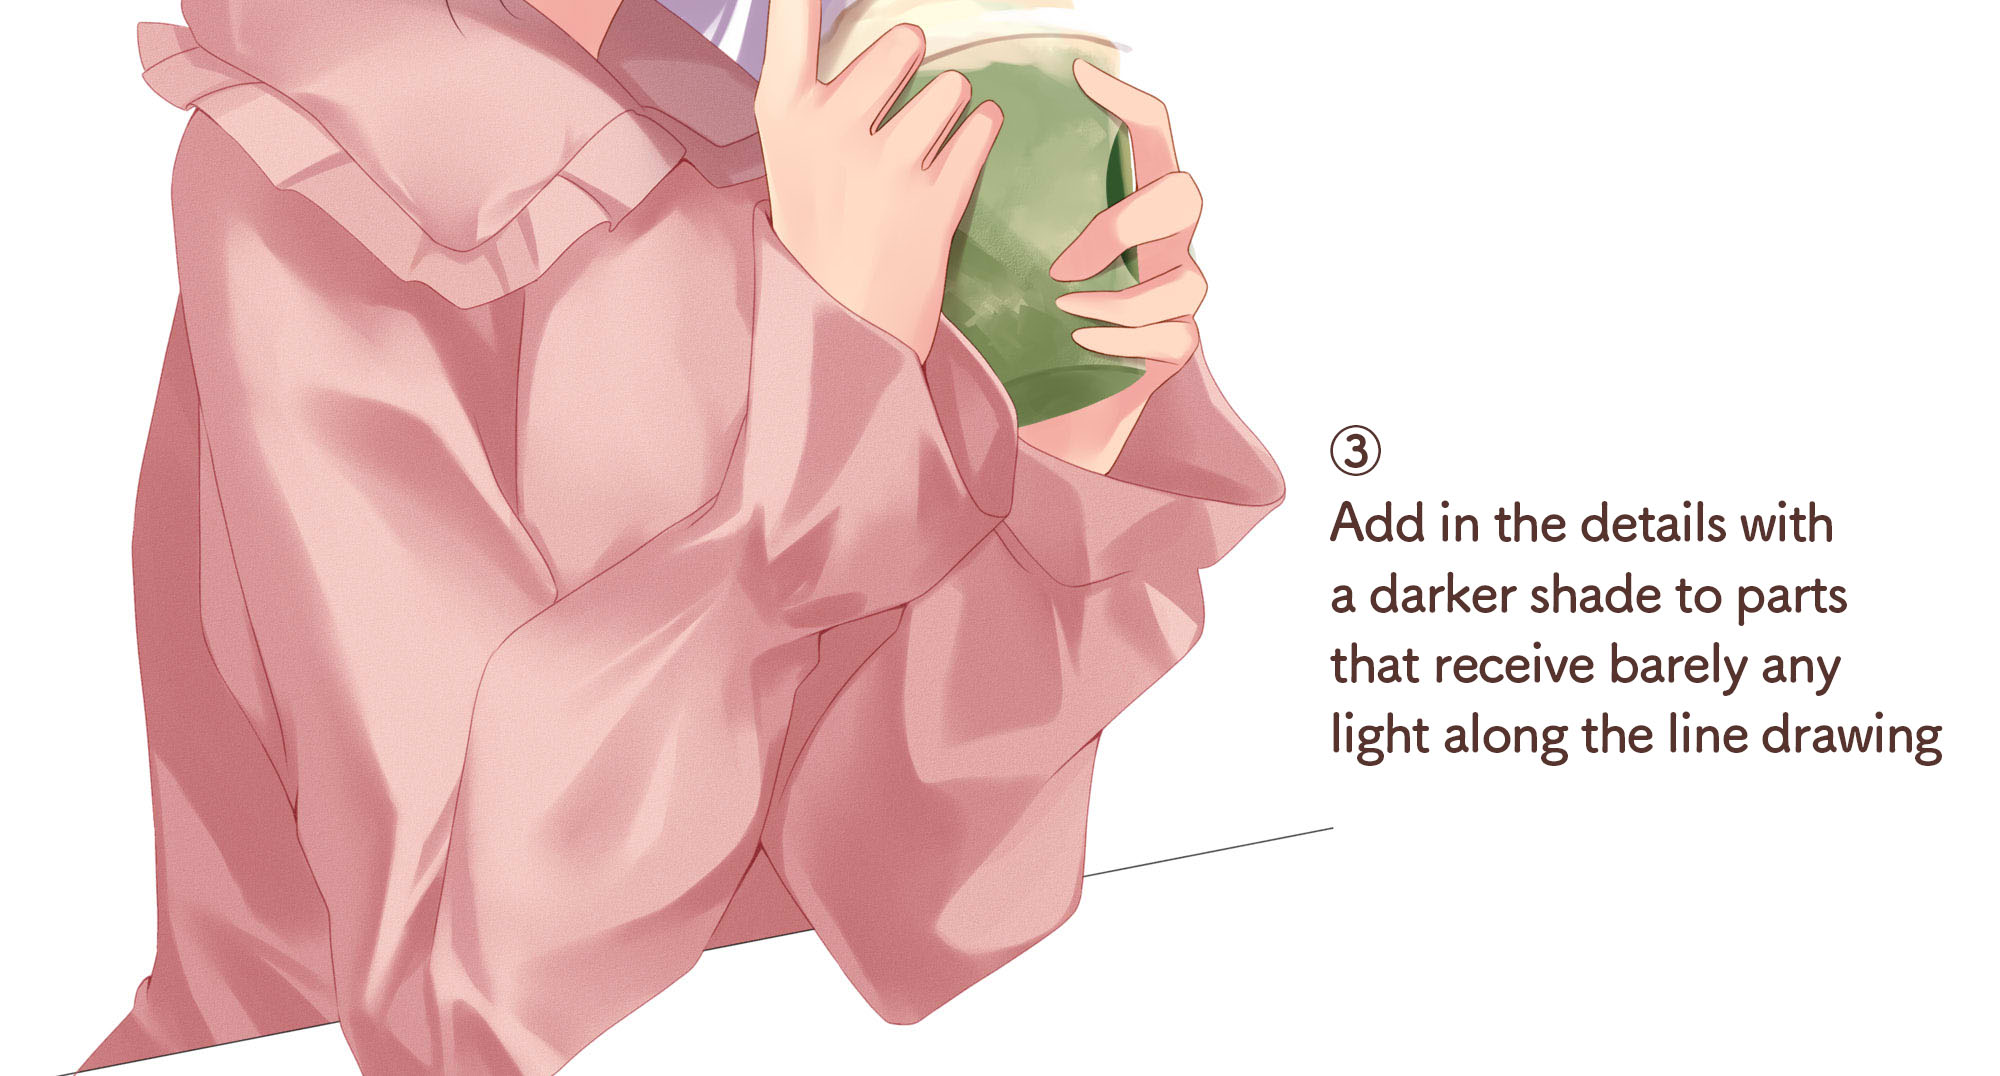
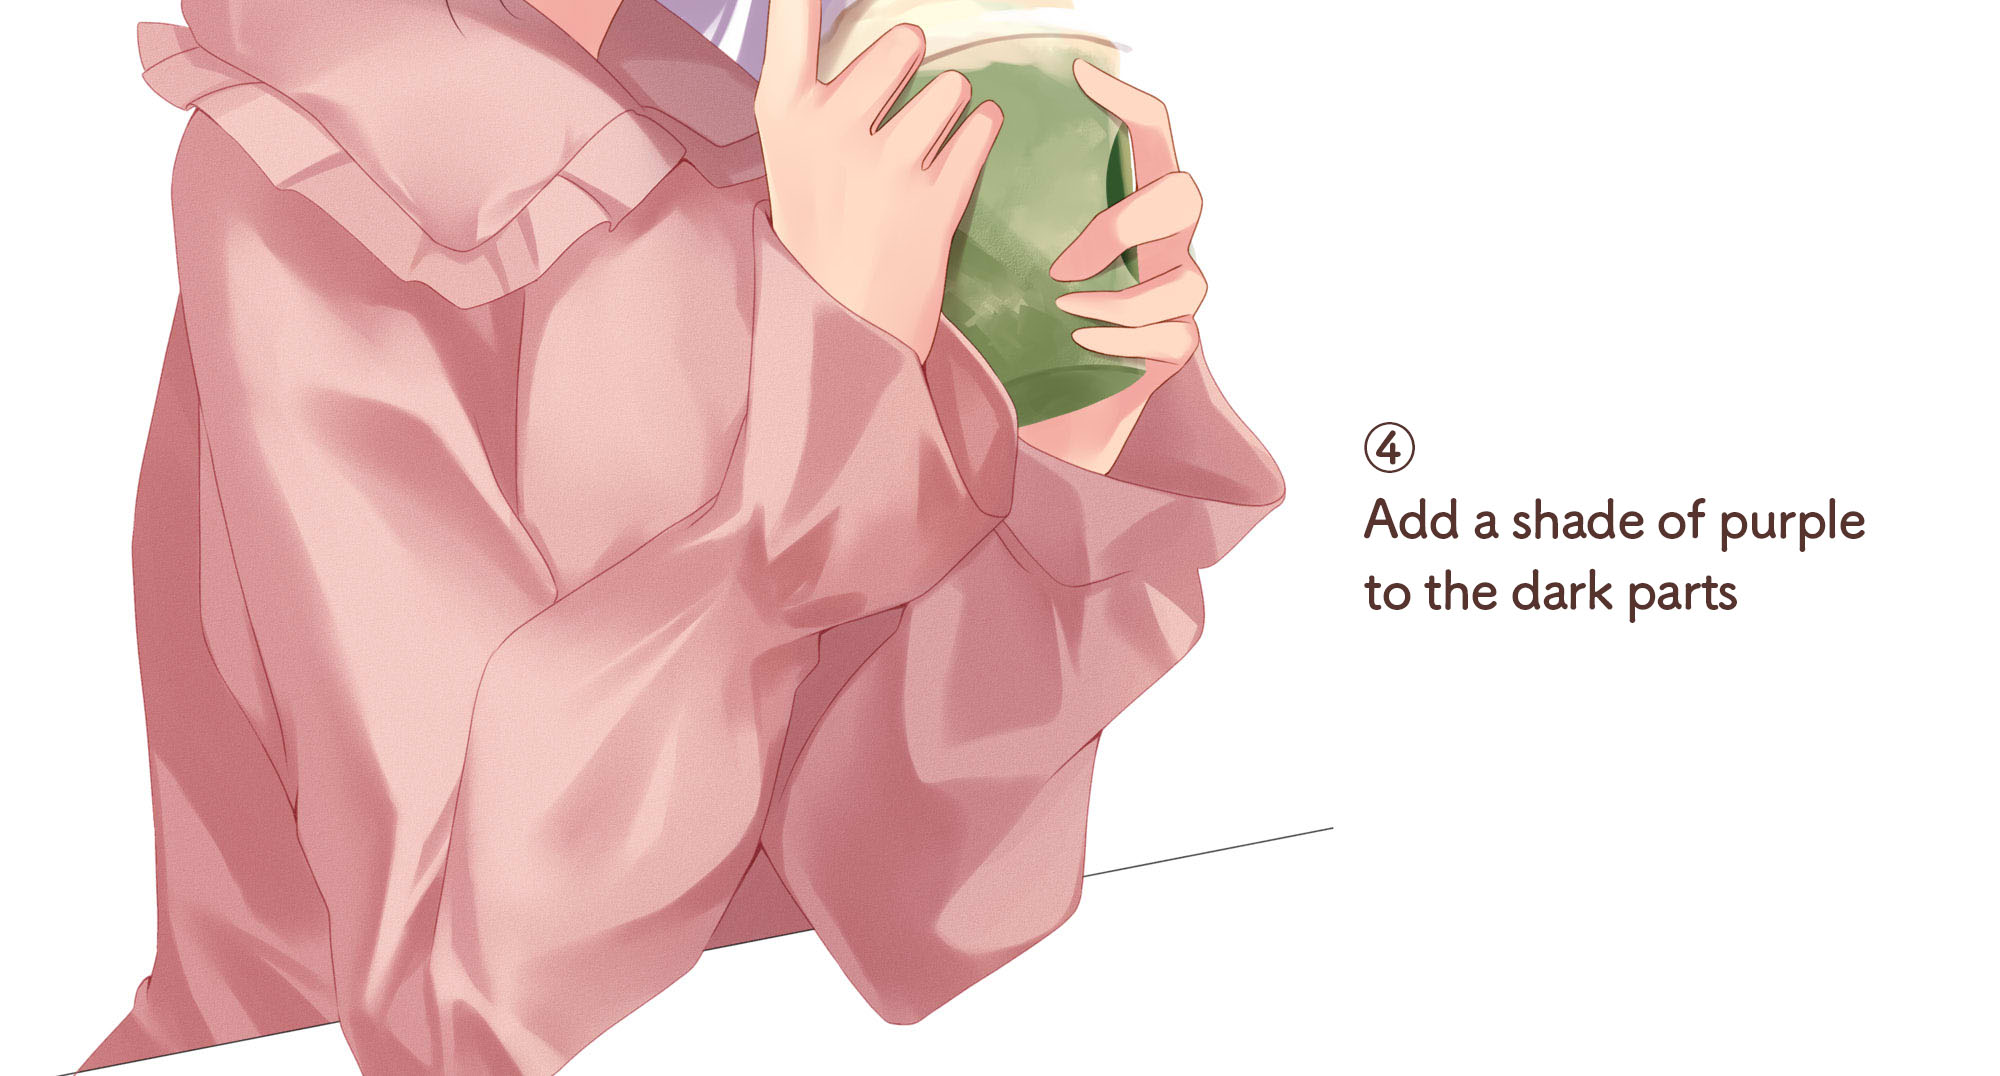
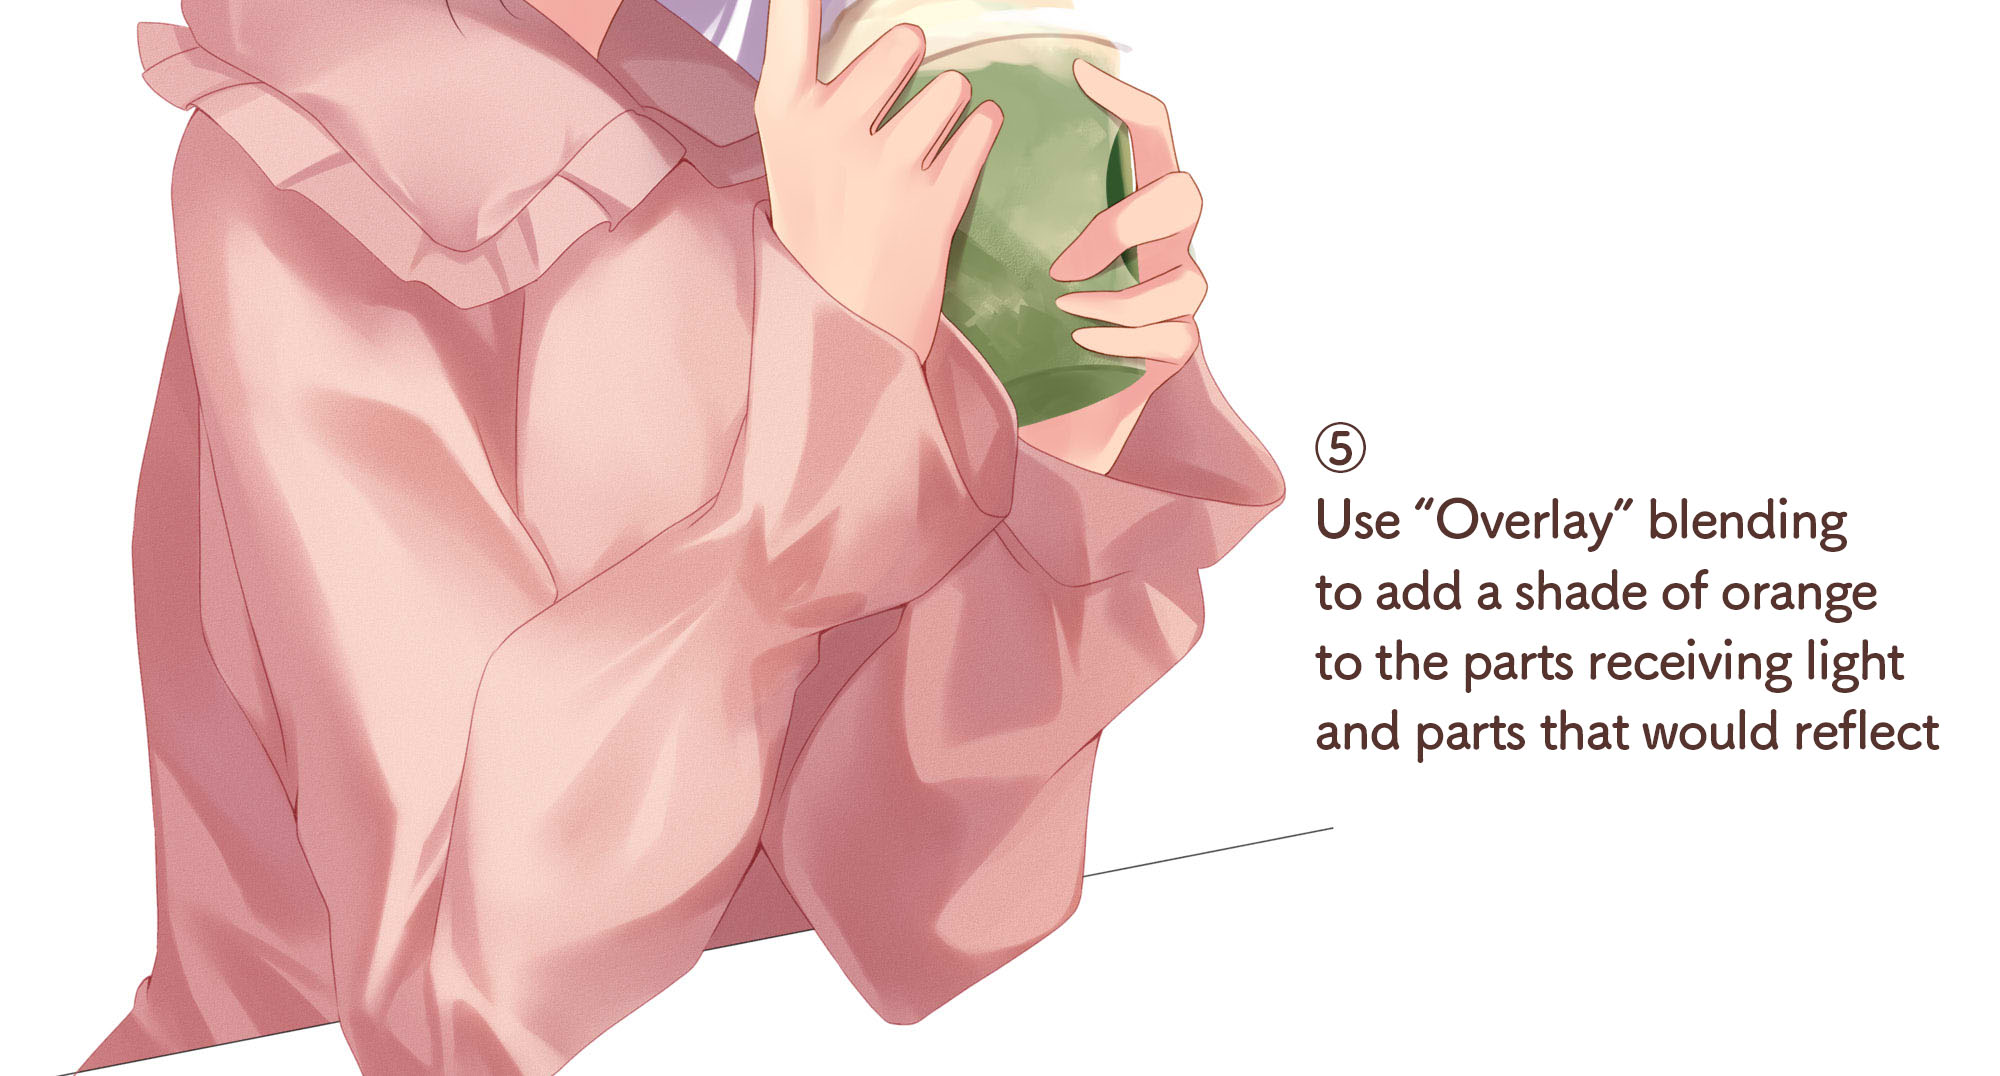
I feel like the color is too simple if I leave it as it is now, so you might not see it well but I like to add a shade of orange or purple as the final touch.
I think this depends on your preference.
I introduced the easy steps to drawing the clothing folds in this tutorial, how did you like it ?
I think the best tip for drawing realistic folds is to look at photos and observe how the folds are made.
You can also take a photo of yourself in the pose you want to draw and use the folds as your reference as well.
But of course, you can work your own way out by finding easy tricks like the “1277 method” and draw everything quickly without being too particular about achieving a realistic look.
Observe a lot, practice a lot and aim to draw the natural texture of clothing folds !
(Text・Illustration/でぺ)
Twitter / https://twitter.com/depe874
ART street / https://medibang.com/u/depe874/
\ We are accepting requests for articles on how to use /

