2021.11.26
Nostalgic Sceneries! Illustrating Traditional Japanese Houses


In this article, I will be drawing a traditional Japanese house with a historical appearance.
If you’ve ever wanted to draw an illustration of the Japanese countryside but think it would be too difficult, this is the article for you!
1. From Rough to Line Drawing
The first thing I did was to roughly draw the house I want to draw.
Here, I pictured a low porch that are common in “my grandmother’s countryside house”, a house structure where you can see the sky through the shoji sliding doors.

Draw a line along the middle of the shoji doors, slightly above the eye level.
The “eye level” should literally be roughly at your first line of sight.

Then create a vanishing point on the eye level as shown in the figure.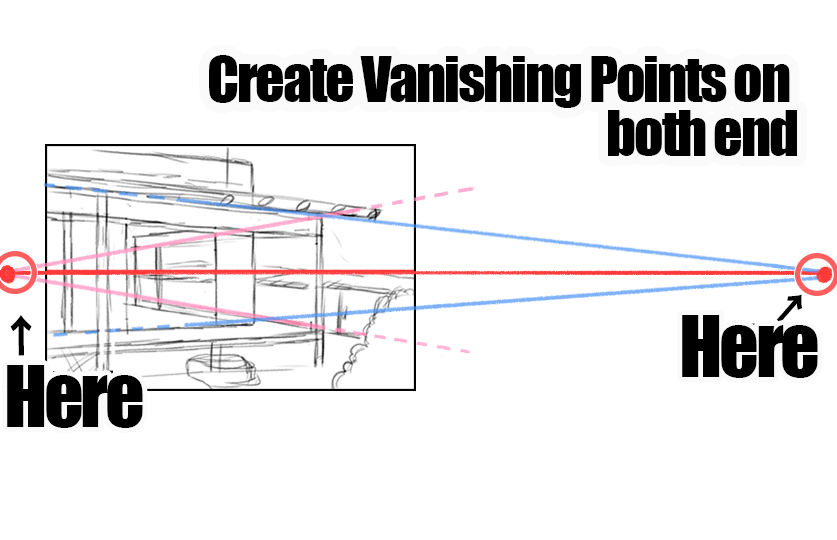

You can create a vanishing point on the eye level by drawing two lines, one along the angle and one along the eye level, as shown in blue.
Don’t forget to save the two vanishing points when you are done.
Now draw the framework along the created vanishing points.

At this point, try to be aware of the structure of the building: the vertical red bars are the columns, and the horizontal blue bars are the supporting structures.

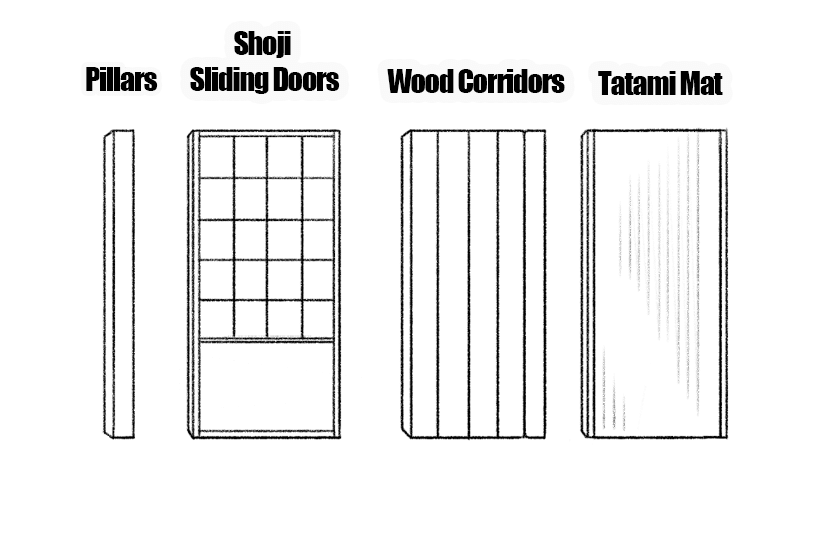
Here, draw the structural parts separately, such as the “pillars,” “shoji doors,” “corridor floors,” and “tatami mats”.
And the “Kawara roof tiles” are indispensable parts of traditional Japanese houses.
Kawaras come in various shapes, but this time we’ll use the standard one.
The kawara roof tiles have round and curved shapes that creates a pattern of waves flowing.
If you draw them into the house, it will look like this.

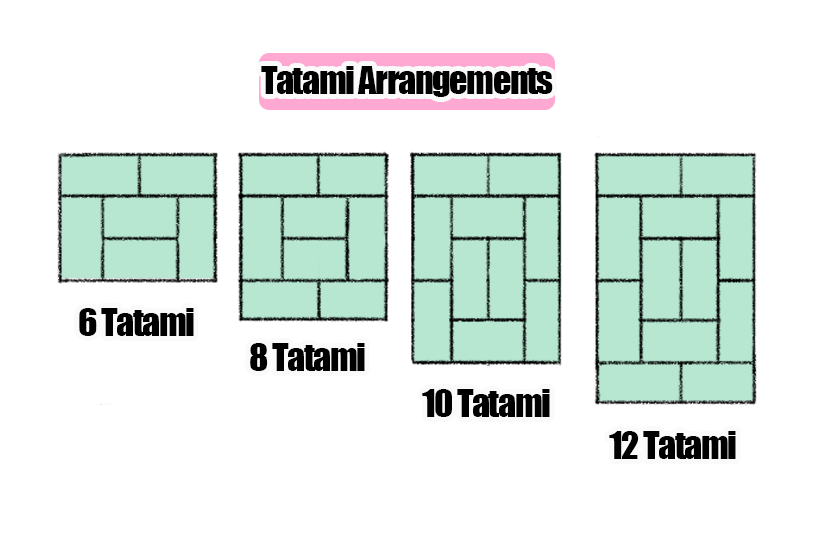
Although they are only slightly visible here, tatami has a law of arrangement.
Instead of simply drawing lines in a mesh pattern, try to be aware of the rectangles lined up as shown in the figure.

I made a line drawing from the draft I made.
This time, clouds and plants are not drawn as line drawings because they will be drawn in when I paint them.
2. Creating Color
① Wood-Grained Areas such as Pillars and Shoji Screens
We will now proceed to coloring.
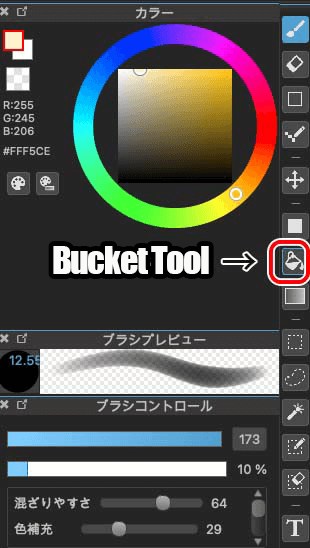
First, we will use the bucket tool in the toolbar.
Give it a rough painting as the image below.
The bucket tool allows you to redo as many times as you like, so paint the color as you wish.

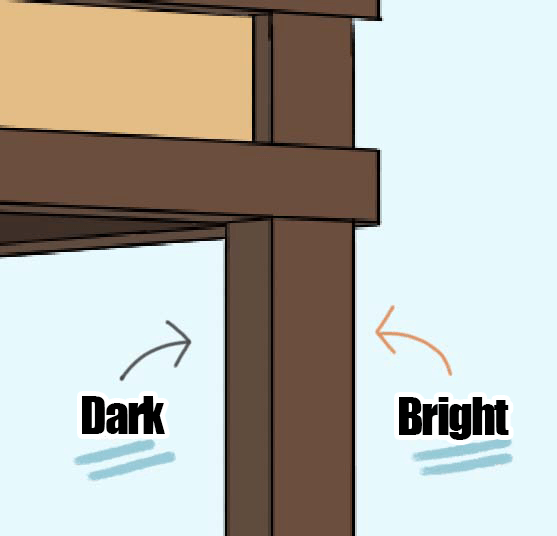
From here, decide on where the light will be shining from.
I want to draw the sun shining from the upper right, so I’ll make sure that the top face is the brightest, the right face as the second brightest, and the left side as the shadow.
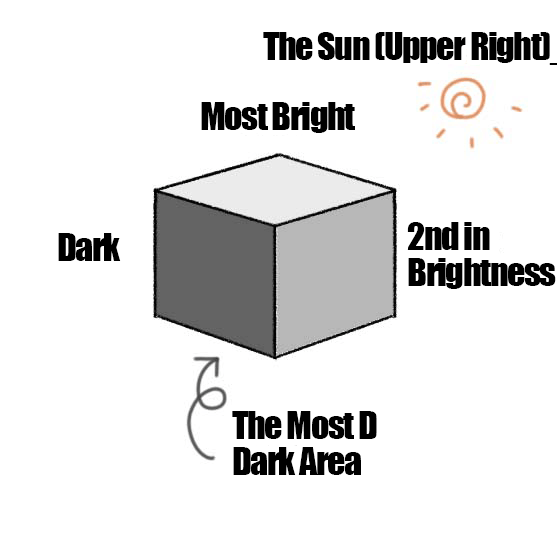
It’s hard to see the difference since the paint is still in undercoating, but you can see the difference in the color brightness close up.
Now, we will draw in the undercoating.
First, place a new layer on top of the layer you want to draw on, and select “Clipping”.

We want to start with the wall, so we select the wall layer.
Use a color that is a little darker than the wall color and roughly draw in the shading.
It’s okay if the color is a little uneven so that you show the wall has history.
Draw the shadows of the wood on the wall as well.

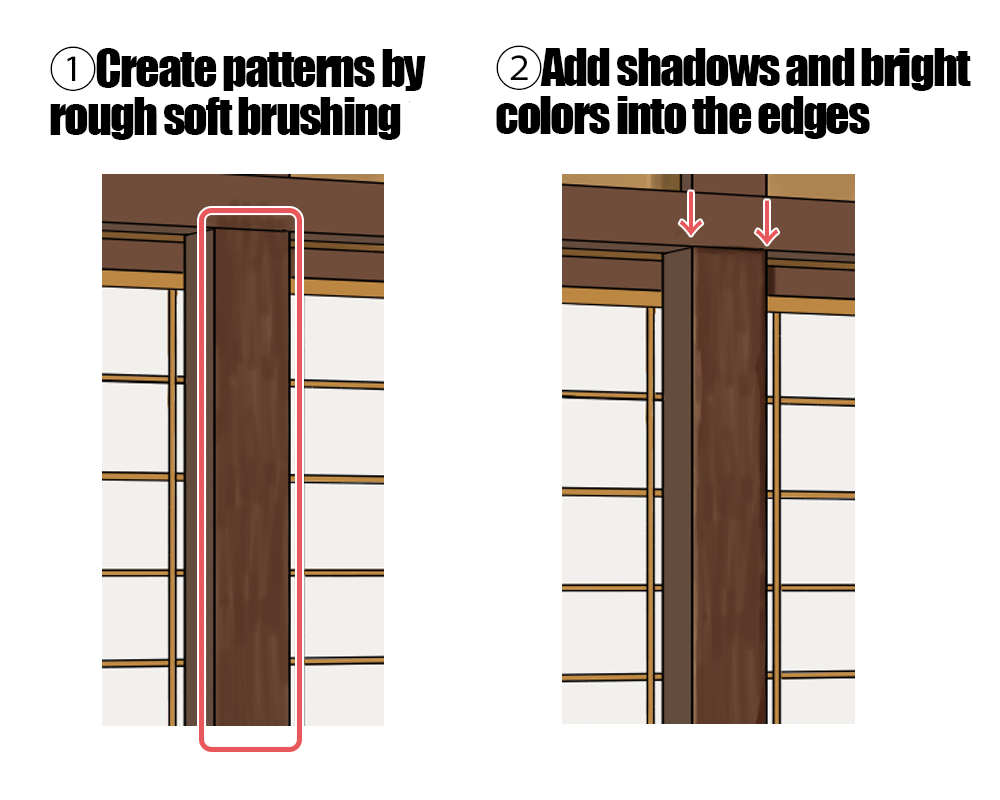
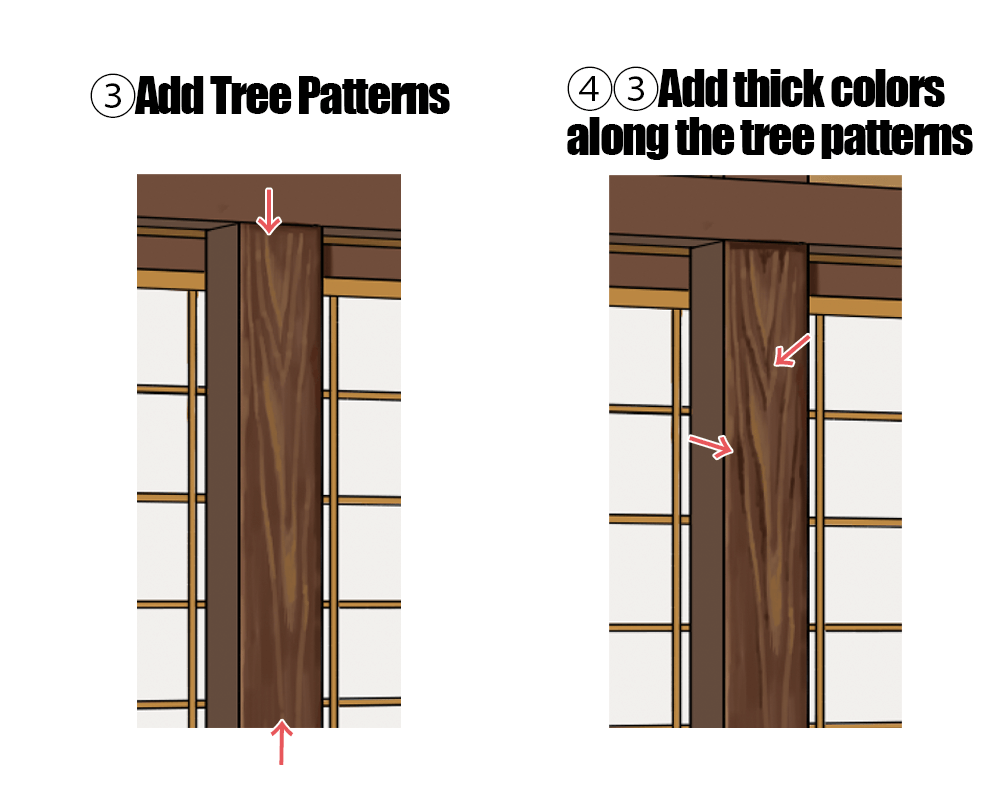
We will add the pattern on the pillars.
A Japanese house is a wooden structure, so let’s make sure to express the texture of wood here.
I will explain along the image below.
To add the shadow and bright color faces, place them along the vertical edges.
This will add a more three-dimensional effect.

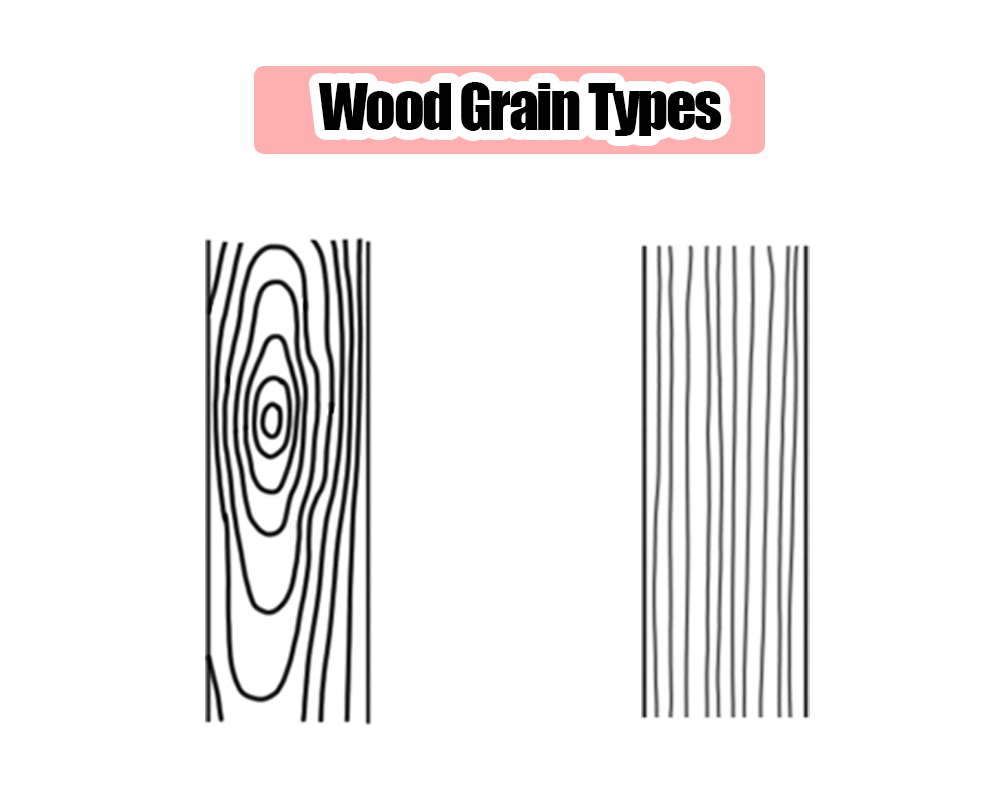
There are two main types of wood grain: overlapping circles and straight lines.
This time, I used the pattern on the left as a base.
Please try using the one that is easier for you to draw.
This is what it looks like when you finish drawing the grain of the wood where the pillars will be.

I used the same technique to draw in the shadowed surfaces.

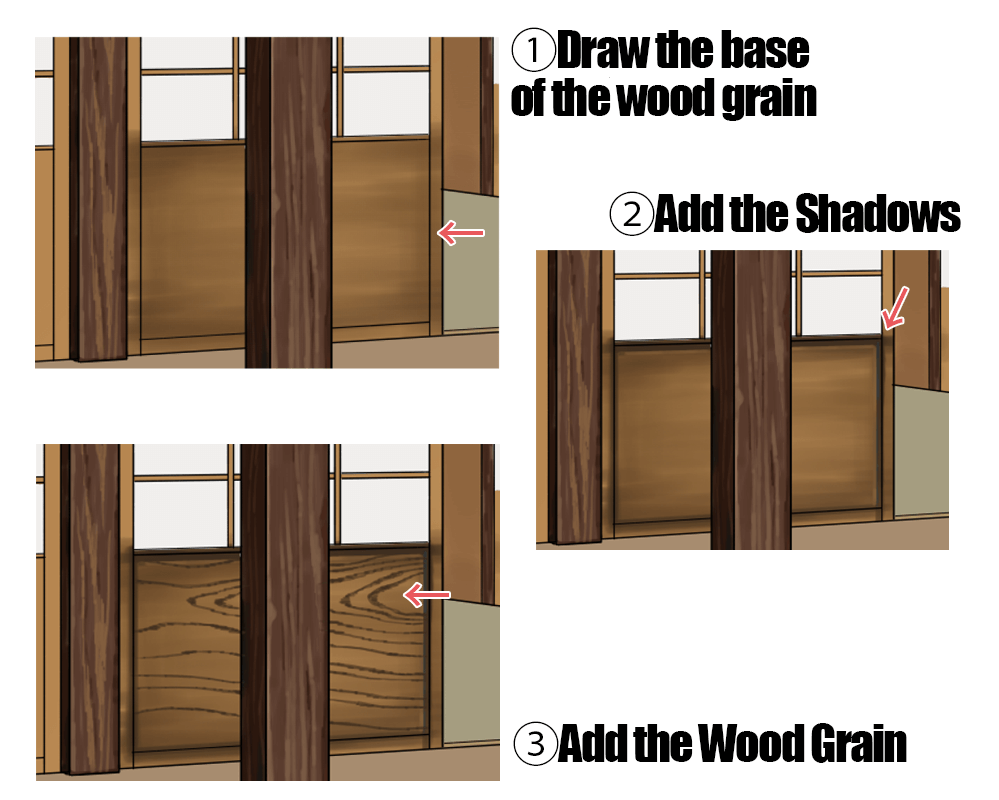
Next we draw the wood grain of the shoji screens.
The method of drawing is almost the same as for the pillars.
1) Draw the base pattern.
2) Add shadows.
3) Add the grain.
I painted the grain of wood over the shoji.
I made the flat shadows ragged to match the wood grain, and added a few bright patterns.

Check again to see if the entire image is balanced.

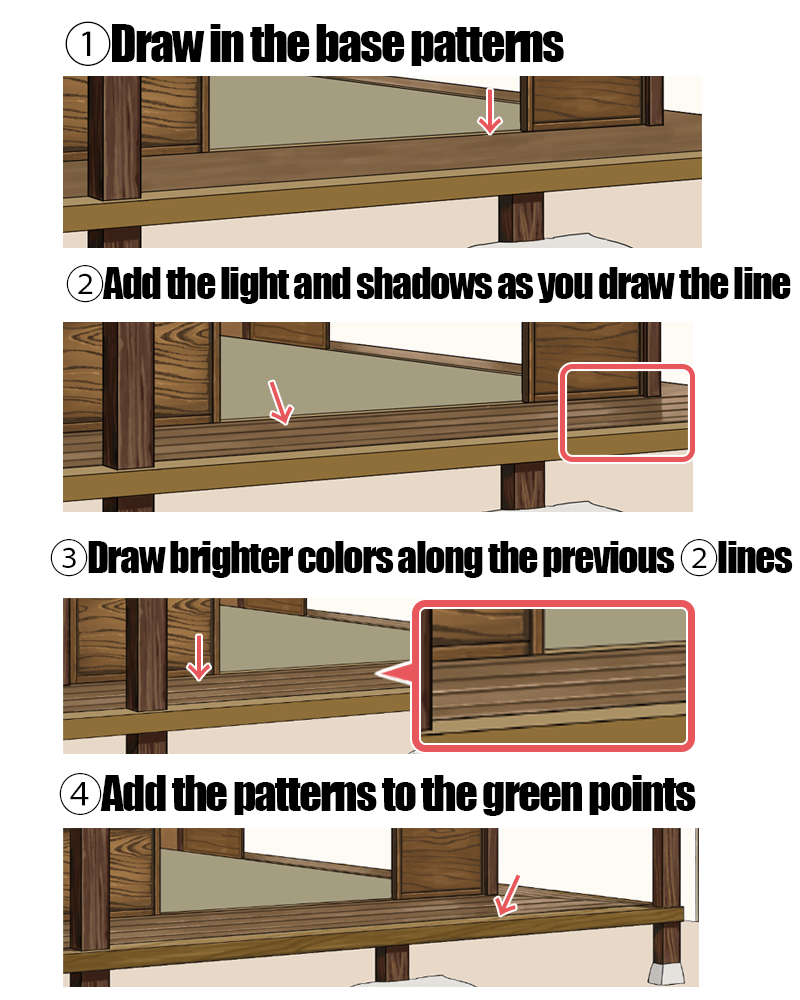
The next step is to draw in the (Japanese) porch.
The porch floor should be more of a slippery texture than the pillars, so try to addd light reflections and shadows to it, as illustrated below in (2).
This is the resulting illustration.

② Kawara・Tatami・Paper parts of Shoji
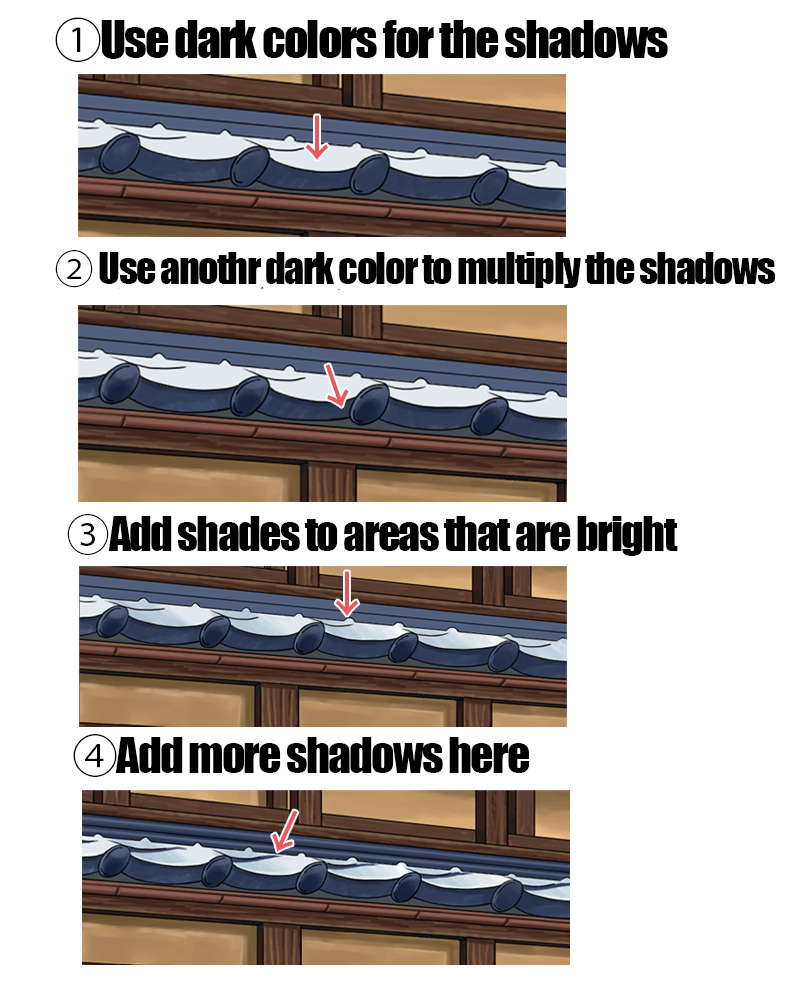
Next we will draw in the Japanese roof tiles.
Tiles have a large difference in color between light and dark areas.
The surface is a bright light blue color close to white, and the shadows are a deep blue with grayish tones.
Please remember this.
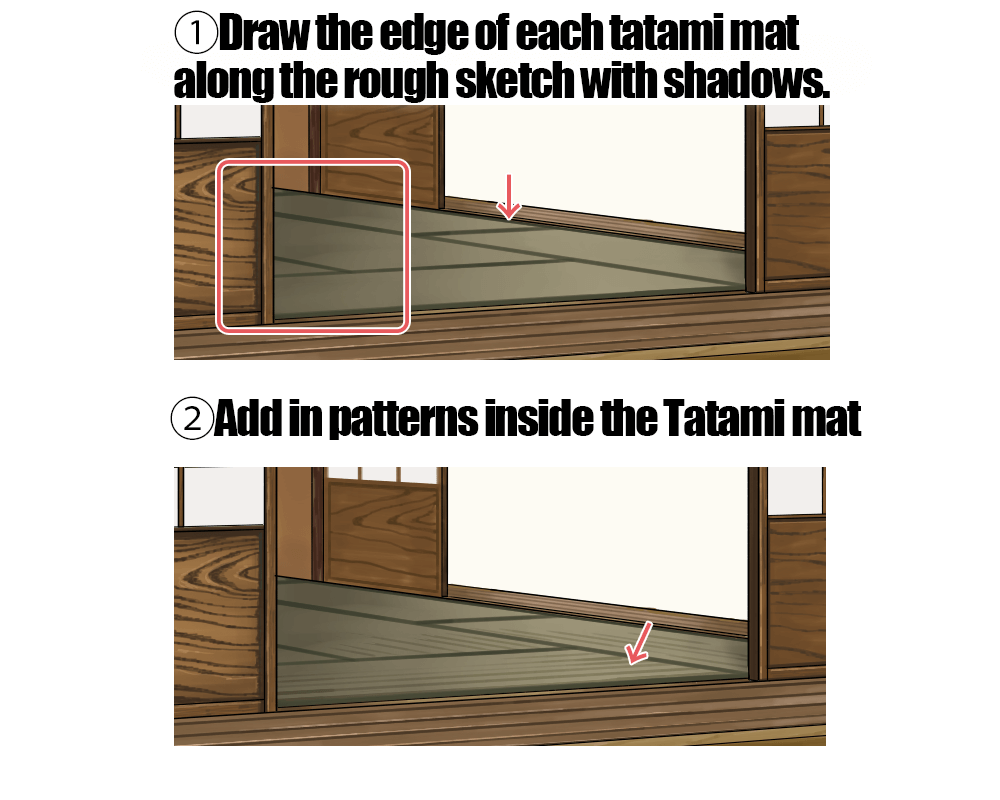
The next step is to draw in the tatami mats.
The tatami mats are only slightly visible, so I try to keep it simple and not overdraw.
The garden wall was also created using the same procedure as before.

Try to draw in less and with brighter colors as your distance grows.
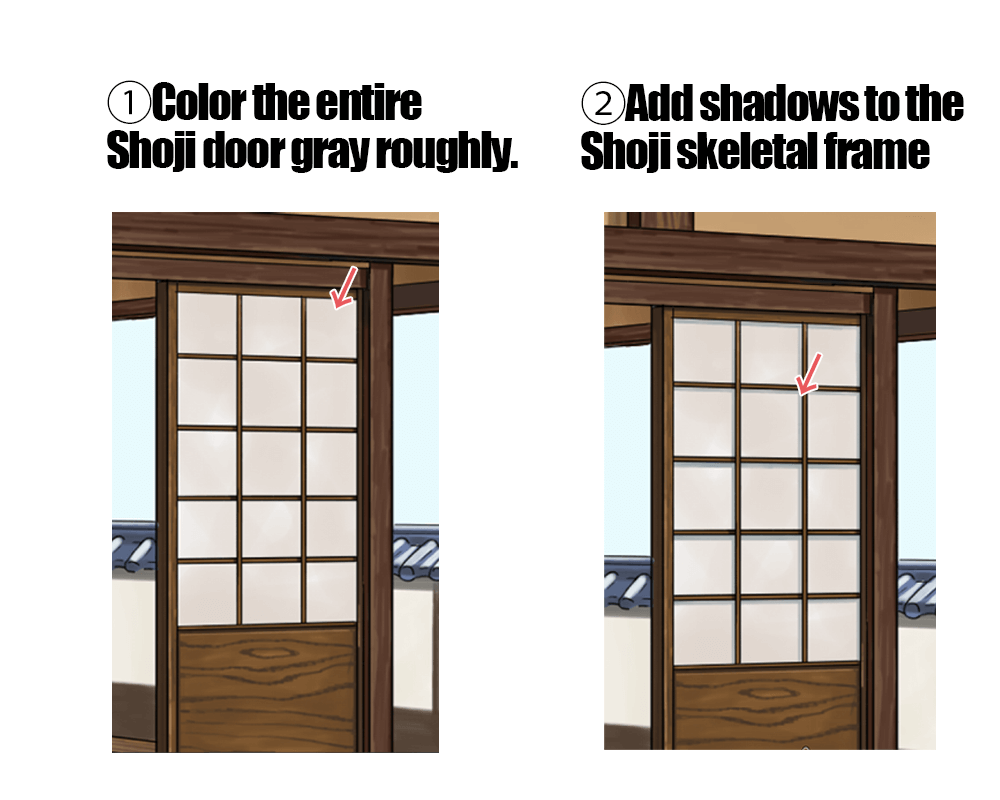
Add shadows to the shoji doors.
Instead of a pure white shoji, I added a little grayish color this time.
We want to give it an aged texture, so use a large brush to apply the color as if you were applying dust.
③ Rocks and Plants in the Yard
Apply patterns to the stone under the porch.
Try to follow the pattern of the line drawing, paying attention to the protrusions and indentations.

Paint the rock roughly rather than neatly, as if you paint it out of balance to show the rockiness.
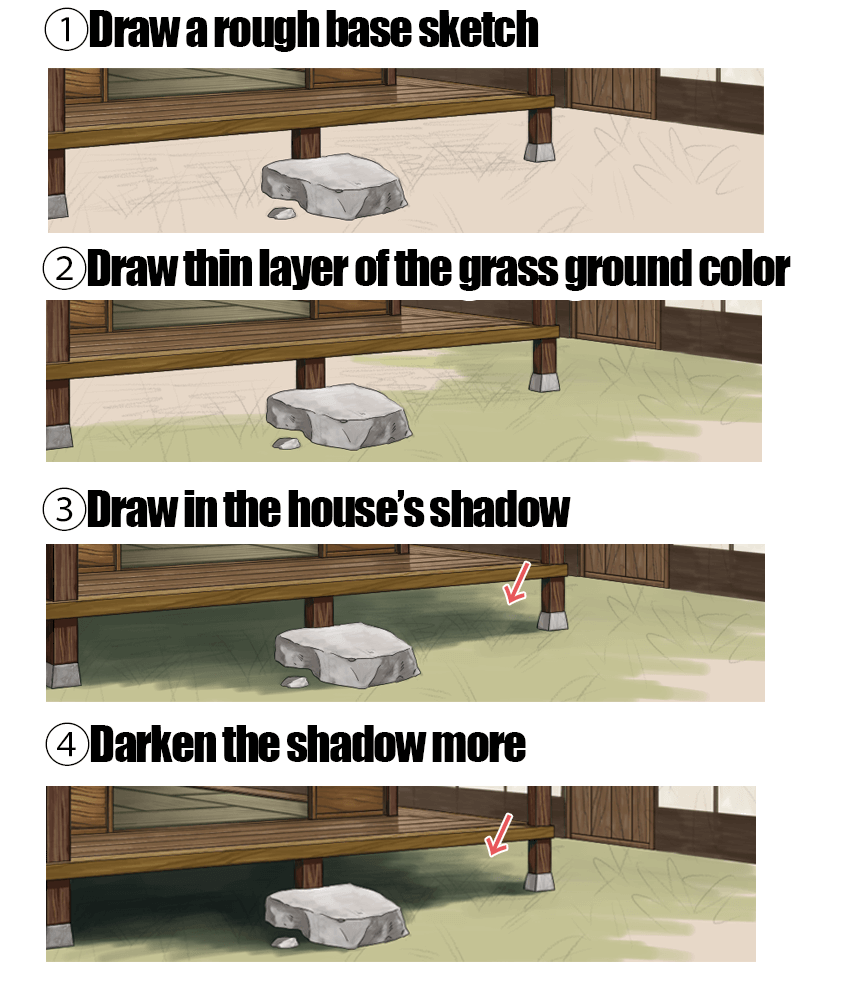
Leyt’s paint the garden next.
Instead of a choosing a bright, youthful green color here, try coloring a slightly muddy, yellowish green.
This will fit right in with the illustration.
The shadows of the buildings will be very dark, so you can go all out and use a dark green.
Draw in the weeds.
Separate the large weeds in the foreground and the short weeds under the building in different layers.

Spread the weeds out over the entire ground.
Try to draw short grass, long grass, and darker grass in the shaded areas.

Next, we will draw the large shrub in the foreground.

You don’t need to try to draw the shrub in meticulous detail.
Select the layer you just created and choose [Filter→Gaussian Blur].

Increase the value slightly to blur the leaves.
Click OK when it is just right.

I blurred not only the shrubs on the lower right but the weeds on the lower left as well.
This naturally draws the eye toward the building.

④ The Sky and the House’s Shadow
Now let’s paint the sky.

The first thing to do is to paint the untouched sky blue.

The closer to the ceiling, the deeper the blue should be.
Use a soft brush to blend the colors.

Draw in the clouds.
Summer clouds have a distinct shape, so try to make them look like cotton candy.

Keeping in mind that clouds also have shadows, I blurred the clouds a little closer to the ground to give them more reality.
I added some sudare (a type of bamboo curtain) to the shoji in the back.

Next, we will use blending to create the shadows.
We painted the areas of the building that we wanted to be in shadow with a dark blue color.

With the shadow layer selected, lower the opacity and change the blend to Multiply.

Then it will become translucent like this.

Use the eraser to erase the parts you don’t need.
You want the room to look like it’s filled with daylight, so erase some of the shadows on the tatami.

I wanted to add some sunshine, so I painted bright yellow on the border of the shadows and the middle of the porch.
Try to paint softly here.

Then like the shadows, we will lower the opacity and set the blend to “Add and Emit”.

This adds brightness to the image.
Again, use the eraser to erase any protruding area.

This completes the project.
Even if you’ve never drawn a Japanese house before, did you now have a picture of where to start?
I hope you will take this opportunity to try it out
(Text and pictures by Hiromi Arakane)
\ We are accepting requests for articles on how to use /

