2022.11.23
【For Beginners】Poses with Weapons ~Part 1~【Making】
“I can come up with weapon designs but when it comes to drawing, it doesn’t work the same way.”
I’m sure many of you feel this way. I do as well.
I draw weapons often but I’m actually struggling every time.
This article will be a making tutorial to help you draw such difficult illustrations of weapons!
I’ve written a couple articles about weapon designs already so please refer to those if you are interested!
▼Become a Weaponsmith
【For Beginners】Become a Weaponsmith – Casting & Minting ~【Weapon Design】
【Weapon Design】Become a Weaponsmith ~Bow Edition~
【Weapon Design】Become a Weaponsmith ~Wand Edition~
I also wrote a detailed explanation in the article below so I hope you check it out!
▼Illustrations with weapons
【For Beginners & Intermediates】Become a Weaponsmith ~Equipment Edition~【Weapon Design】
The first time the functions and tool names appear, they will be written as【Functions, Tool
Names (Windows Shortcut Key)】.
I will link the related articles below, so please refer to those for more details!
▼About【Shortcut Keys】
Draw the rough sketch
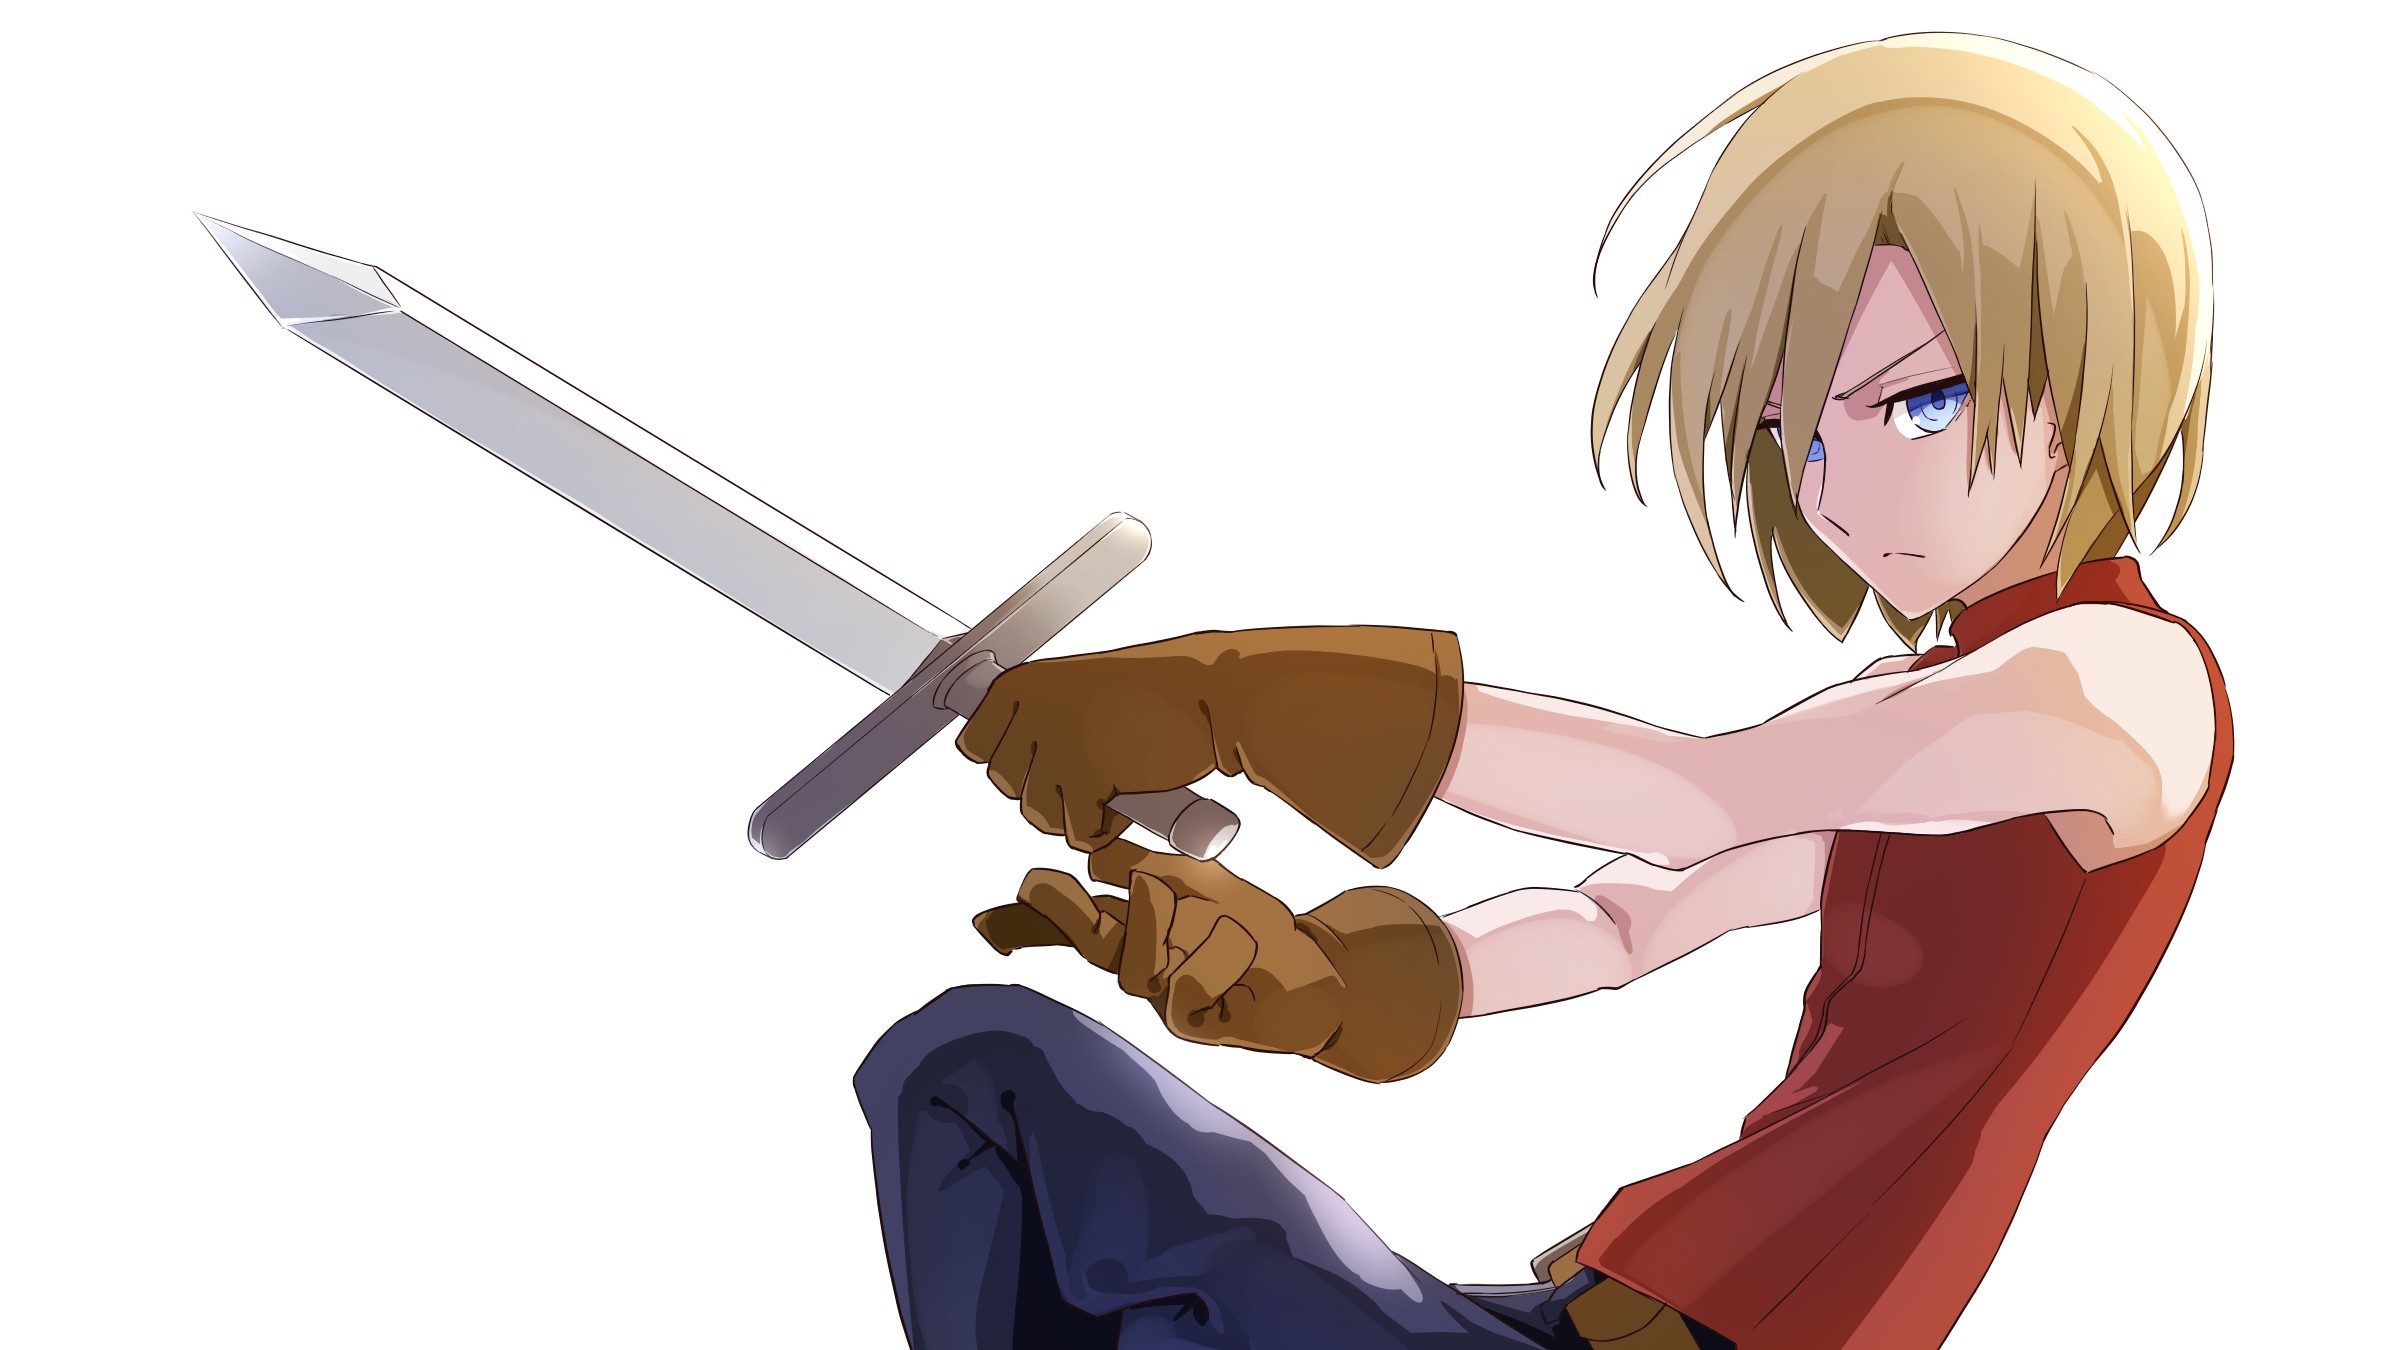
The main part of this illustration is the character’s pose so we are starting off with the most important step.
First, prepare the character and the weapon.
I recommend drawing easy ones in the beginning!
You will start to understand what you need to get done and what you are doing so it becomes applicable to other types of weapons.
So for this tutorial, let’s make an illustration with the simplest weapon!
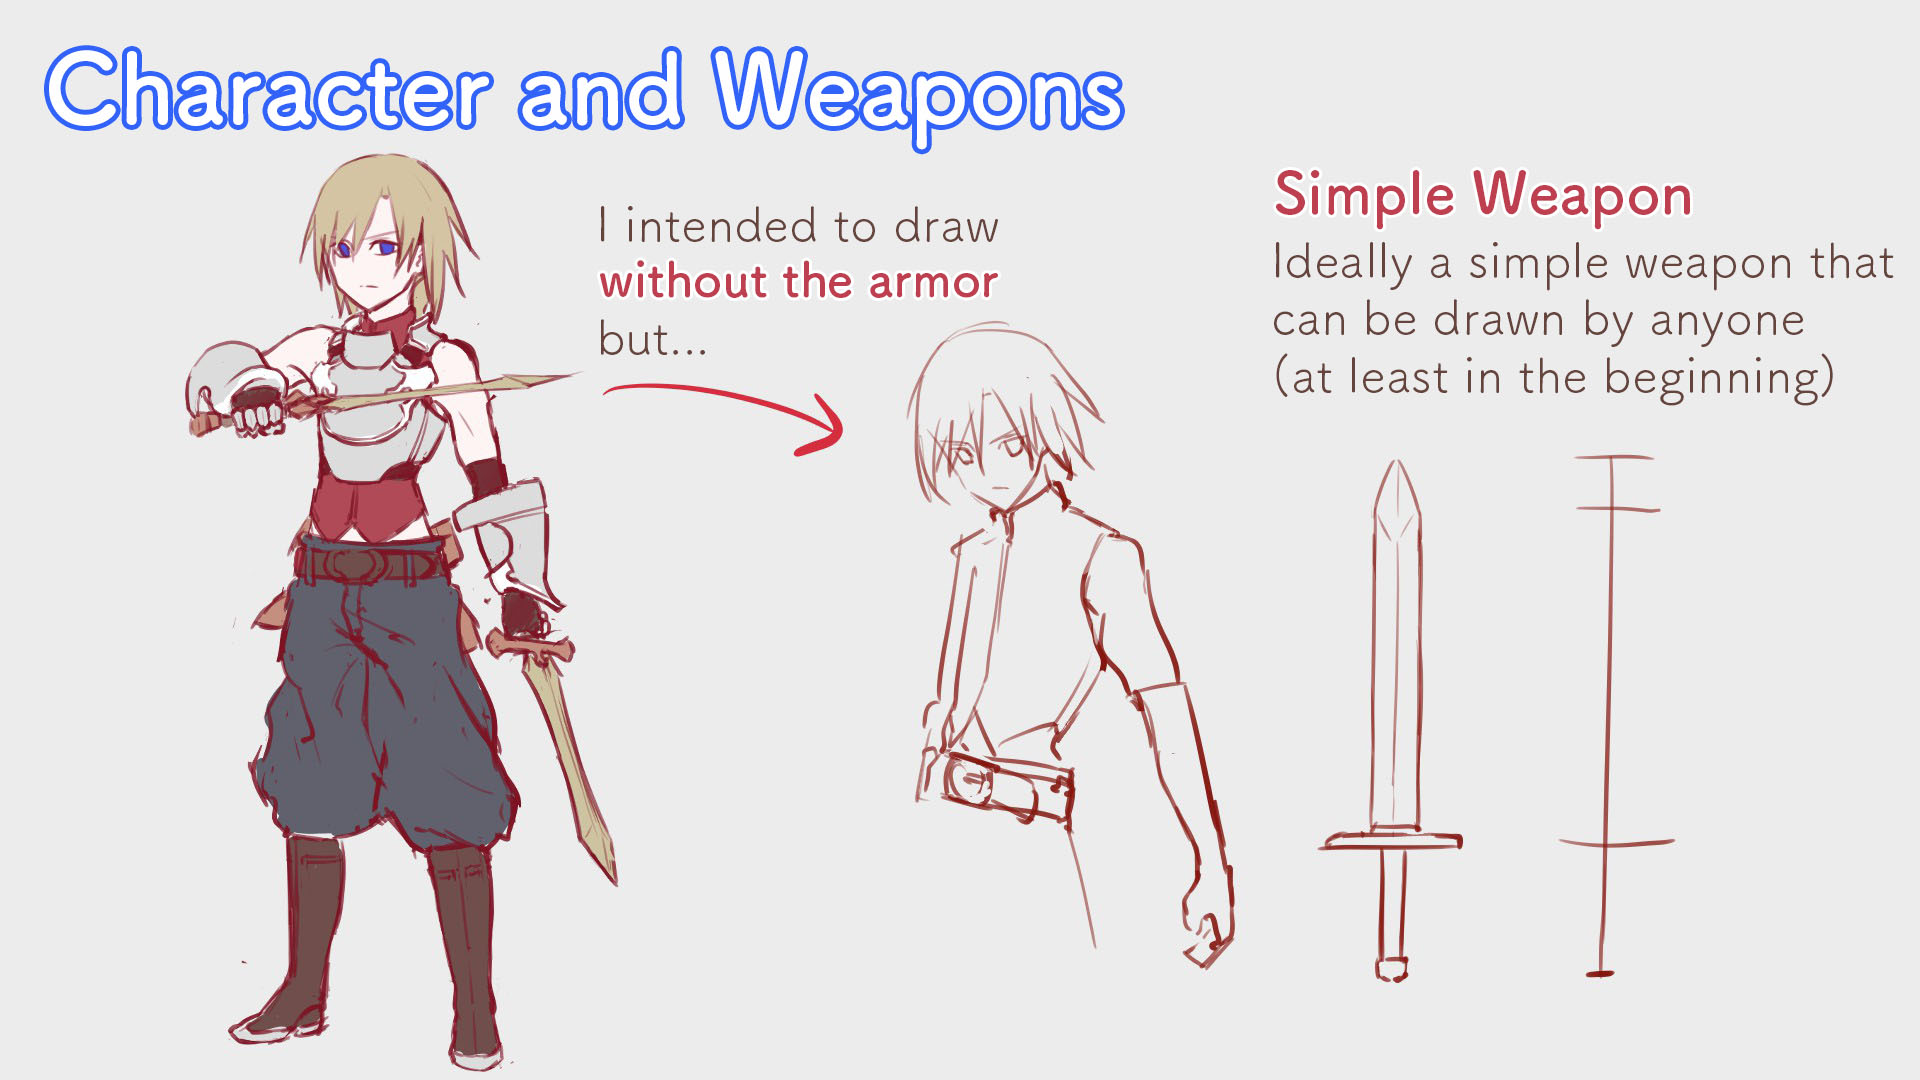
Speaking of the character, I reused the one I drew for an article from a while ago.
I first wanted to draw him without armor but the face became a little too childish so I will be working with the childhood setting.
It’s important to make flexible adaptations!
▼Character Design
[For Beginners] Let’s make our own child! Part 1 [Original Character]
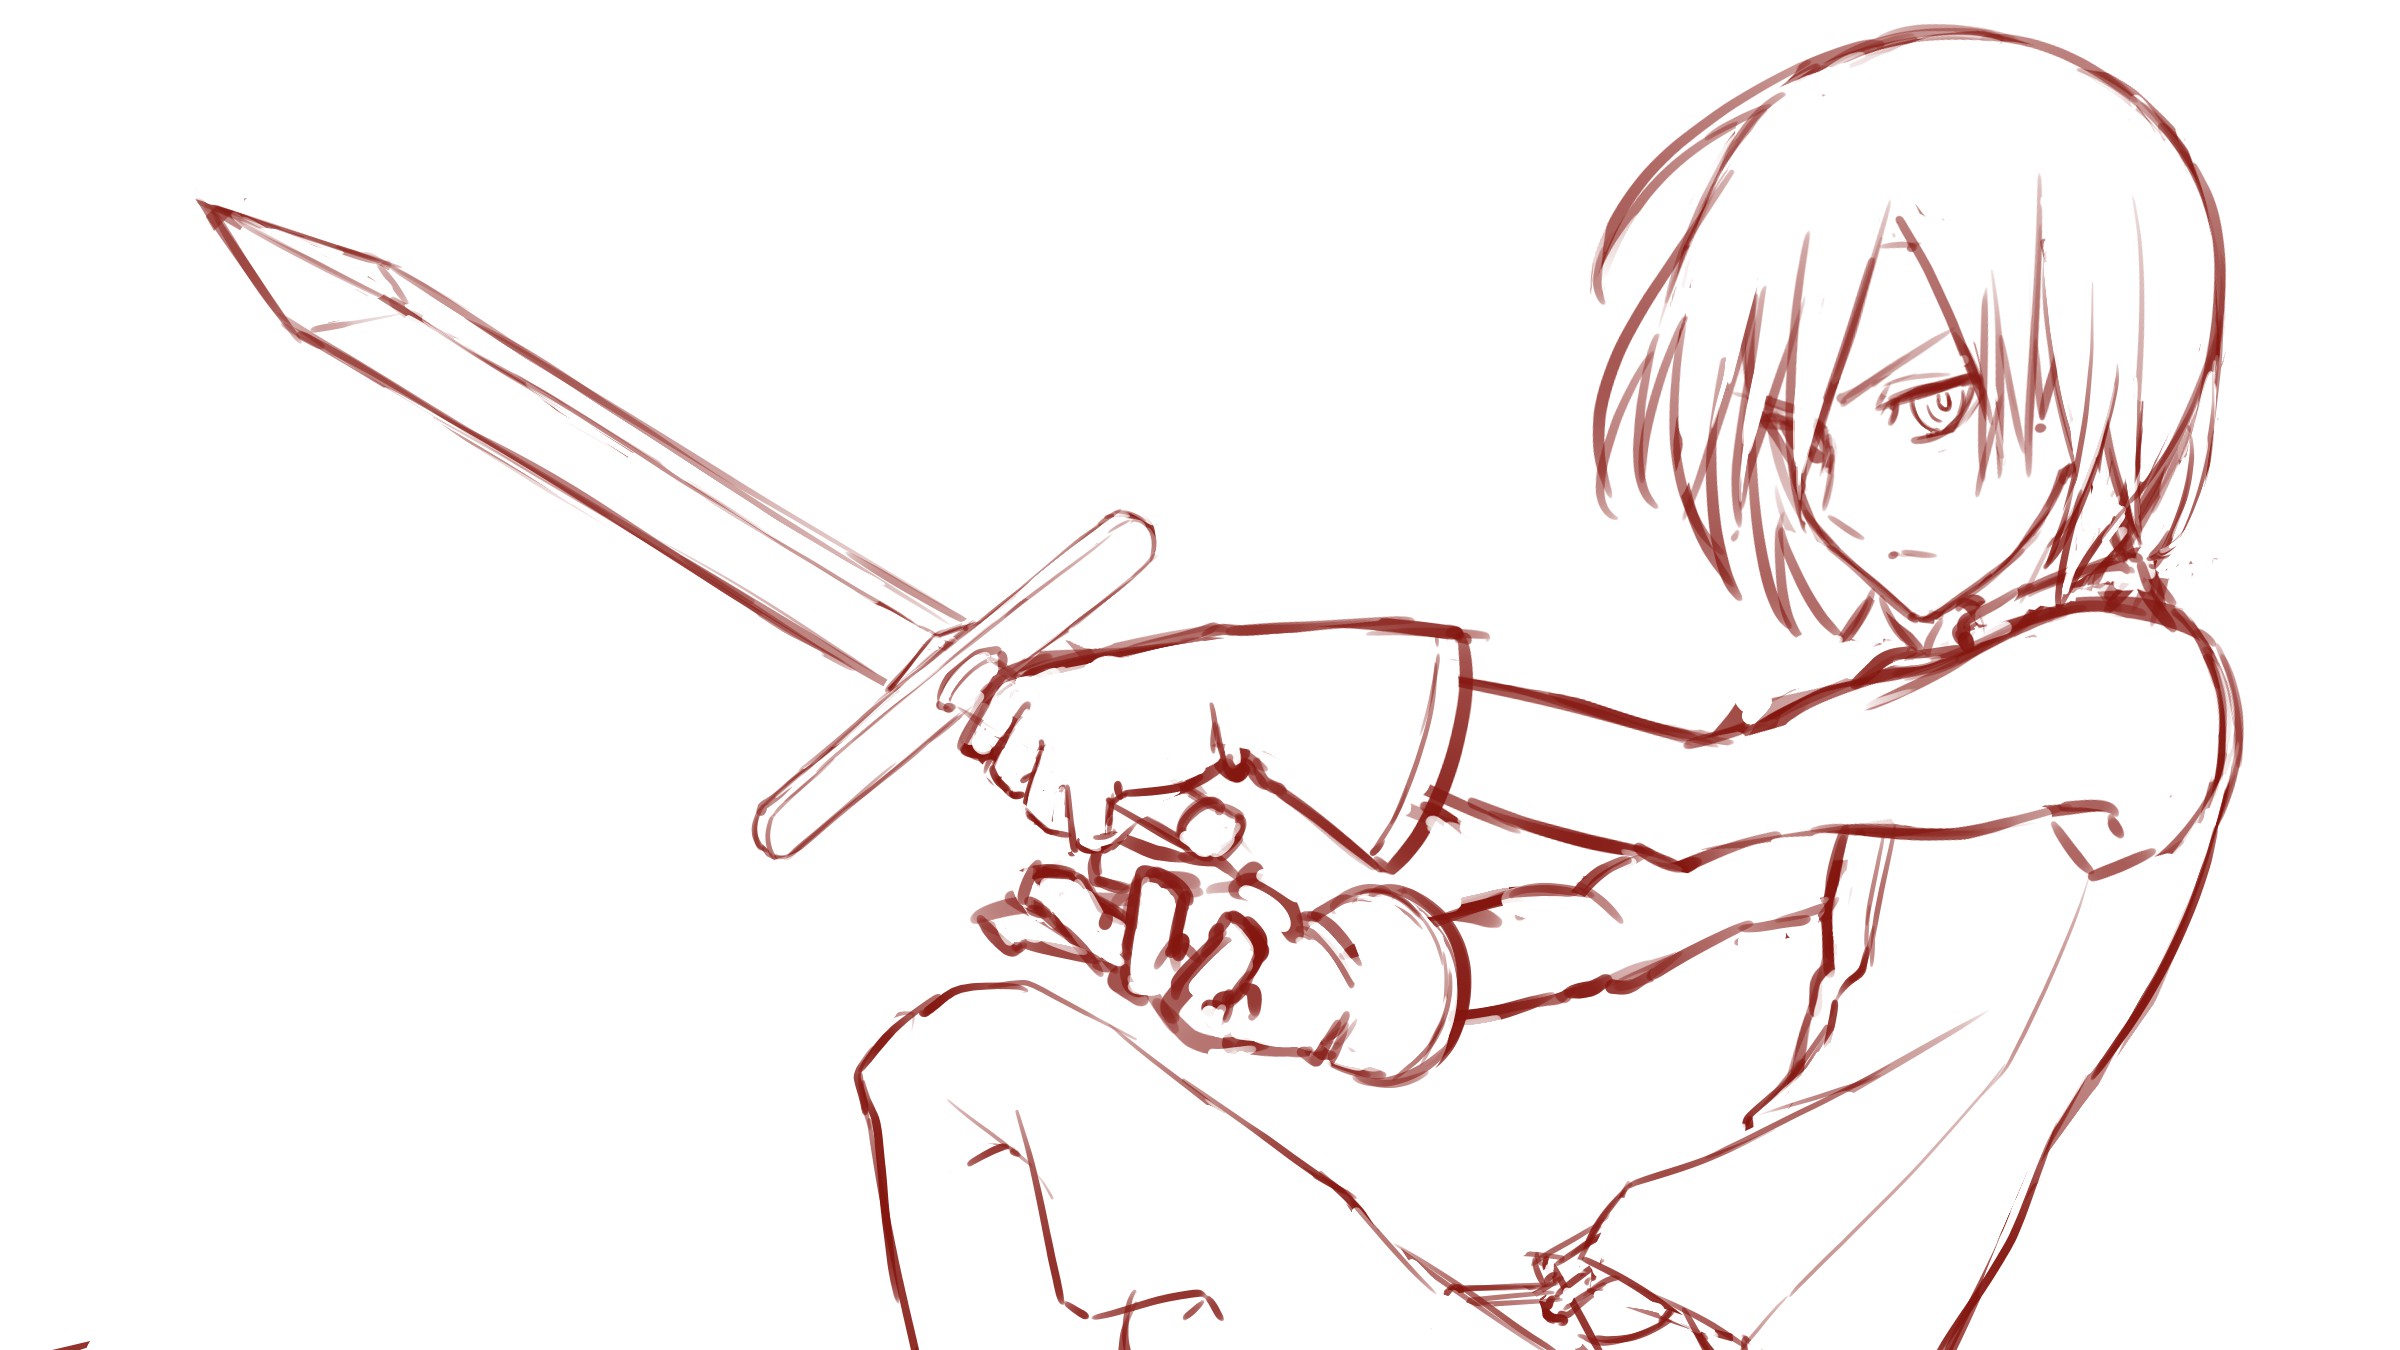
I will be drawing a landscape illustration.
Since I want to make use of the long sides, I decided on the pose below.
Avoid making it complex by choosing an easy yet natural look for the weapon (a little slanted or with perspectives etc.).
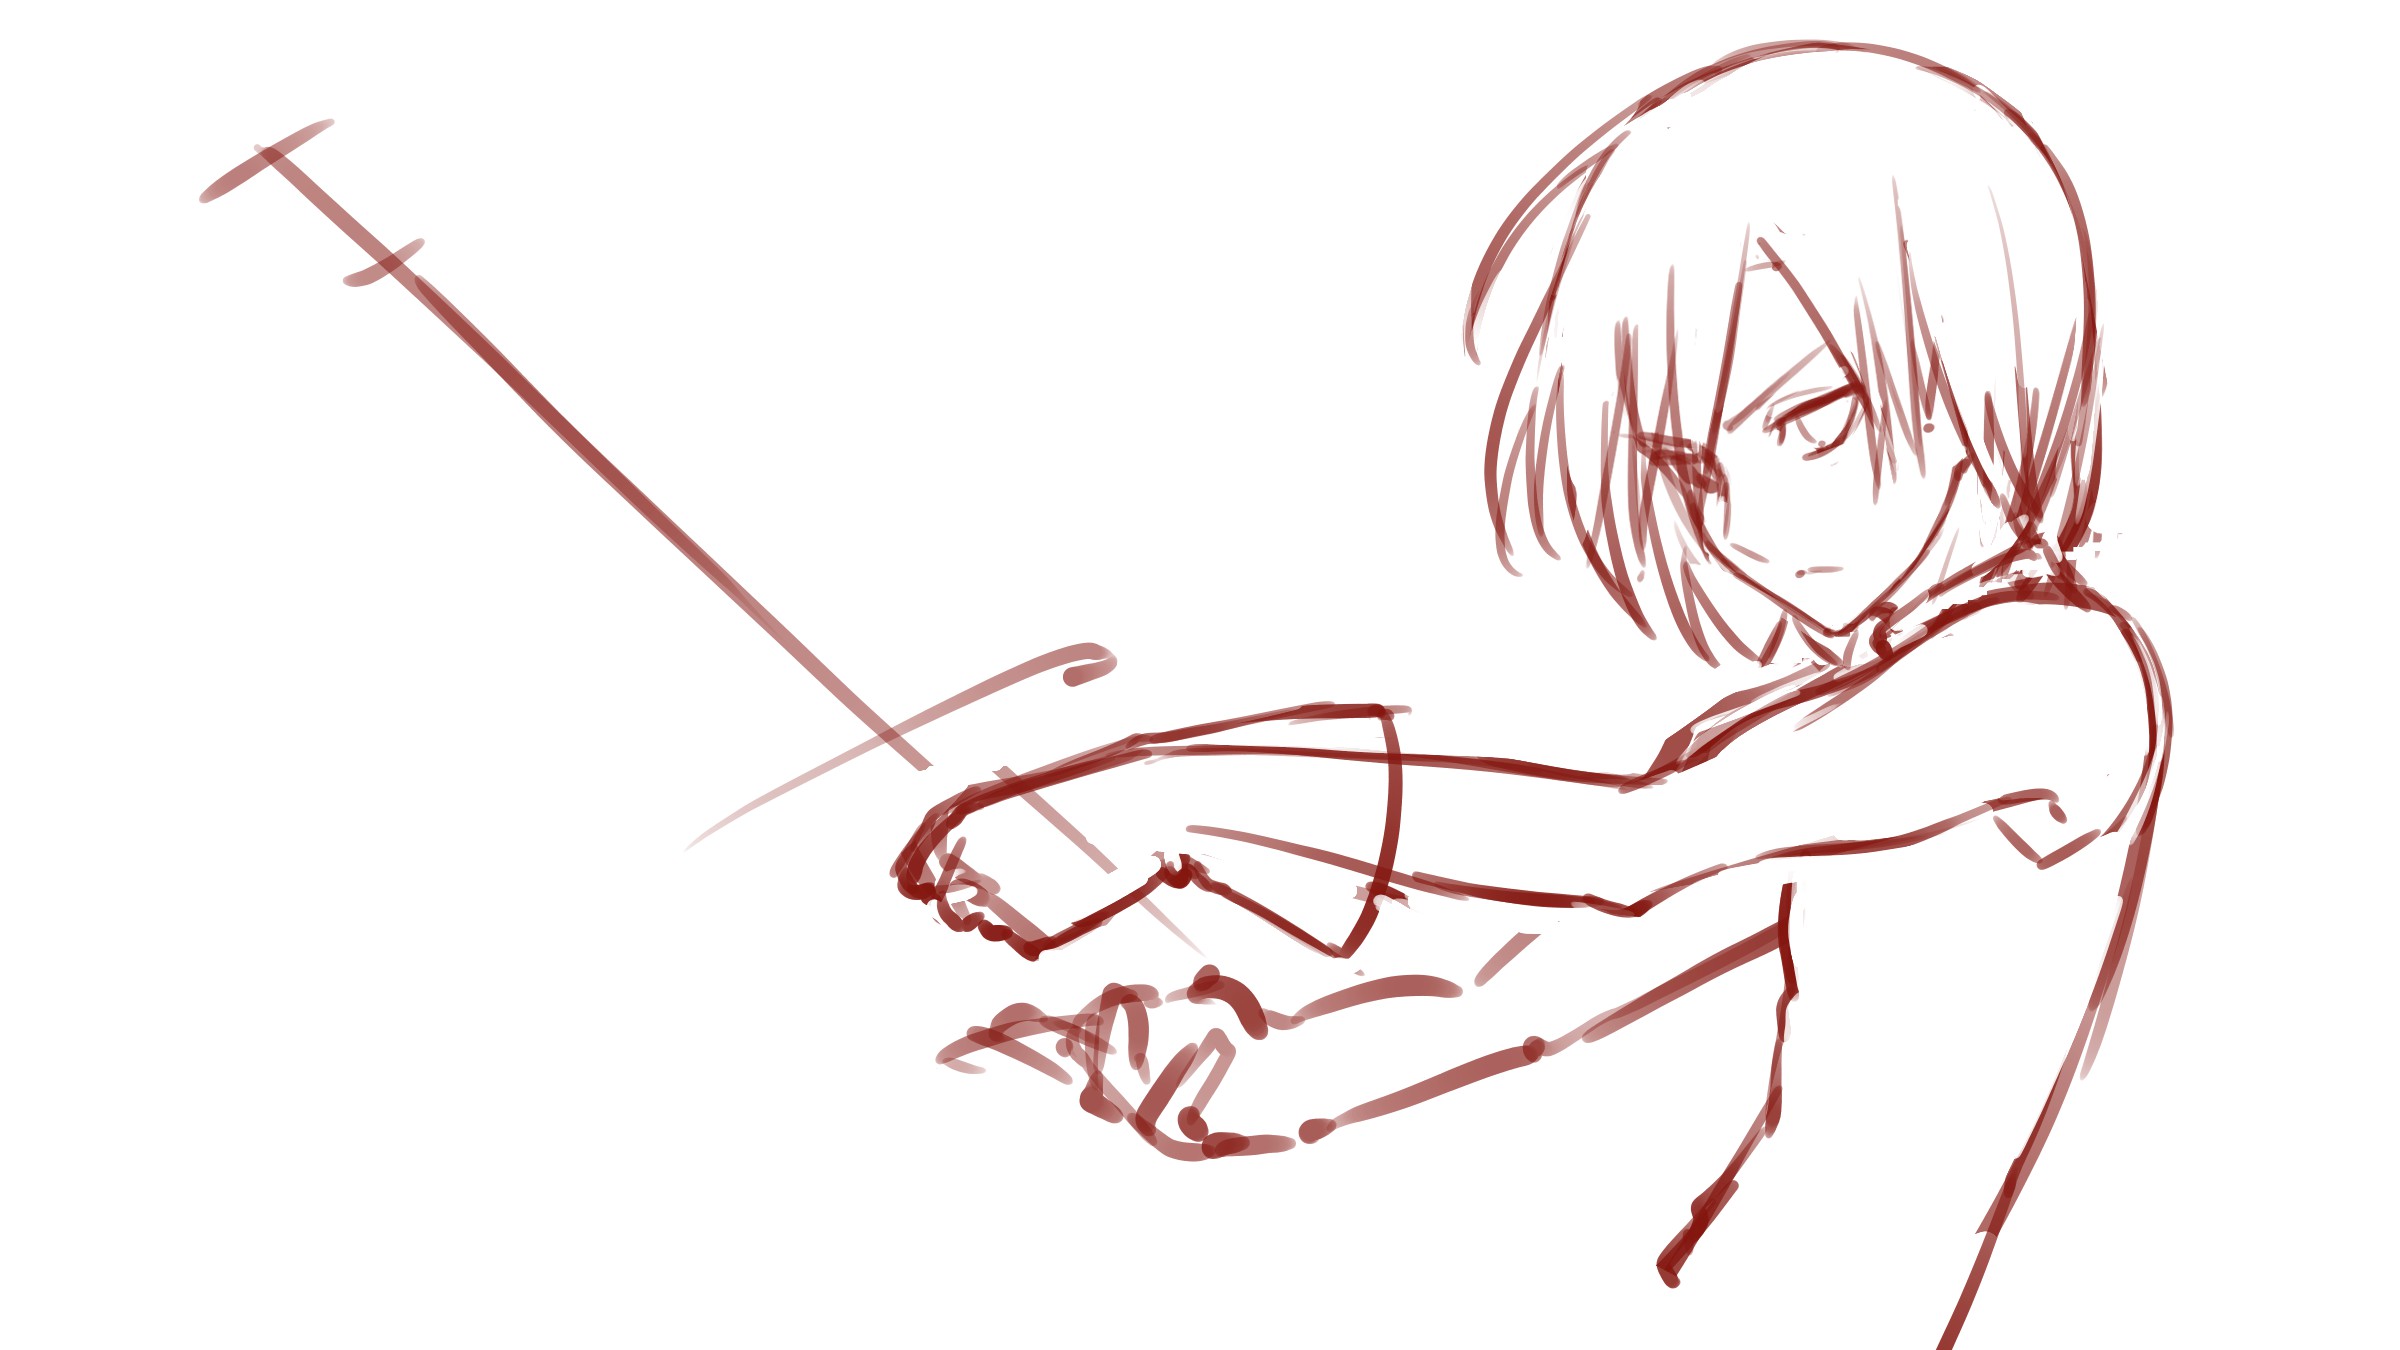
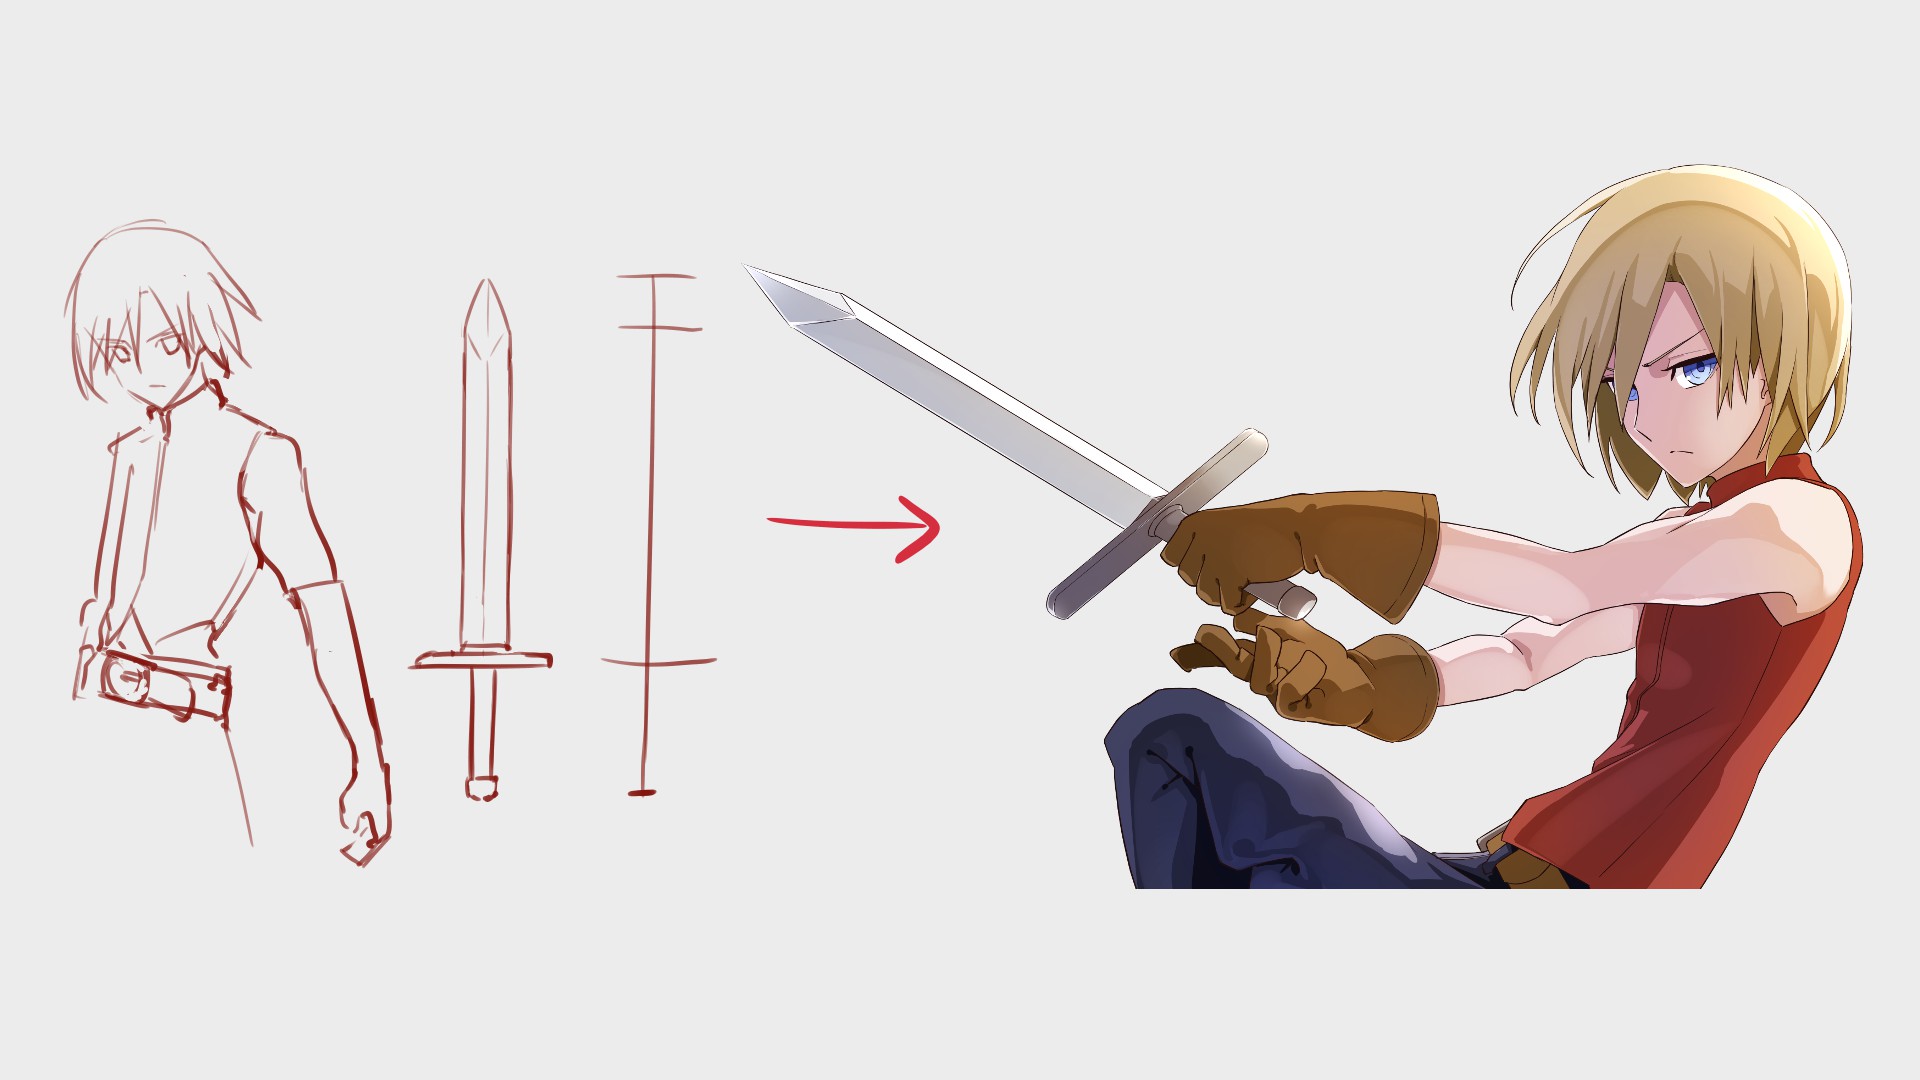
As you can see in the image above, I used a guide before drawing the actual sword!
Draw lines for where the corners and pointy parts will be, creating a simple model.
It will be easier to use a cylinder to imagine the three-dimensional shape but I won’t be creating that much angle for the sword so I used a line here!
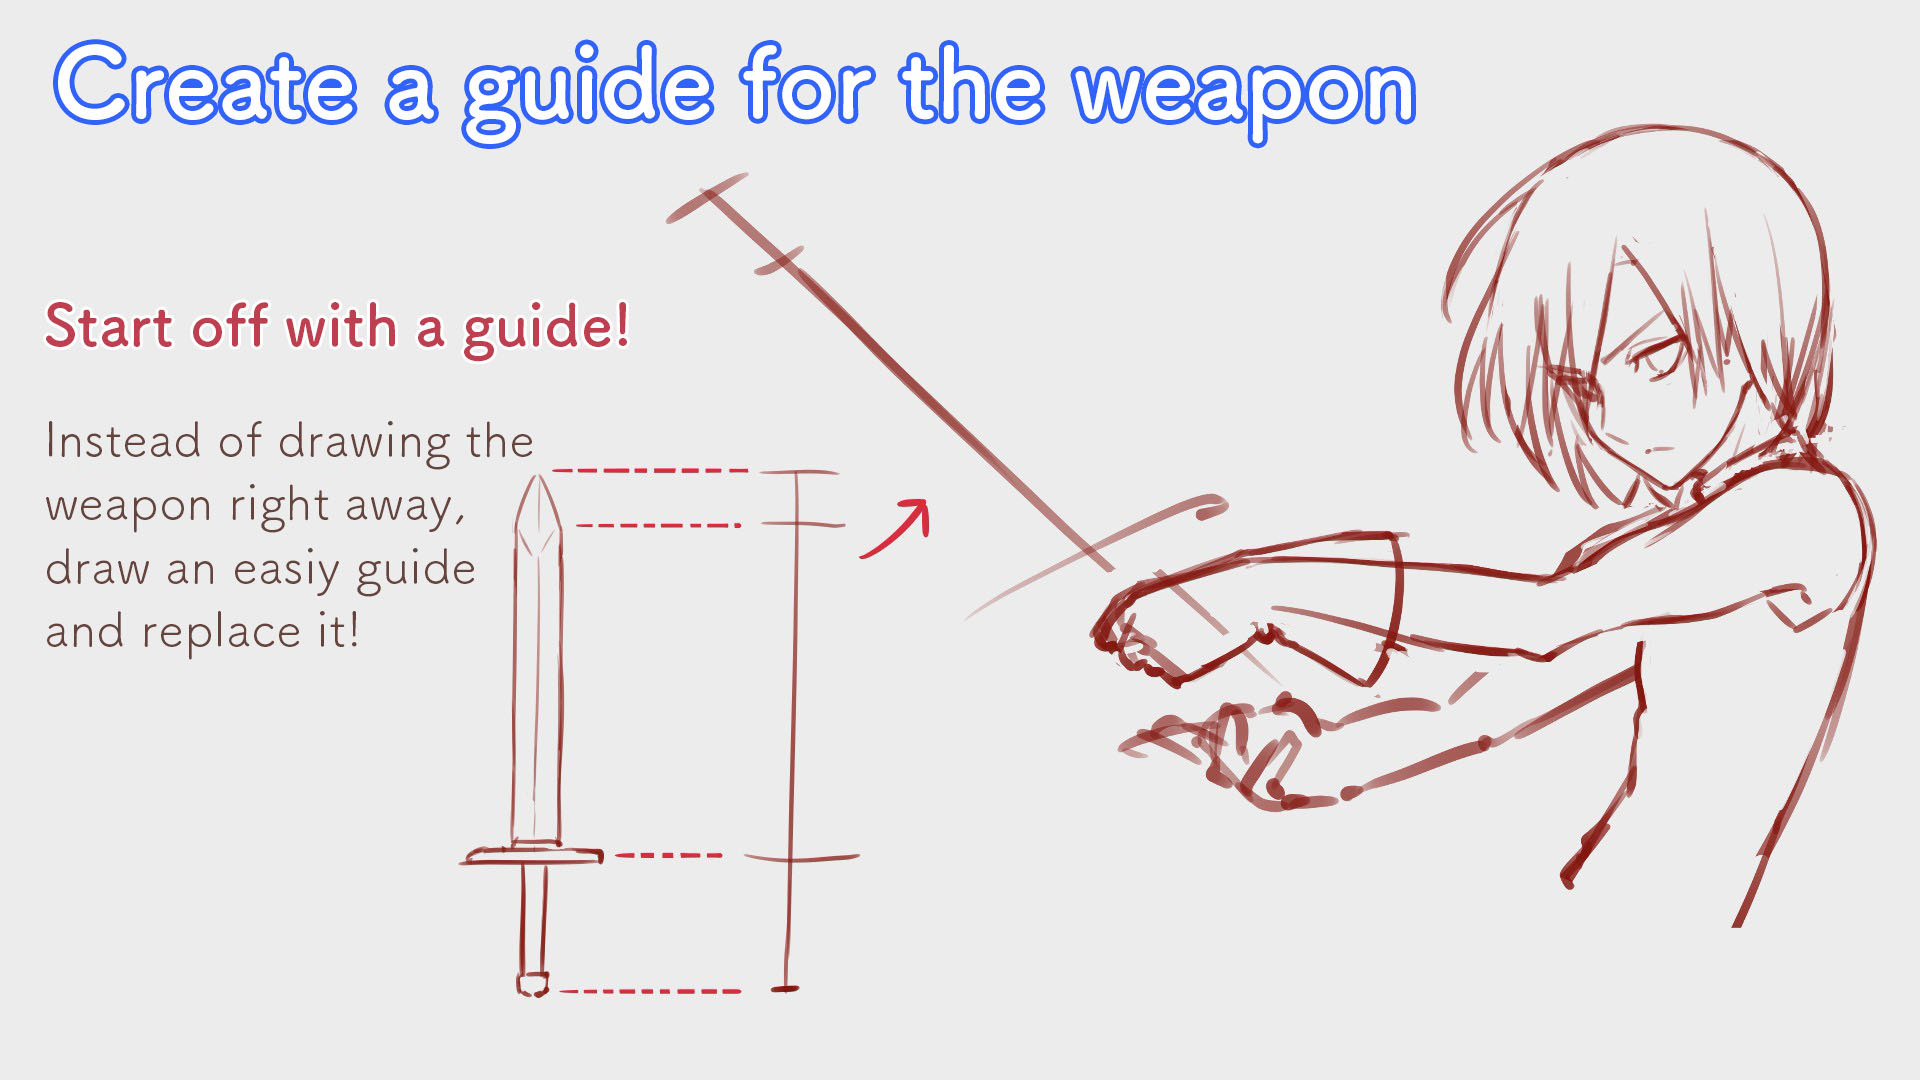
I wanted the sword to stretch over a bigger space so I will adjust the angle of his body and the sword.
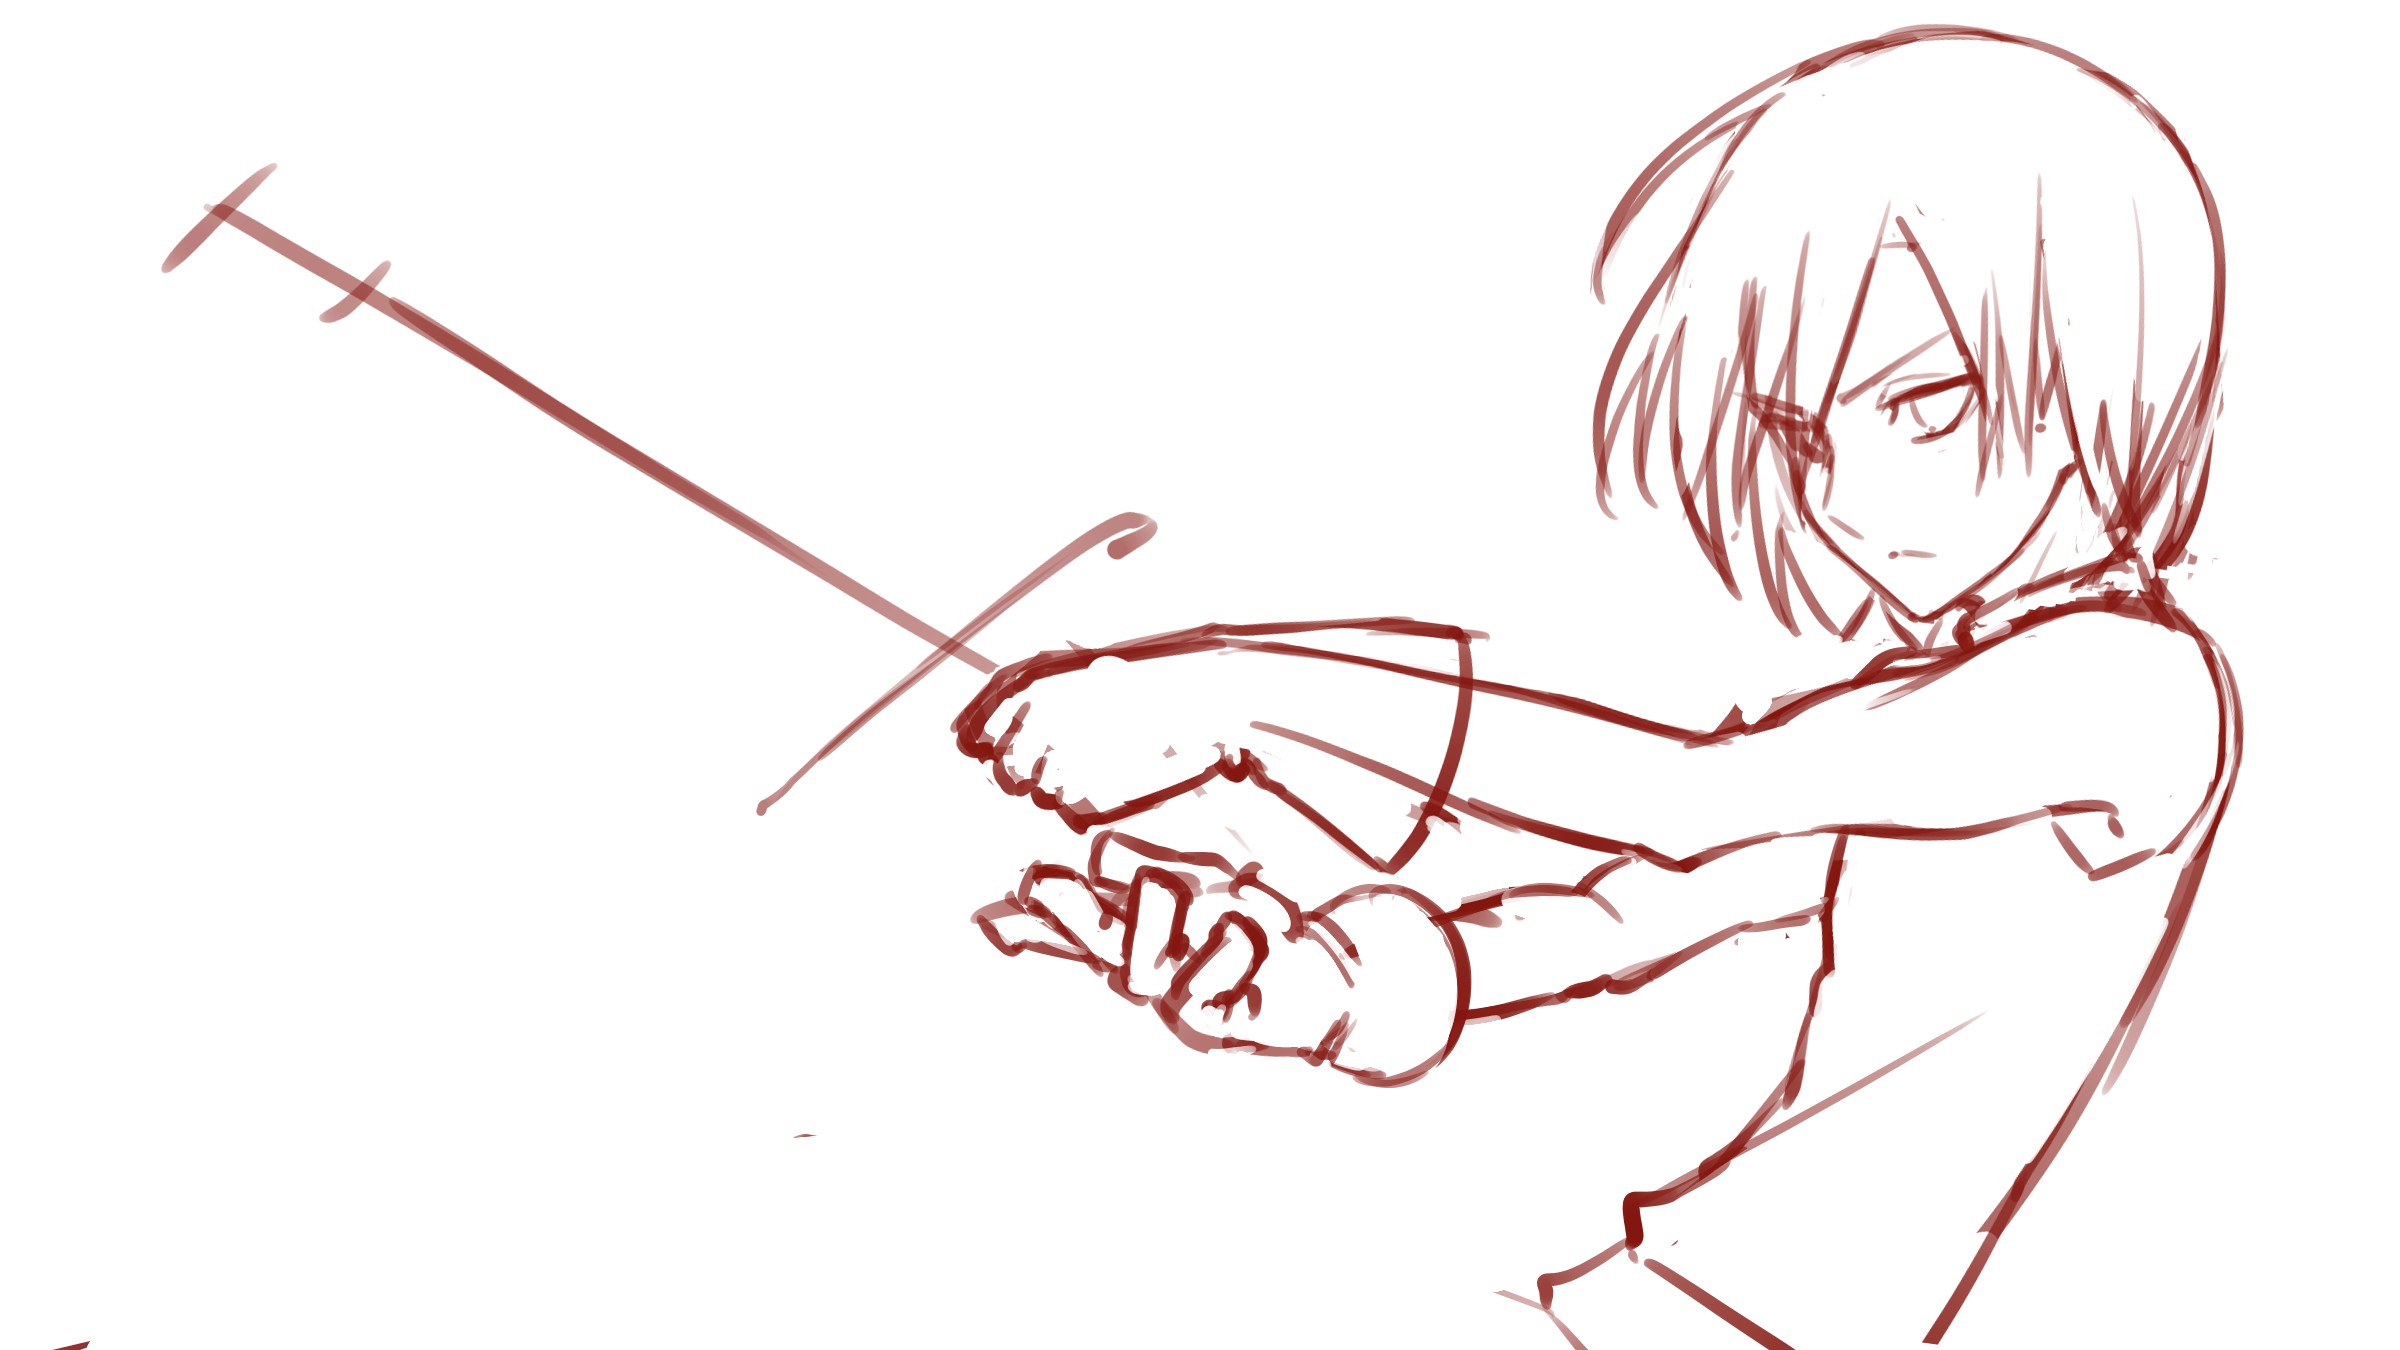
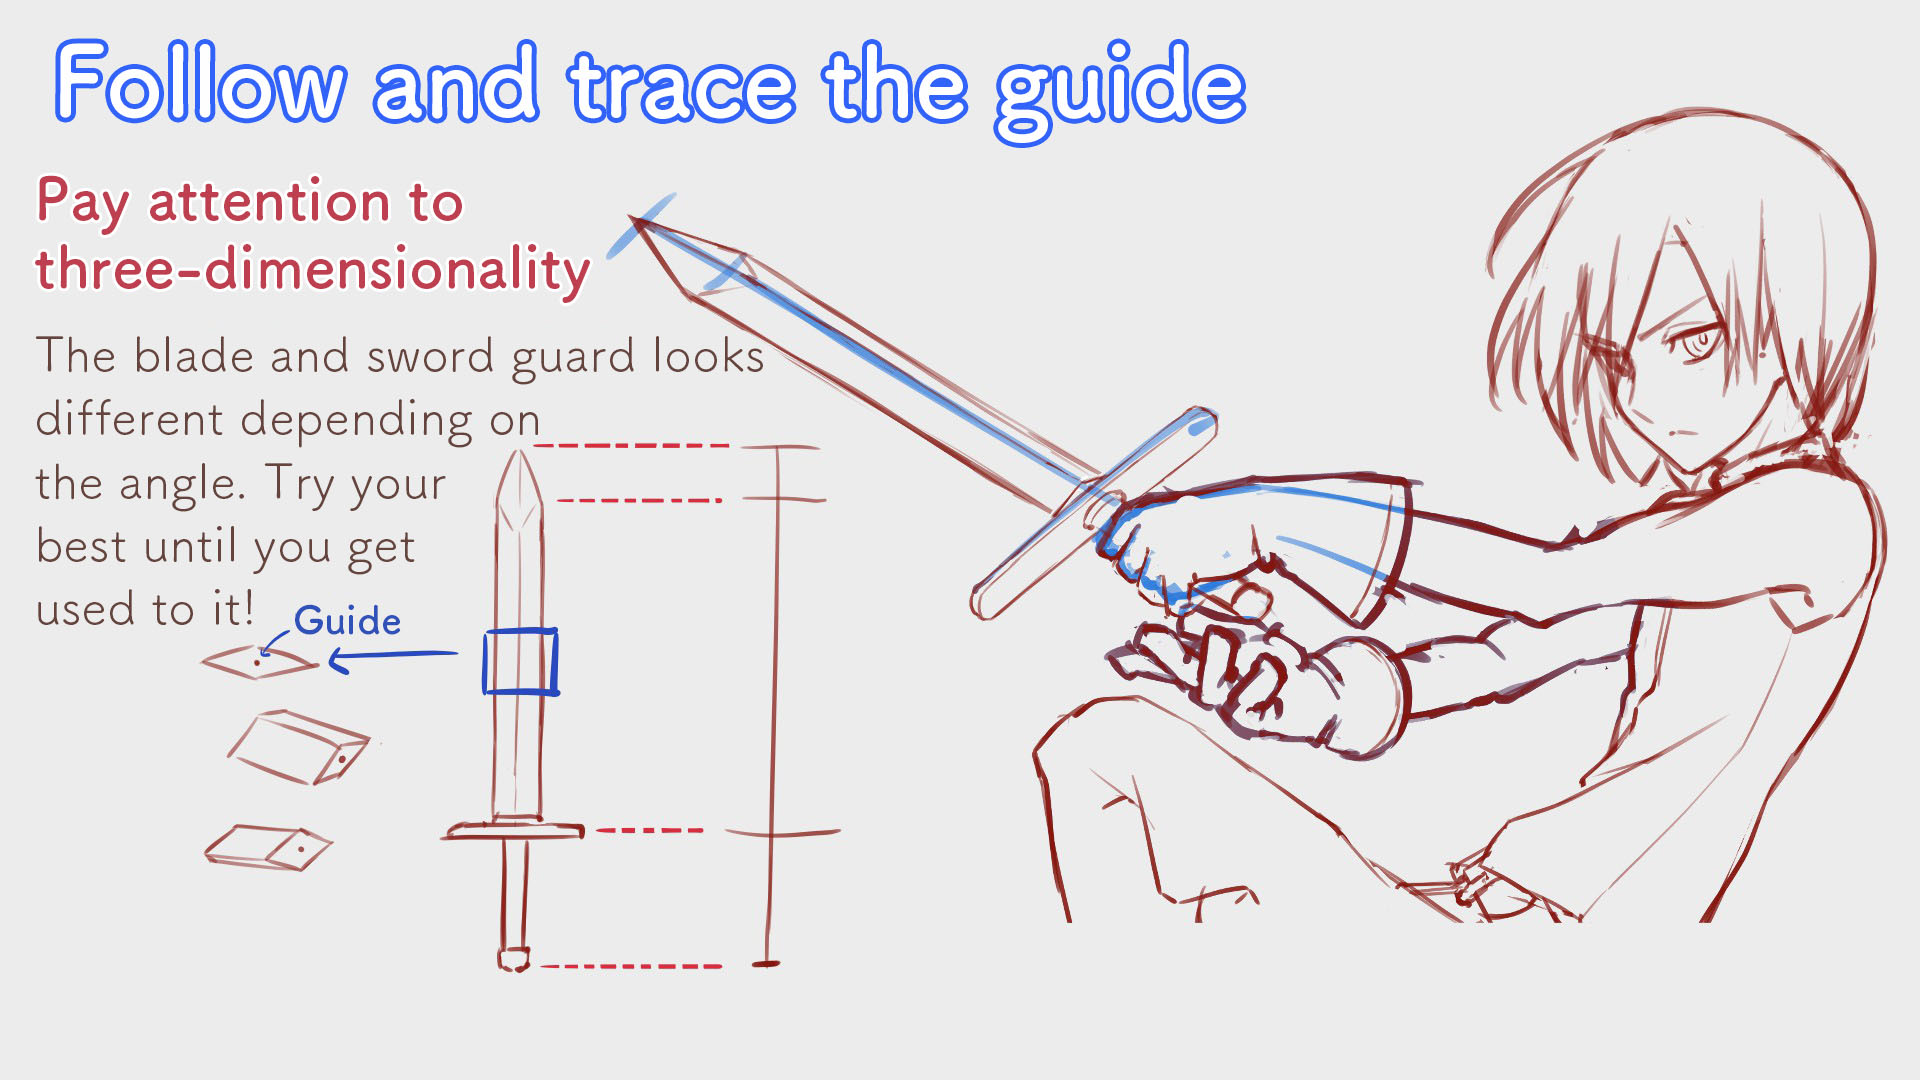
Once you are set with the position, start drawing the actual weapon.
I think following the guide will make it much easier for you to angle the sword!
You have to be careful with the three dimensional look by making sure that the center part of the blade is the highest.
The rough sketch is now complete!
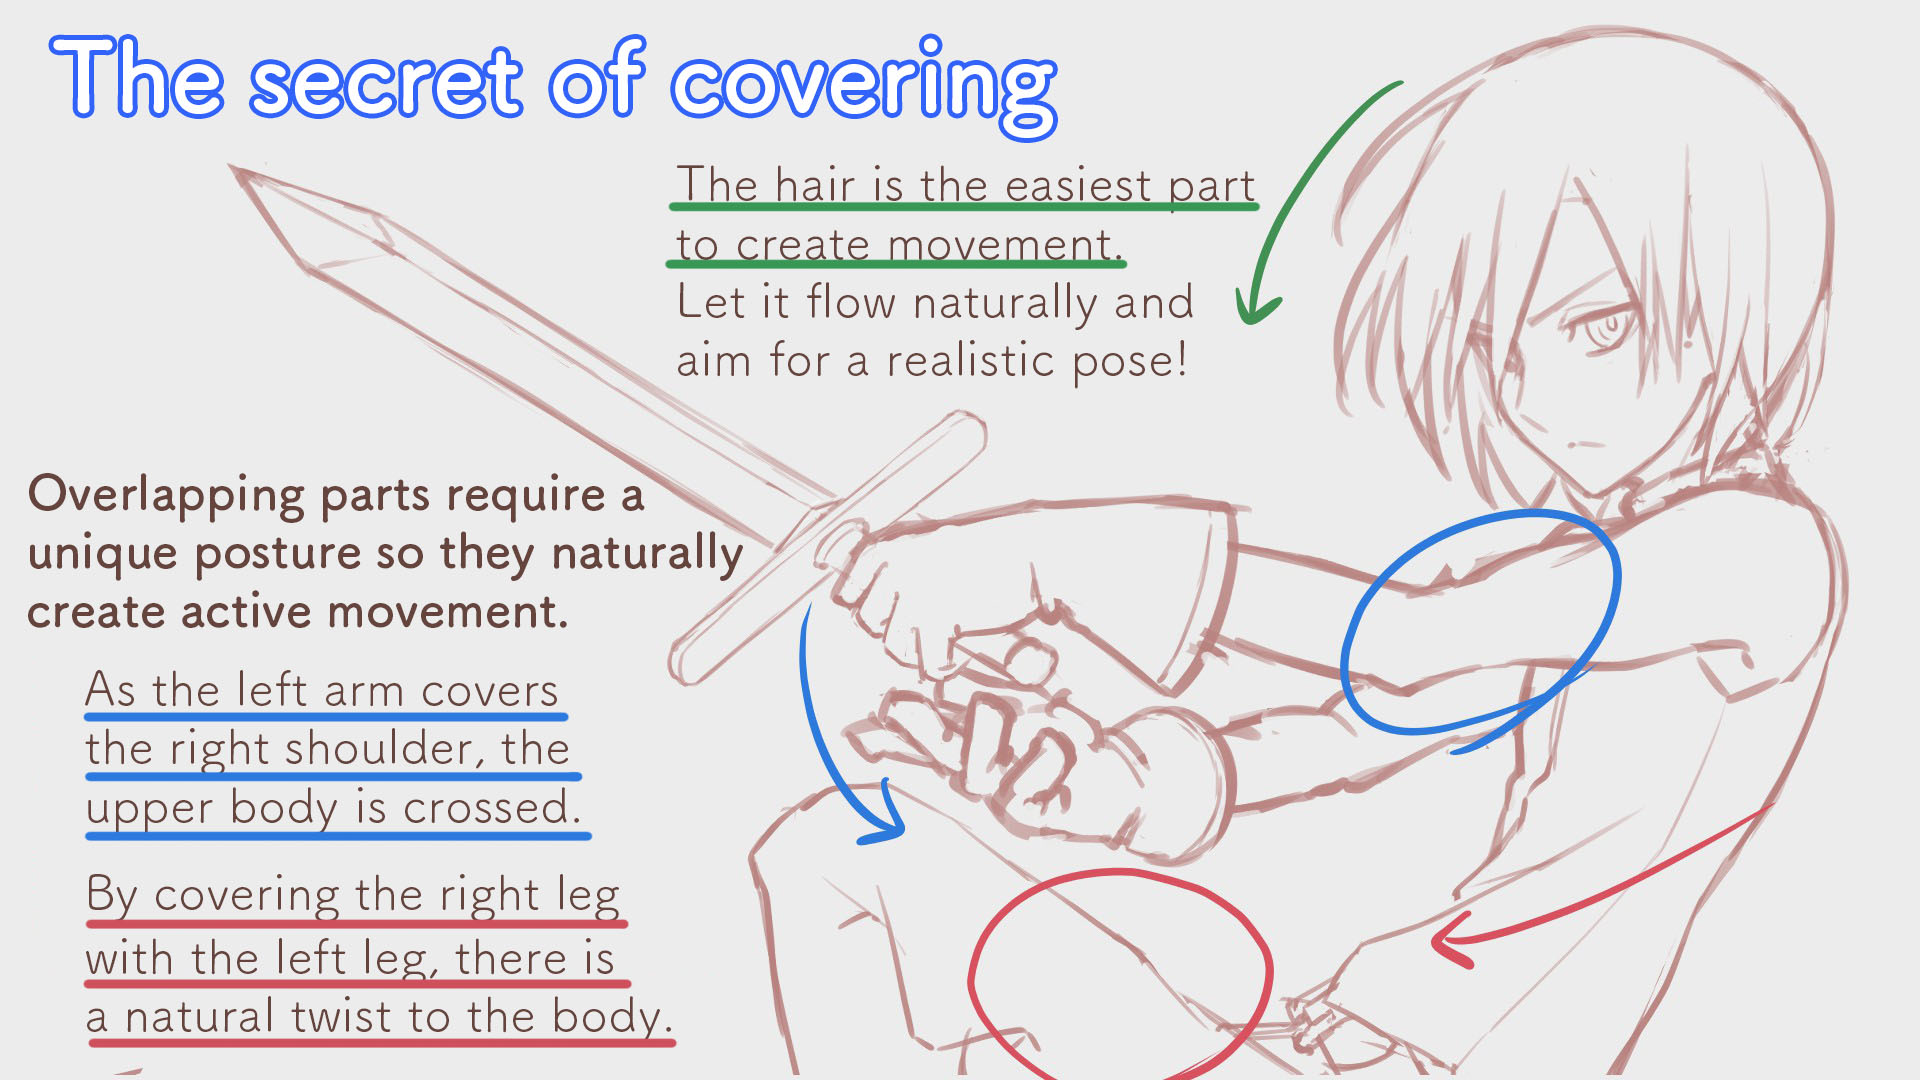
When you want to create force or movement, try overlapping the body with the weapon.
“Overlapping” means to “twist” the body but isn’t it easier to end up creating a natural twist to the body instead of trying to twist the body?
With a more straight posture, the illustration will look much more still.
Try drawing various poses to fit the type of illustration you want to draw!
Create a line drawing
Let’s start the line drawing.
I introduced the details of line drawing and painting for characters in the other articles so please read those as well!
▼Line Drawing & Painting
【For Beginners】Let’s make our own child! Part 2 【Original Character】
【Making】Drawing a Japanese Style Female Assassin !
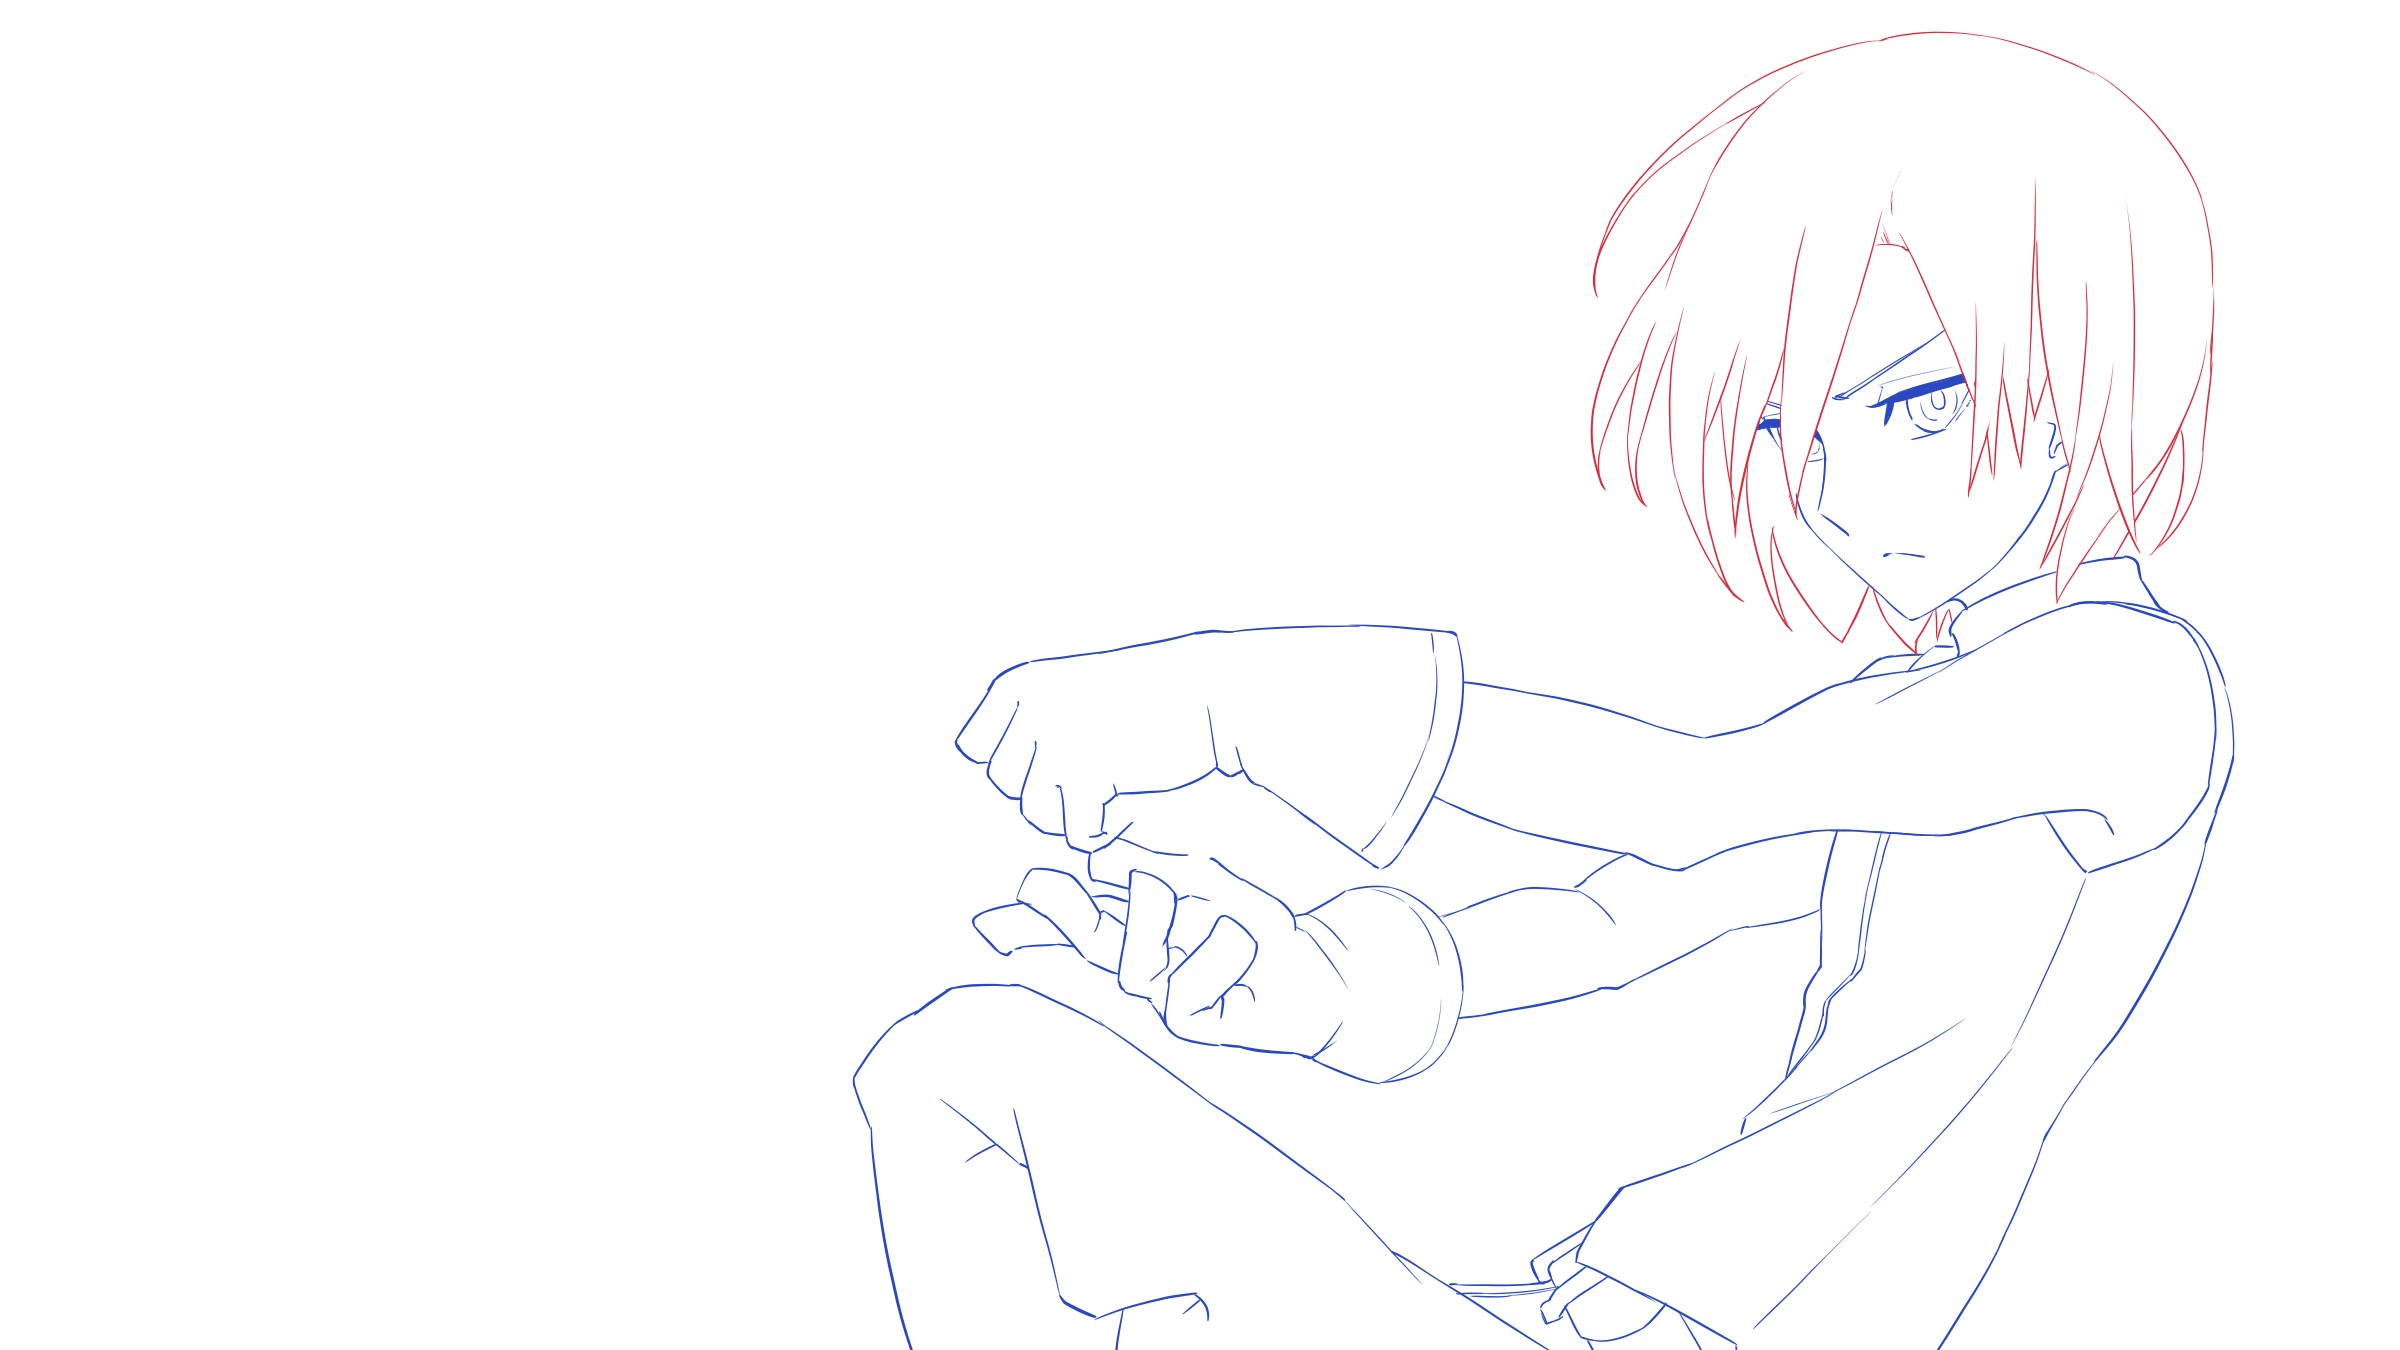
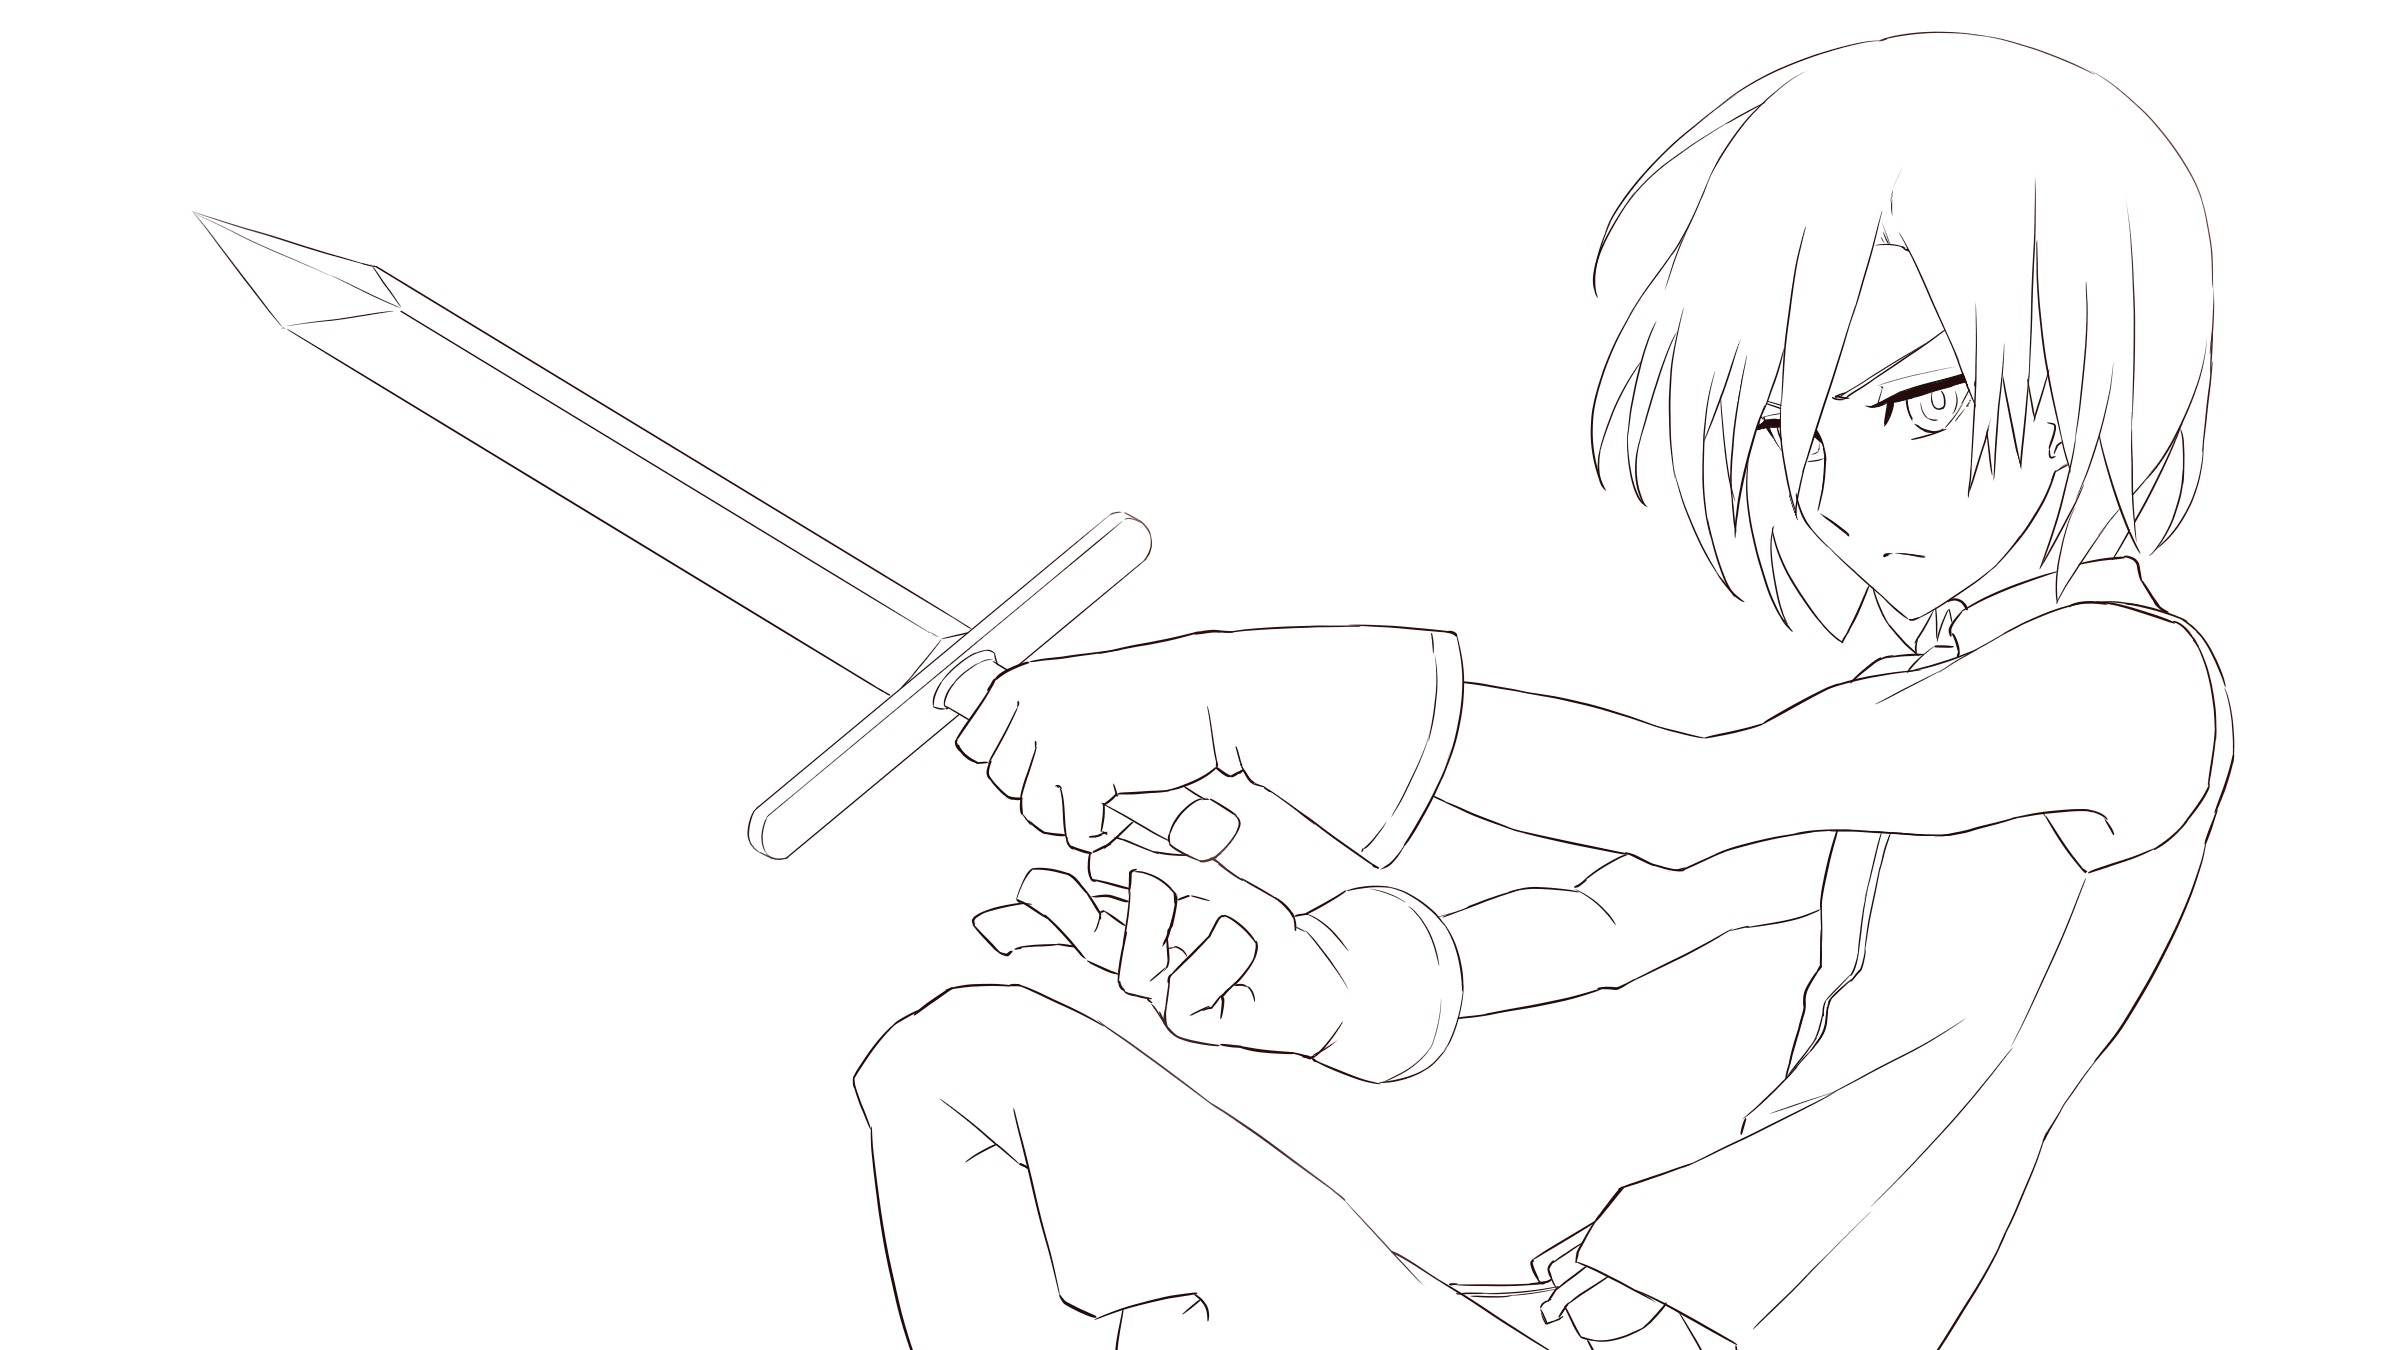
For the character, I created a separate line drawing for the hair and the body.
It will be much easier to change the color of the line drawing or erase the overlapping lines so depending on the illustration, it would be best to create layers for each part of the character!
For the weapon, I used the Snap Tool.
By using the snap named “Parallel Snap (2)”, you can draw many parallel lines in whatever angle you want!
Use the Snap Tool for both the blade and the sword guard.
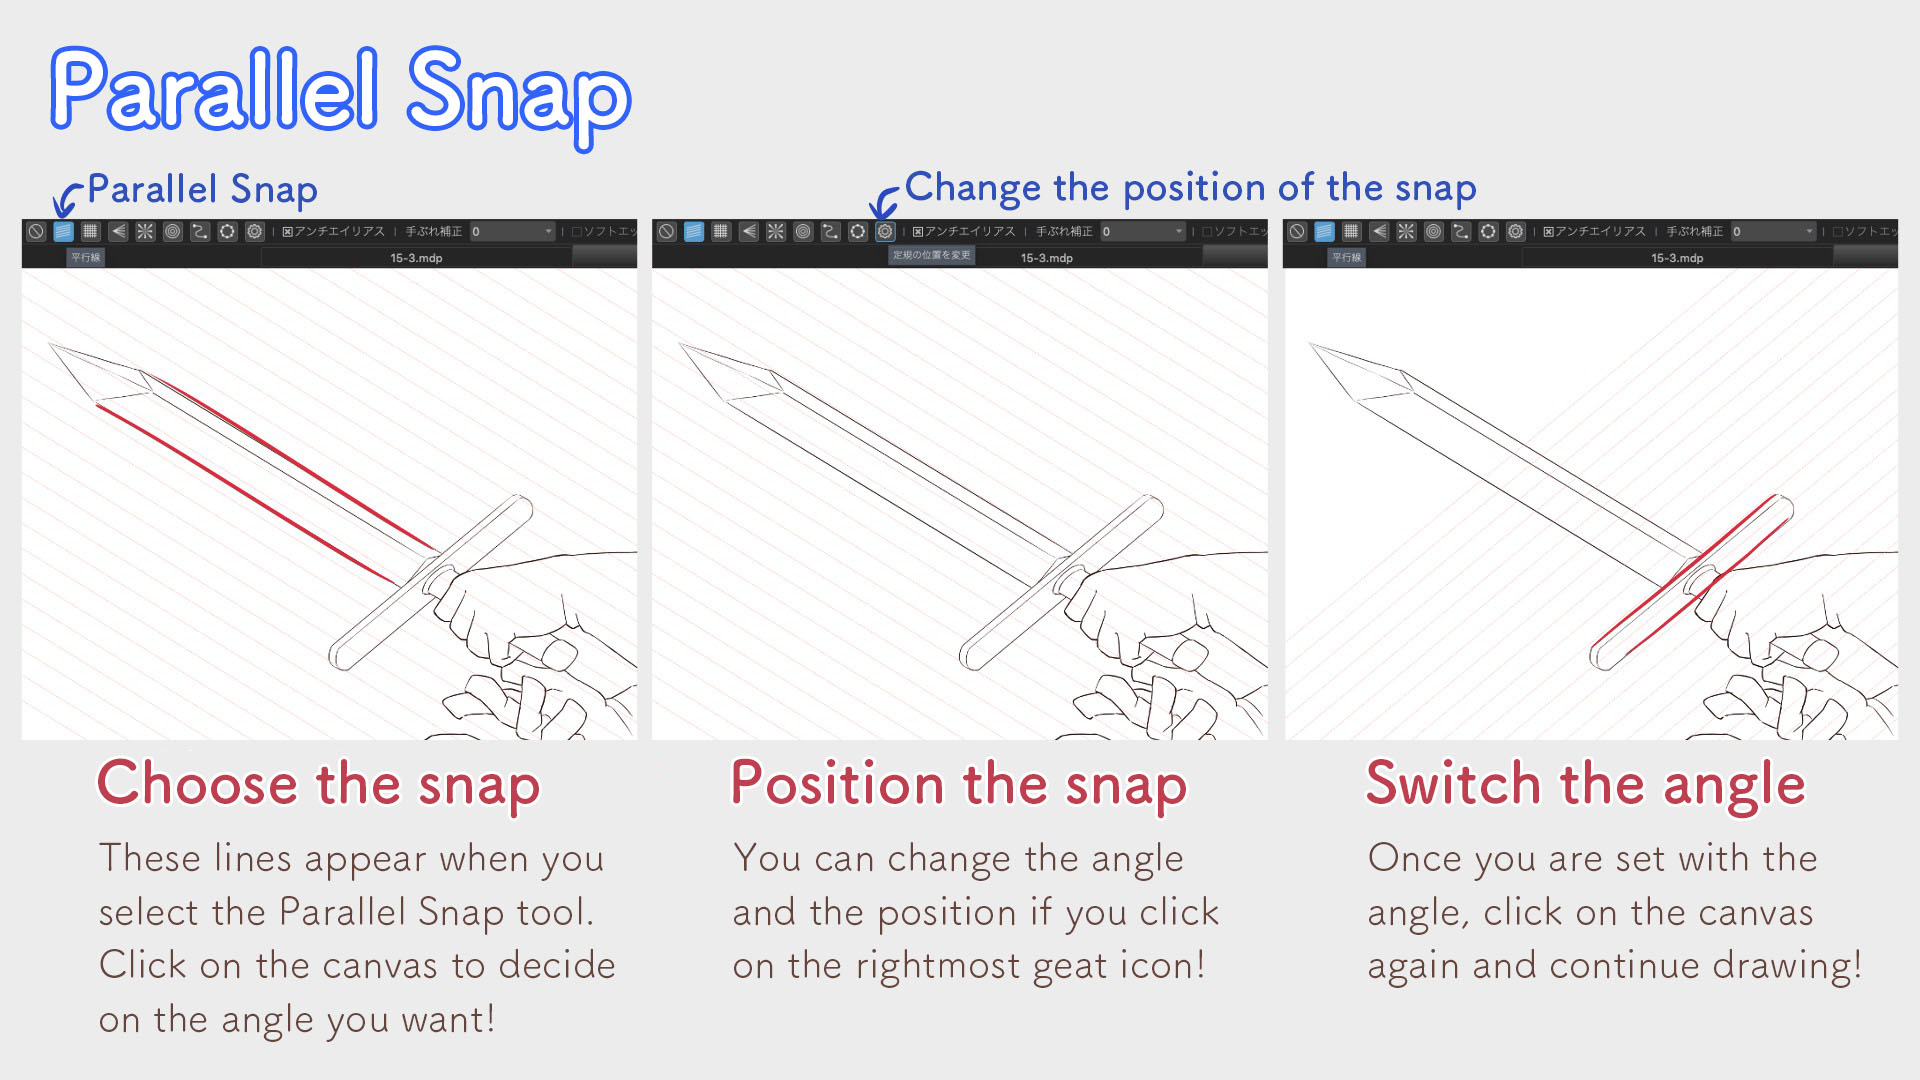
▼Using the Snap Tool to draw weapons
【For Beginners】Become a Weaponsmith ~Using Tools~
Now the line drawing is complete!
Paint the colors
Let’s move on to the painting step.
I didn’t really think of drawing a background since the focus is on the character’s pose but let’s just keep it white! I’m not being lazy! Even though it helps!
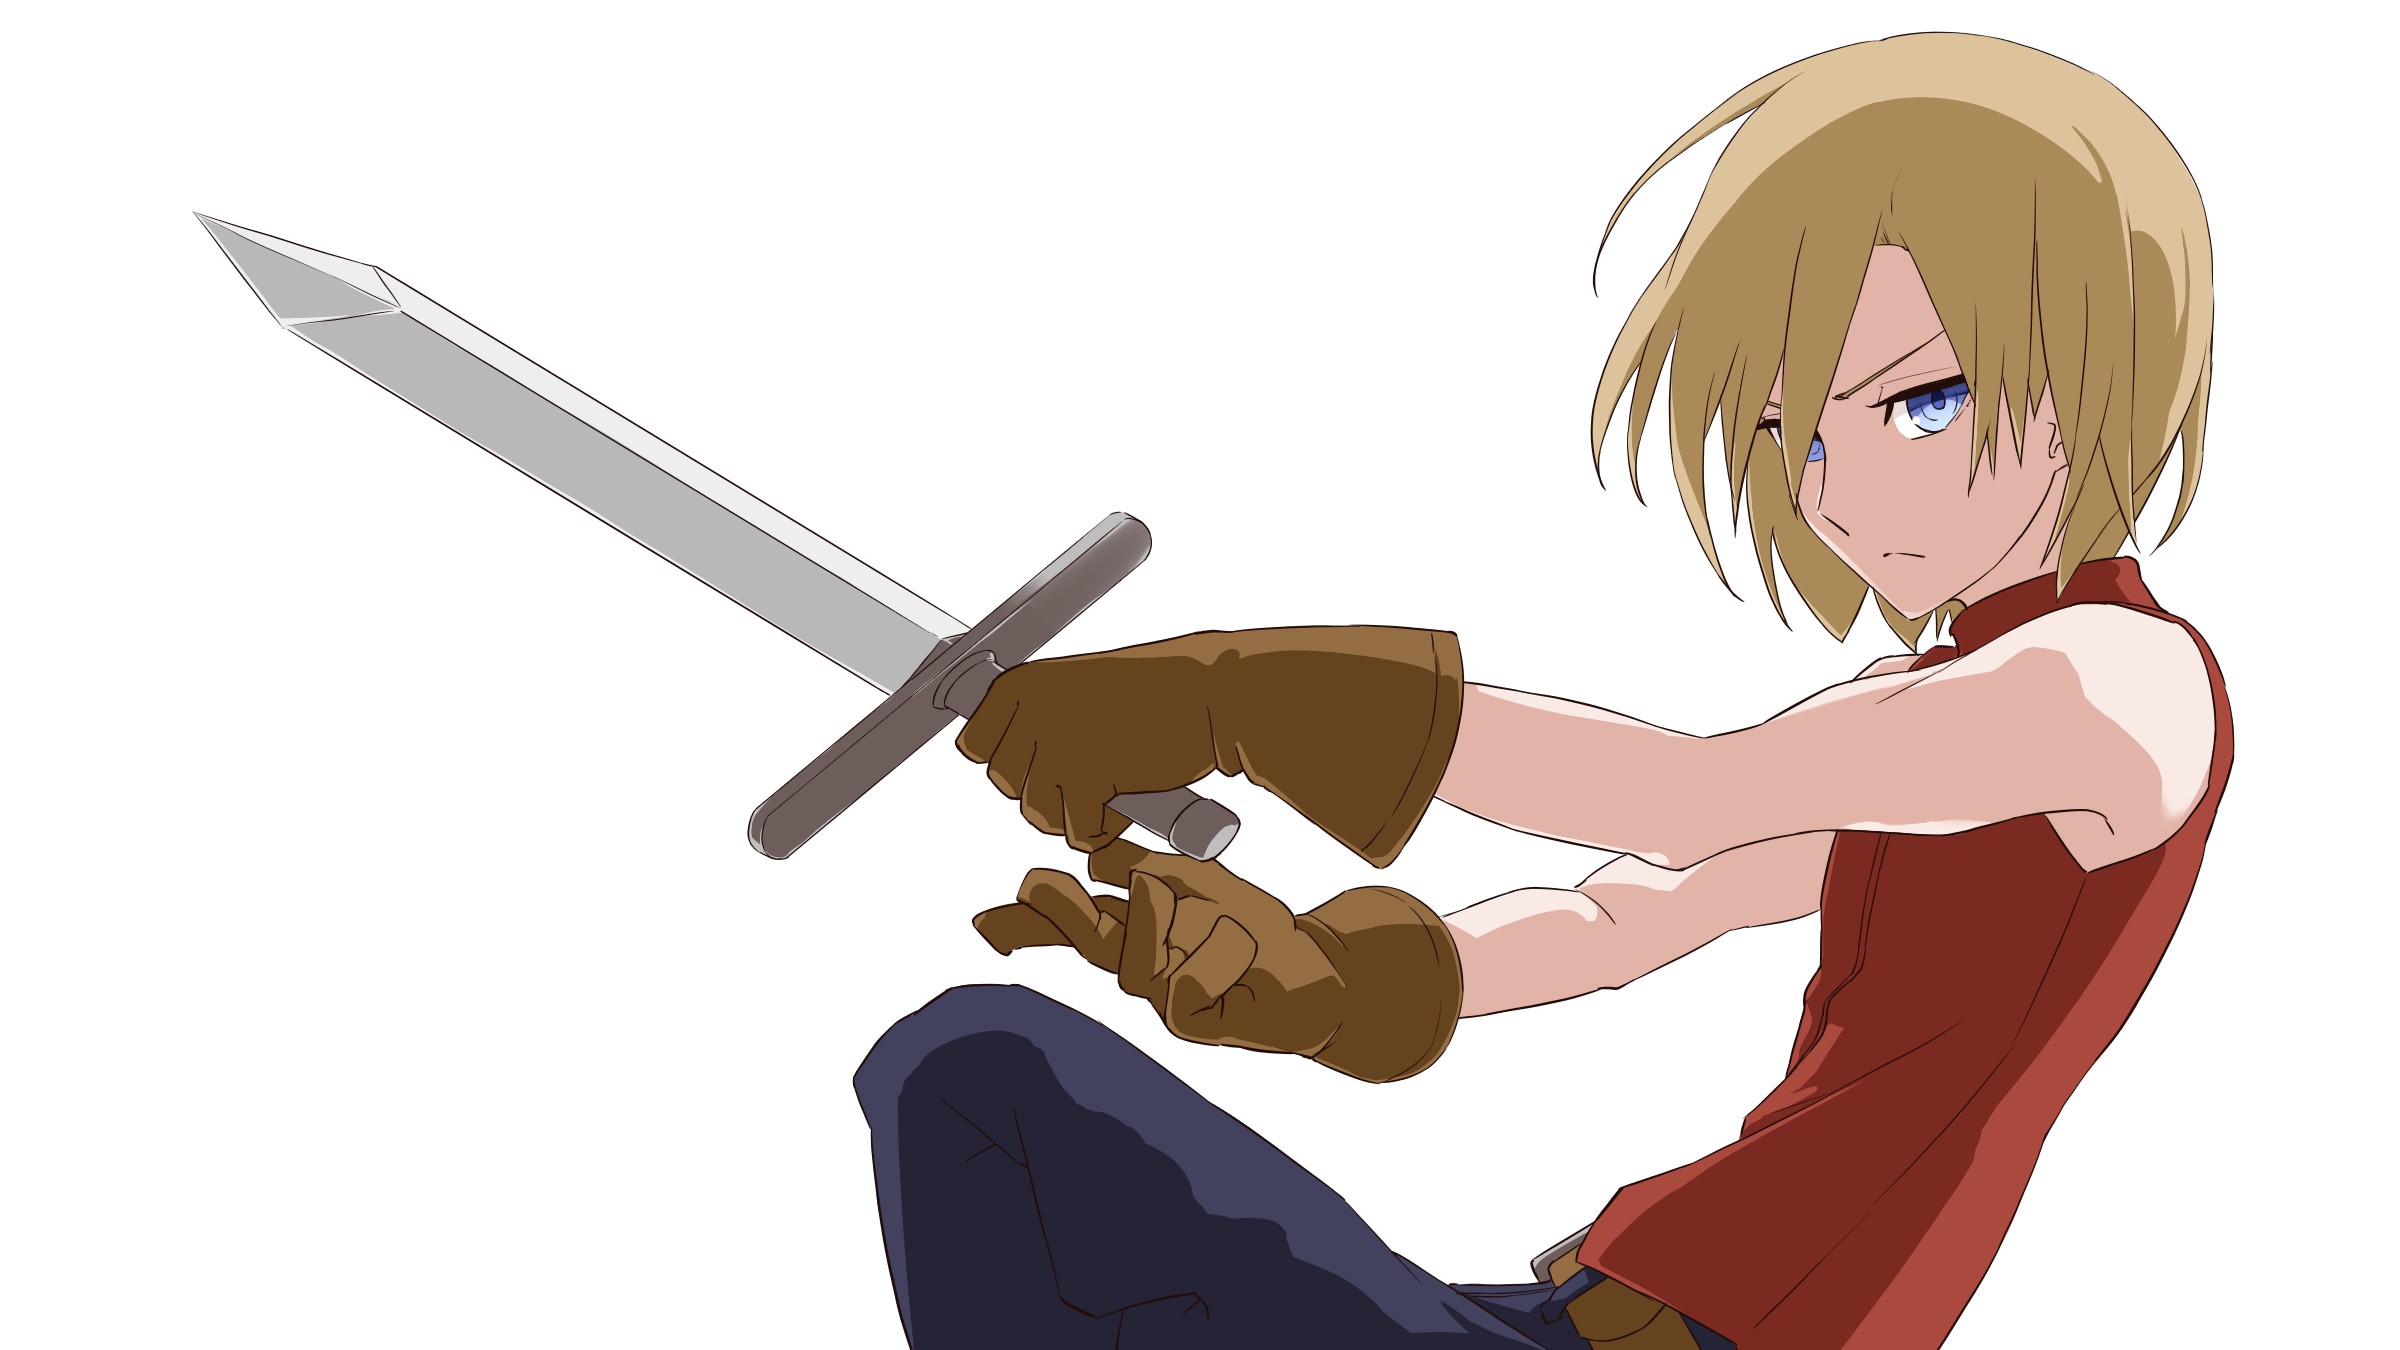
To make use of the white background, I decided on backlighting.
White can mean both nothing and a bright, dazzling light at the same time.
Give it a purpose, other than just saving effort.
When it’s drawn well, it can look very fancy so try using this as a technique!
Paint the base color.
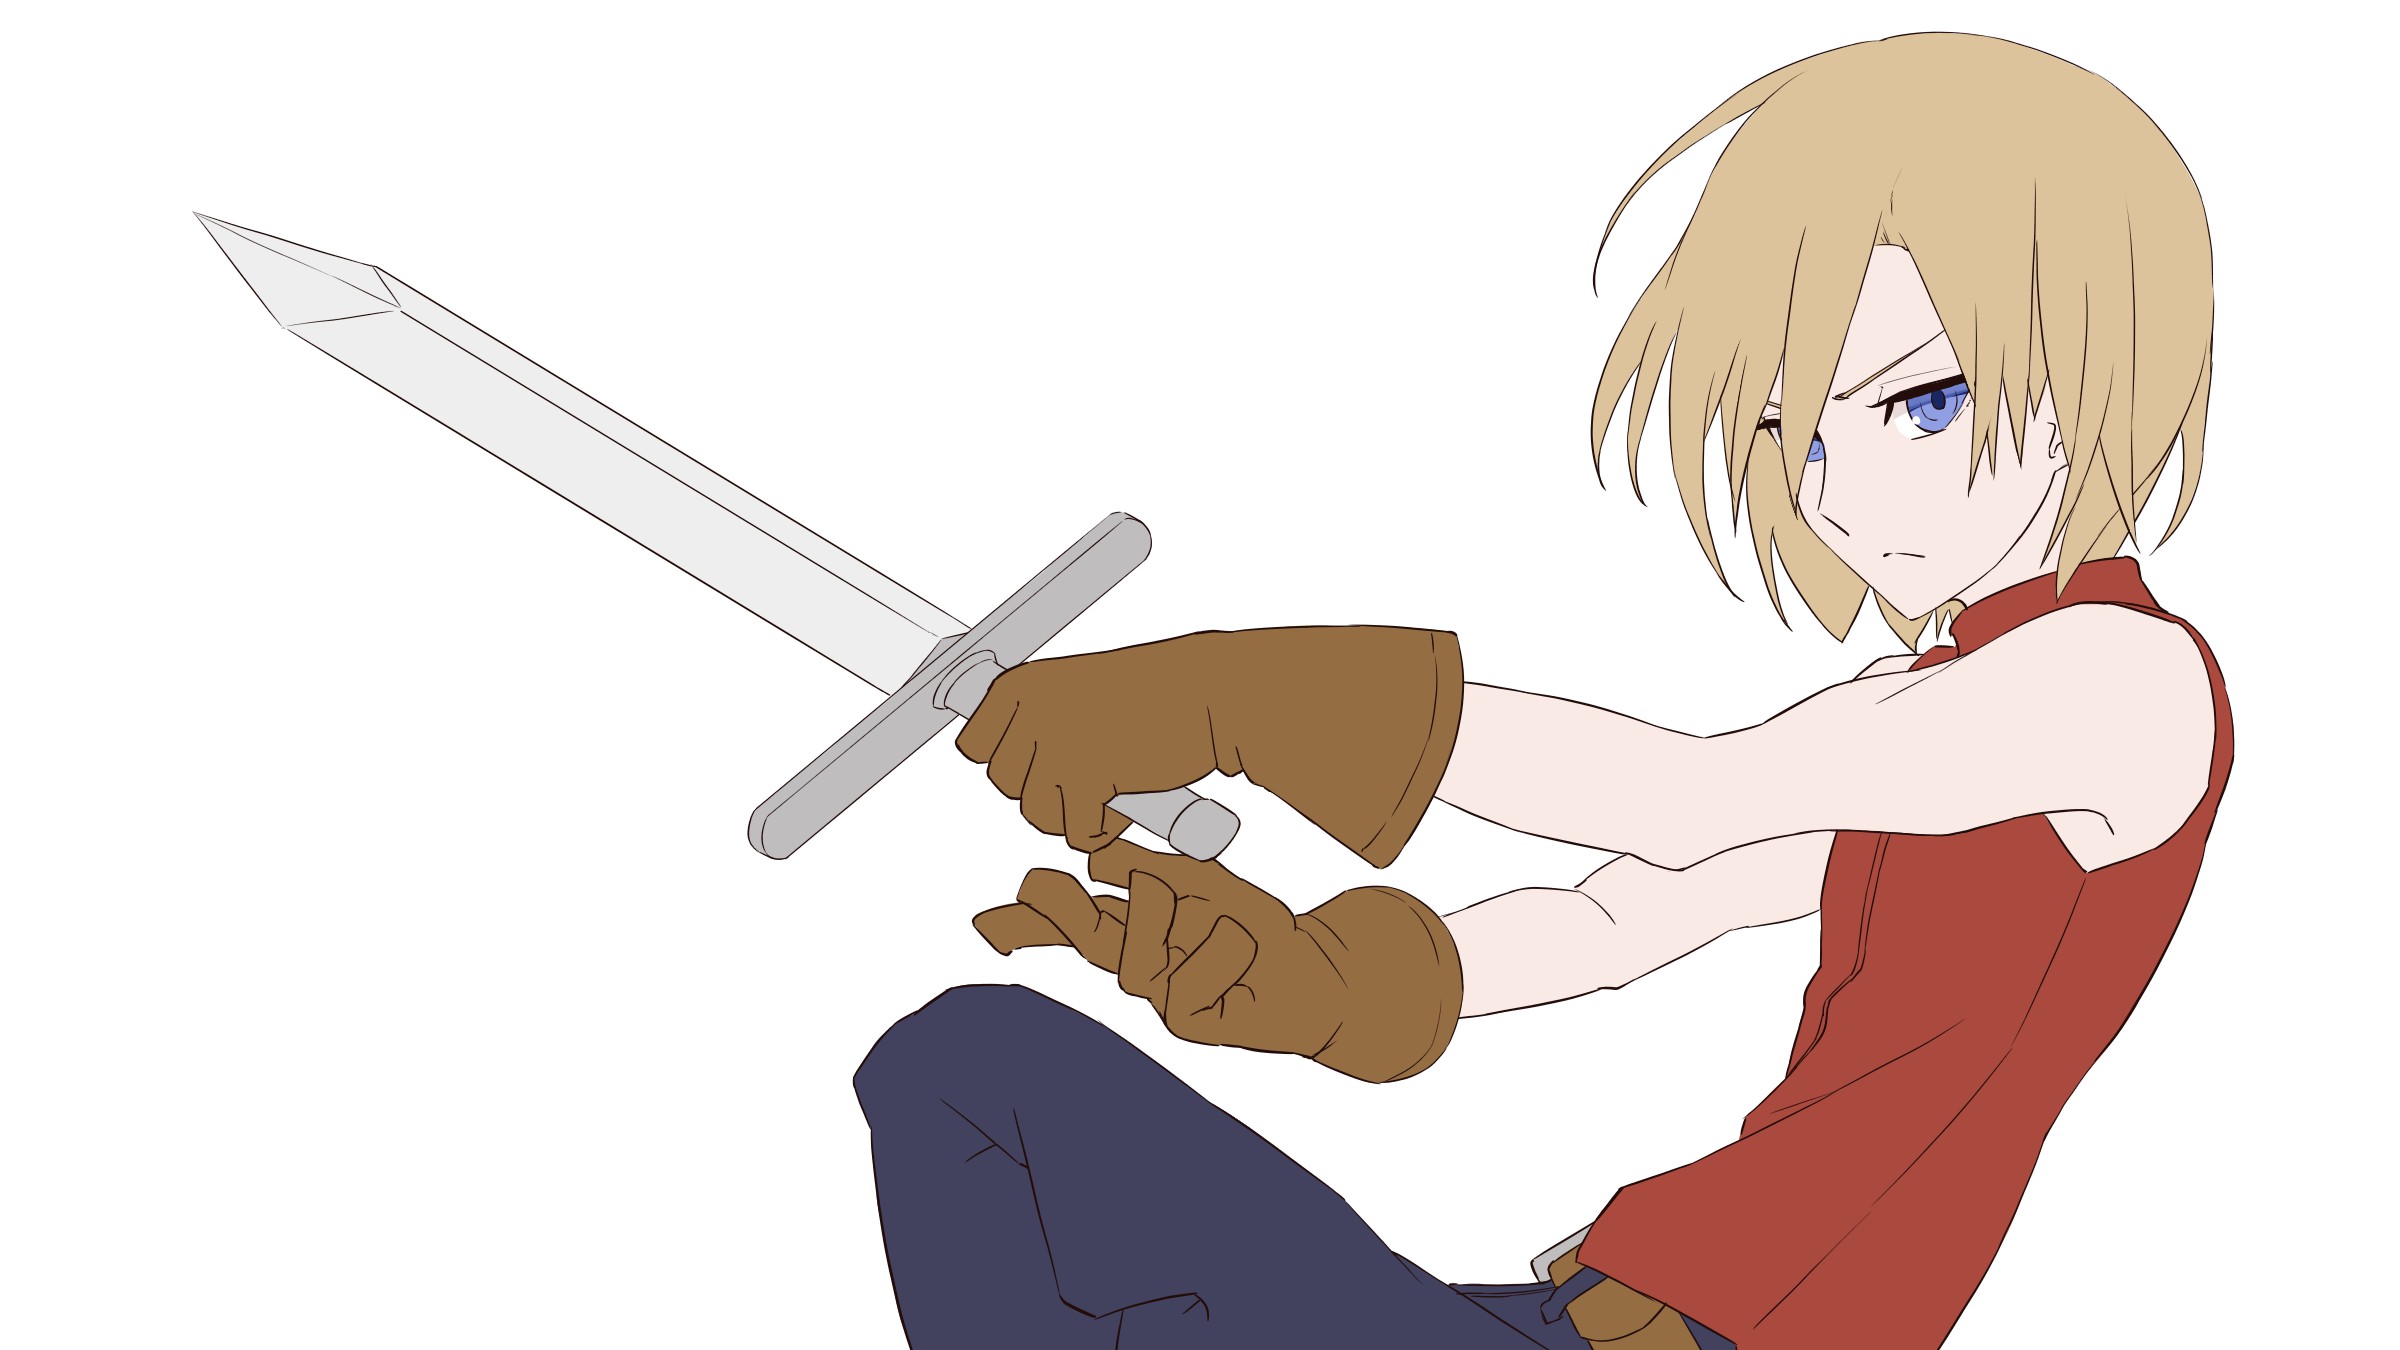
Since it’s a backlight, the shadows must be inside and the highlights must be on the outside!
This completes the illustration!
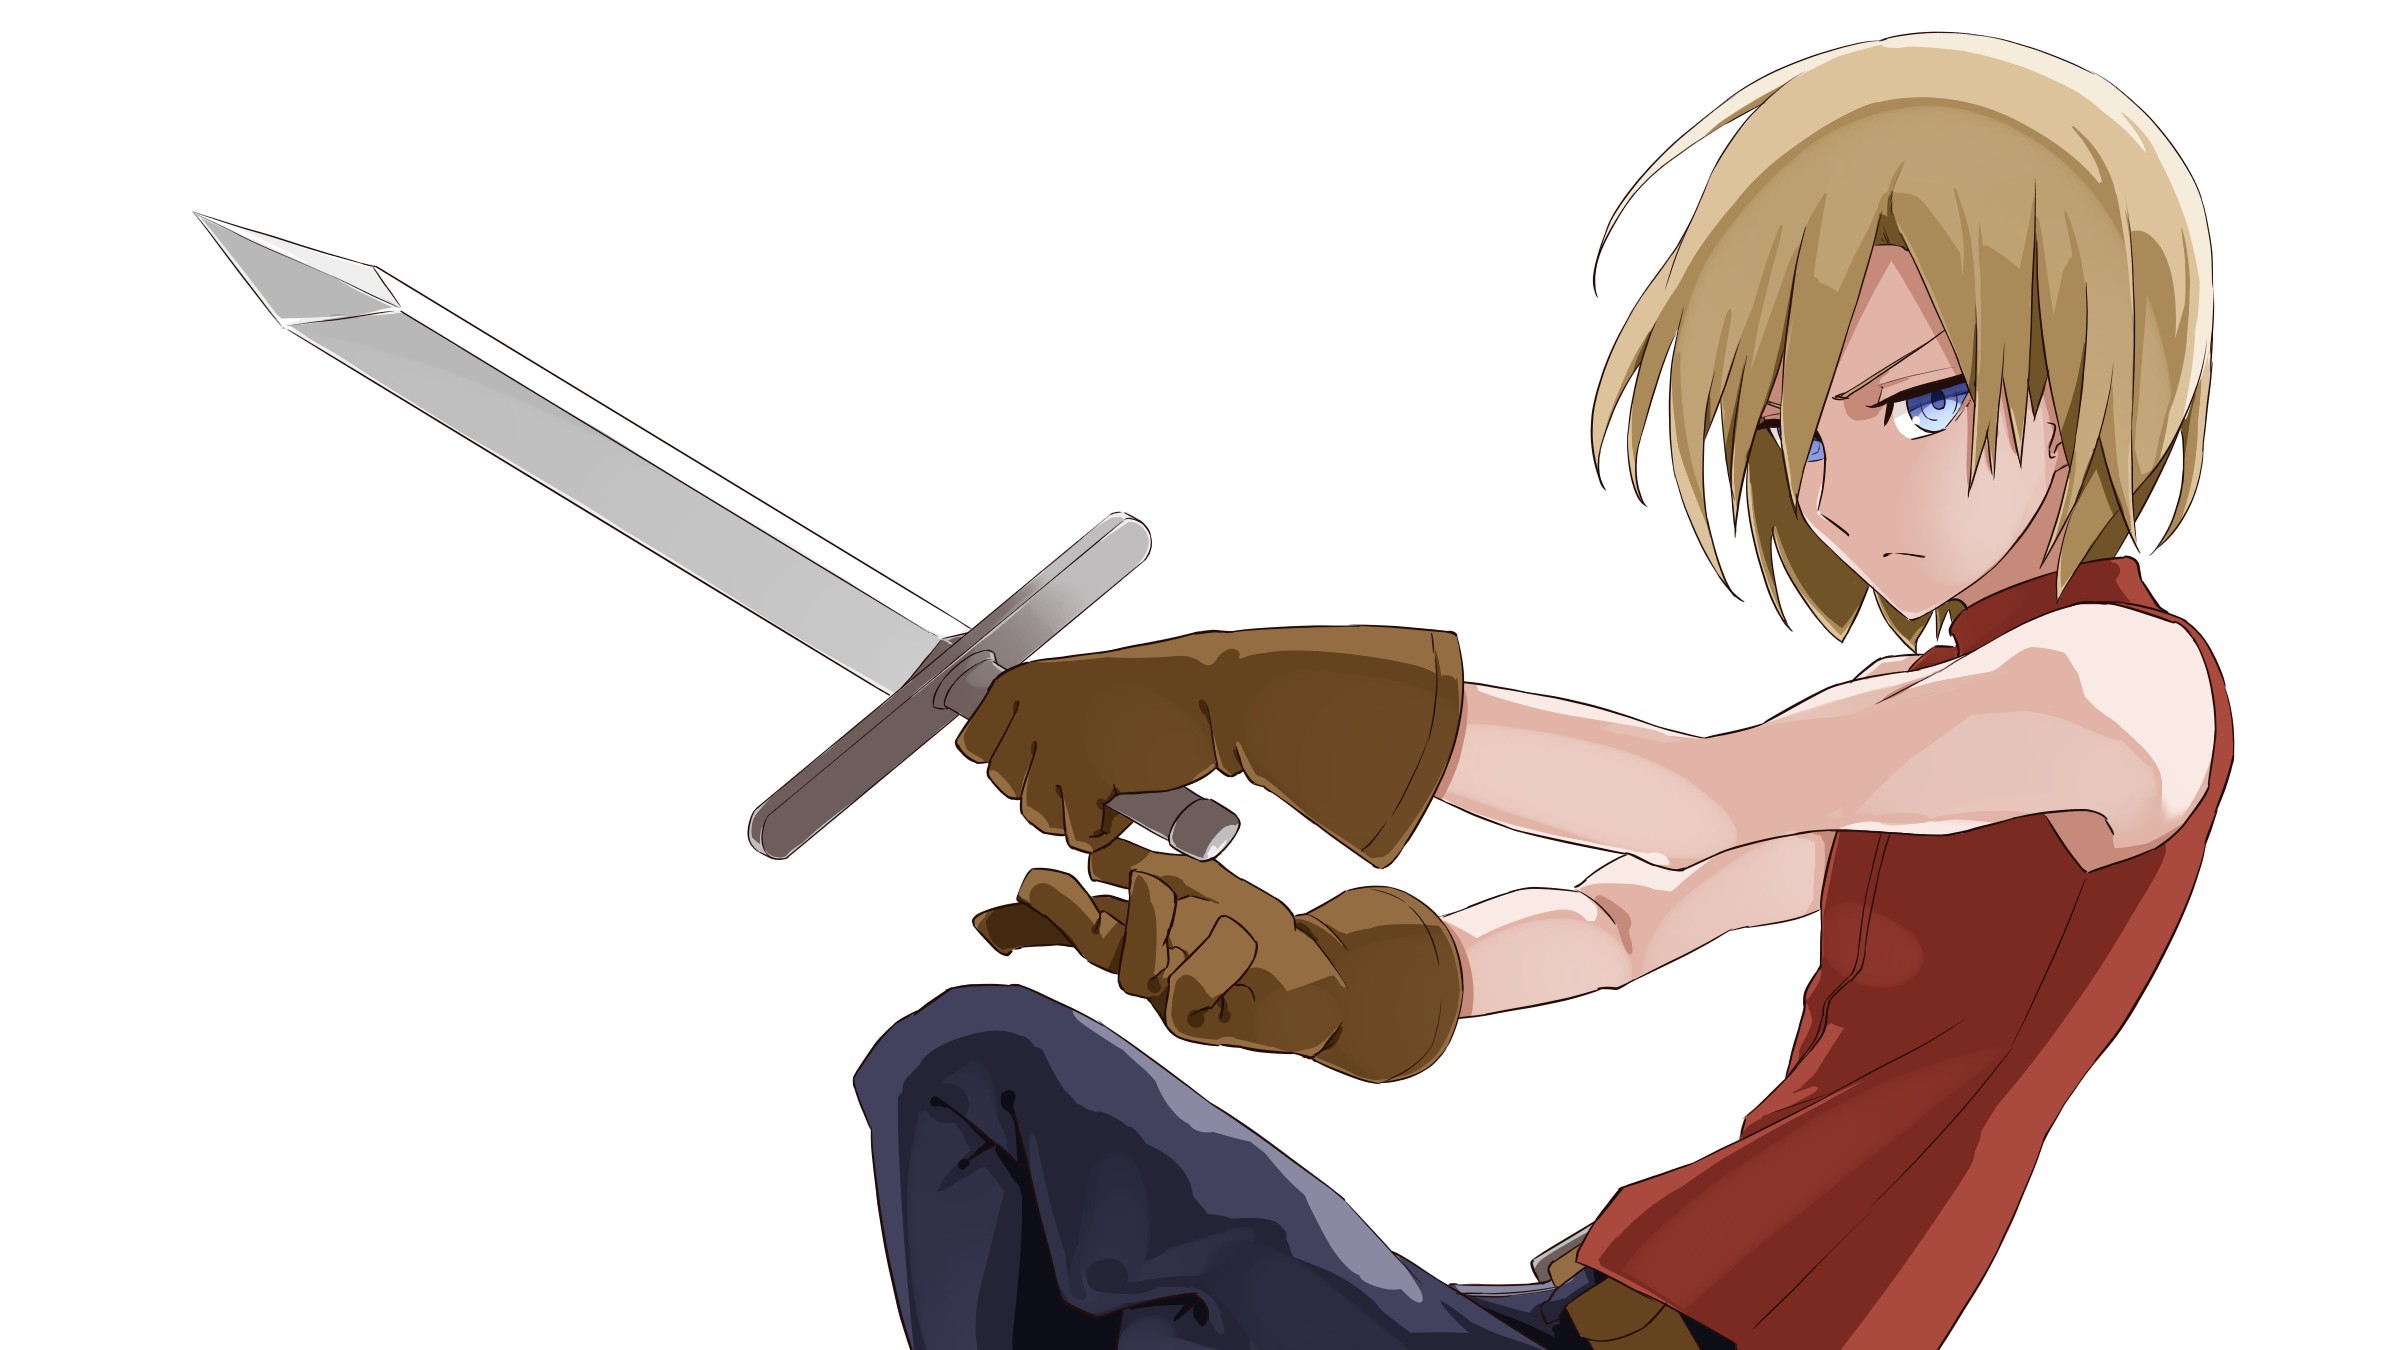
It took me about 4 hours to make this illustration.
I was able to shorten my time since I omitted the background.
But it ended up looking gorgeous so I think it’s pretty well drawn!
Drawing cool or cute illustrations with high efficiency is also a great technique.
I hope you also master various drawing techniques and draw many attractive illustrations!
(Text・Illustration/時計)
Twitter @Clock1231
\ We are accepting requests for articles on how to use /

