2023.05.11
Attract with your character’s face! Draw mesmerizing eye illustrations
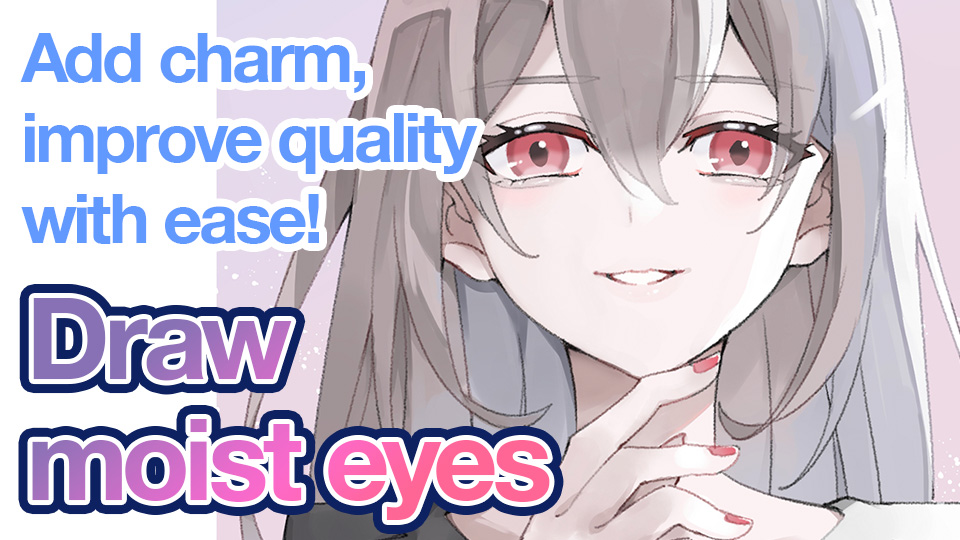
Today, I will show you how to draw pure and clear characters with moist eyes.
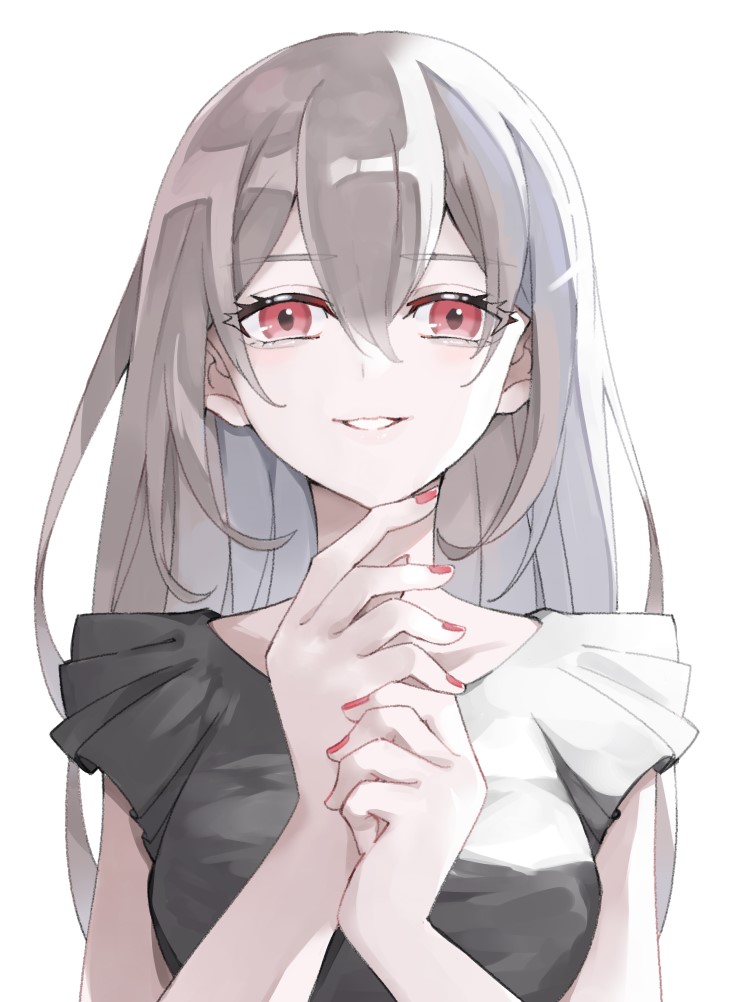
Following image is the illustration drawn using today’s eye drawing method.
Index
Rough color palette
We are going to draw on an A6 vertical canvas at 350 dpi (but it was 1502×2039 when I finished, the width has been slightly modified).
Create a rough color palette to solidify the idea of coloring.
This time I chose to focus on these low saturated colors.
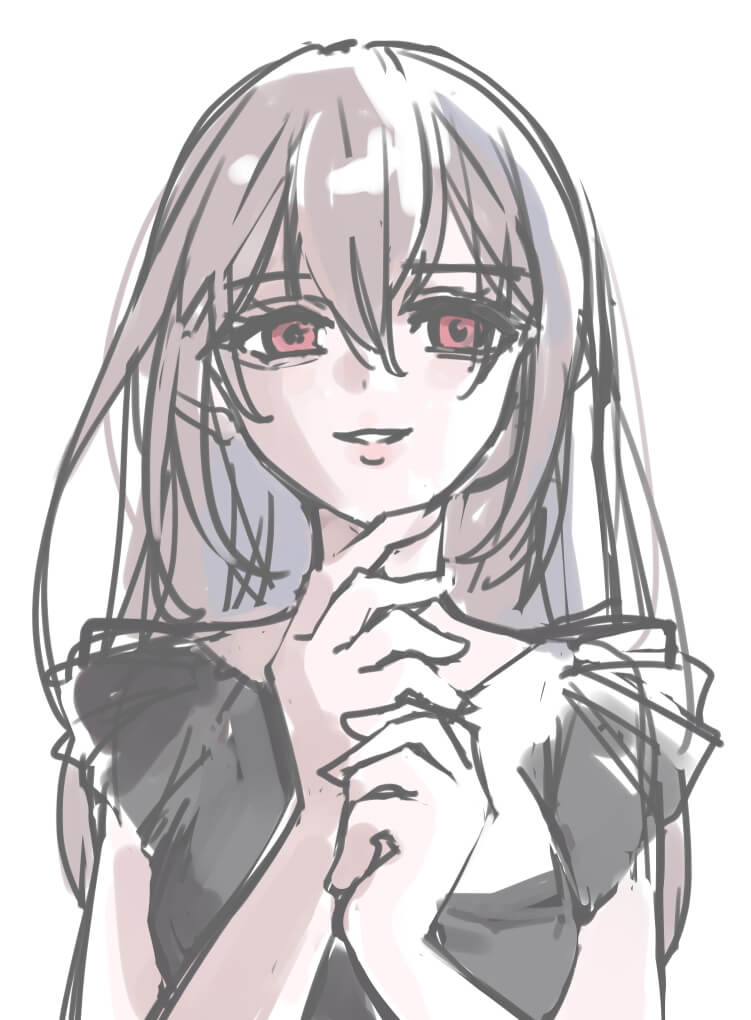
Also you ought to paint roughly at this stage as you can use it as a color swatch later when you paint the base colors.
Line drawing
Draw lines of the eyes.
As we want to emphasize the moist eyes, we will draw them while adjusting the ratio. If the width of the white part of the eye is 100%, then the width of the black part of the eye must be more than 50%.

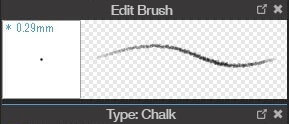
For your information, I am using the Chalk brush (free) for the line drawing this time.
As the colors drawn with this brush are easy to blend, it is suitable for illustrations with a soft look.
I draw the lines while adjusting the width of the brush from 3 to 5.
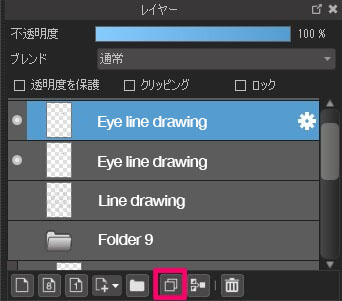
Drawing symmetrical eyes can be challenging, so once you have drawn one eye, you can duplicate that layer and flip it over to create the other eye.
Press ![]() to duplicate the layer.
to duplicate the layer.
Choose “Transform” from the “Select” menu at the top. Click on “Flip” to flip the duplicated layer horizontally.
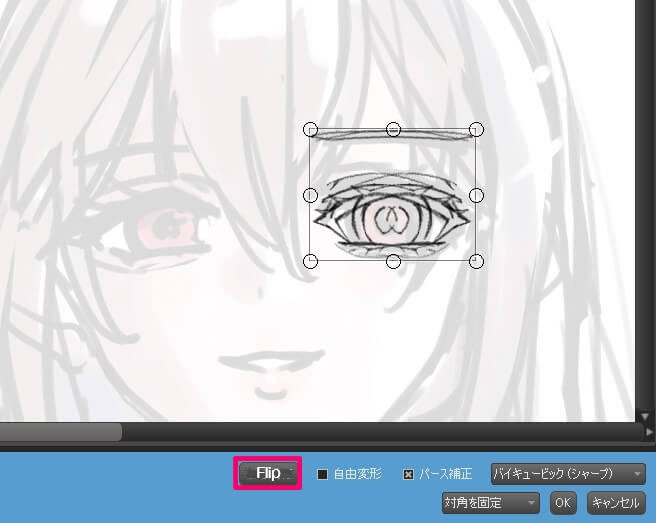
Use the “Move tool” ![]() to move the flipped layer parallel to the correct position for the other eye, while holding down the Shift key.
to move the flipped layer parallel to the correct position for the other eye, while holding down the Shift key.
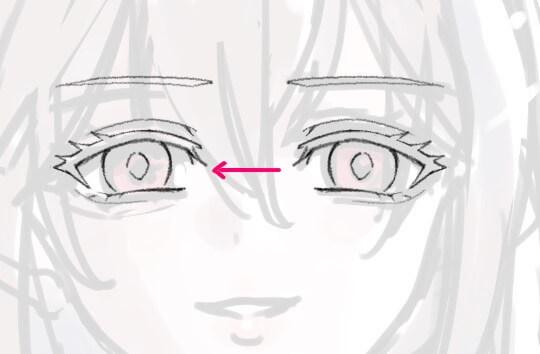
Draw other areas in detail and adjust the placement of the eyes to match the overall balance.
Coloring
Draw base colors.
Display the rough color palette you’ve created in the Materials window and use the eyedropper tool to extract colors. Create layers for each area and paint them carefully so that they do not stick out.
We’ve finished drawing base colors.
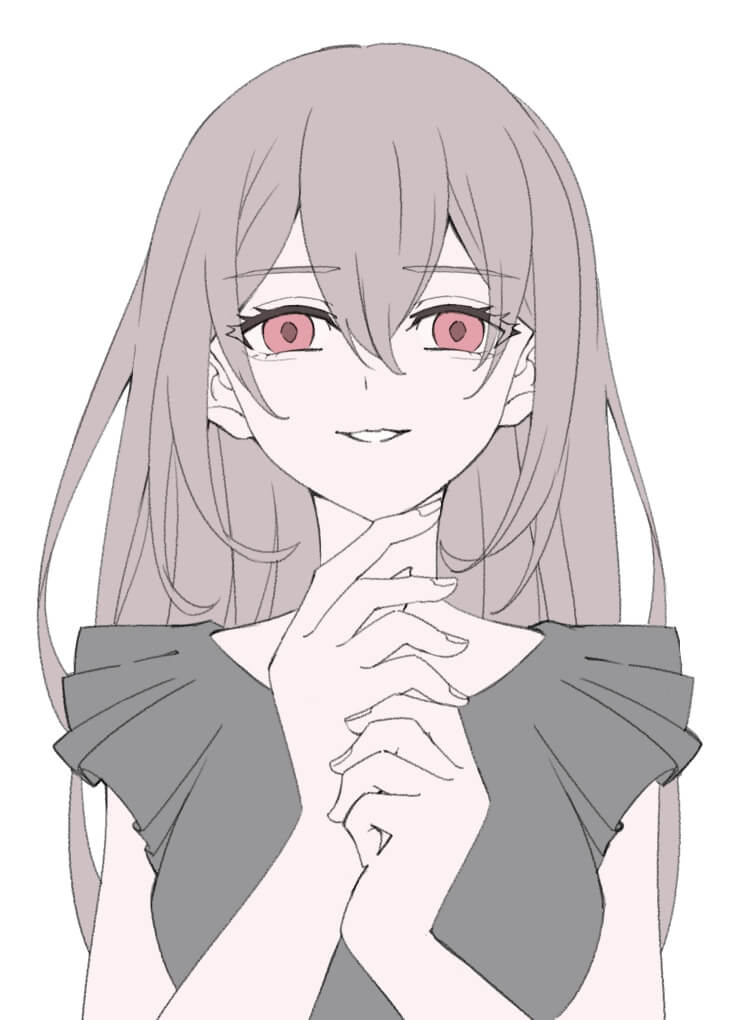
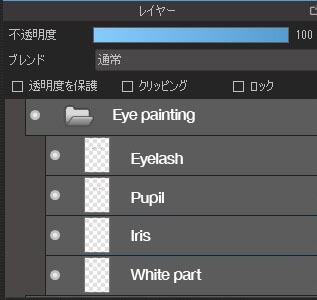
In the painting phase, the eyes are divided into 4 layers: the white part, the iris, the pupil, and the eyelashes. Collect these 4 layers in the “Eye painting” folder and place it under the Hair painting folder.
Areas for eyelashes or the white part of the eyes that overlap with the hair color in the image above are actually painted. You can see this by hiding the hair layer.
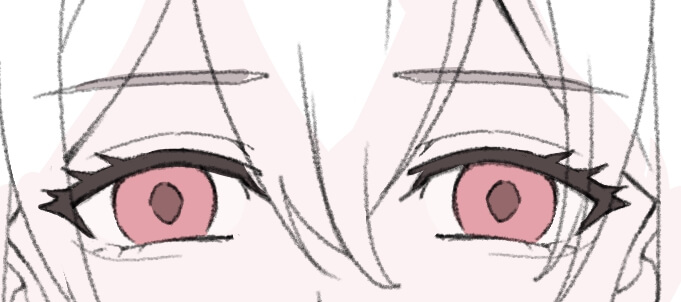
Now we are going to do the detailed painting, adding more layers.
Painting eyes
Add shadows to white parts of the eyes first.
Add a new layer over the “White part” layer and do the “Clipping”.
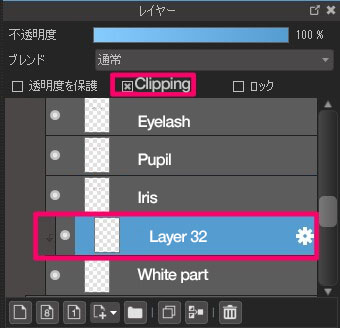
Use the Airbrush to add a faint shadow to the top of the white part (indicated in light green).
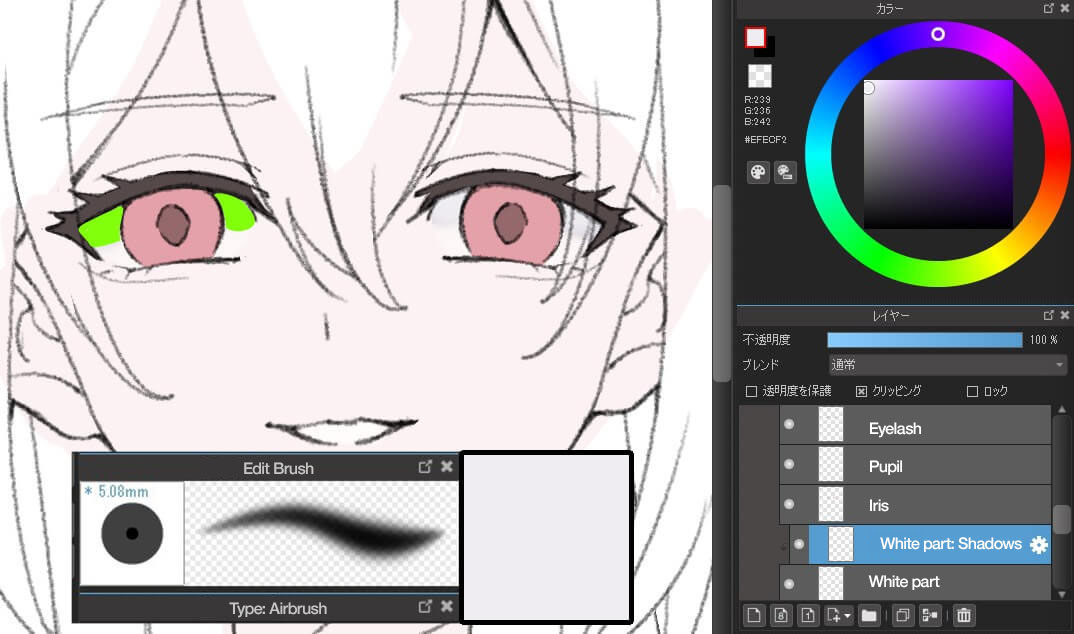
Next, change the color of the iris and pupil line (indicated by yellow).
Add a new layer on top of the layer with the eye line drawing, do the “clipping” and paint each part in a color that is darker than the iris and the color of the pupil.
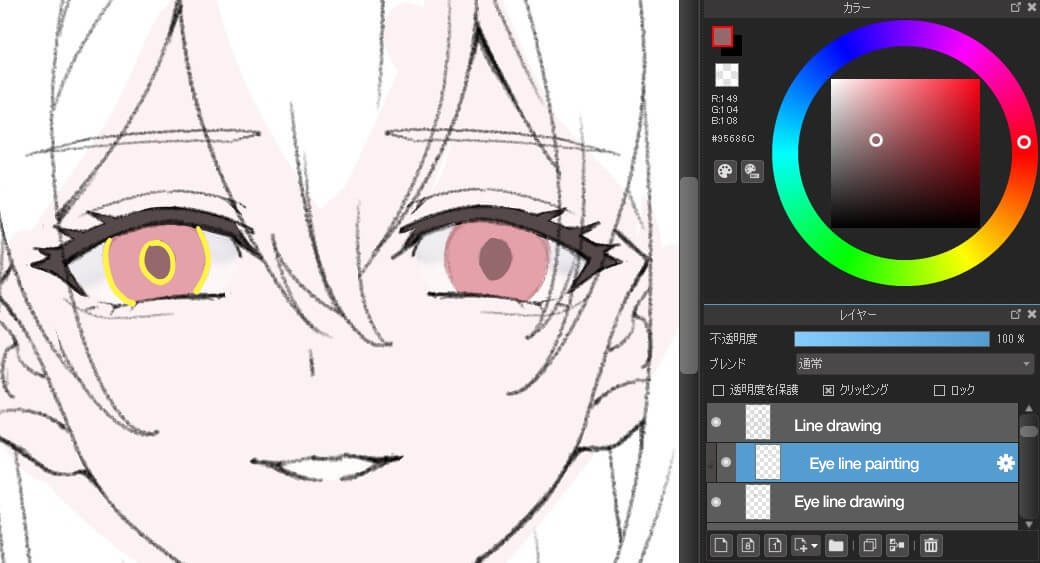
After changing the colors of the iris and pupil lines, add a new layer on top of the Iris layer and clip it. Use the airbrush to paint the outline of the iris (indicated in light green below).
If you have painted too much, use the airbrush with the transparent color to erase the area where you have painted too much.
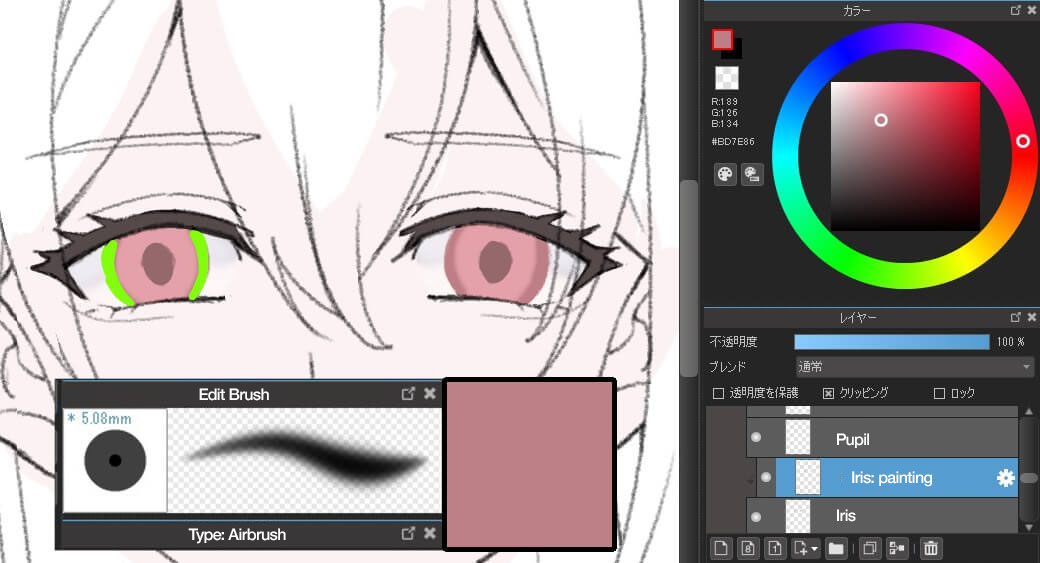
Add a new layer to paint the lower part of the iris (indicated by light green) with the lower saturated purple.
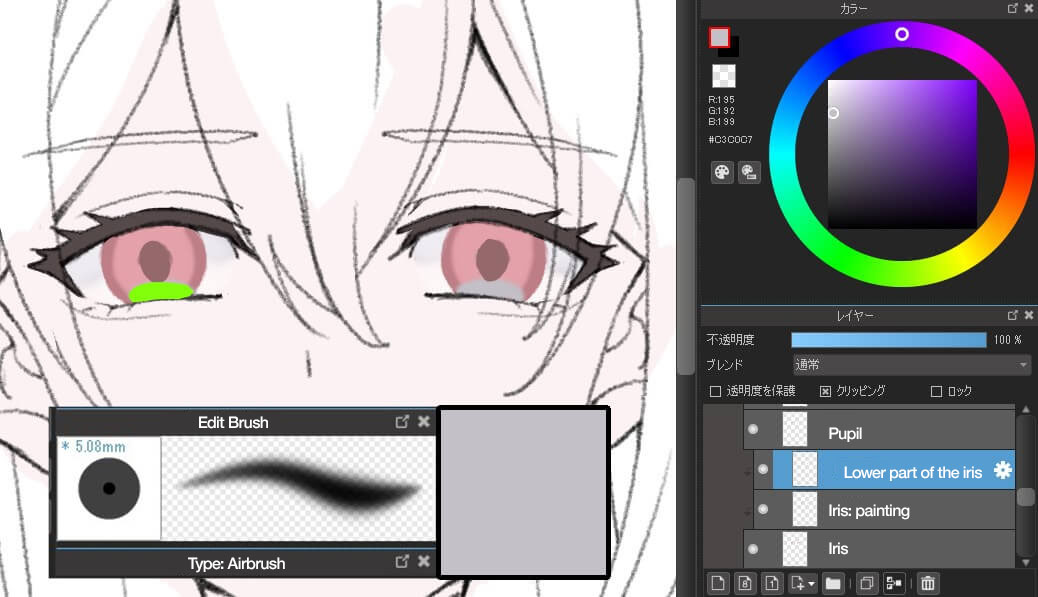
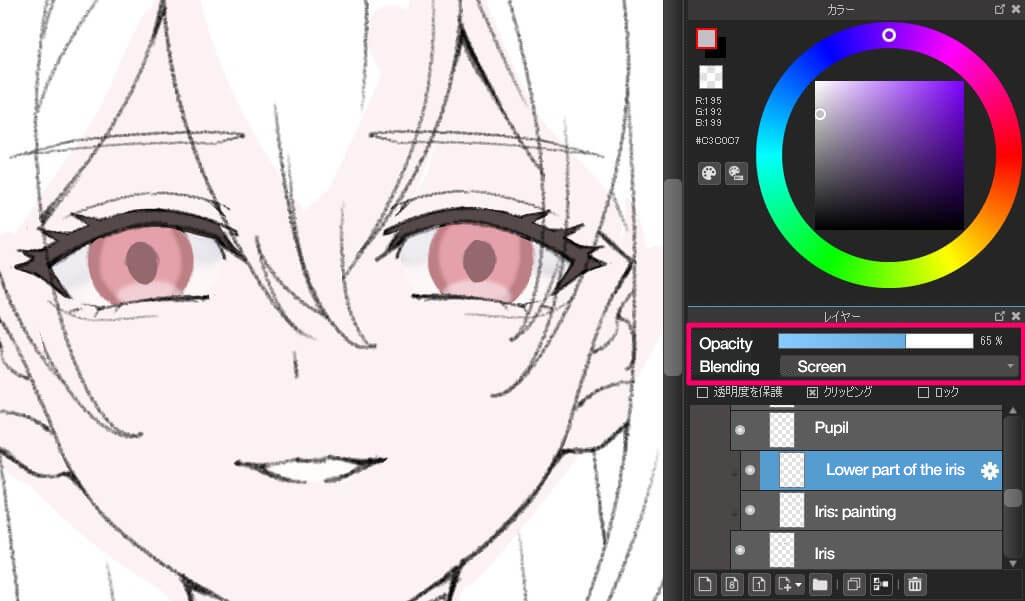
Set the layer blend to Screen and reduce the opacity to 65% to soften the shadow of the iris rims we’ve now painted.
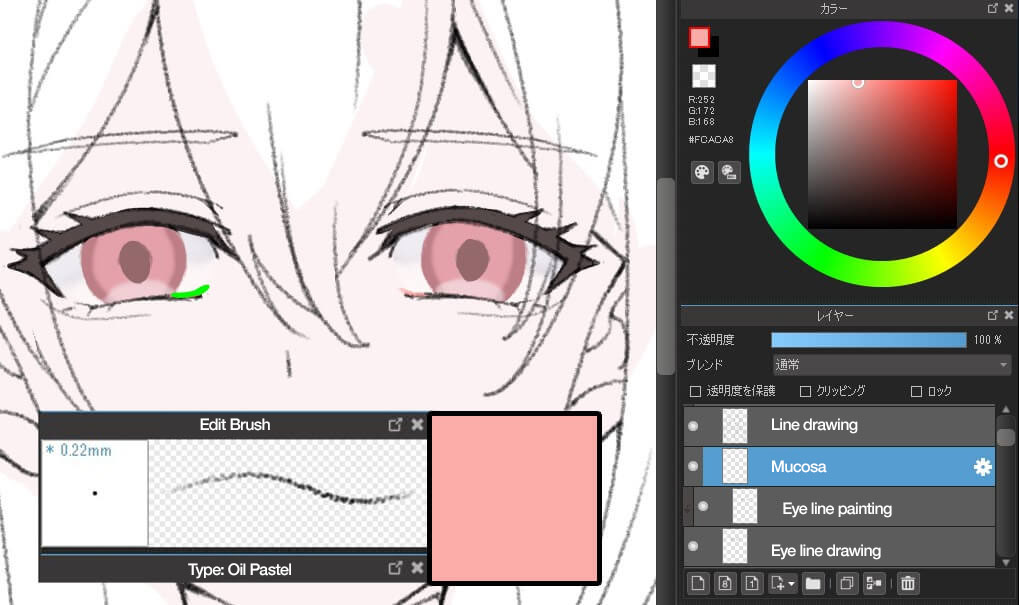
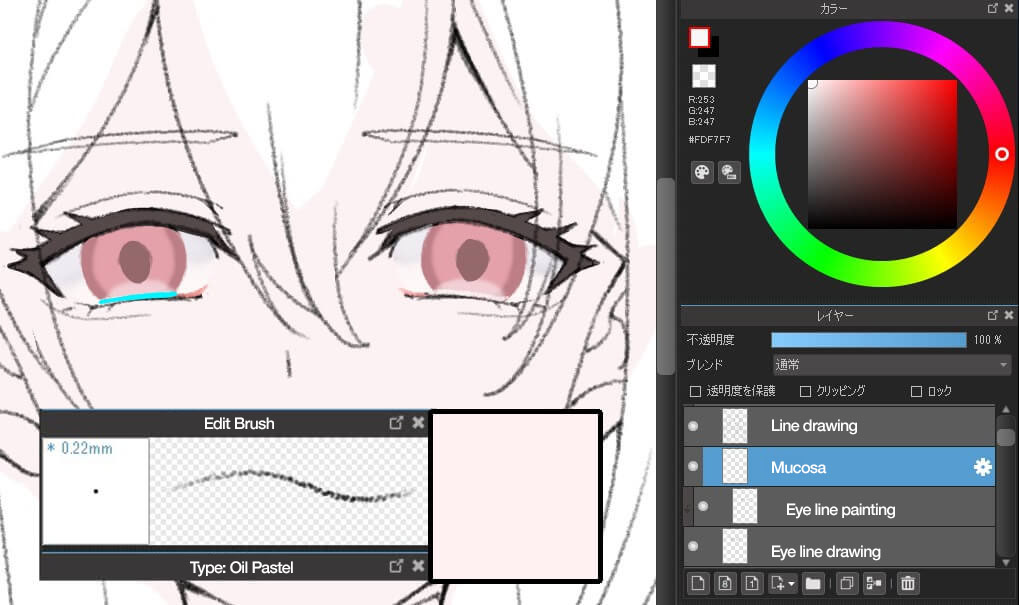
Then use the Oil Pastel brush (for free) to draw the mucosa at the bottom of the eyes.
Add a new layer on top of the eye line layer (don’t do clipping).
Use pink for the corner of the eye (which is in light green), and white pink for the bottom of the eye (which is in light blue).
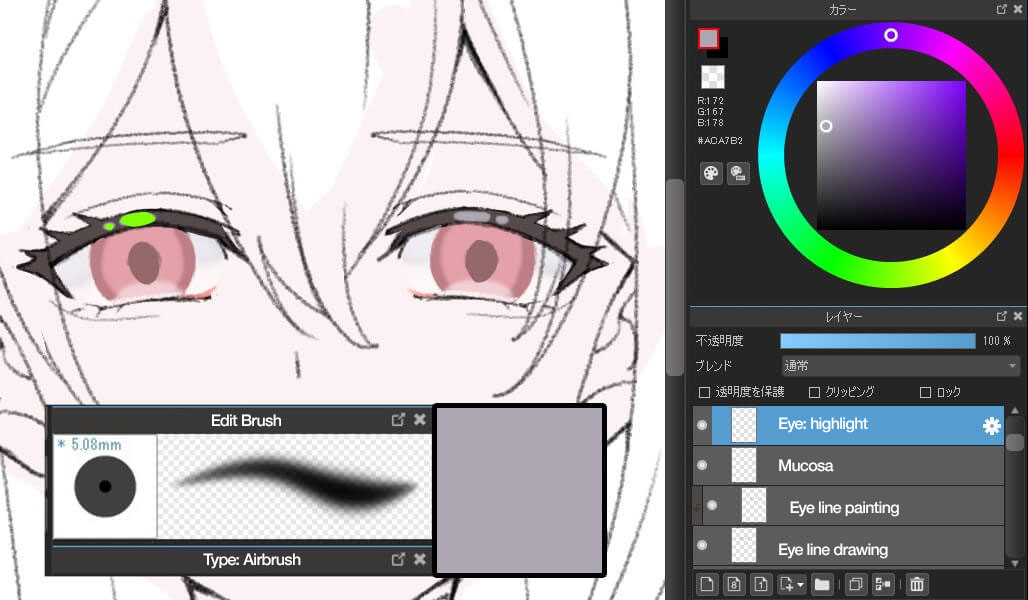
On top of the mucosa layer, add a new layer to add highlights on the eyelash.
First, use low saturated purple to draw lights as shown in the light green below.
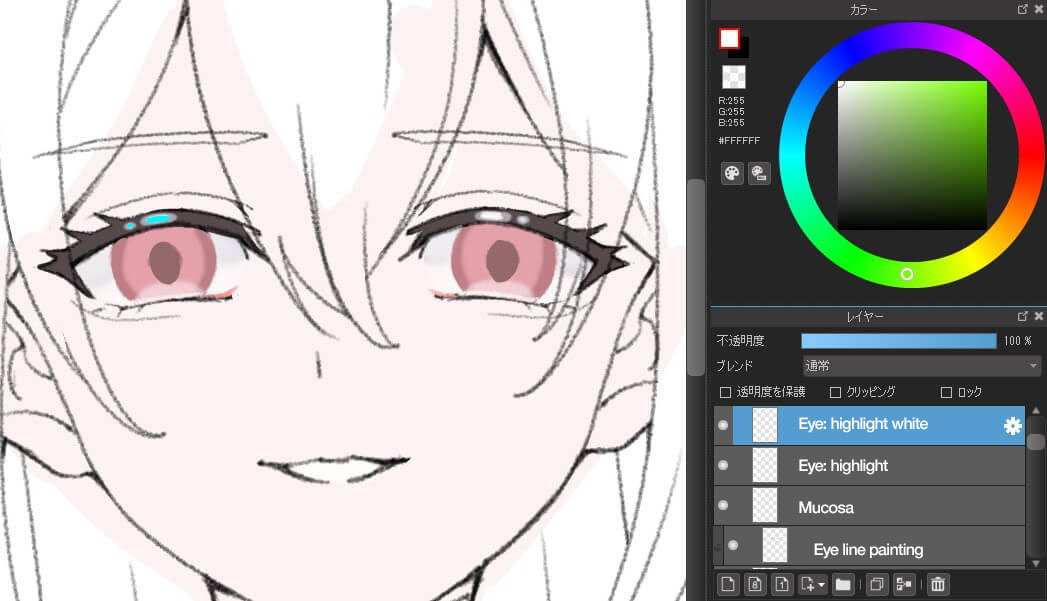
Add a new layer on top. Paint the inside of the highlight in white.
The painted area is shown in light blue in the image below.
As this is a detailed part, use the Chalk brush which is also used for the line drawing.
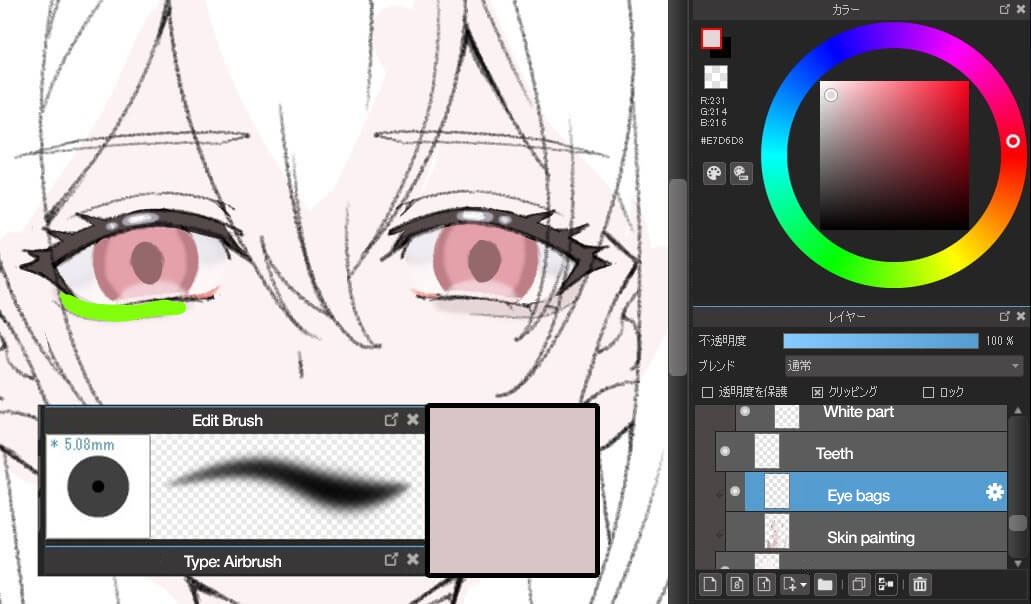
Now paint the eye bags.
Add a new layer on top of the skin painting layer and clip it. Use the darkened skin color to paint the eye bags (shown in light green).
As indicated in blue, add detailed highlights in white over the shadows.
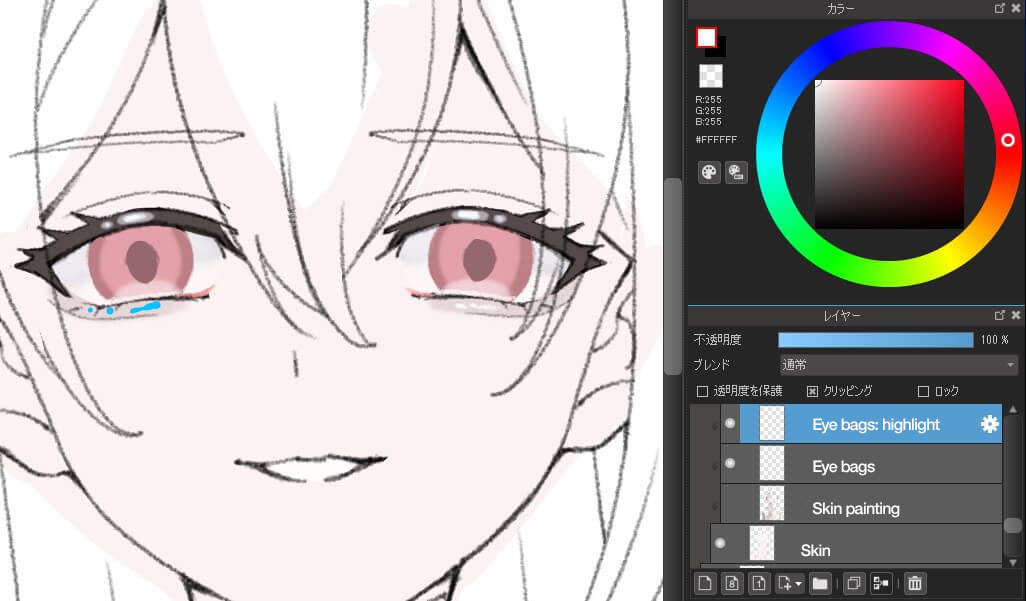
If you hate having too many layers, use the “Merge layers” ![]() button from time to time to merge layers together, or paint details on a single layer.
button from time to time to merge layers together, or paint details on a single layer.
After drawing the eye bags, add highlights to the iris. This time we will draw them on the same layer as the eyelash highlights.
Even though we are creating moist eyes, do not make the highlights too big.
Areas to add highlights are near the pupil and the border between the iris and the white part (shown in light green).
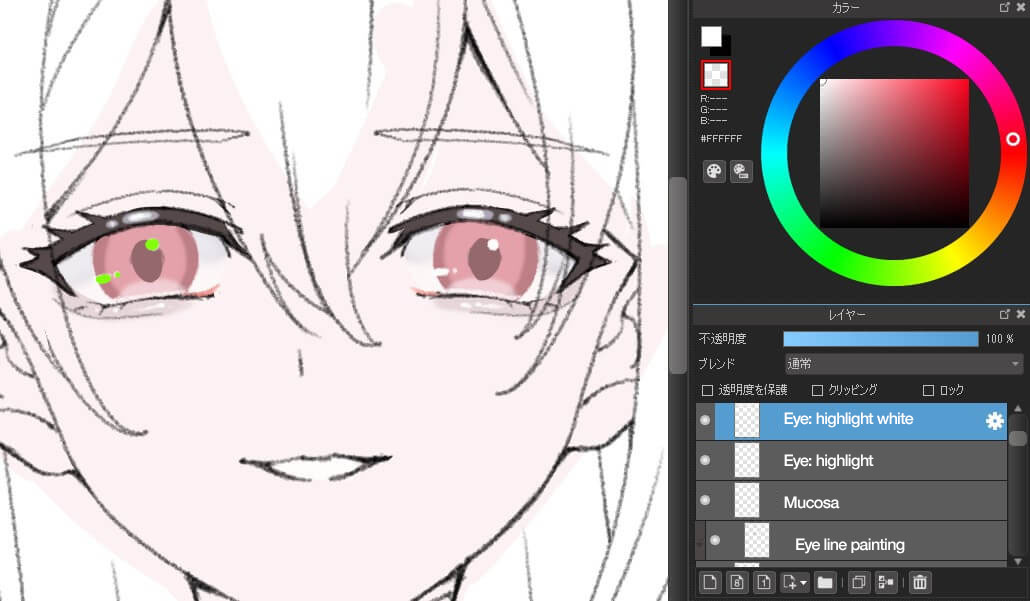
After adding the highlights, add color to the top of the eyes.
Add a new layer on top of the layer on which you painted the edges of the iris and set the layer blend to “Multiply”.
Use the Eyedropper tool to extract the base color of the eyes and use the Airbrush to add color to the top of the iris (shown in light green).
This creates the depth of the eyes.
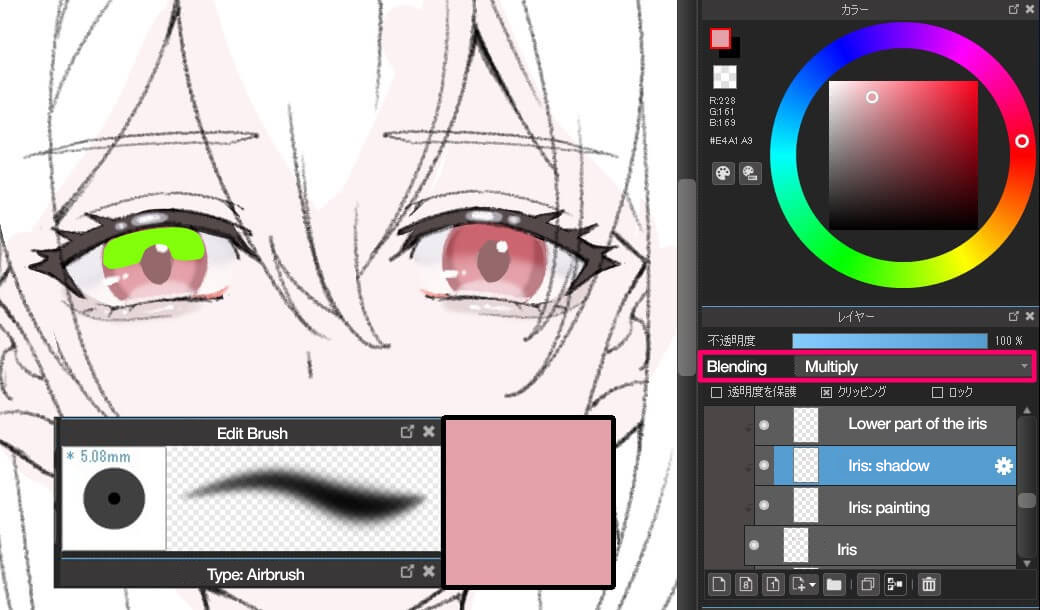
As its color was darker than the edge color, I added a darker color to the edges of the eye layer, shown in light green, so that the colors blend together.
Also add an almost black color to the top of the pupil (shown in light blue).
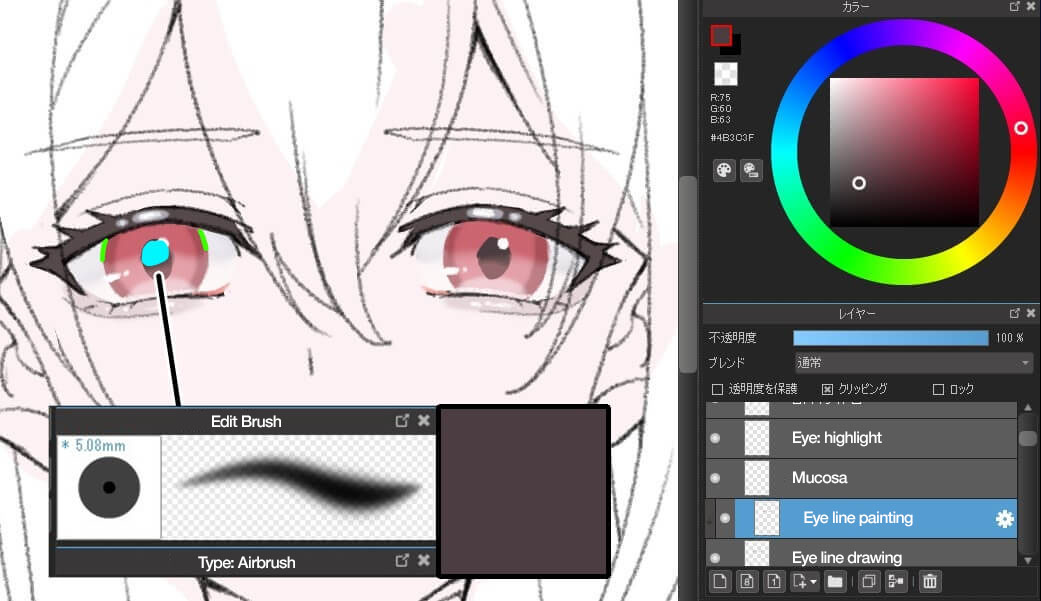
Next, change the eyelash color.
Add a new layer on top of the eyelash painting layer and clip it. Use the Airbrush to add a red gradient to the inner and outer corners of the eyes (shown in light green).
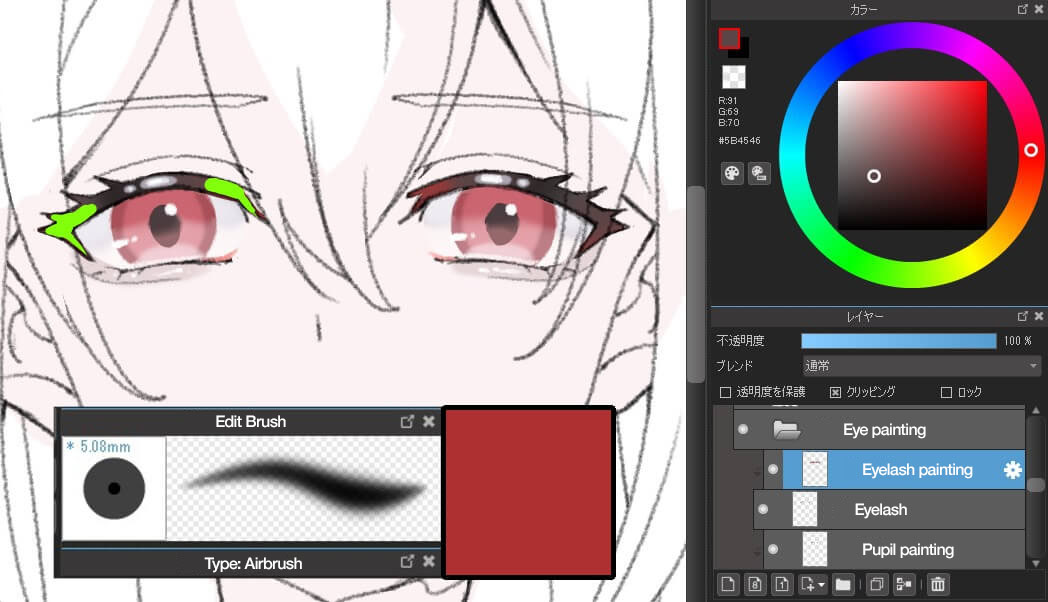
In addition, use the Airbrush with a blackish color and add a denser contrast to the highlighted areas (shown in light blue).
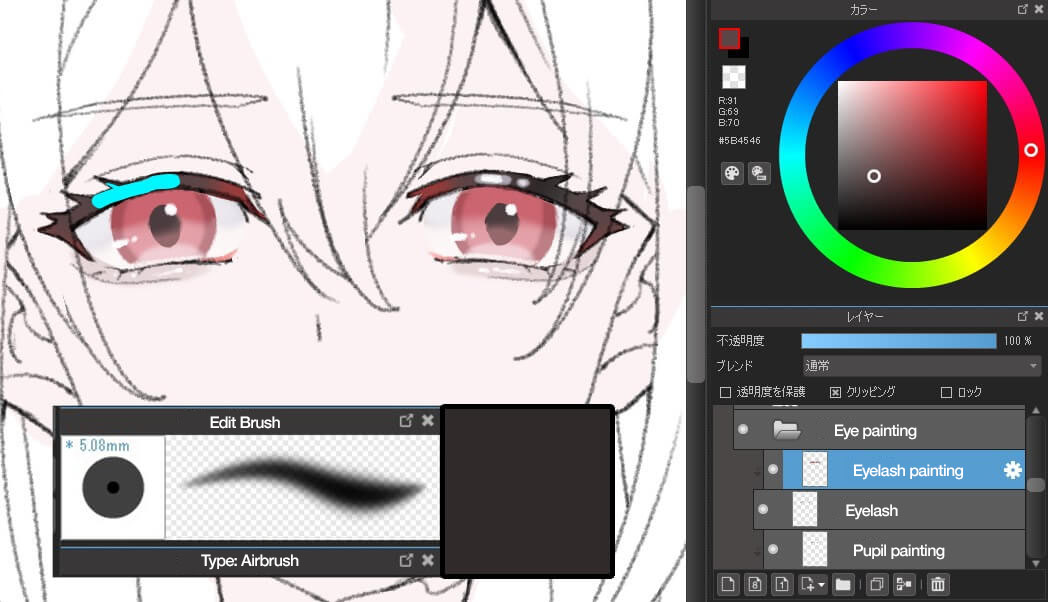
Now we have finished painting the eyes.
As the other areas have been painted, the picture below shows how it came out.
Finally, we will add some paint to give the hair a transparent look.
Adding clarity to hair
Add a new layer on top of the hair painting layer and clip it. Use the Pen brush with a color between the color of the eyelashes and the color of the hair, and paint the part of the hair that overlaps the eyelashes (shown in light green).
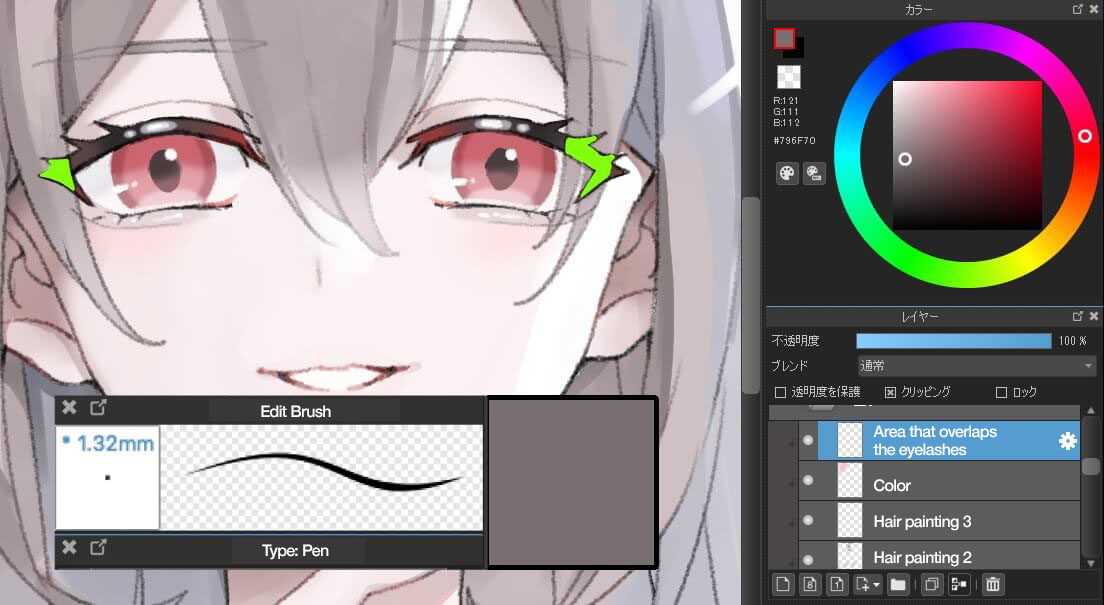
Then dilute the color of the part of the eyelash line where the hair overlaps (shown in yellow).
Add a color that is slightly darker than the color we used to the eye line painting layer.
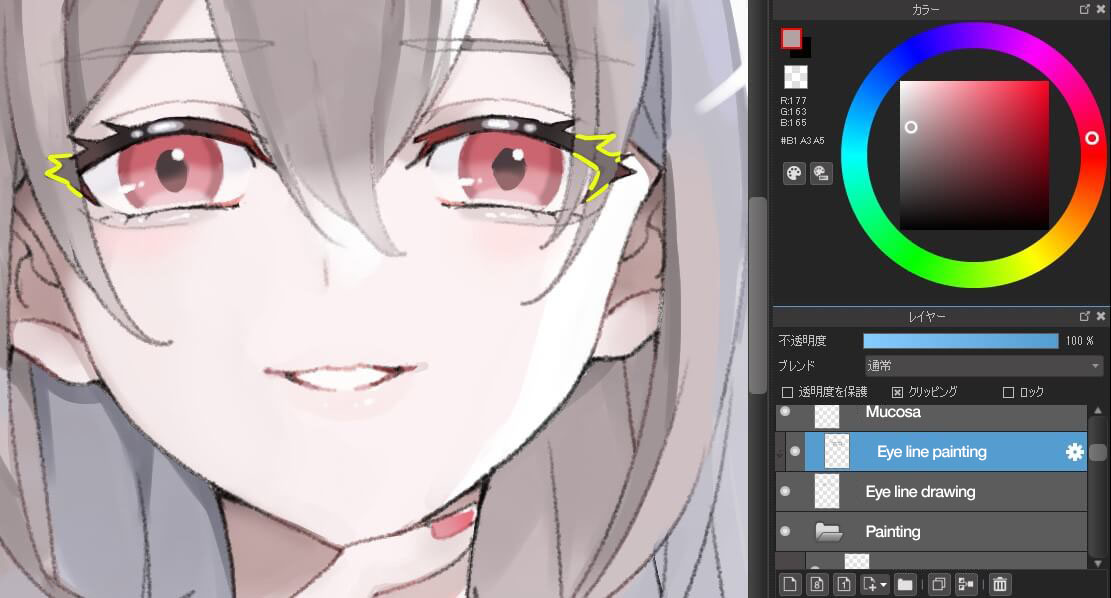
This will make the hair look translucent.
We have finished coloring.

An amazing work of art with impressive eyes has been created.
I hope you will try drawing with this method!
The “Chalk” and “Oil Pastel” brushes used in this tutorial are available from the buttons below.
\ We are accepting requests for articles on how to use /

