Interface
MediBang Paletta allows you to use various color interfaces so you can tailor your workspace.
You can test out different ways to pick, save, and play with your color choices.
Interface
MediBang Paletta allows you to use various color interfaces so you can tailor your workspace.
You can test out different ways to pick, save, and play with your color choices.
Color
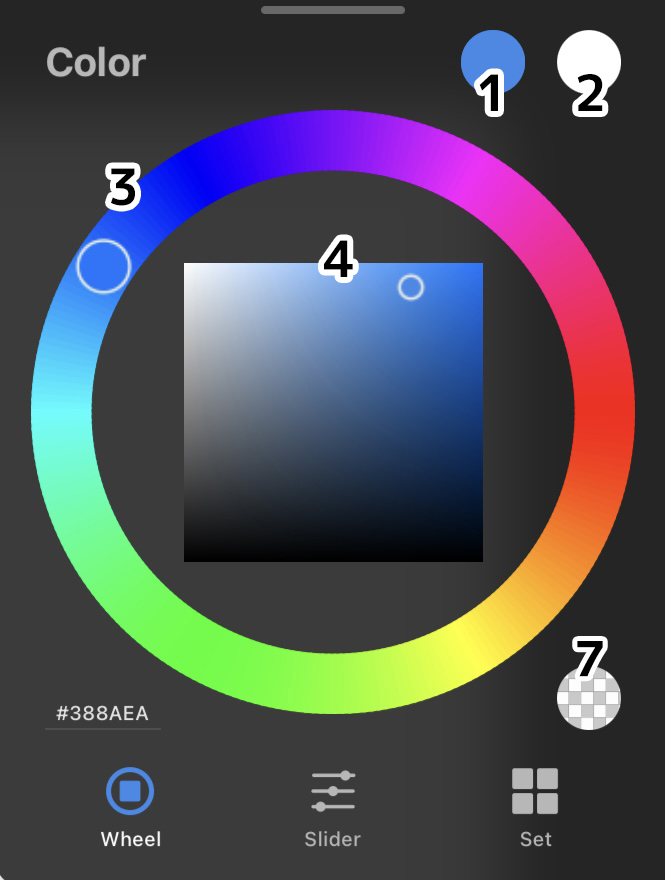
Here is where you pick, change, and even save colors to different palettes.
1. Primary color
Shows the color that is currently selected and in use.
2. Secondary Color
Can be used in brushes with color dynamics as an option to let the brush shift between the primary and secondary colors.
3. Color Disc
MediBang Paletta’s Color Disc as a default gives you the combination of the outer ring and inner square to give you the most expert control over your color choices.
4. Reticle
The two transparent circles are known as reticles that can be dragged around to select colors.
The reticle on the outer ring changes the hue of the color, and the reticle on the inner square can be dragged to change saturation and value.
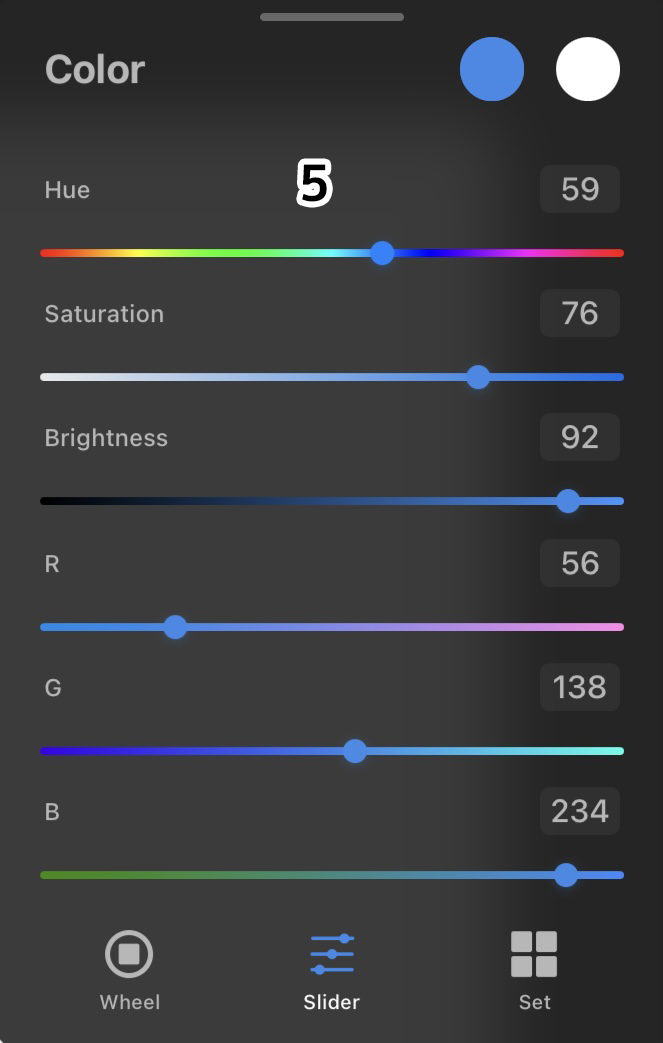
5. Slider
You can adjust colors using HSB and RGB.
HSB stands for Hue, Saturation, and Brightness. Hue represents the color tone, Saturation indicates the vividness, and Value determines the brightness of the color.
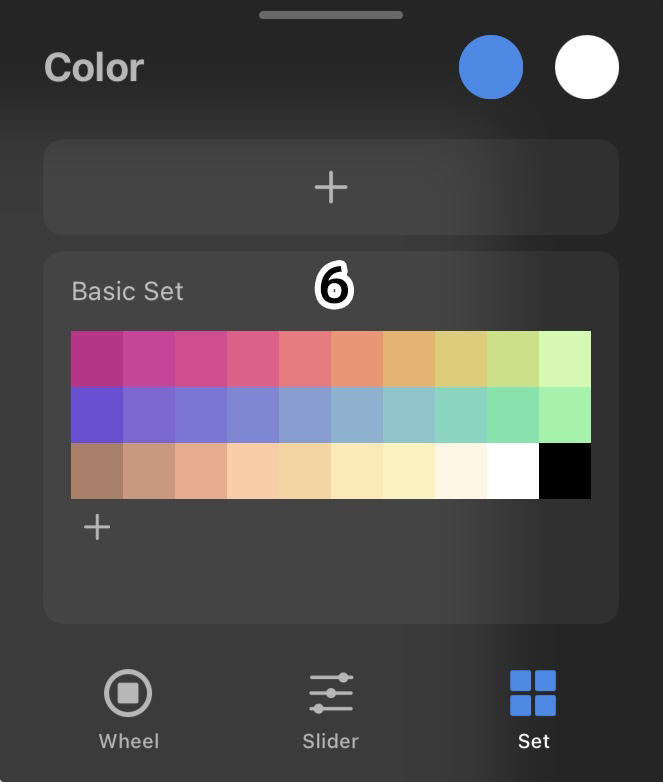
6. Set
You can register your own custom color palettes.
By clicking the “+” button, you can create a new color palette set.
7. Transparent Color
By selecting the transparent color while using the brush tool, you can use the brush just like an eraser.
Bucket Tool
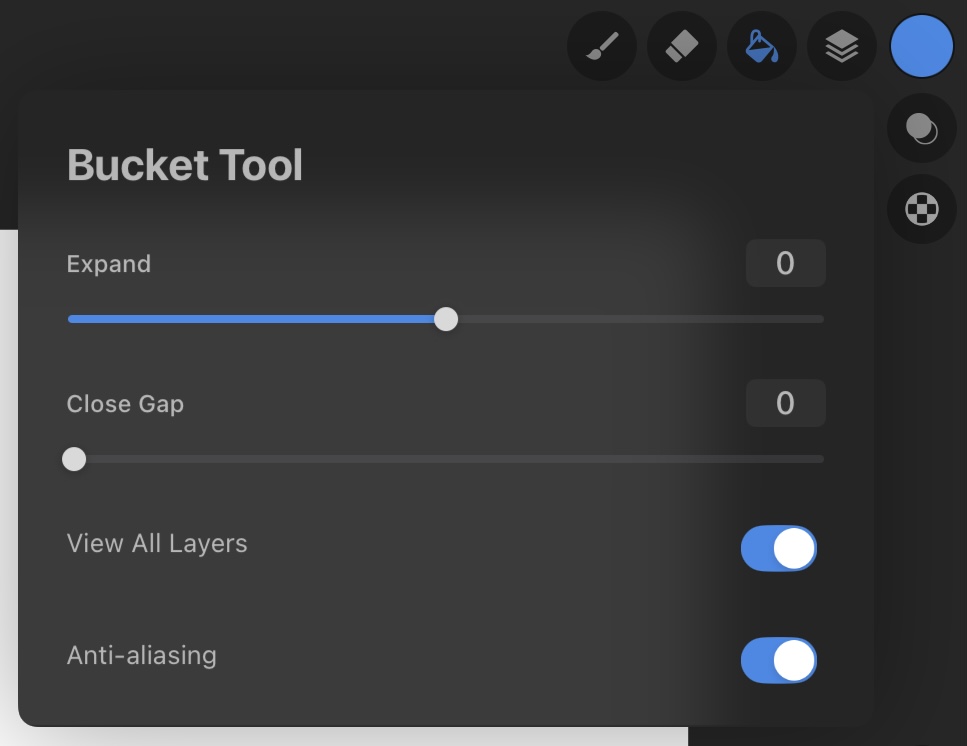
Tap the paint bucket icon to switch to the tool. After switching to the tool, tap whatever area of the canvas you want to fill with color.
The Bucket Tool is automatically set to “View All Layers,” which means that it will observe other layer’s objects on the canvas and fill the blank spaces accordingly.
You can toggle this setting to turn it off and ignore objects on other layers.
Turn on Anti-aliasing to make the fill smoother.
Eyedropper
Pick a color from anywhere on your canvas by using the eyedropper tool, or by activating the long press for eyedropper multi-gesture in settings. After selecting the color you like, release your finger to select the color.