Master how to use layers in MediBang Pro and experiment as much as you want. Edit, duplicate, blend, move, erase, and more, only altering the parts of the canvas you want to.
Using Layers
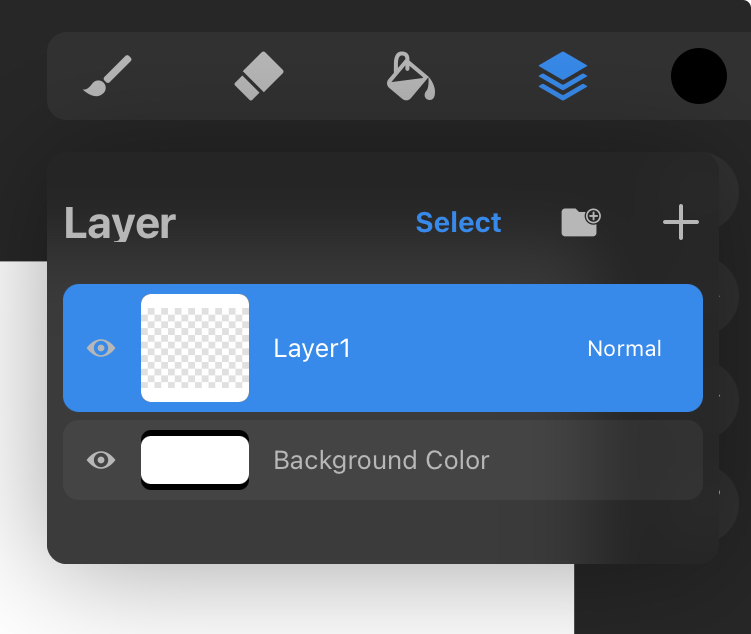
With one tap you can open the Layers panel in MediBang Pro to use the minimalist interface’s many functions.
The Layers Button
Tap the overlapping squares in MediBang Pro’s top right menu bar to open it.
Create
Tap the + button in the top right corner of the Layers panel to add a new layer.
Click here to learn more about creating layers.
Layer Thumbnail
Look here to see a miniature preview of what is on each layer.
Layer Names
Easily track your workflow by renaming different layers to what helps you stay organized.
Selected Layer
Whichever layer is currently selected is the layer that will be altered with any changes made. You can keep track of which layer you’re on by checking to see which one is highlighted.
Blend Mode
Blend Modes allow you to blend together contents on several layers with various effects. Open the Layer Options Menu to bring up the options for blend mode.
Click here to read more in-depth about Blend Modes.
Show/Hide
Switch off the eye icon in the little box on the left hand side to hide the layer contents, and tap once more to switch visibility back on to show the layer contents.
Background Color
MediBang Pro allows you to pick the Background Color layer prior to creating the canvas, but if you want to change it again, just tap the background color once more to pull up the color wheel.
Layer Options
Click here to learn more