MediBang Pro was designed to be the smoothest experience for the working artist.
With a simplistic, clean interface and intuitive gestures, you can focus on making your art over deciphering an overly complicated workspace.
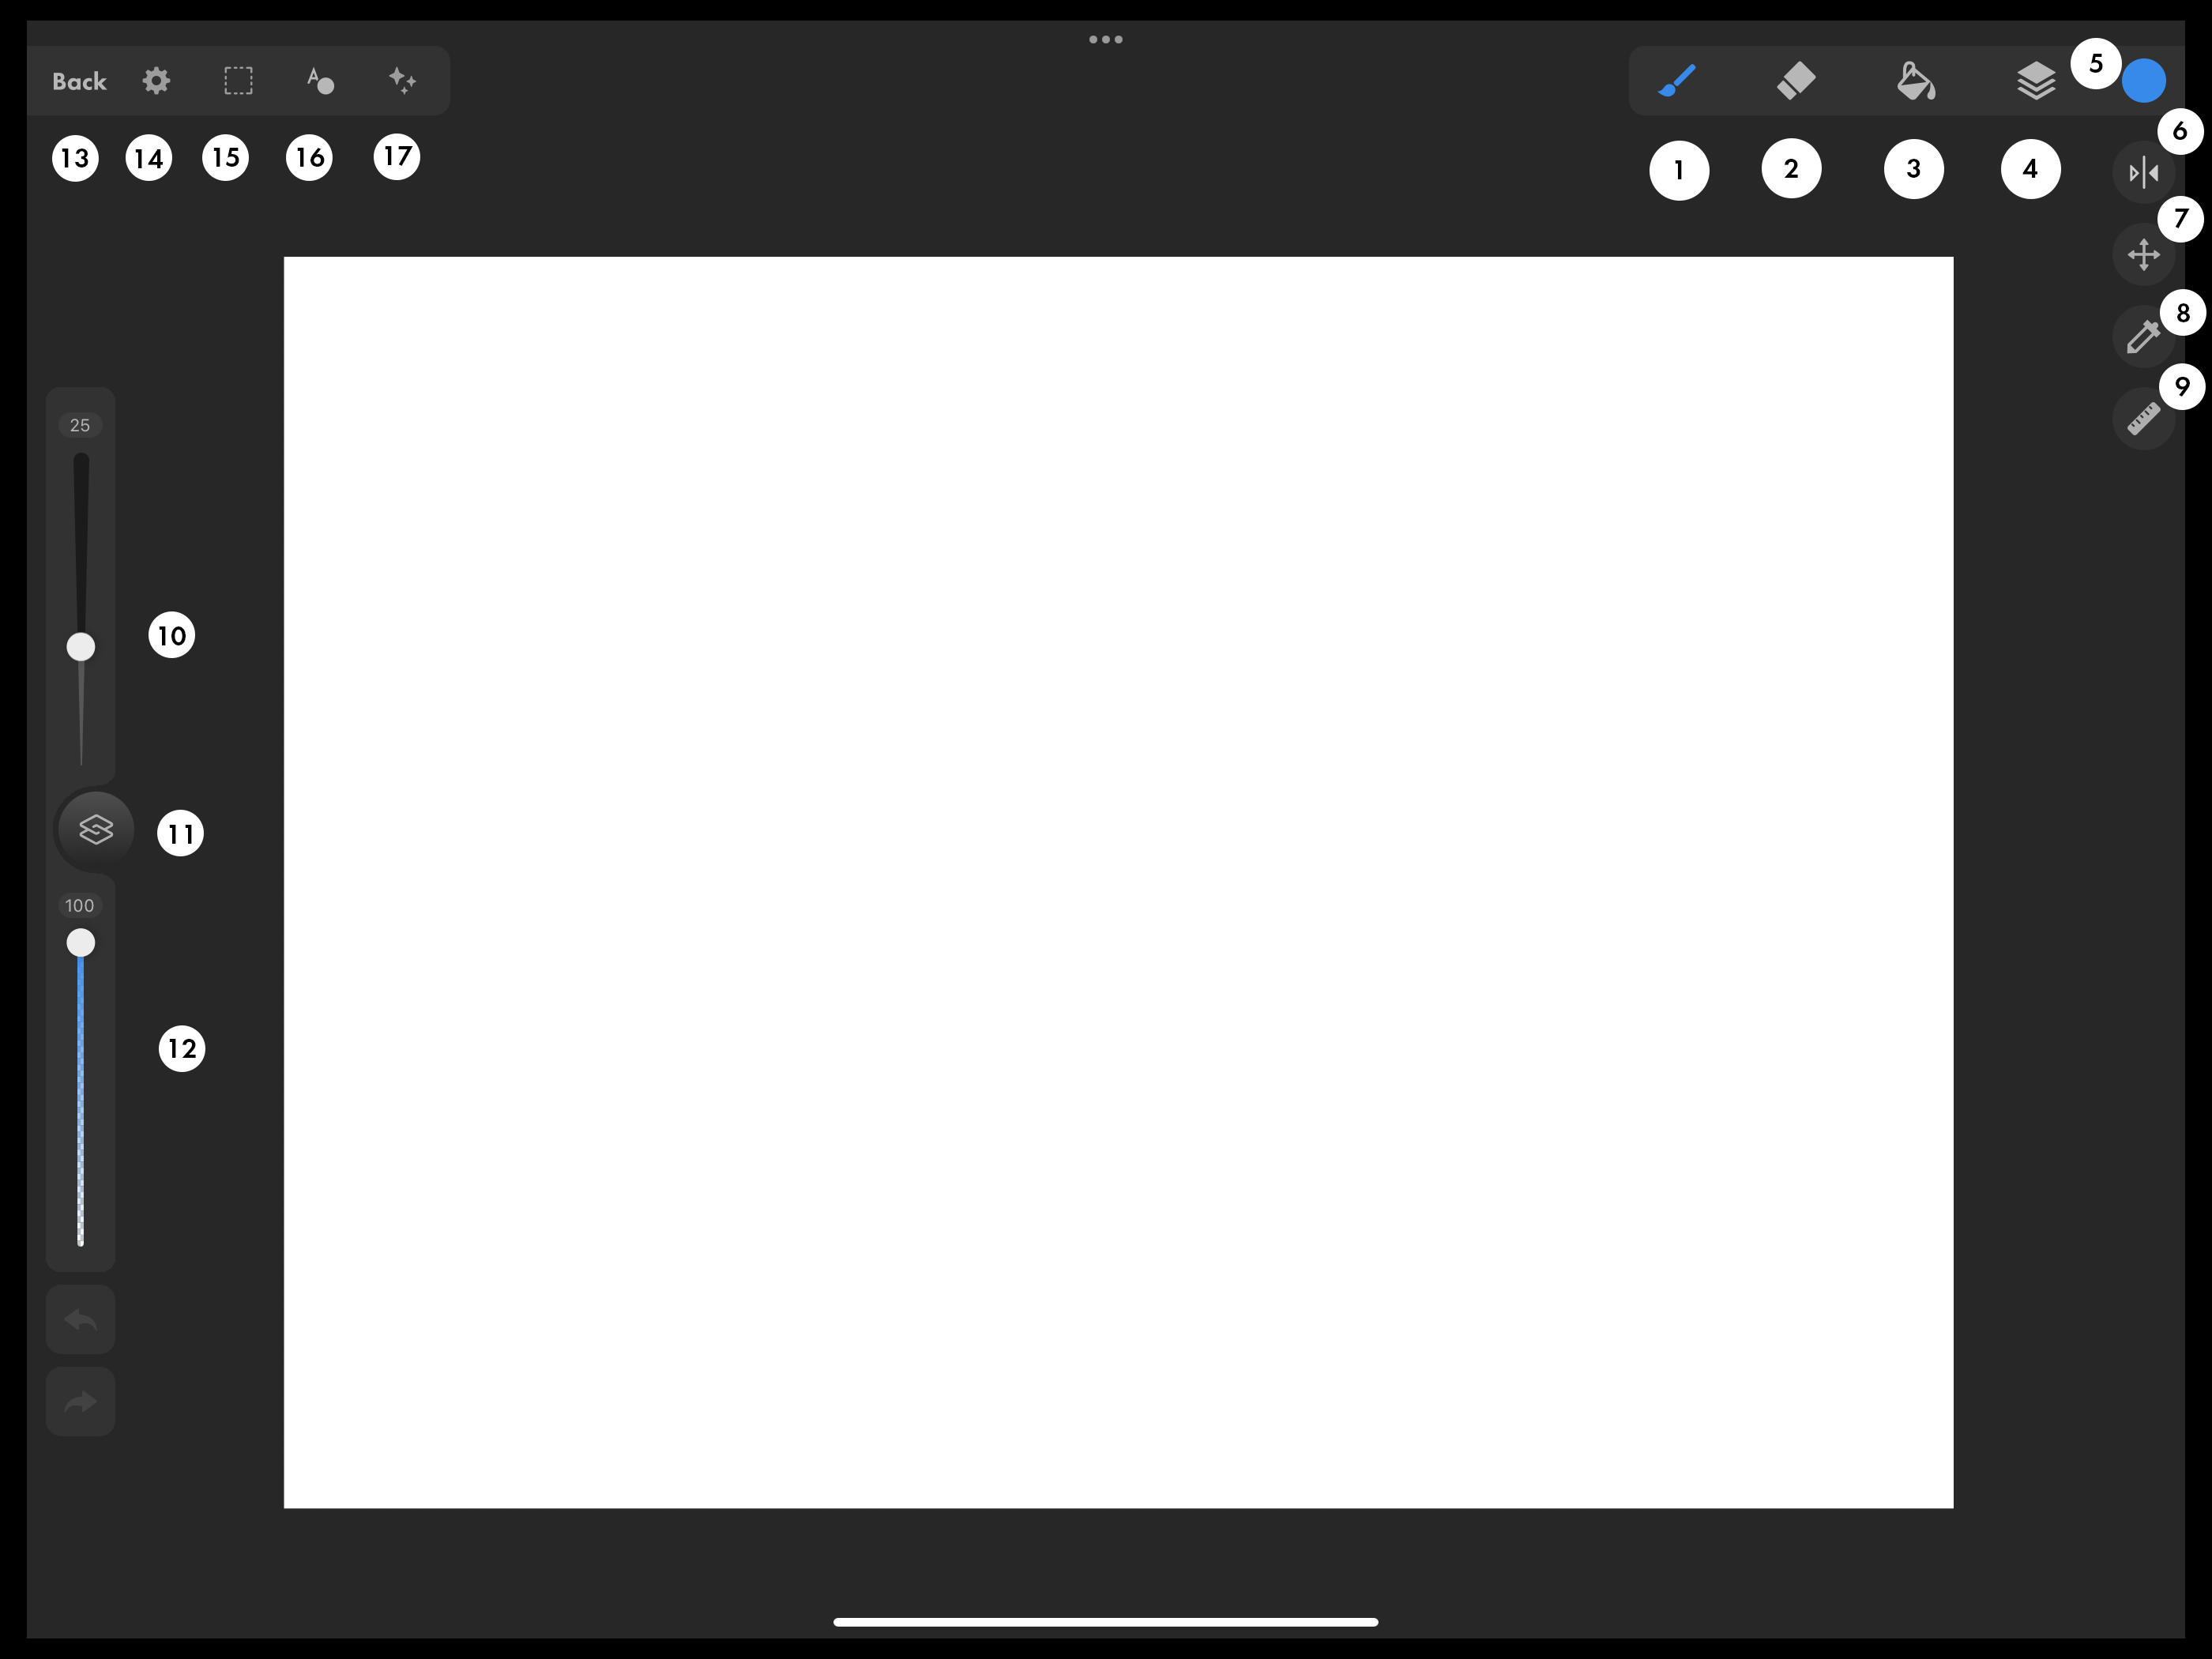
Illustration Tools (Top Right)
The top right corner has all the tools a creator needs to start working.
1. Brush Tool
Sketch, paint, doodle, and render using over a hundred pre-installed brushes. Organize the library, customize the brushes to your liking,
Learn more about MediBang Pro’s brushes here.
2. Eraser Tool
Clean up any messy lines or unwanted marks or just clear the canvas and start from scratch with the Eraser tool.
3. Bucket Tool
Use the Bucket tool to quickly flood any part of the canvas with color on any layer. Simply tap on the targeted area and you’ll be all set.
4. Layers Menu
Adding layers lets you move, edit, recolor, delete, and play with individual assets within the canvas without having to permanently alter any single one. The different blend modes also allow creators to try out interesting effects, adjust colors and light, and even more.
Learn more in depth how layers work here.
5. Color Window
Using various interfaces available in MediBang Pro, you can color pick seamlessly to figure out what suits your piece best.
Learn how to navigate your colors here.
6. Flip Canvas
Quickly flip your canvas using this button.
7. Move/Transform
Move whatever asset you want on different layers around the canvas and access the transformation tools, mesh, free, and alter size.
8. Eyedropper Tool
Pick up whatever color you see on your canvas.
9. Guide Tool
Simply tap this to open the MediBang Pro guide tool.
Click here to learn more about guides.
Sidebar (Left)
10. Brush Size
Increase and decrease the size of your brush with the convenient sidebar. Increase the line thickness by dragging the slider up to the top, and thin it out by sliding it to the bottom.
11. Shortcut Menu
Tap to access the shortcut menu that you can customize to your liking in the Options Menu under Settings.
12. Brush Opacity
Adjust the transparency of your brush by dragging the slider up and down.
Upper Left Menu
13. Save/Back Button
Tap this to manually save your work and then return to the Gallery. The app’s gallery is where you can organize and save all your files. Create new canvases, import images from other apps, and share your work with anyone and everyone.
14. Options
See here to learn how to navigate the Options Menu.
15. Select Tool
MediBang Pro allows you the finest of controls to adjust whatever part of your work think needs a tweak. Click here to learn more about the Select tools in detail.
16. Object Menu
Access tools such as the shape tool, comic frame, text, and materials.
See here to learn more.
17. Adjustments Menu
Use the filters or transformation tools to adjust your art to make it what you want to see. Here you can find the gradient tool, color changing tools, different blurring tools, and more.
See here to learn more.