Draw in Just 5 Minutes! Start Digital Art with MediBang Paletta
If you are new to digital art, please start by trying MediBang Paletta with this starter guide.
The app has many features, but getting started is simple. Let’s try drawing a tulip with the basic tools and enjoy the fun of finishing an illustration!
STEP1:Install the App
1.Let’s install MediBang Paletta.
2.Open the app.

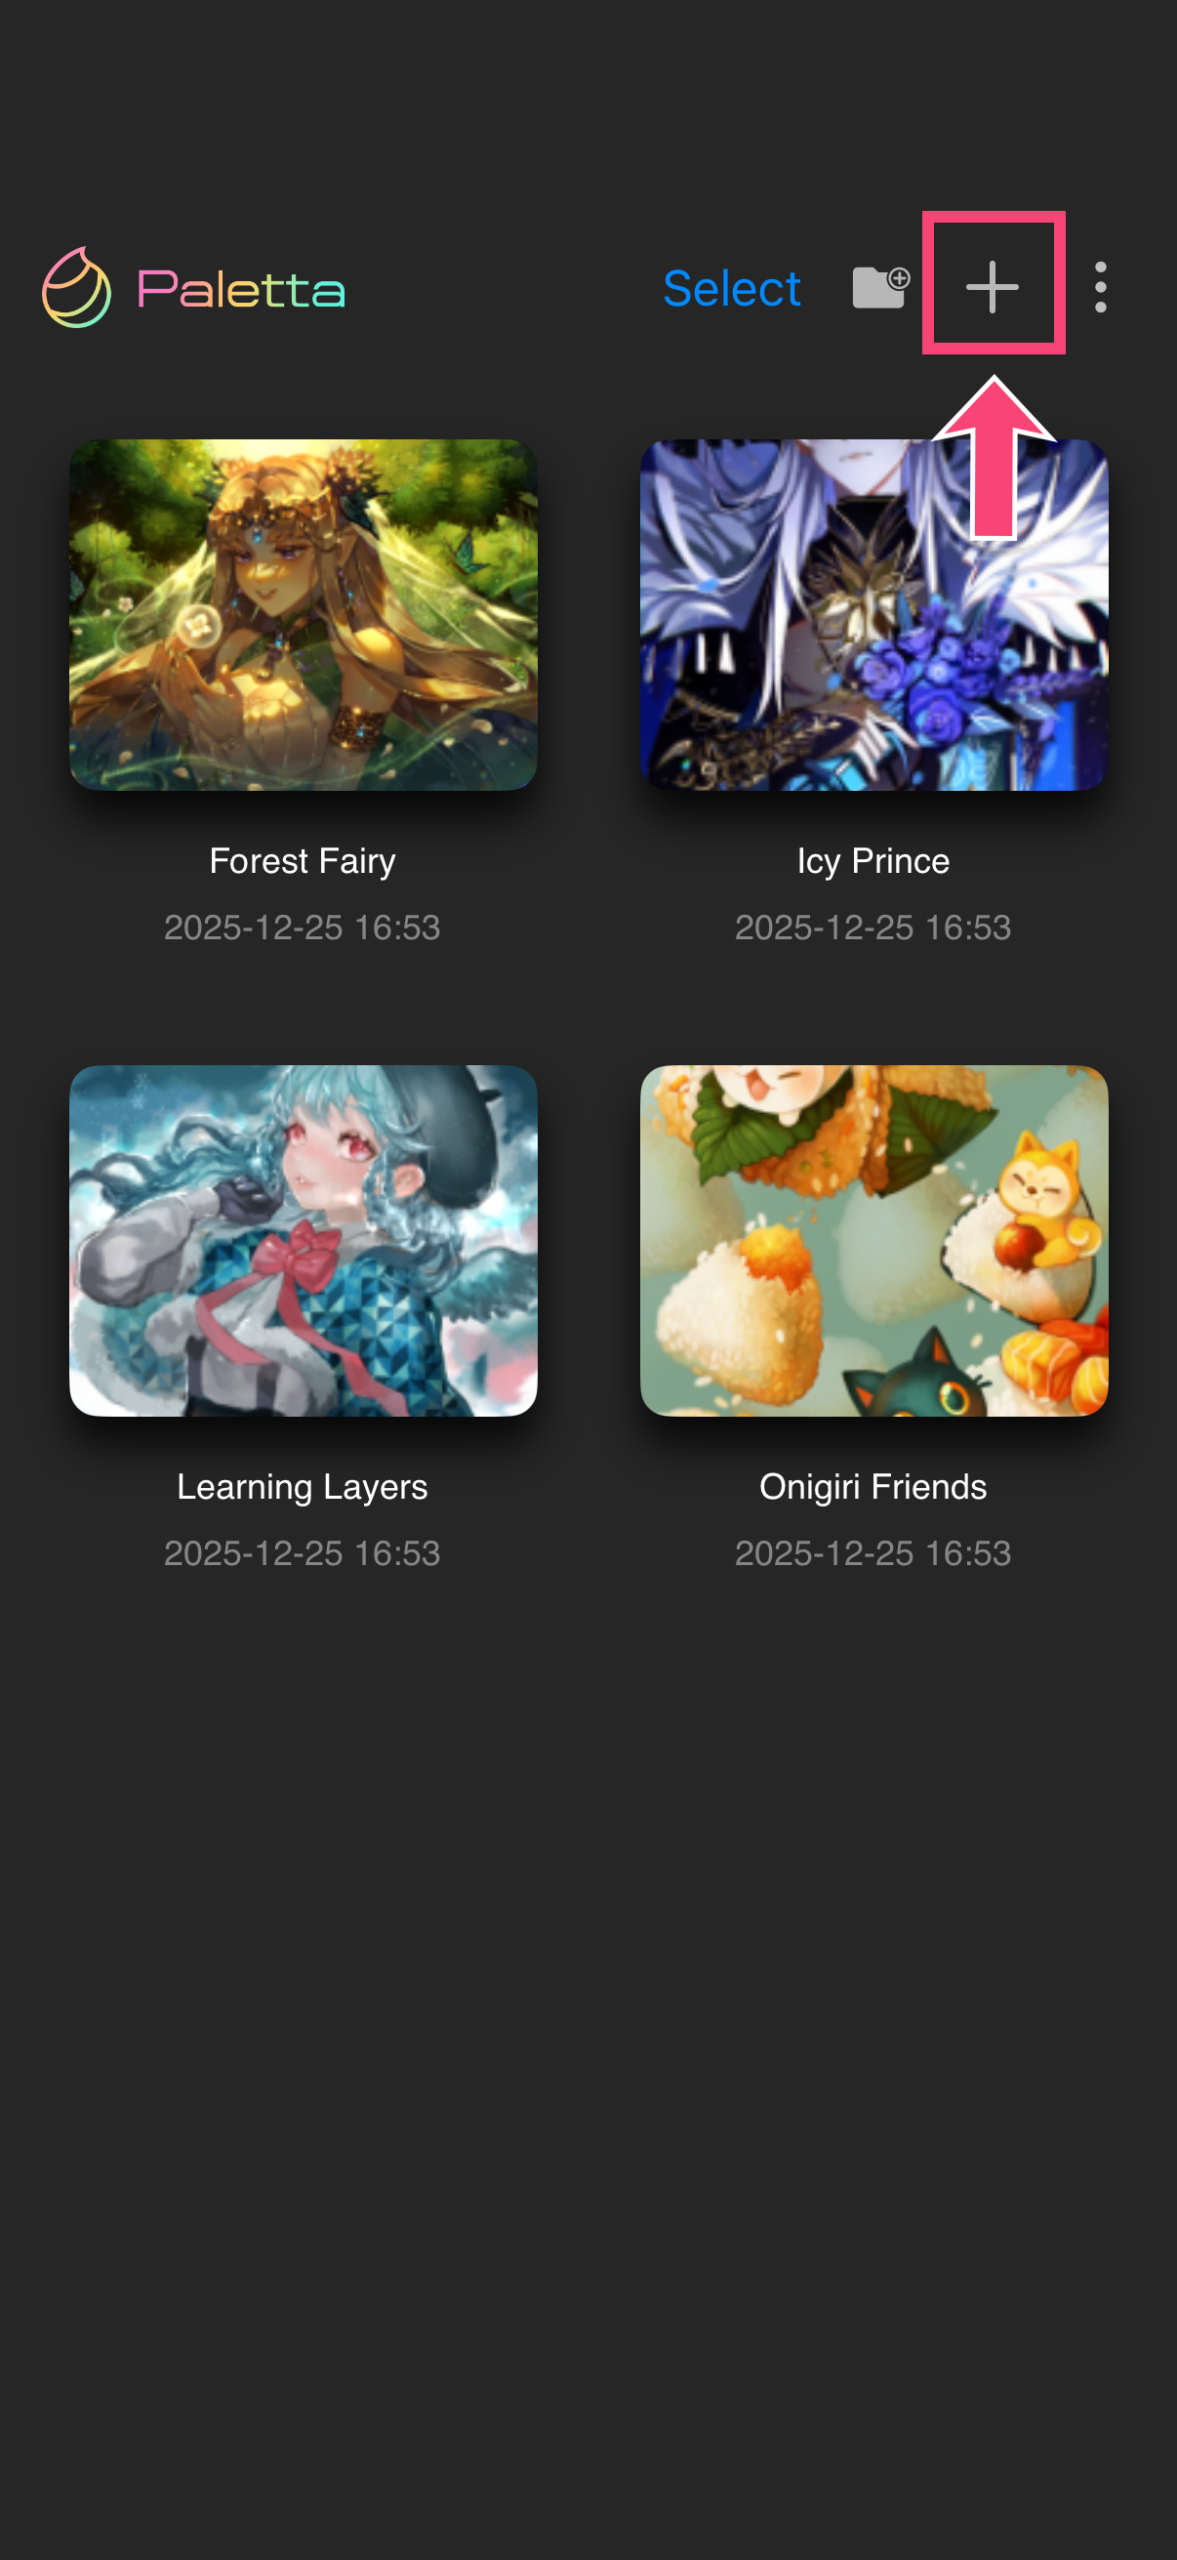
3.This is the home screen of MediBang Paletta.
STEP2:Let’s Open the Canvas
1.Tap the “+” button.
2.Let’s start with the device screen size.
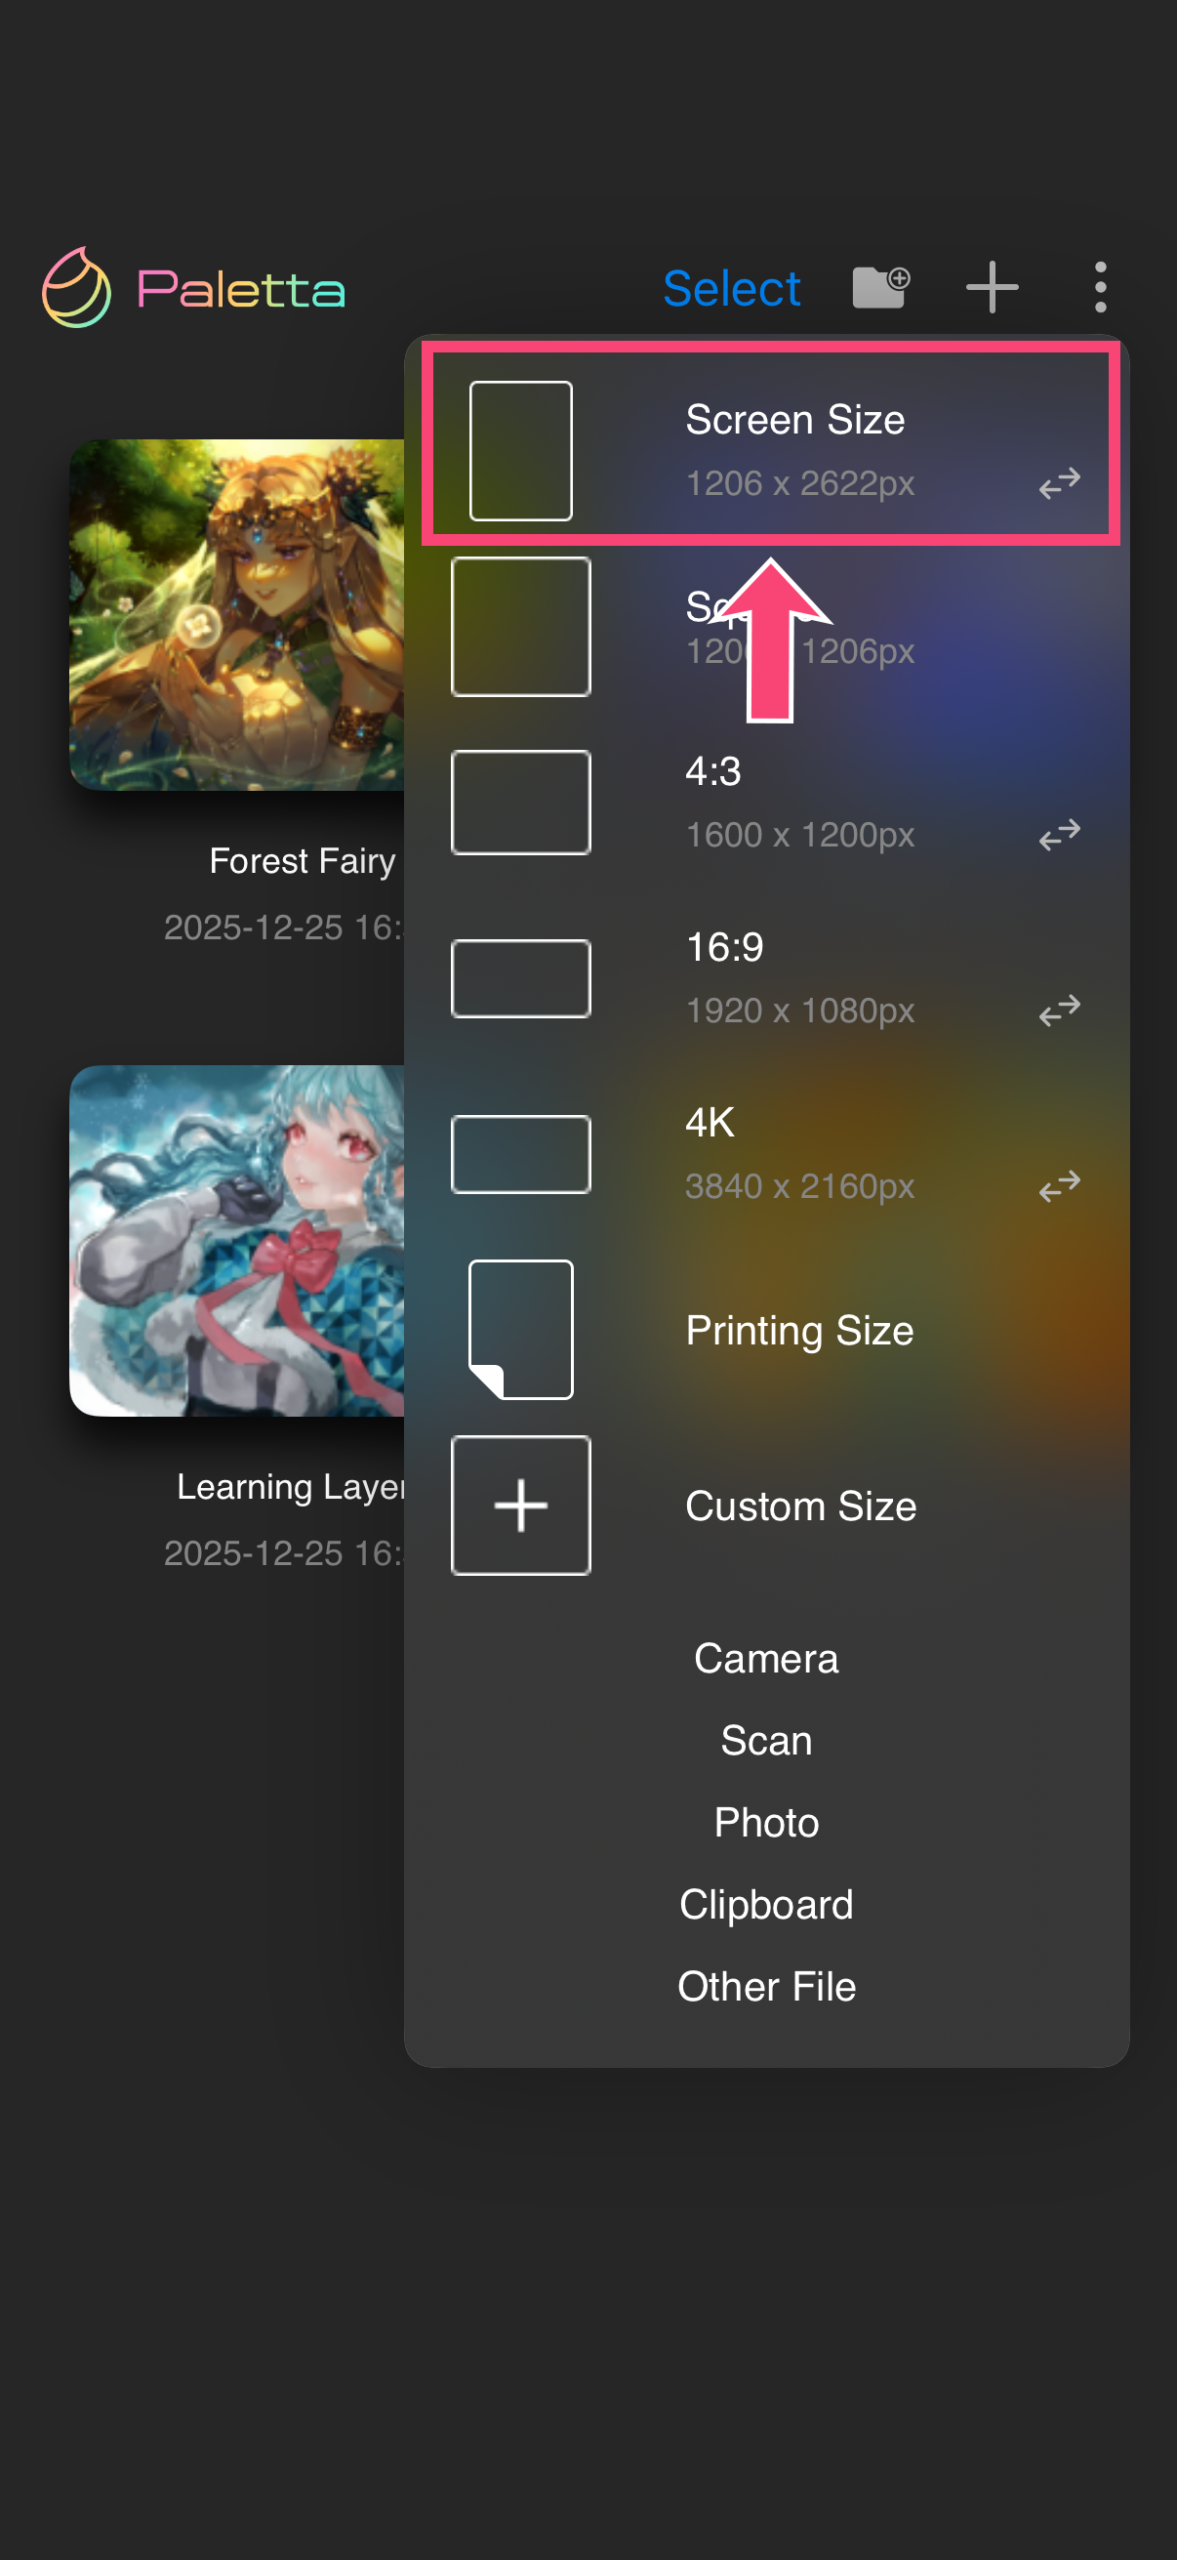
3.This is the “Canvas Screen”.

STEP3:Let’s Draw Lines with the Brush
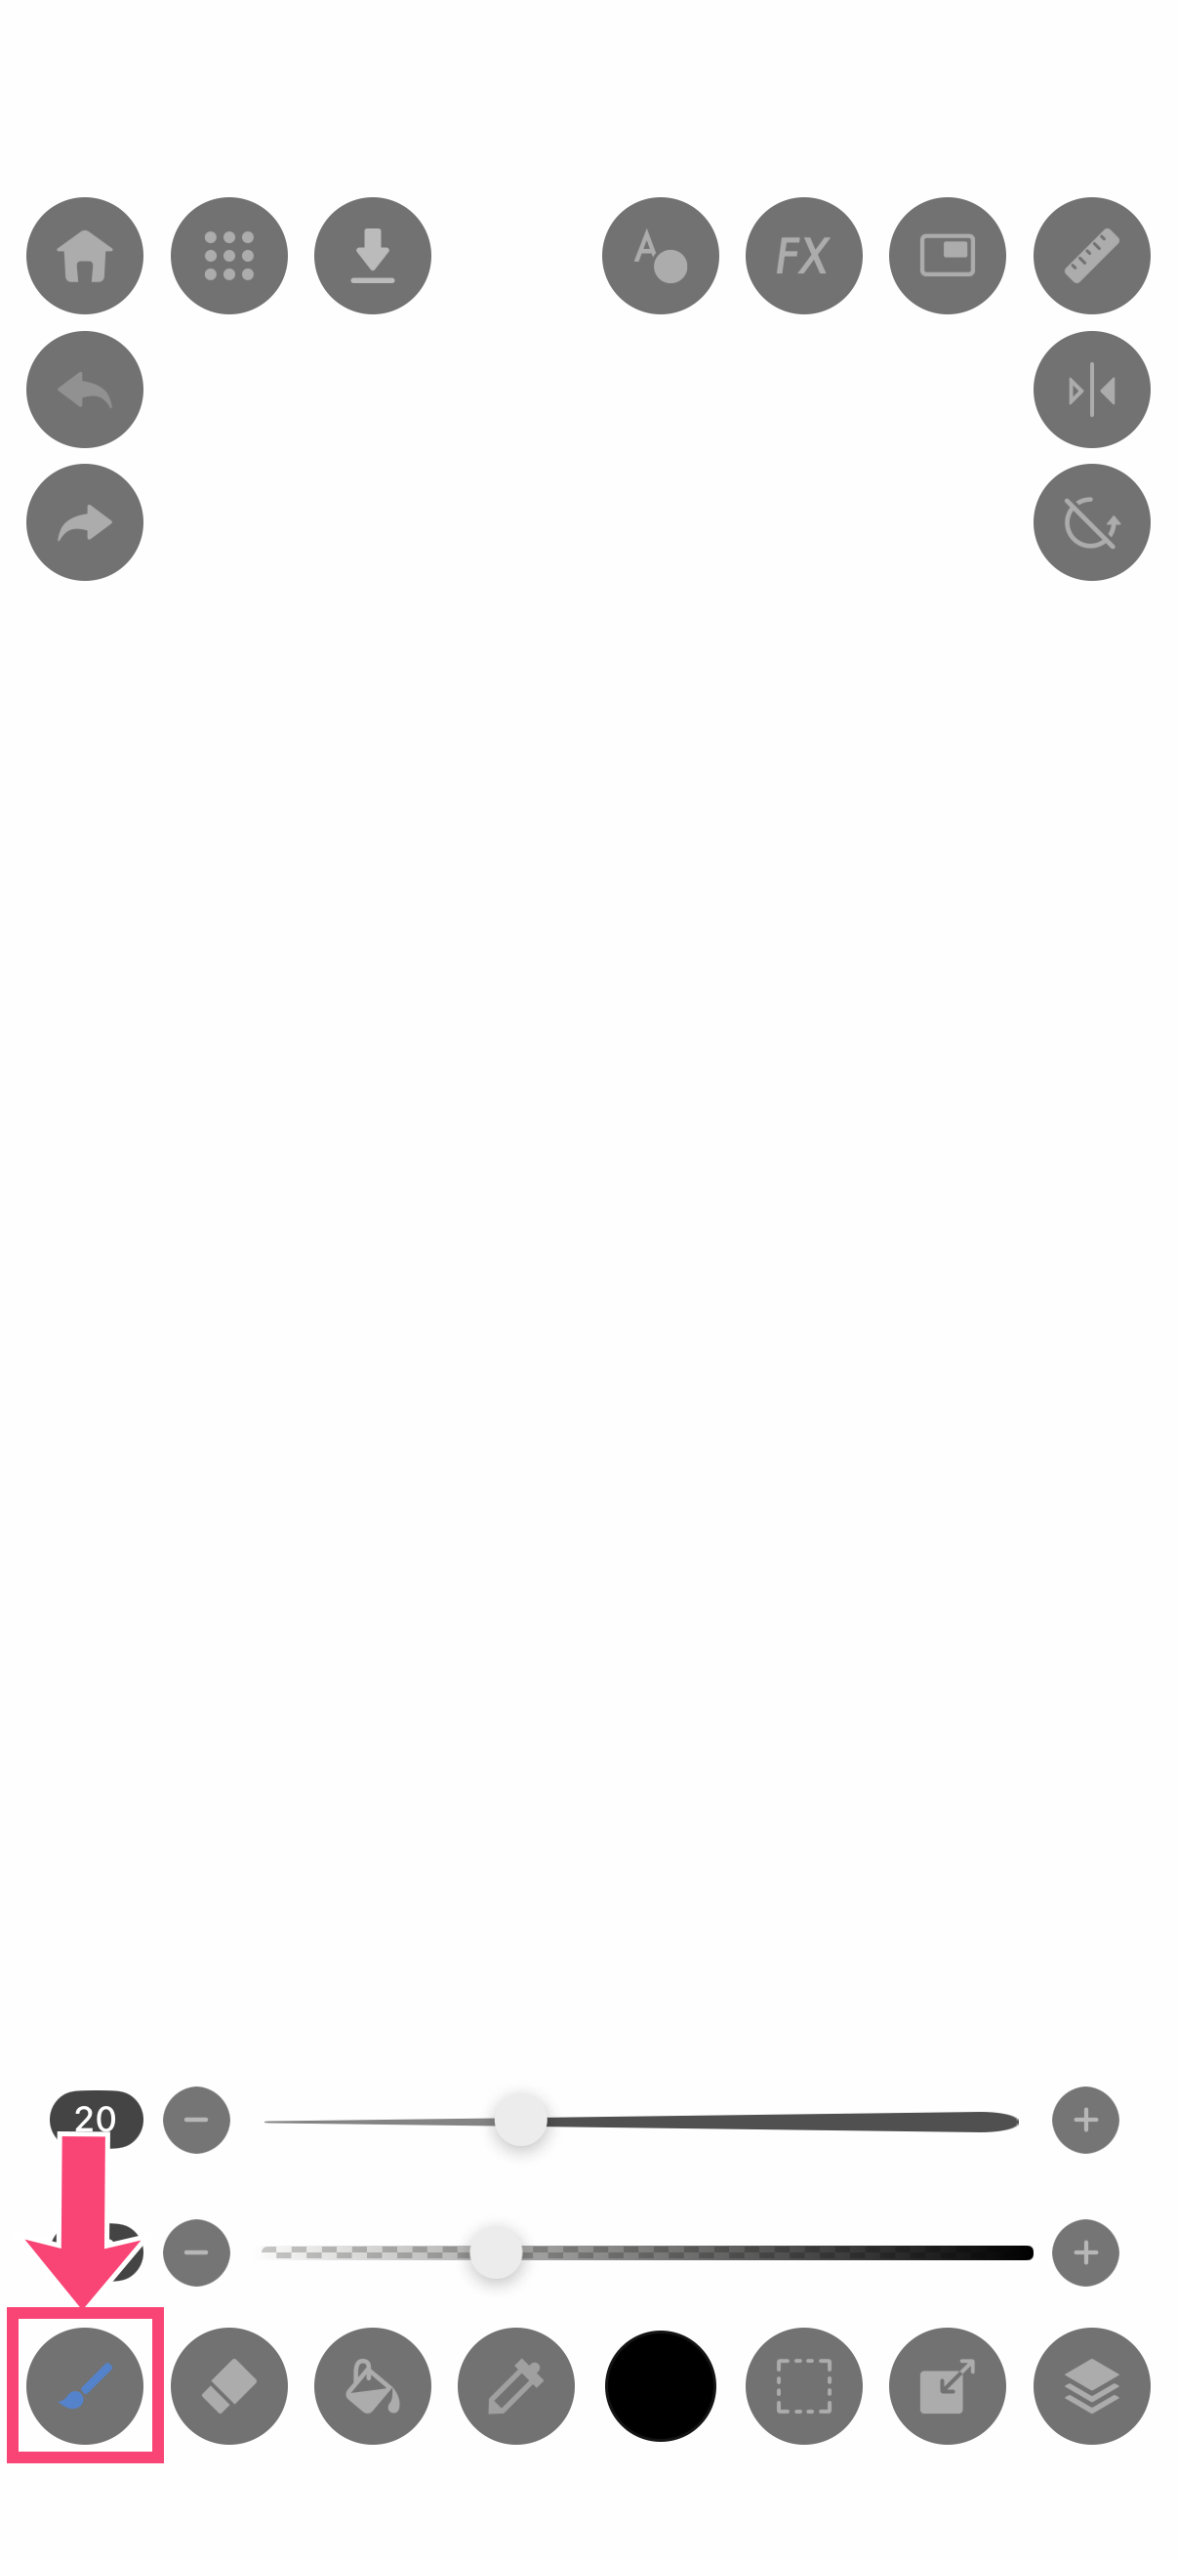
1.Tap the “Brush icon”.
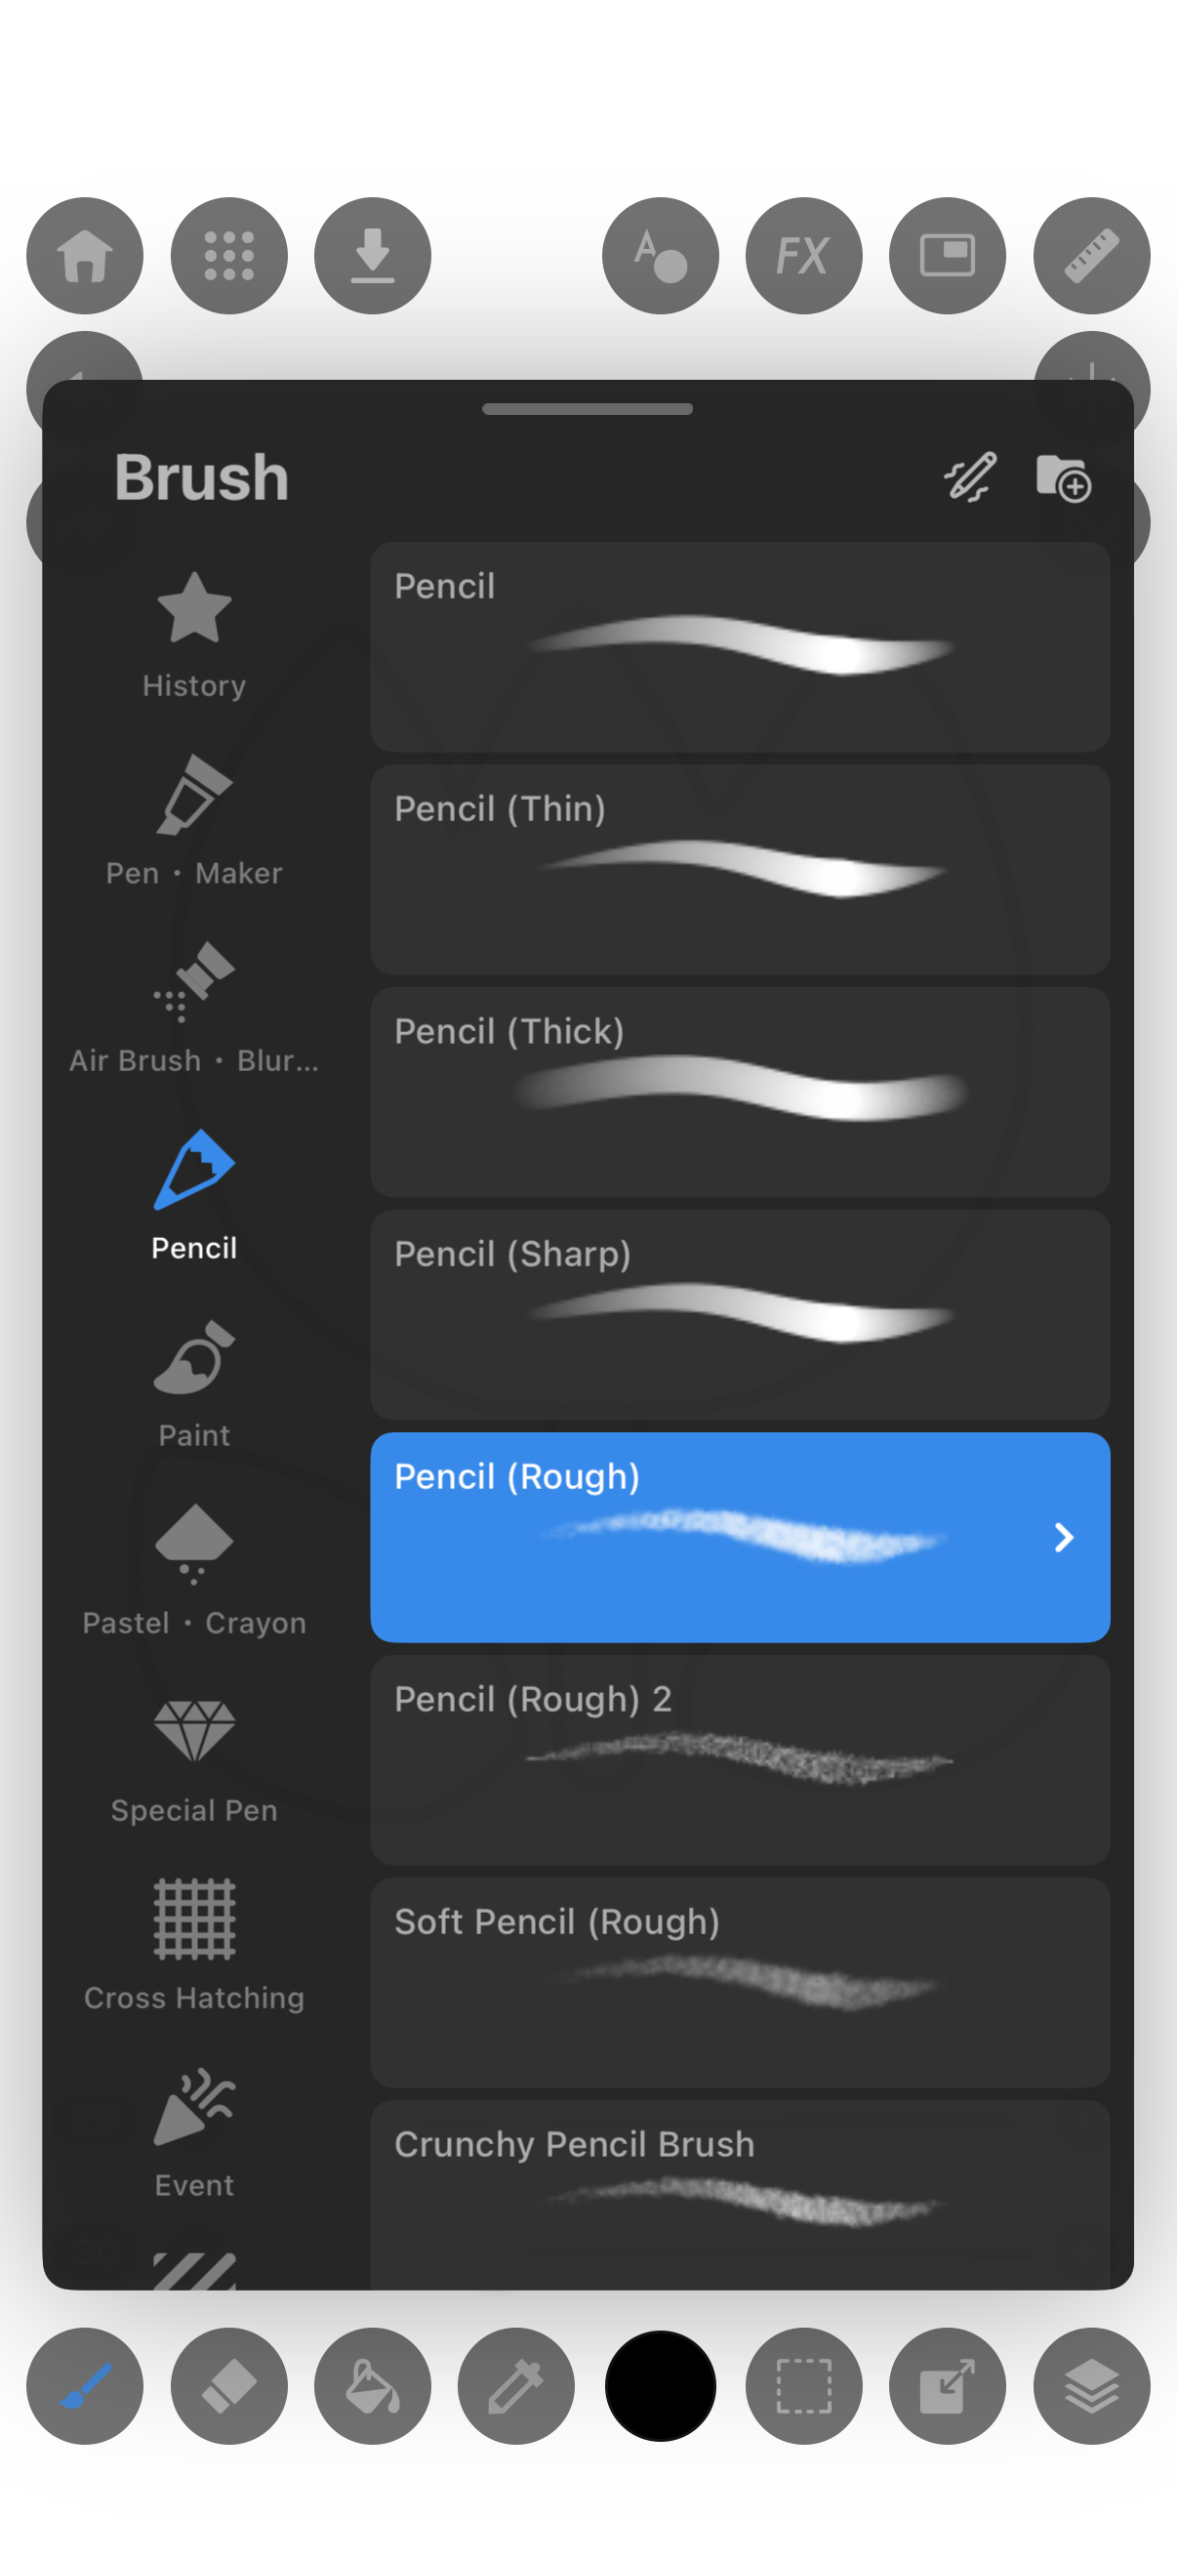
2.”Pencil (Rough)” is selected initially. Let’s scroll and pick your favorite brush.
3.Once you’ve selected a brush, tap the “Brush icon” again to close the brush window.
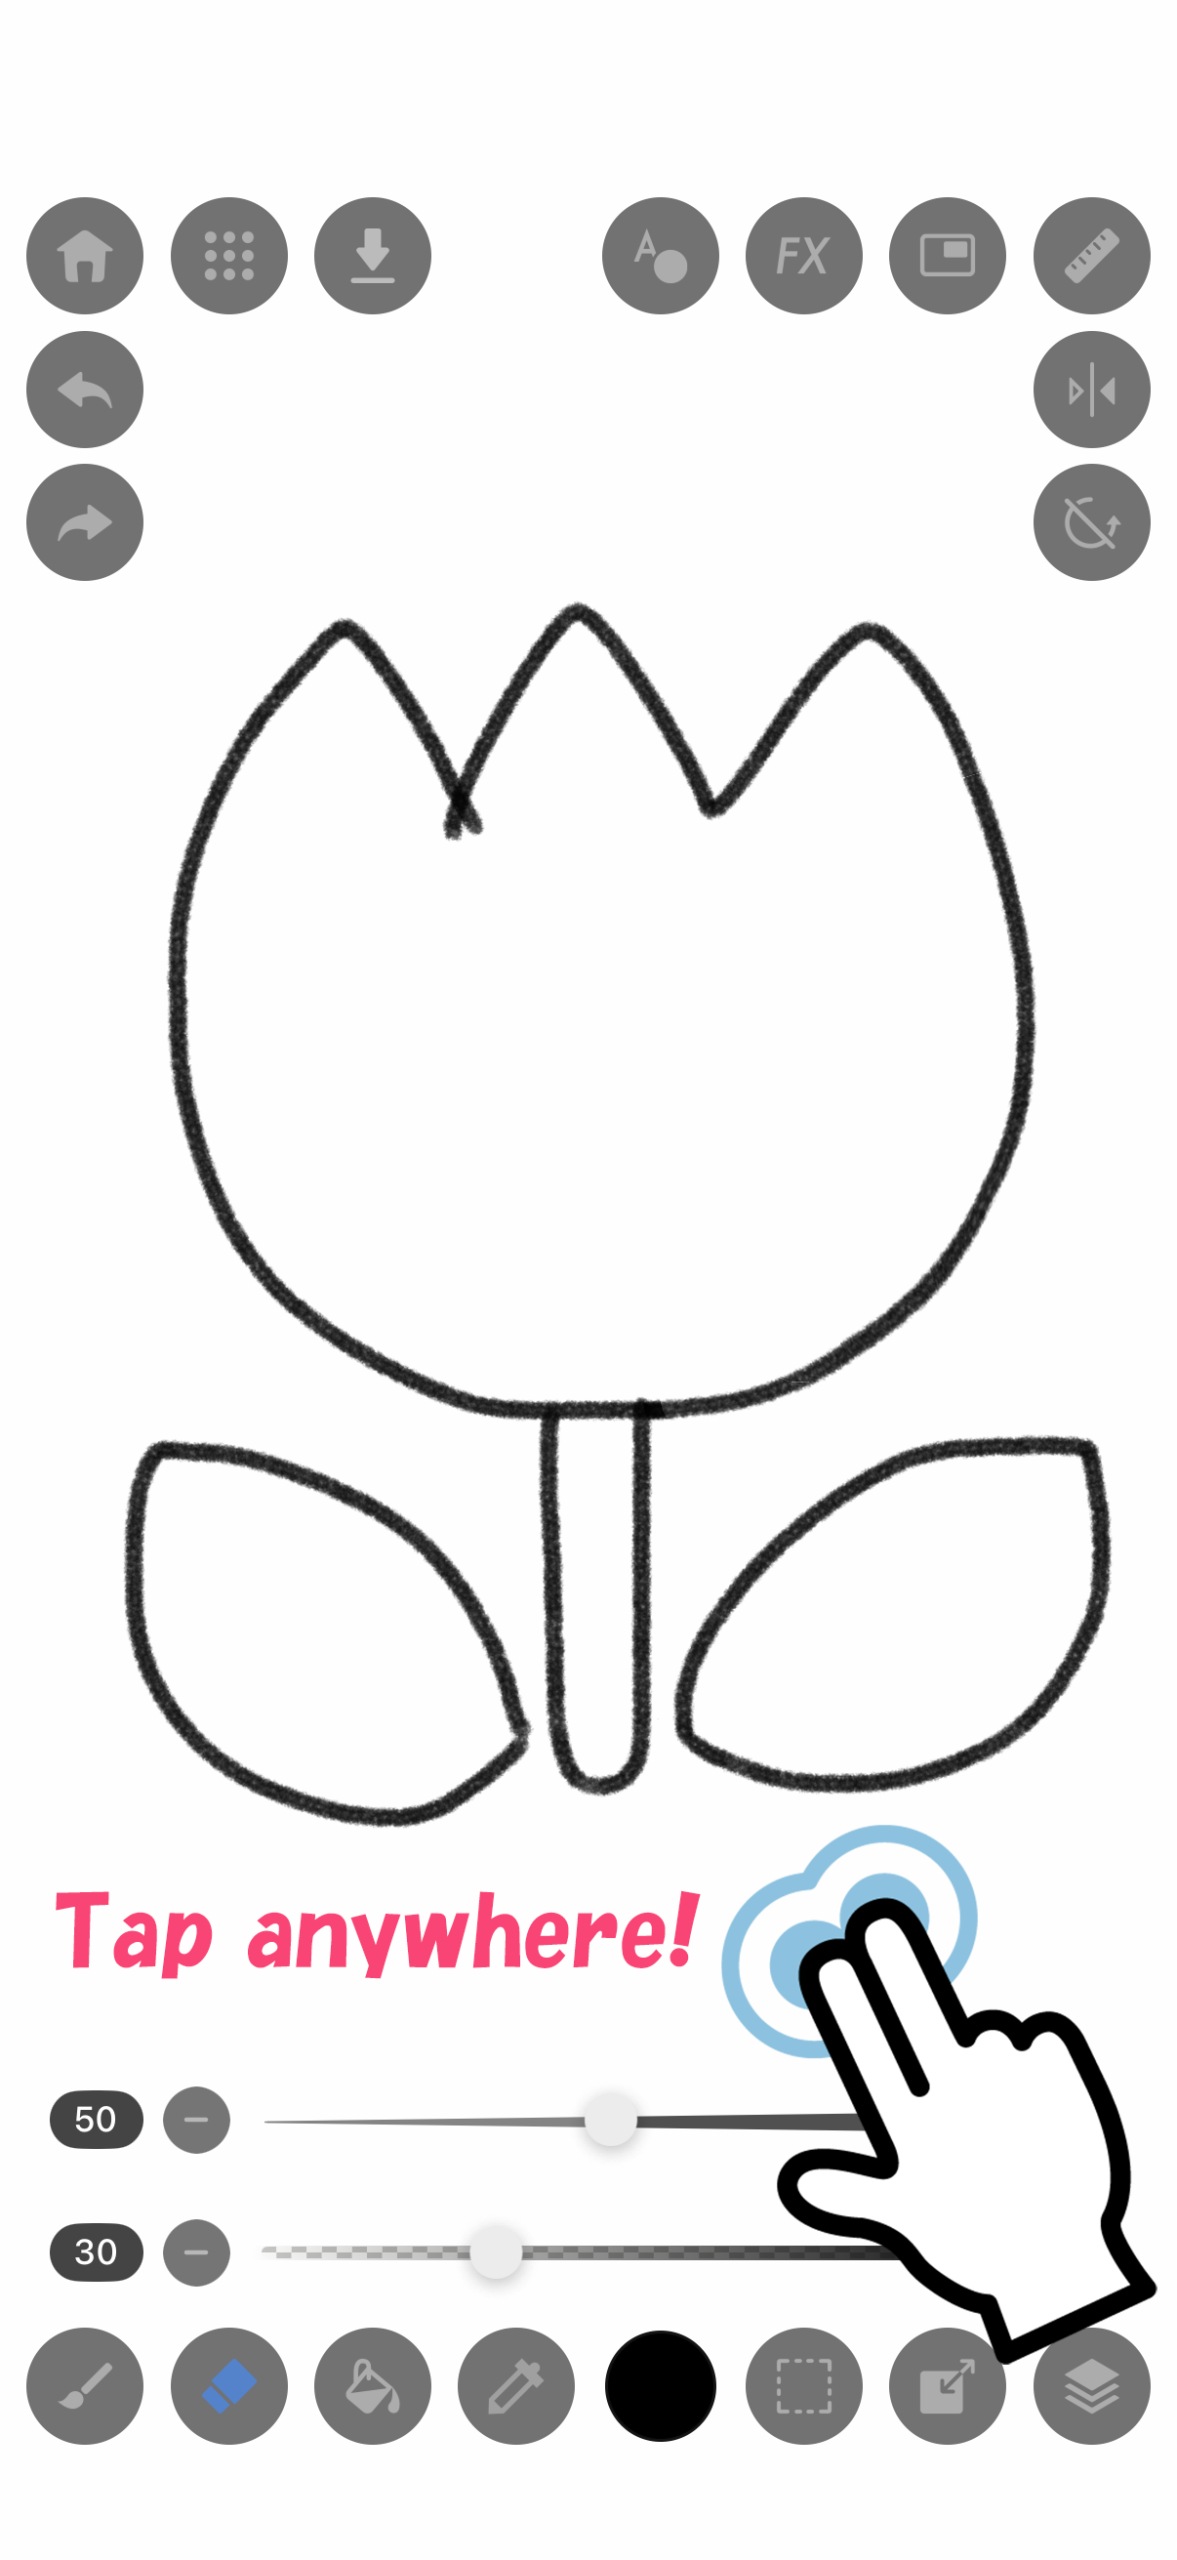
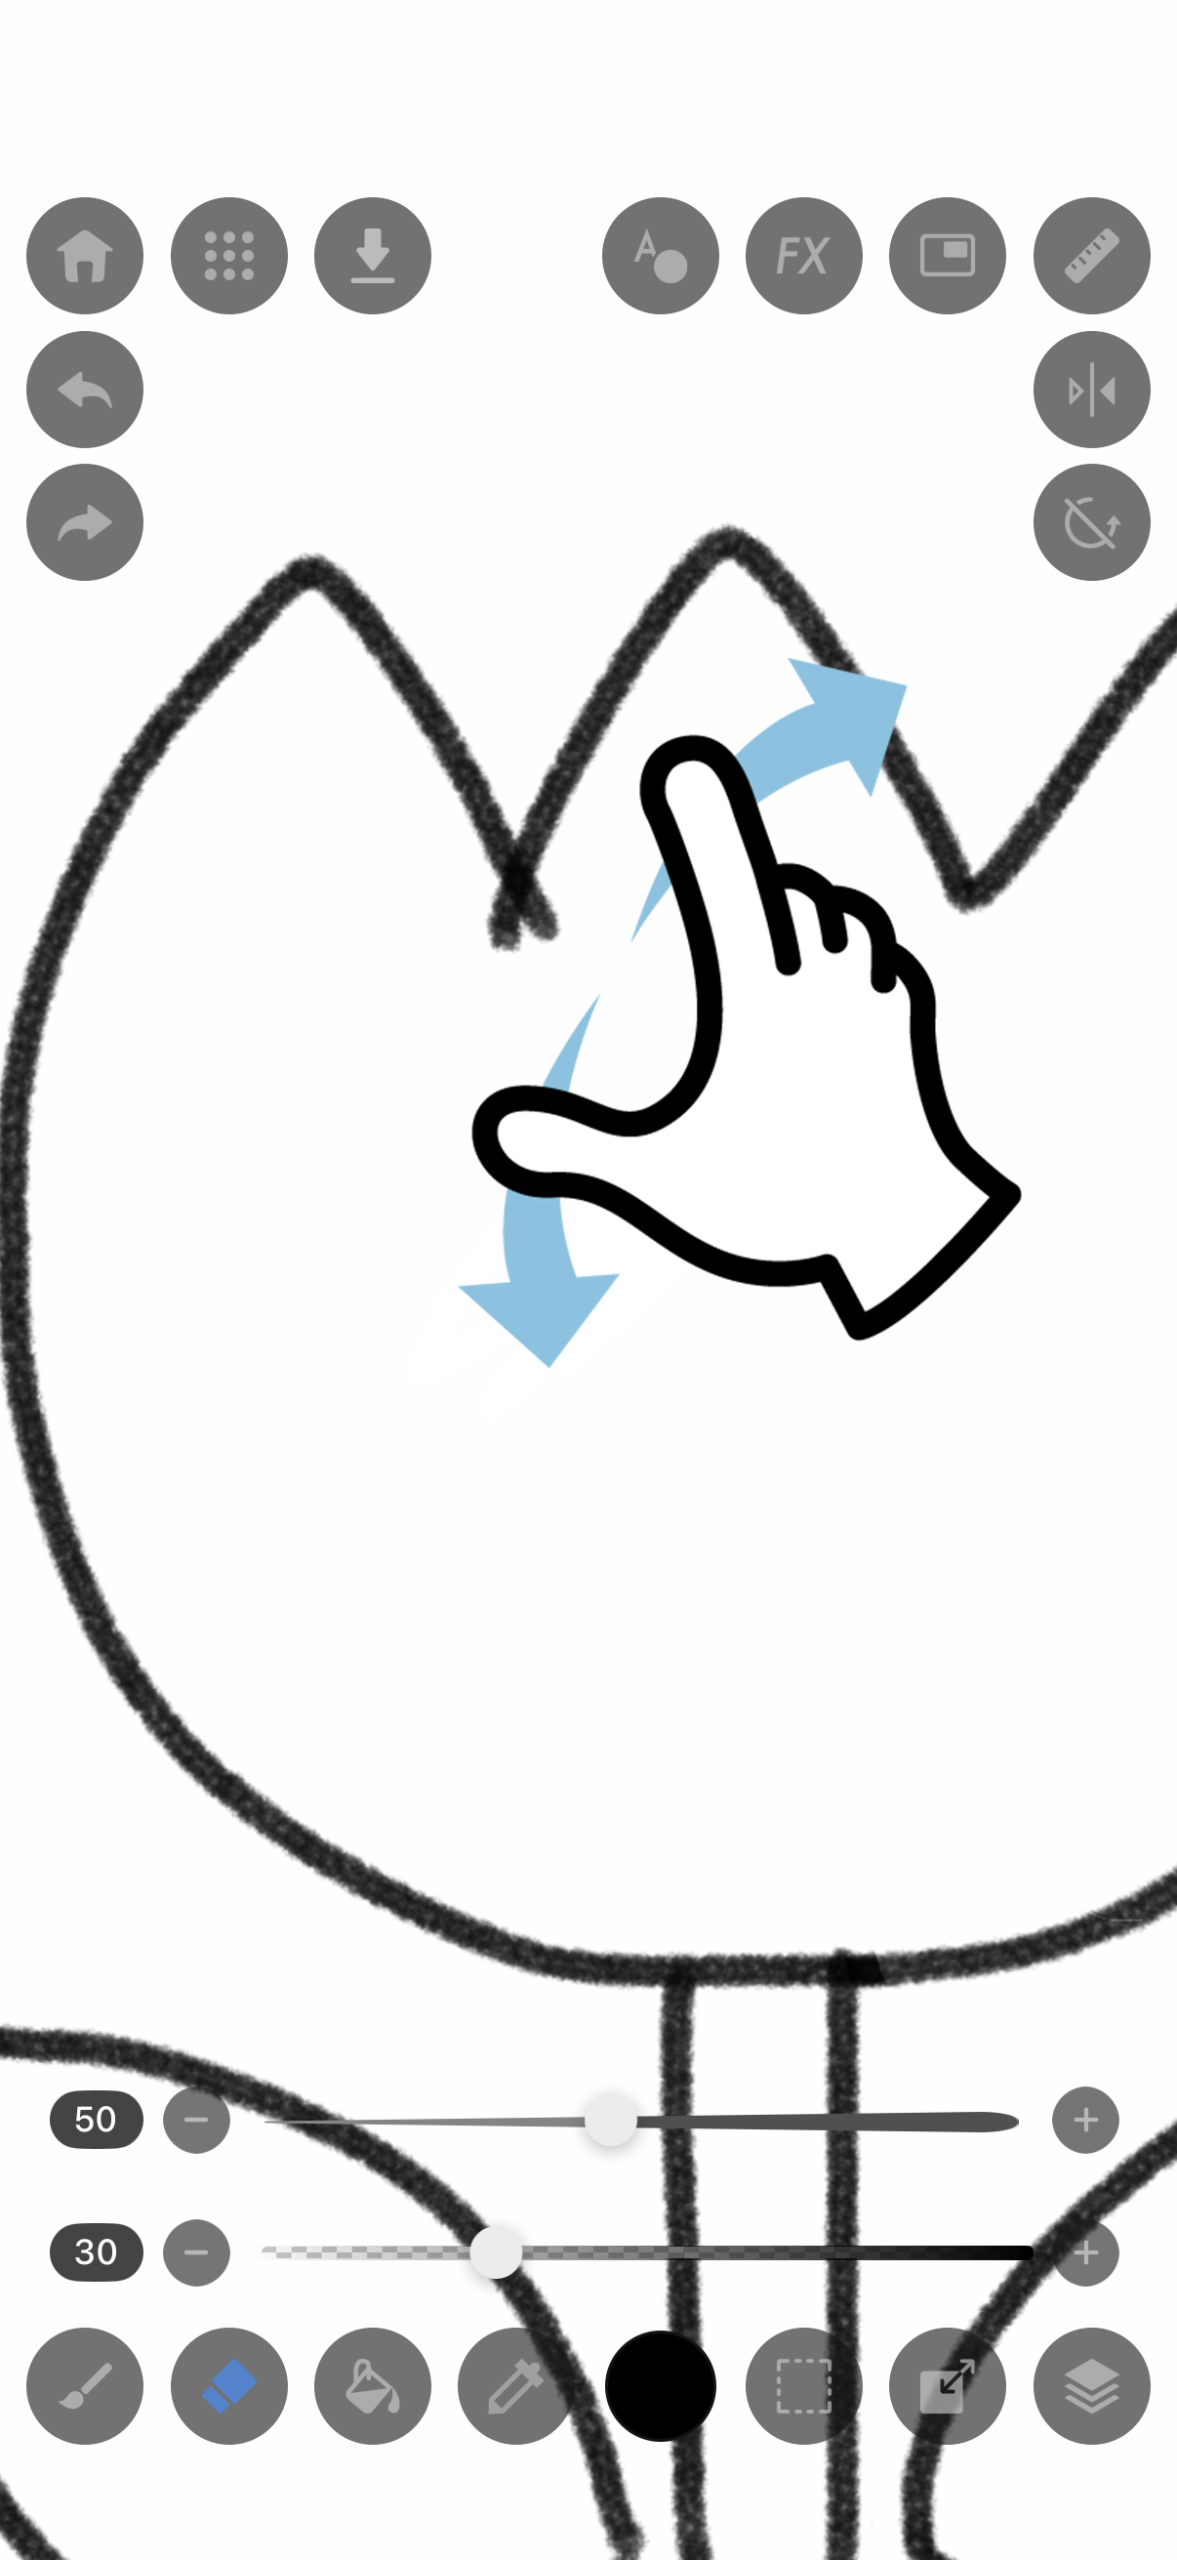
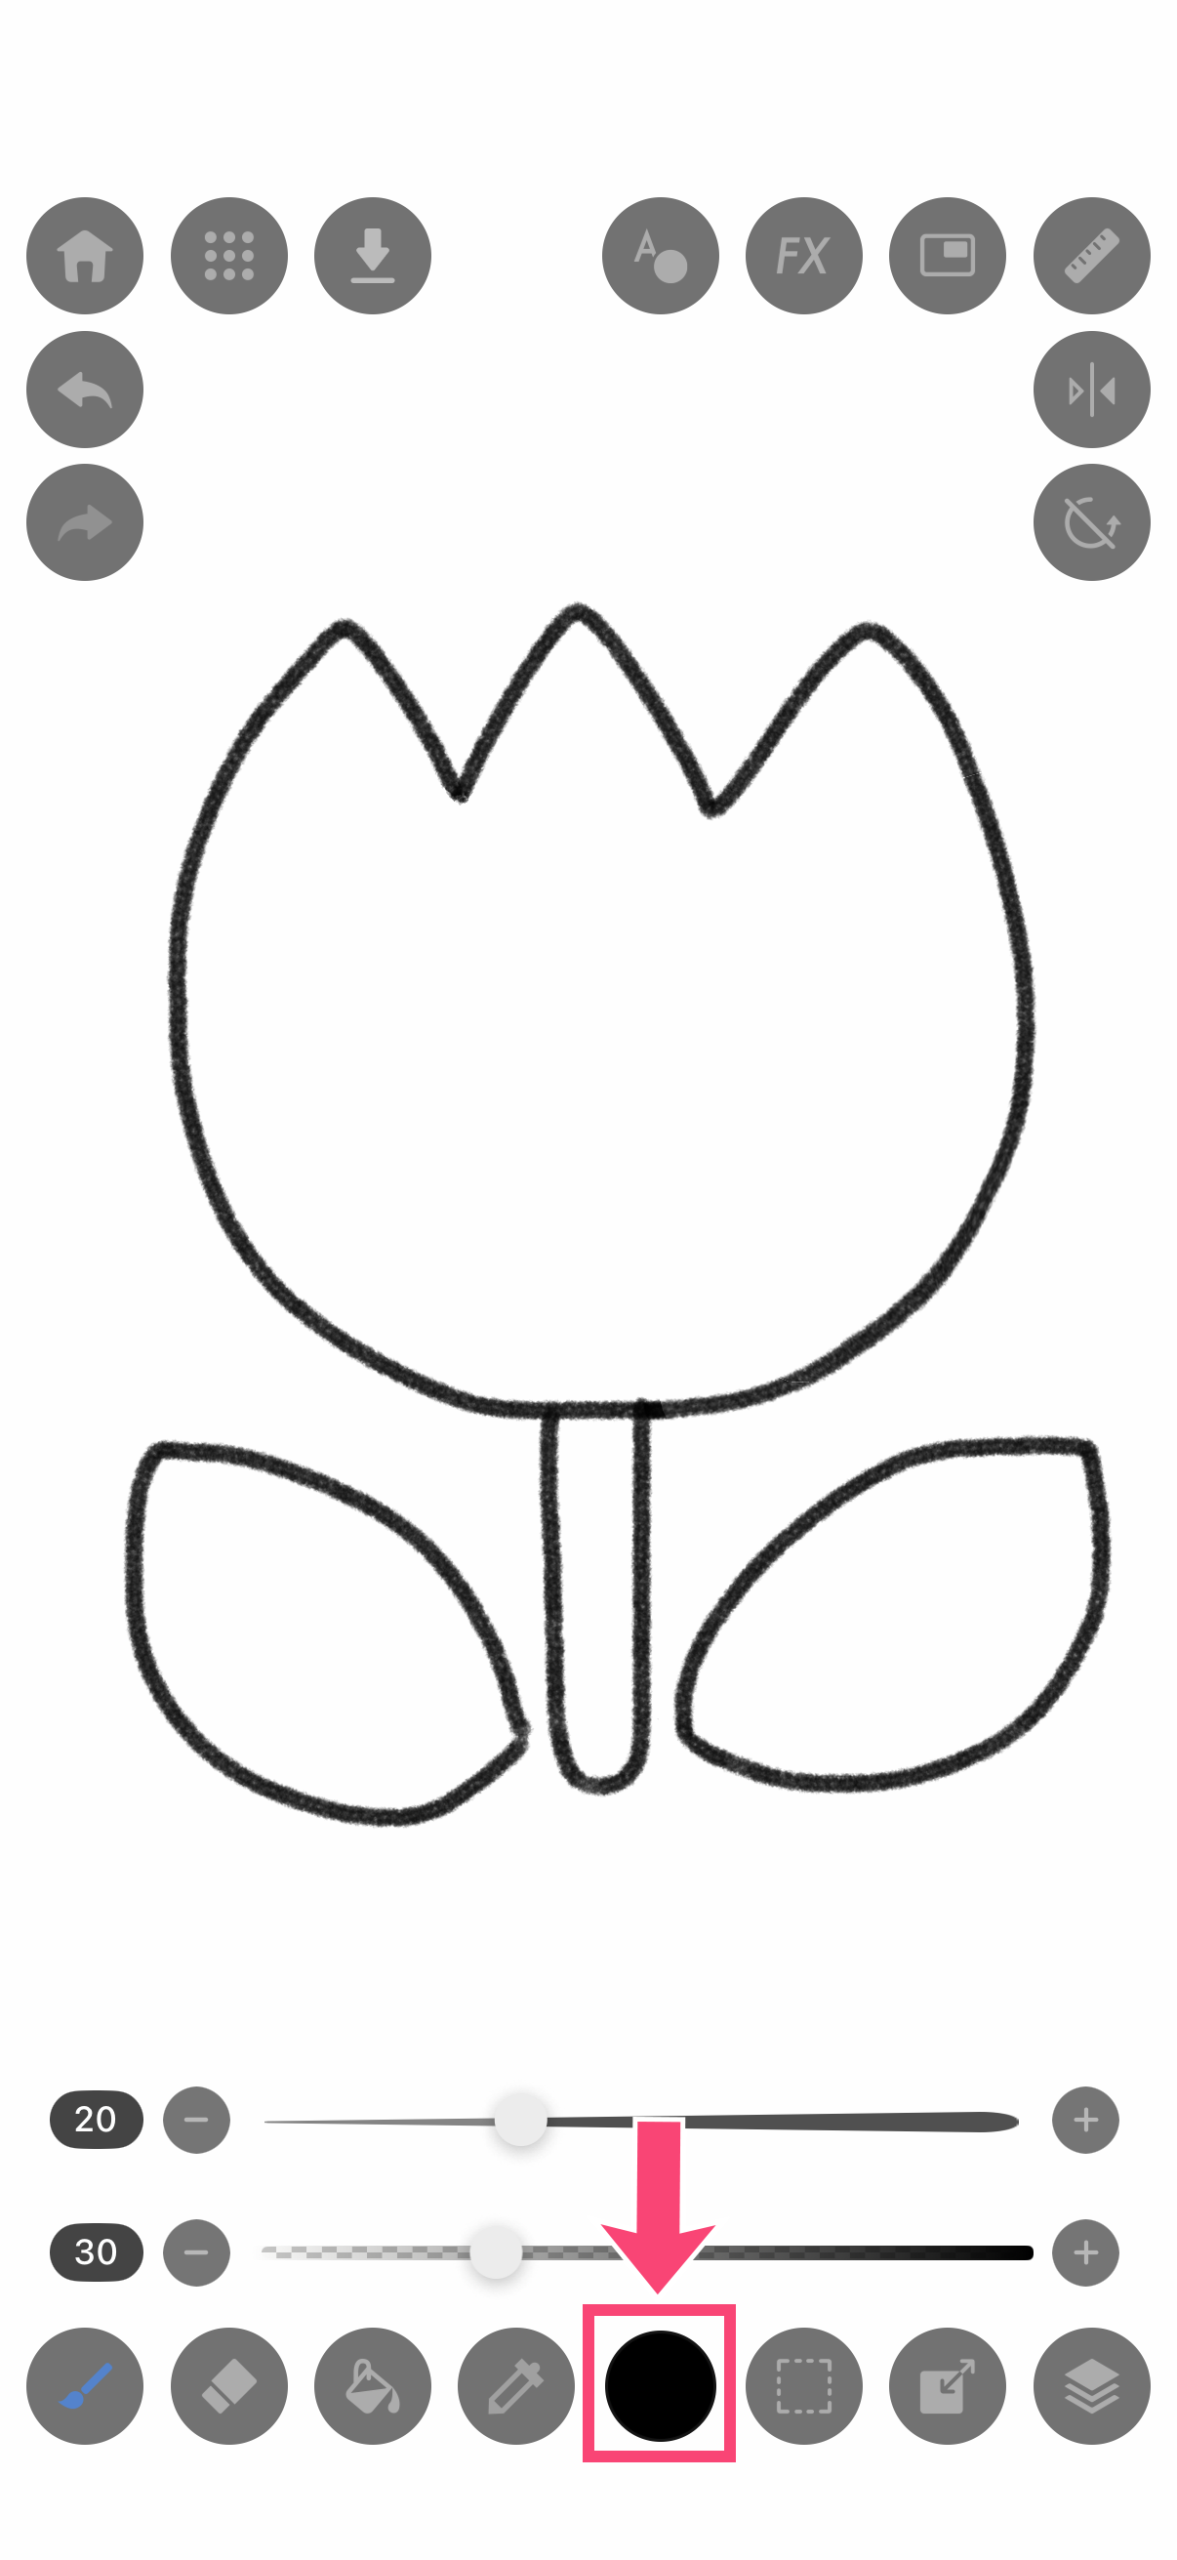
4.Let’s try drawing a tulip on the canvas.
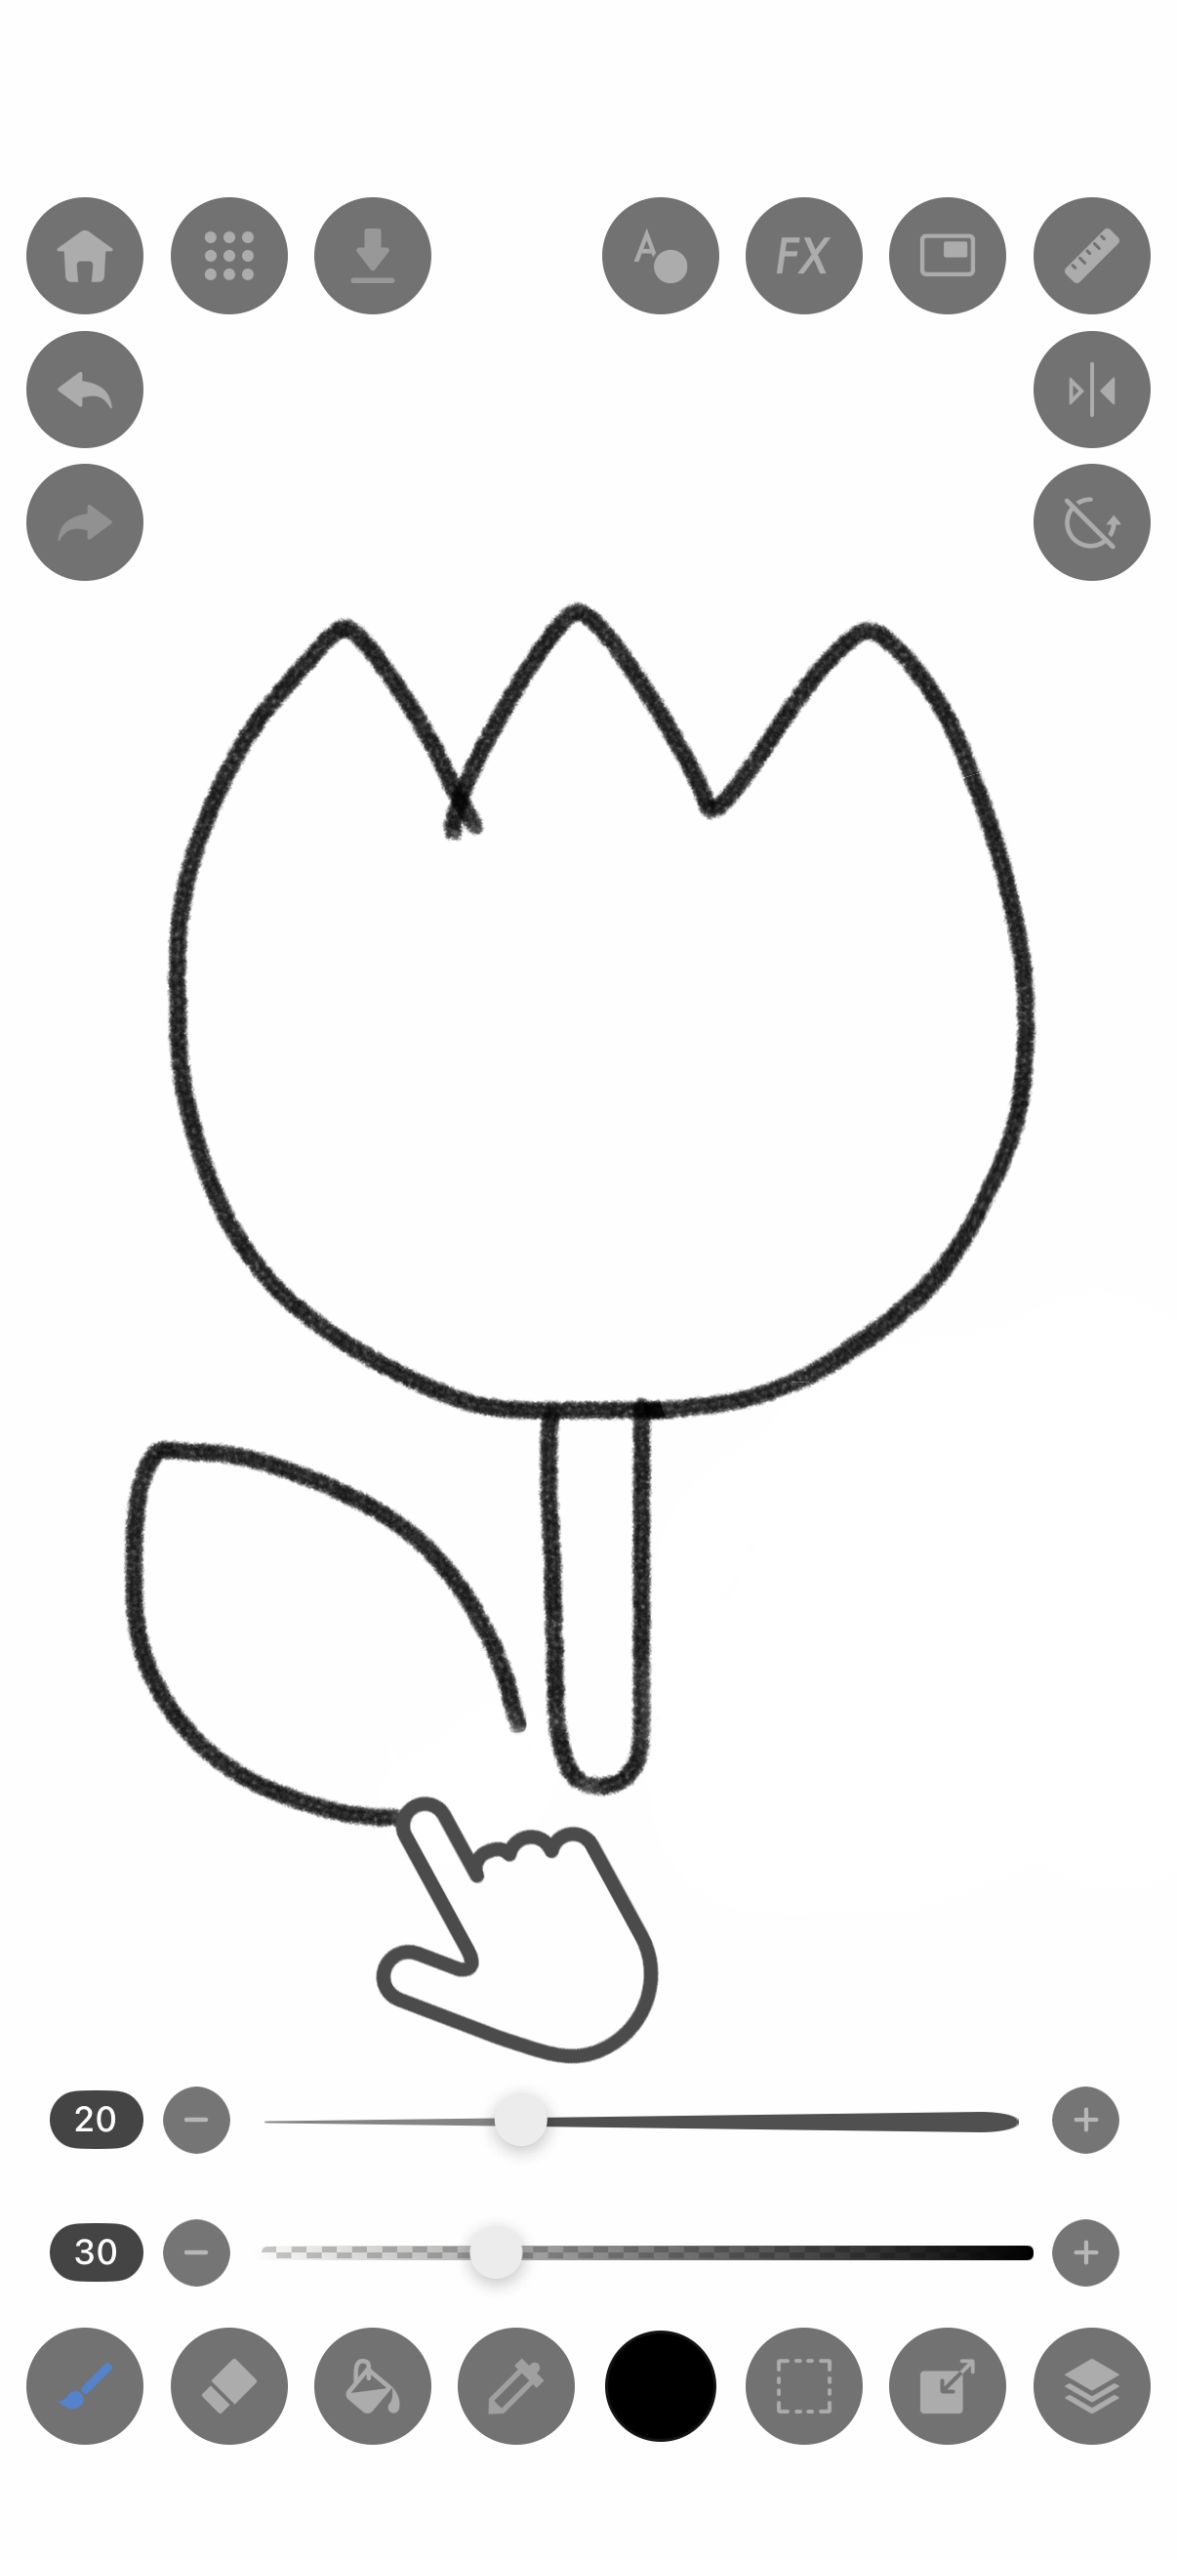
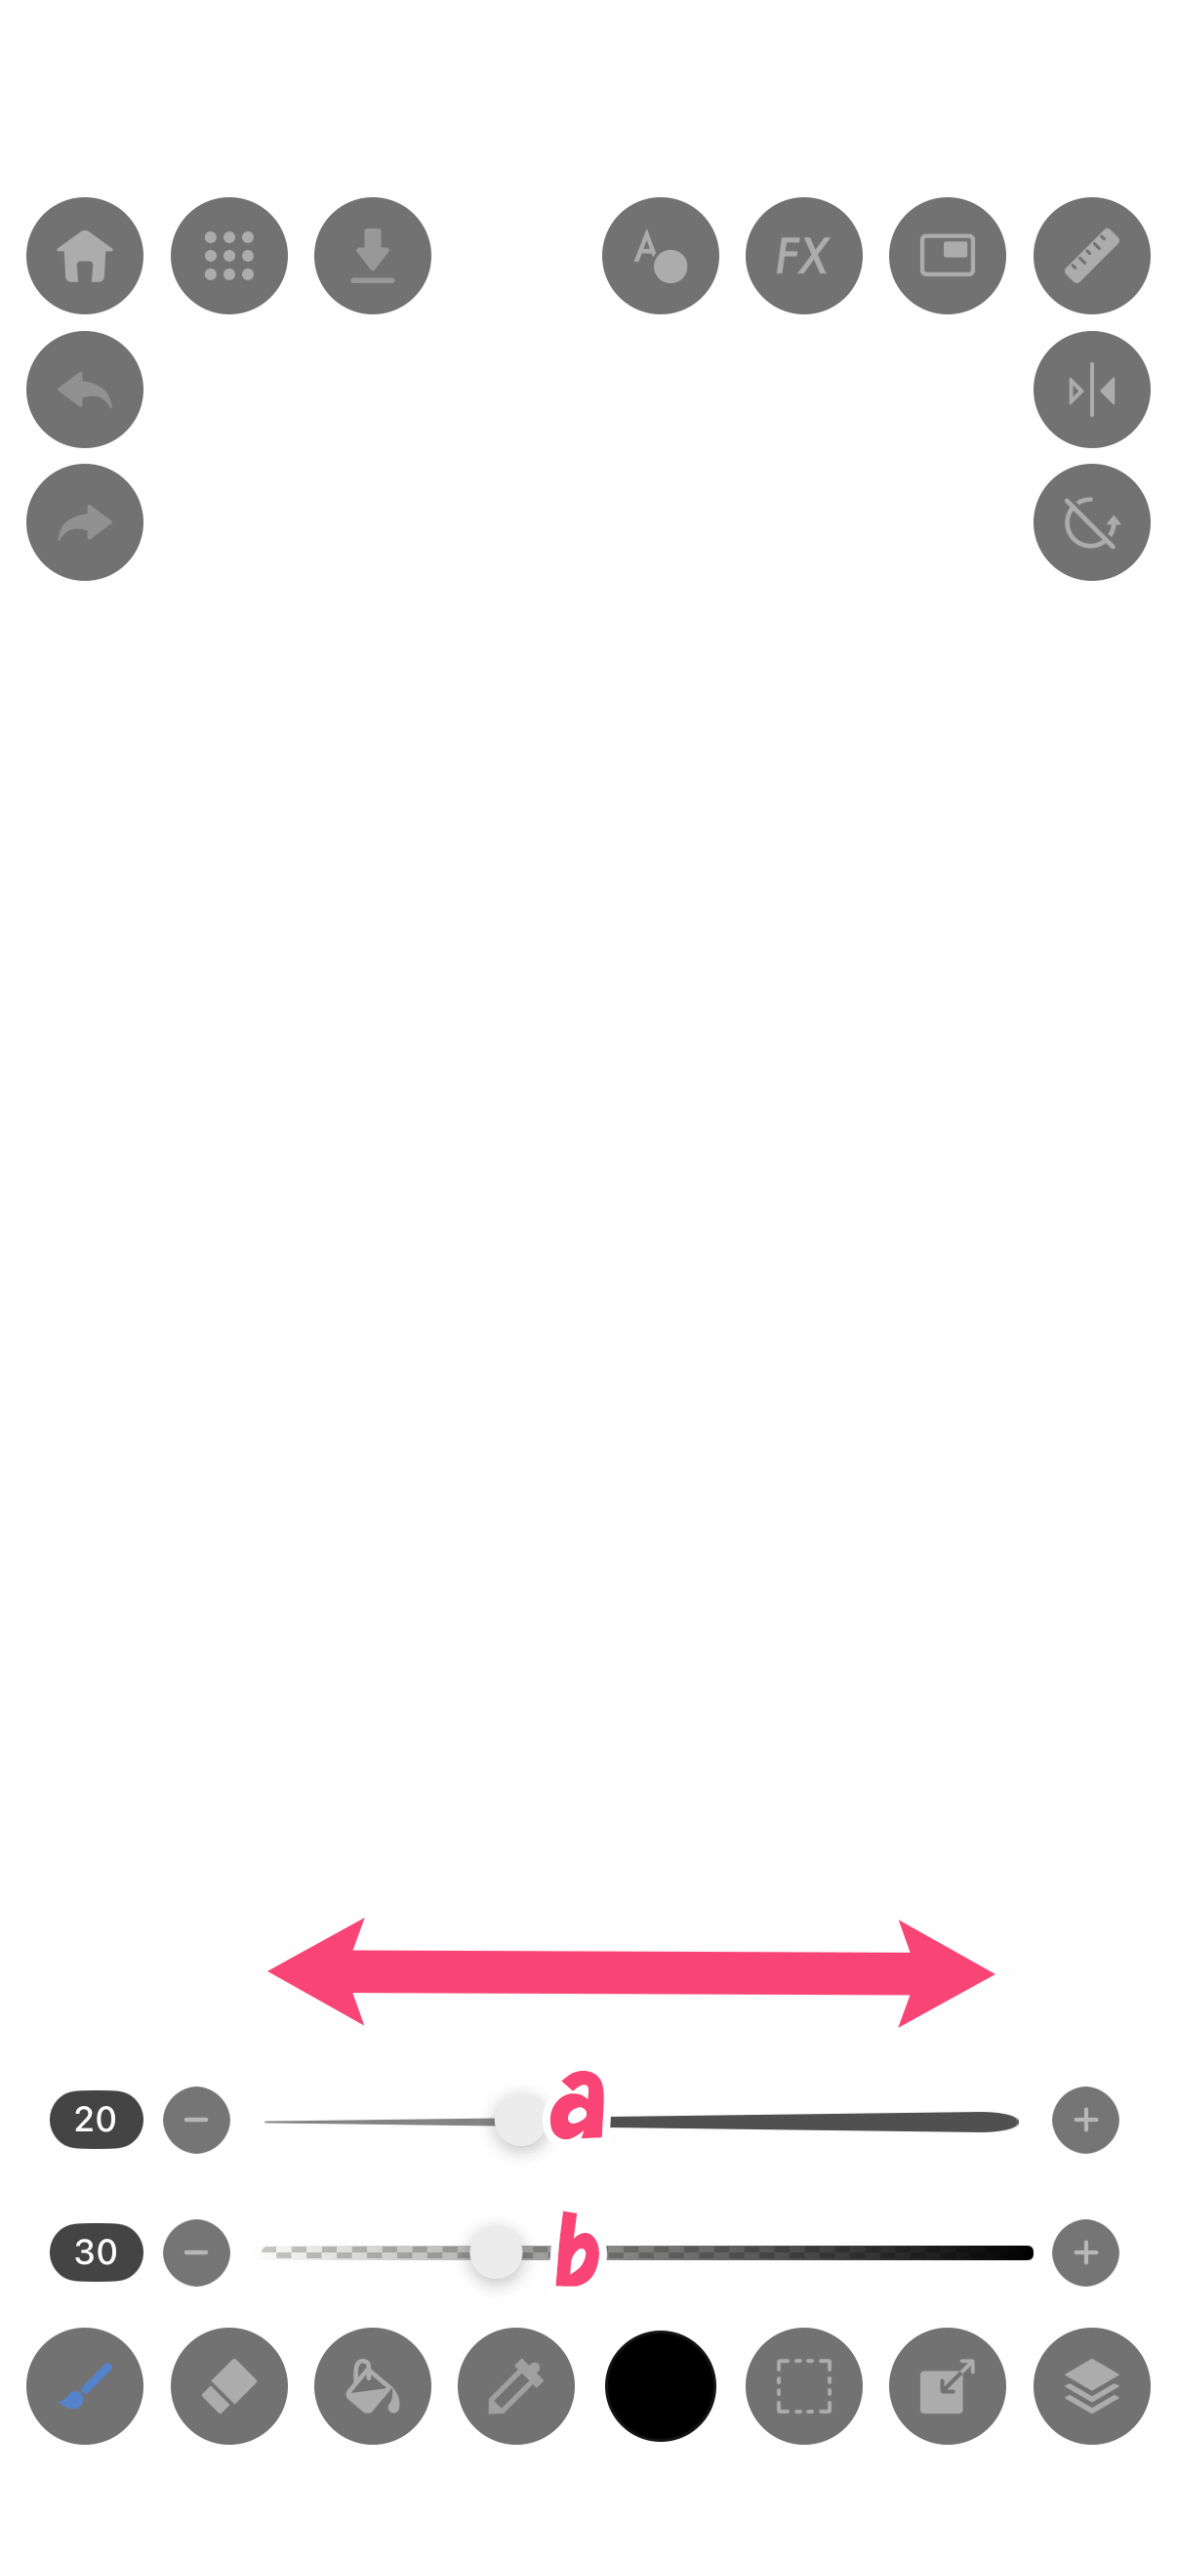
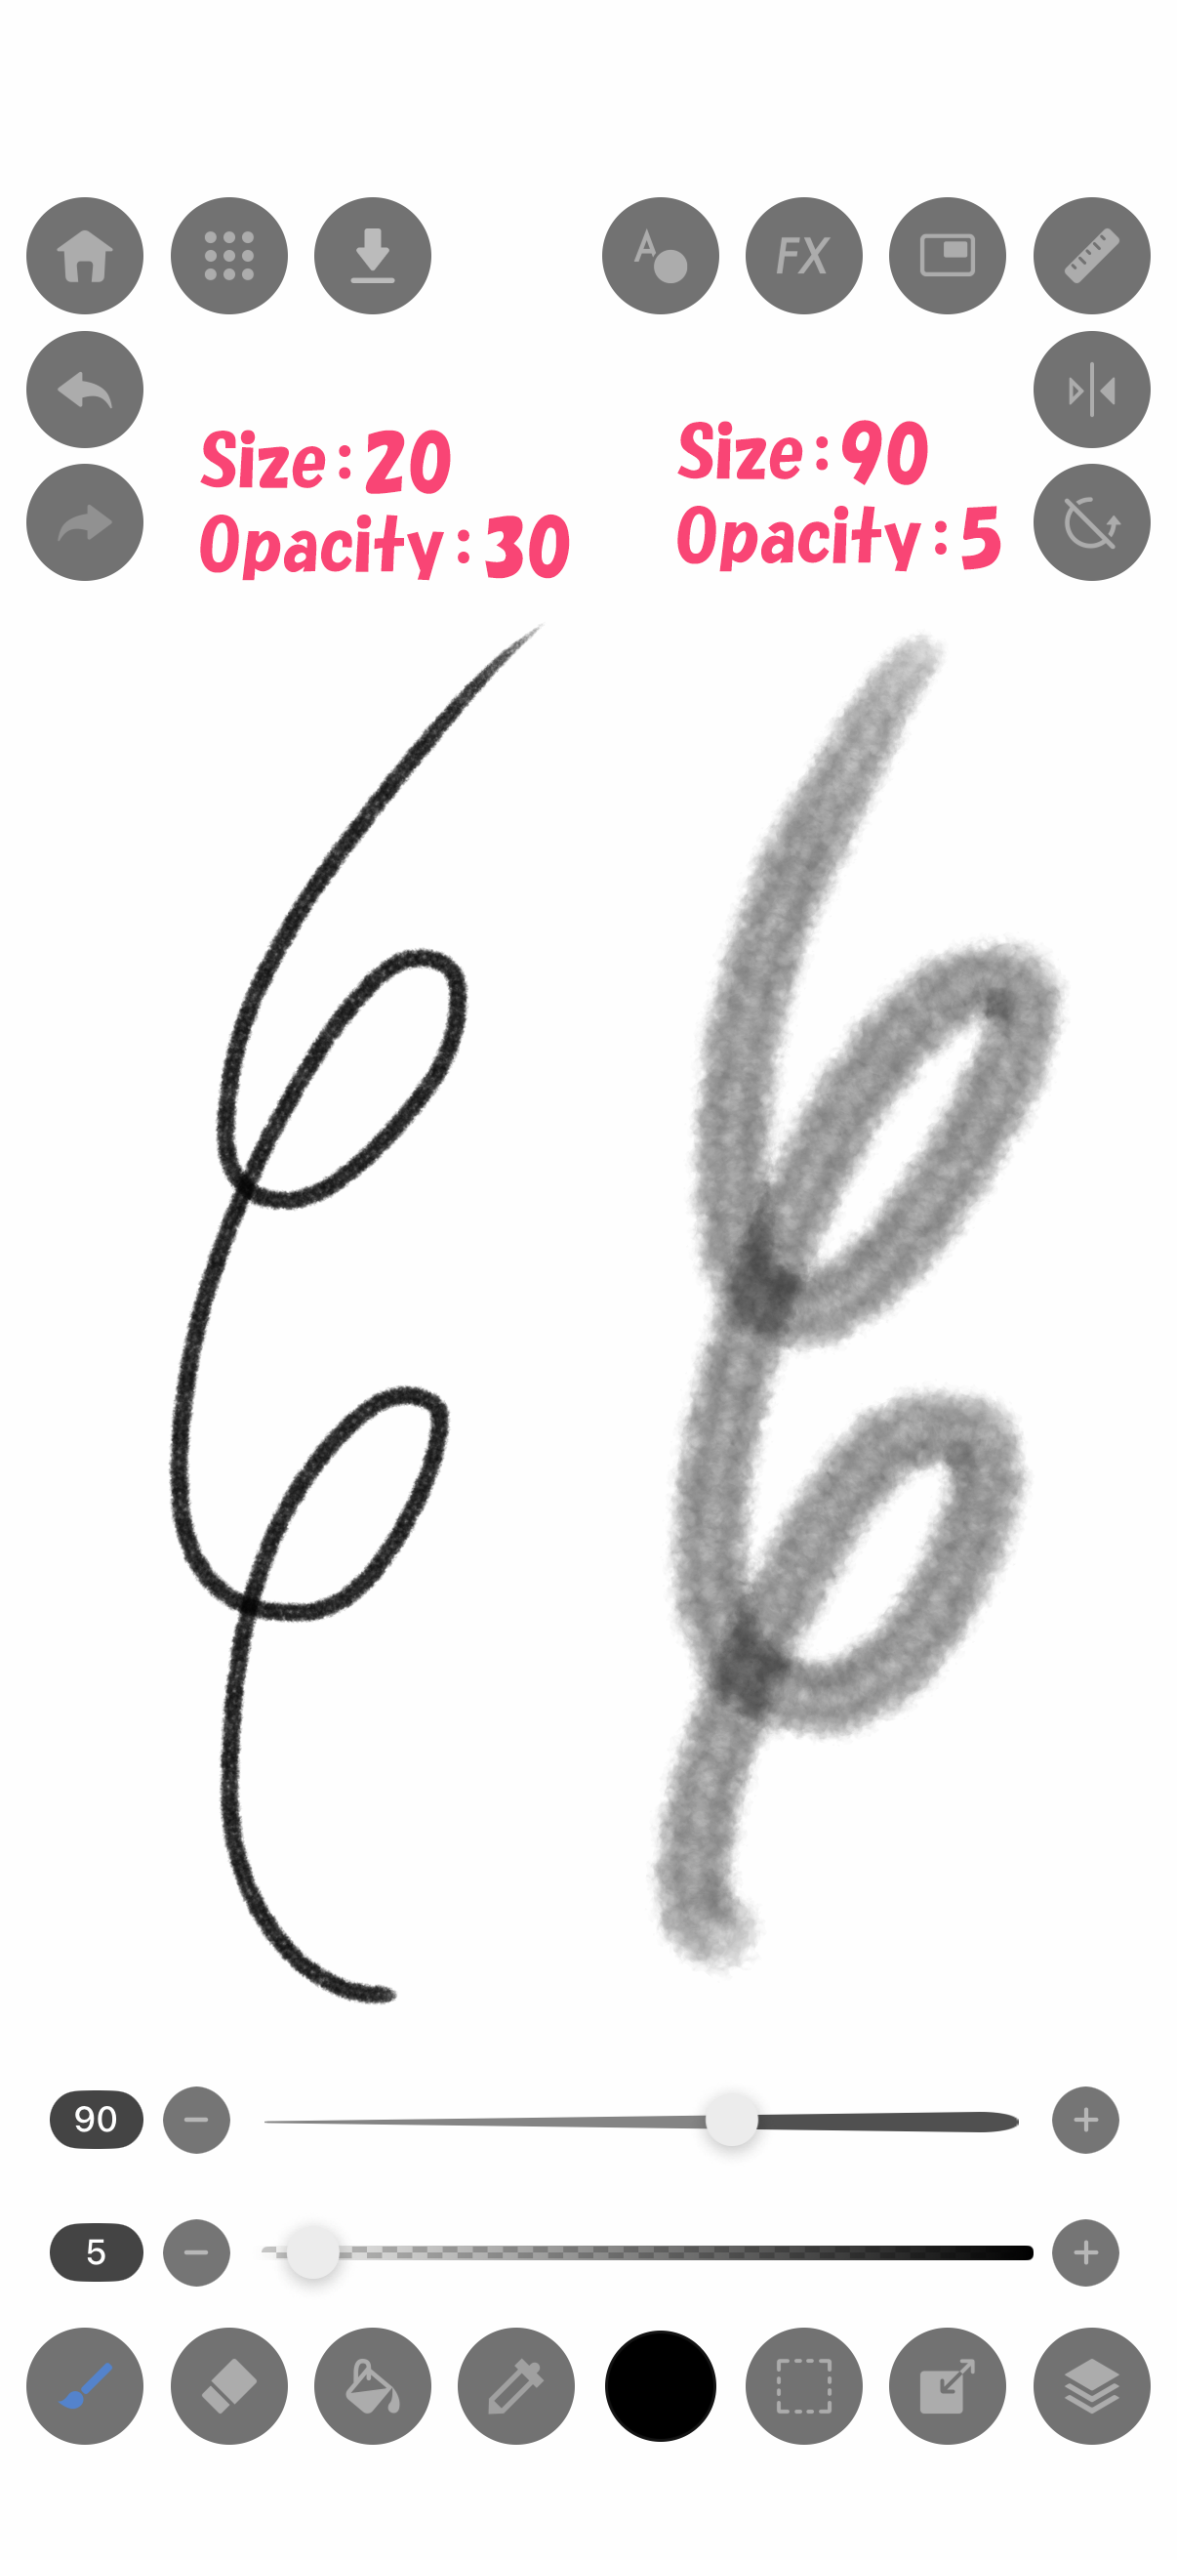
Adjusting Size & Opacity: You can freely adjust the brush size (a) and opacity (b) using the bars at the bottom of the screen.
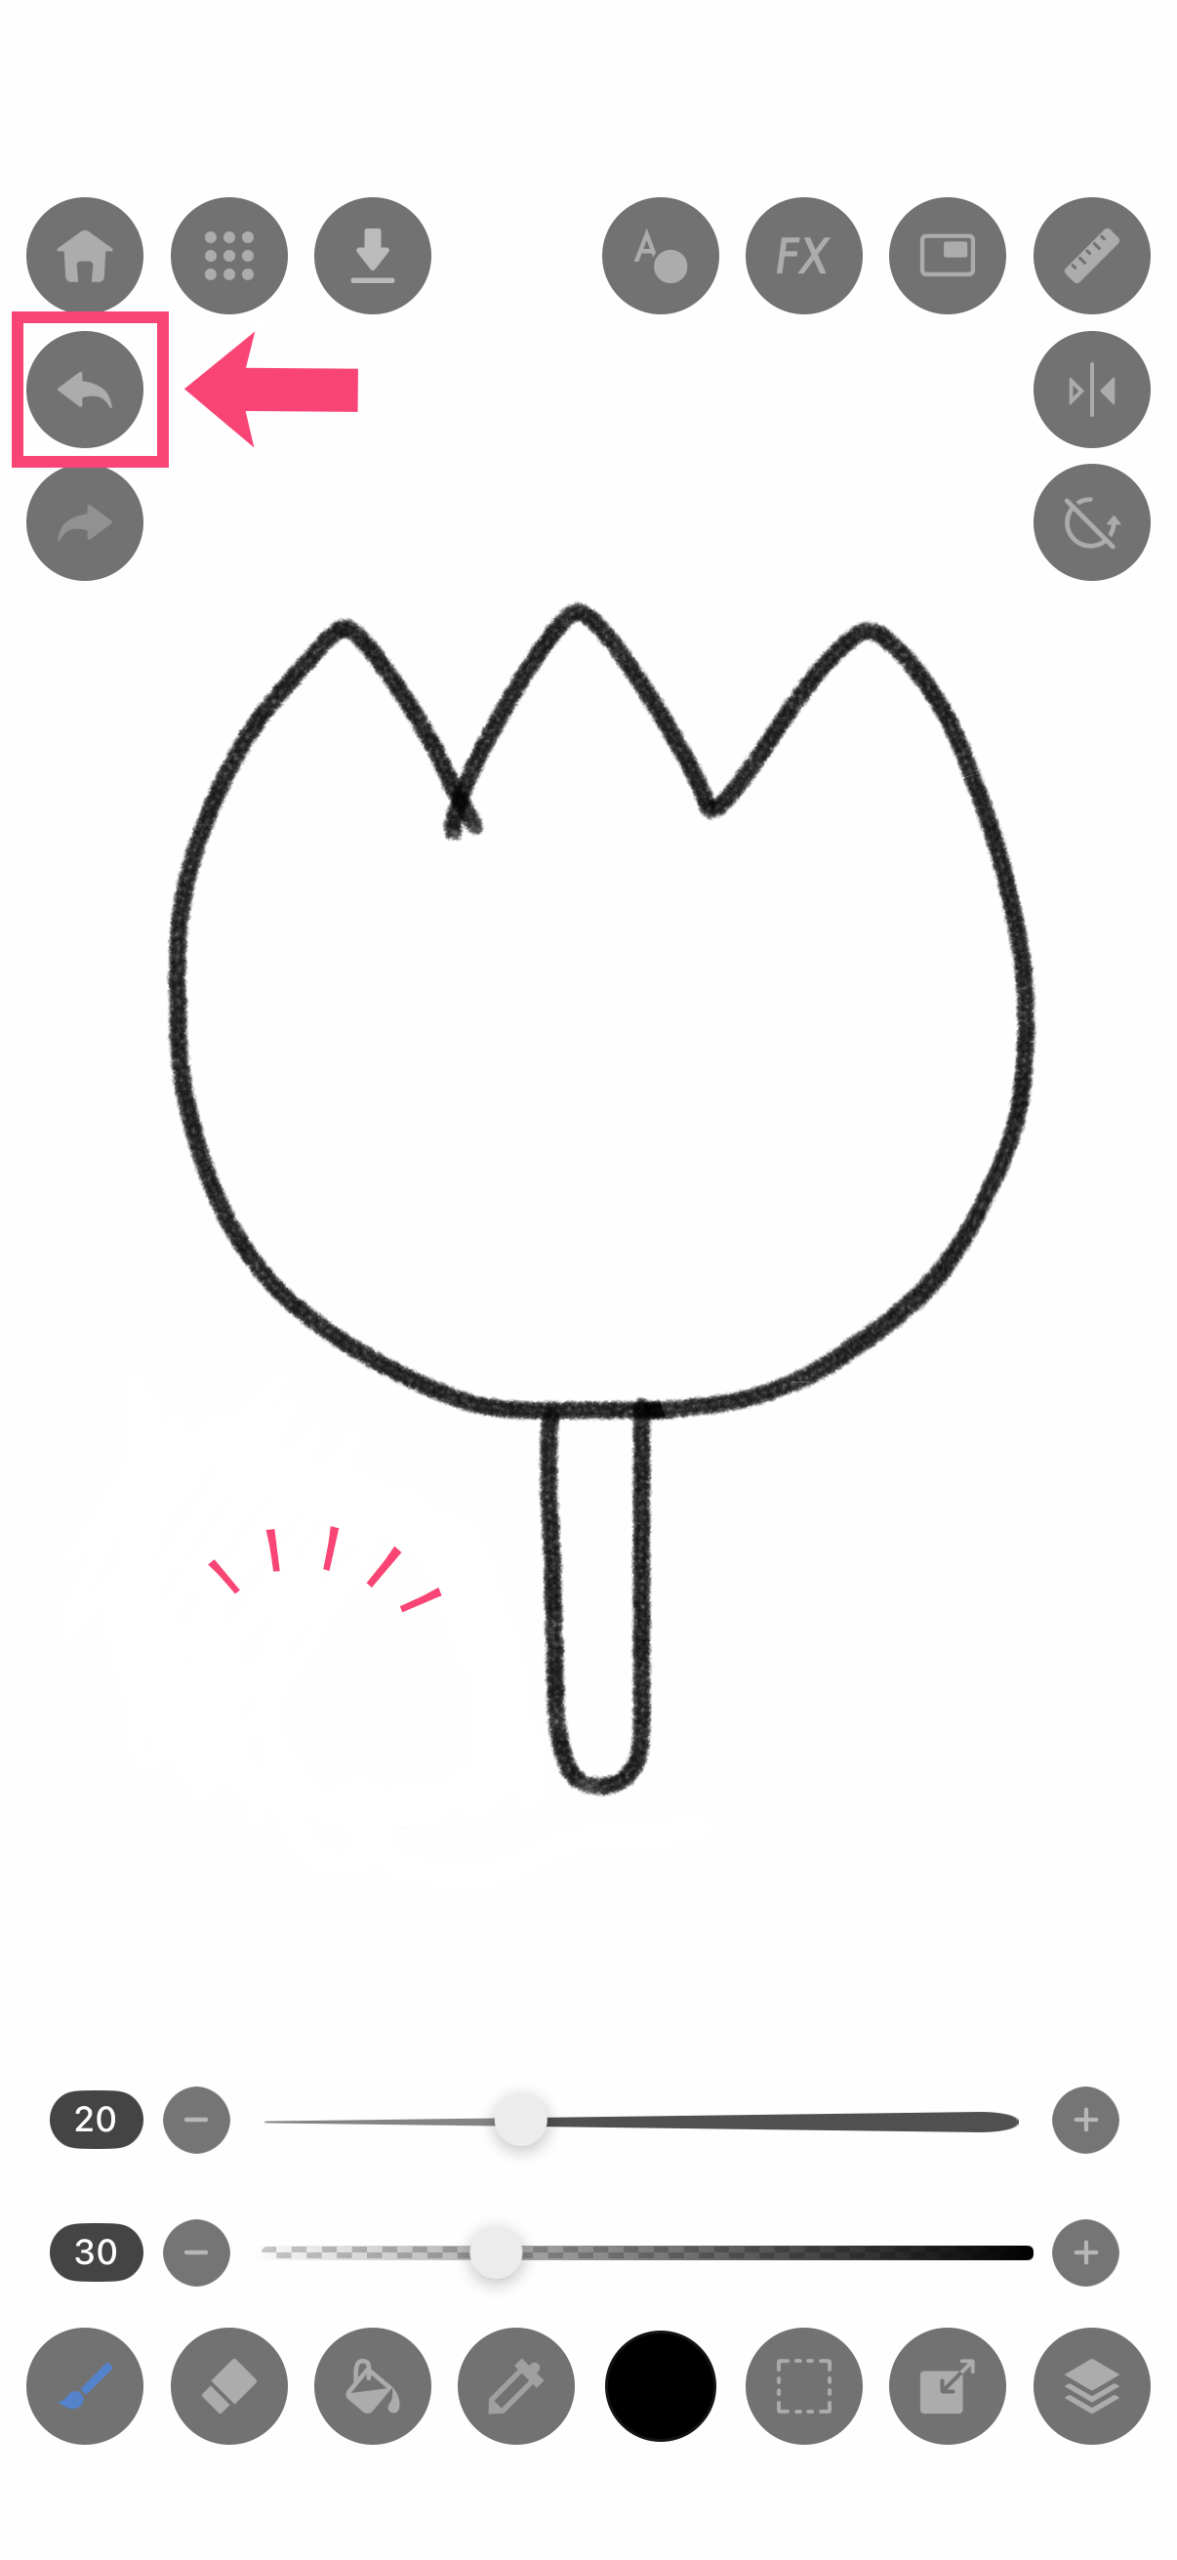
★Tip1:When you want to redo something, try tapping the screen with two fingers (Undo). This takes you back one step.
★Tip2:Alternatively, you can tap the “← (Undo) icon” in the top-left corner to return to the previous state.
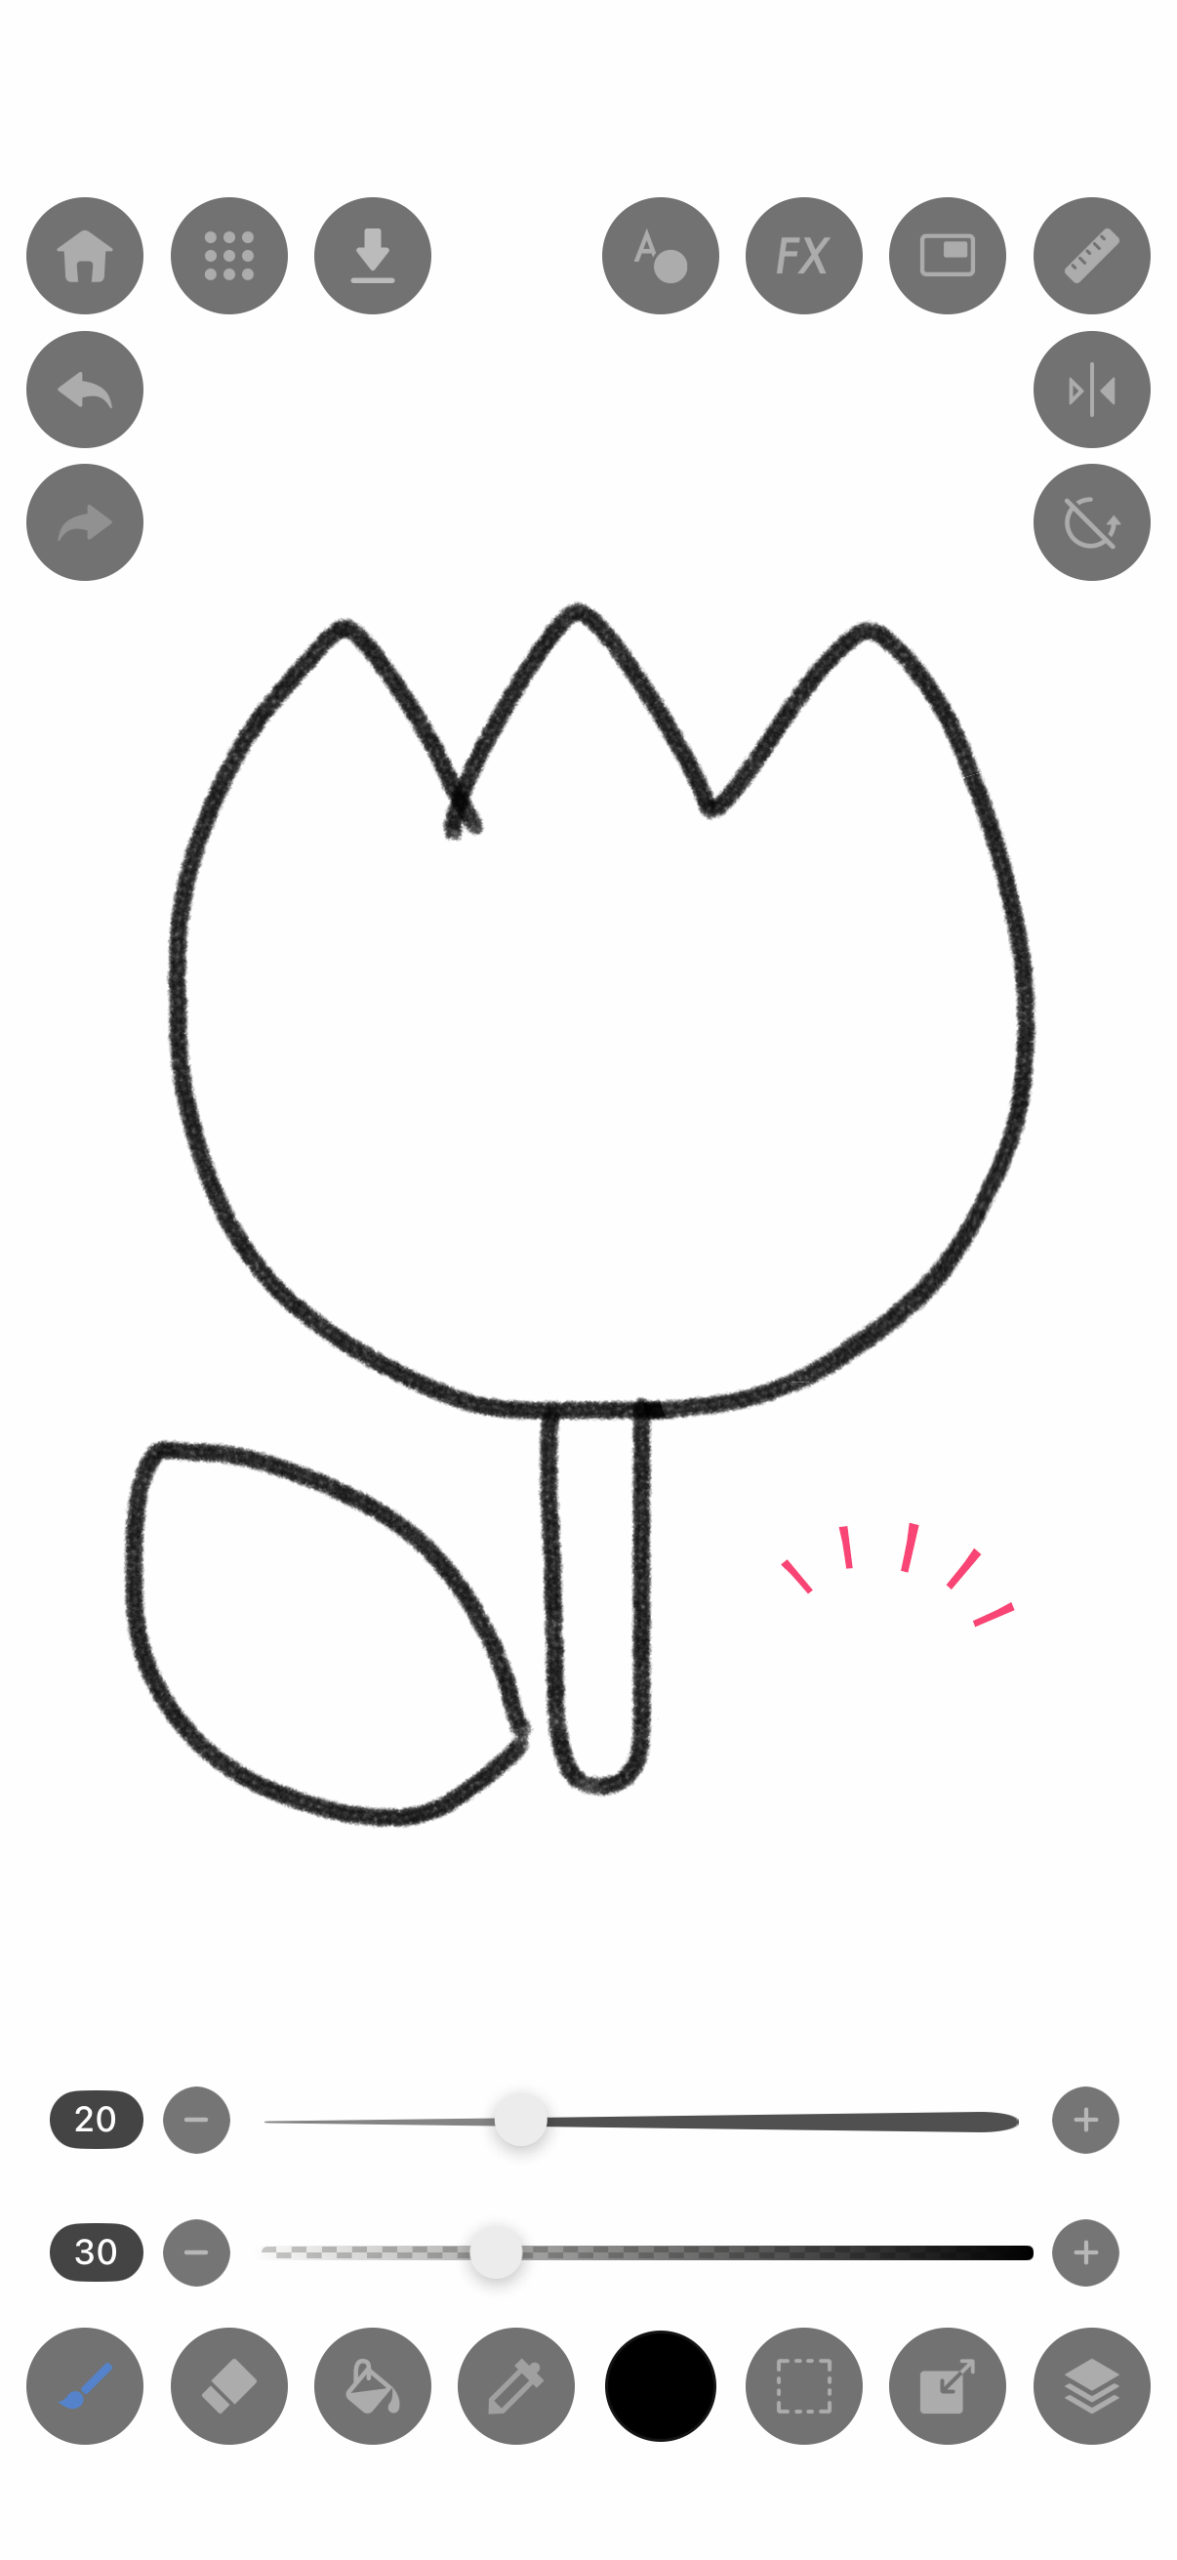
STEP4:Let’s Correct with the Eraser
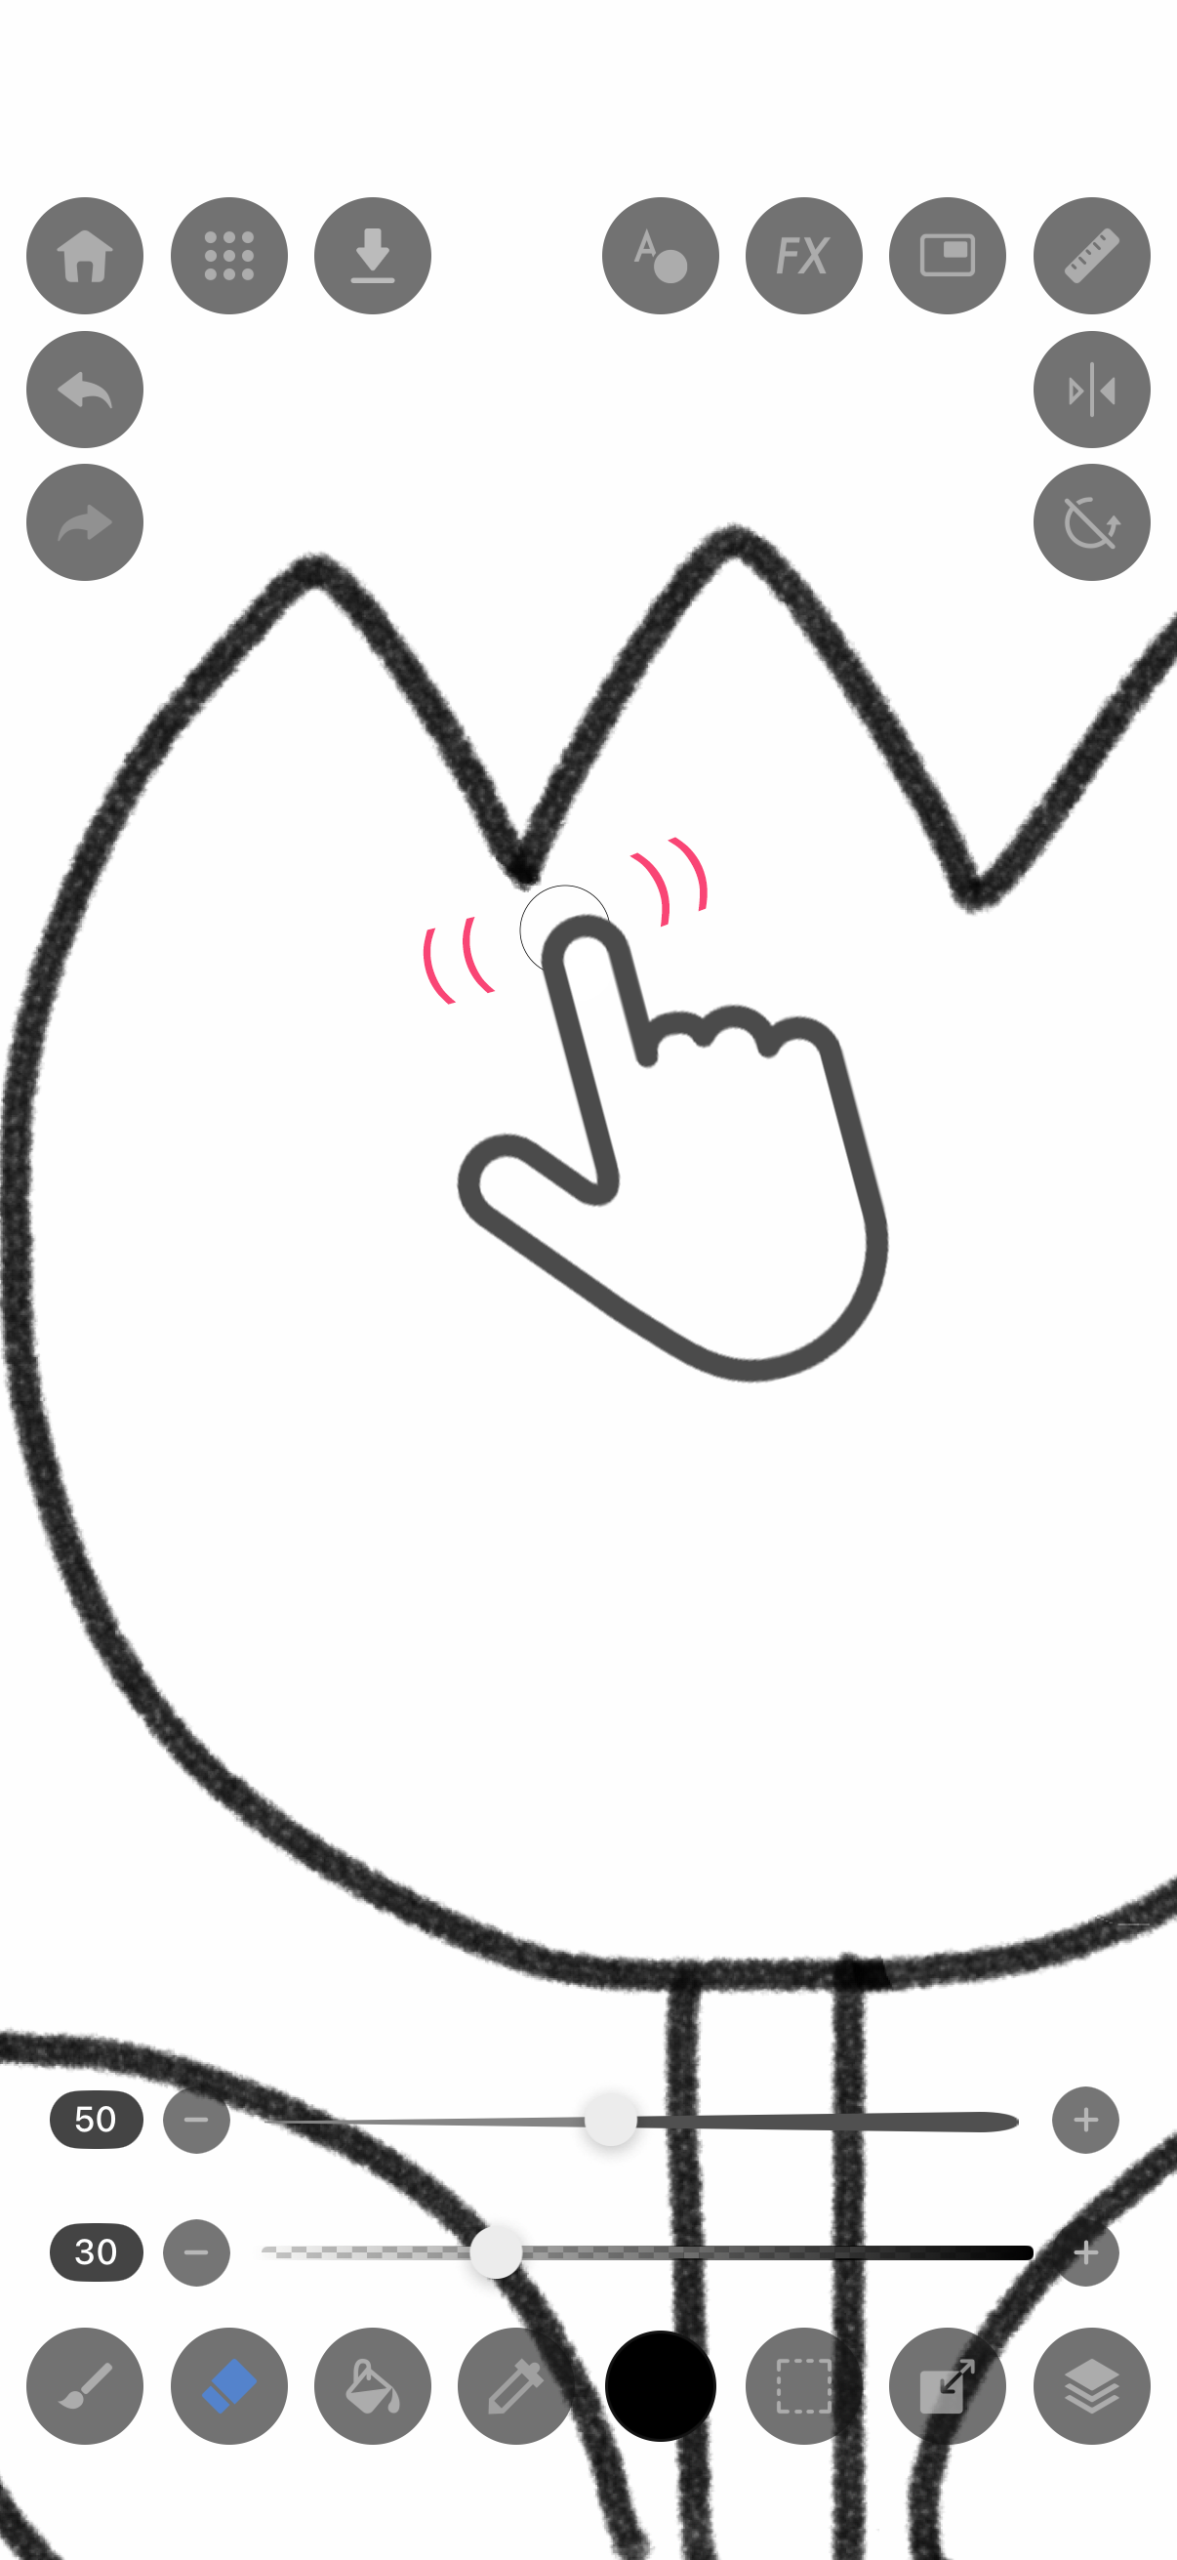
1.When you want to fix a part of the line, tap the “Eraser icon”.
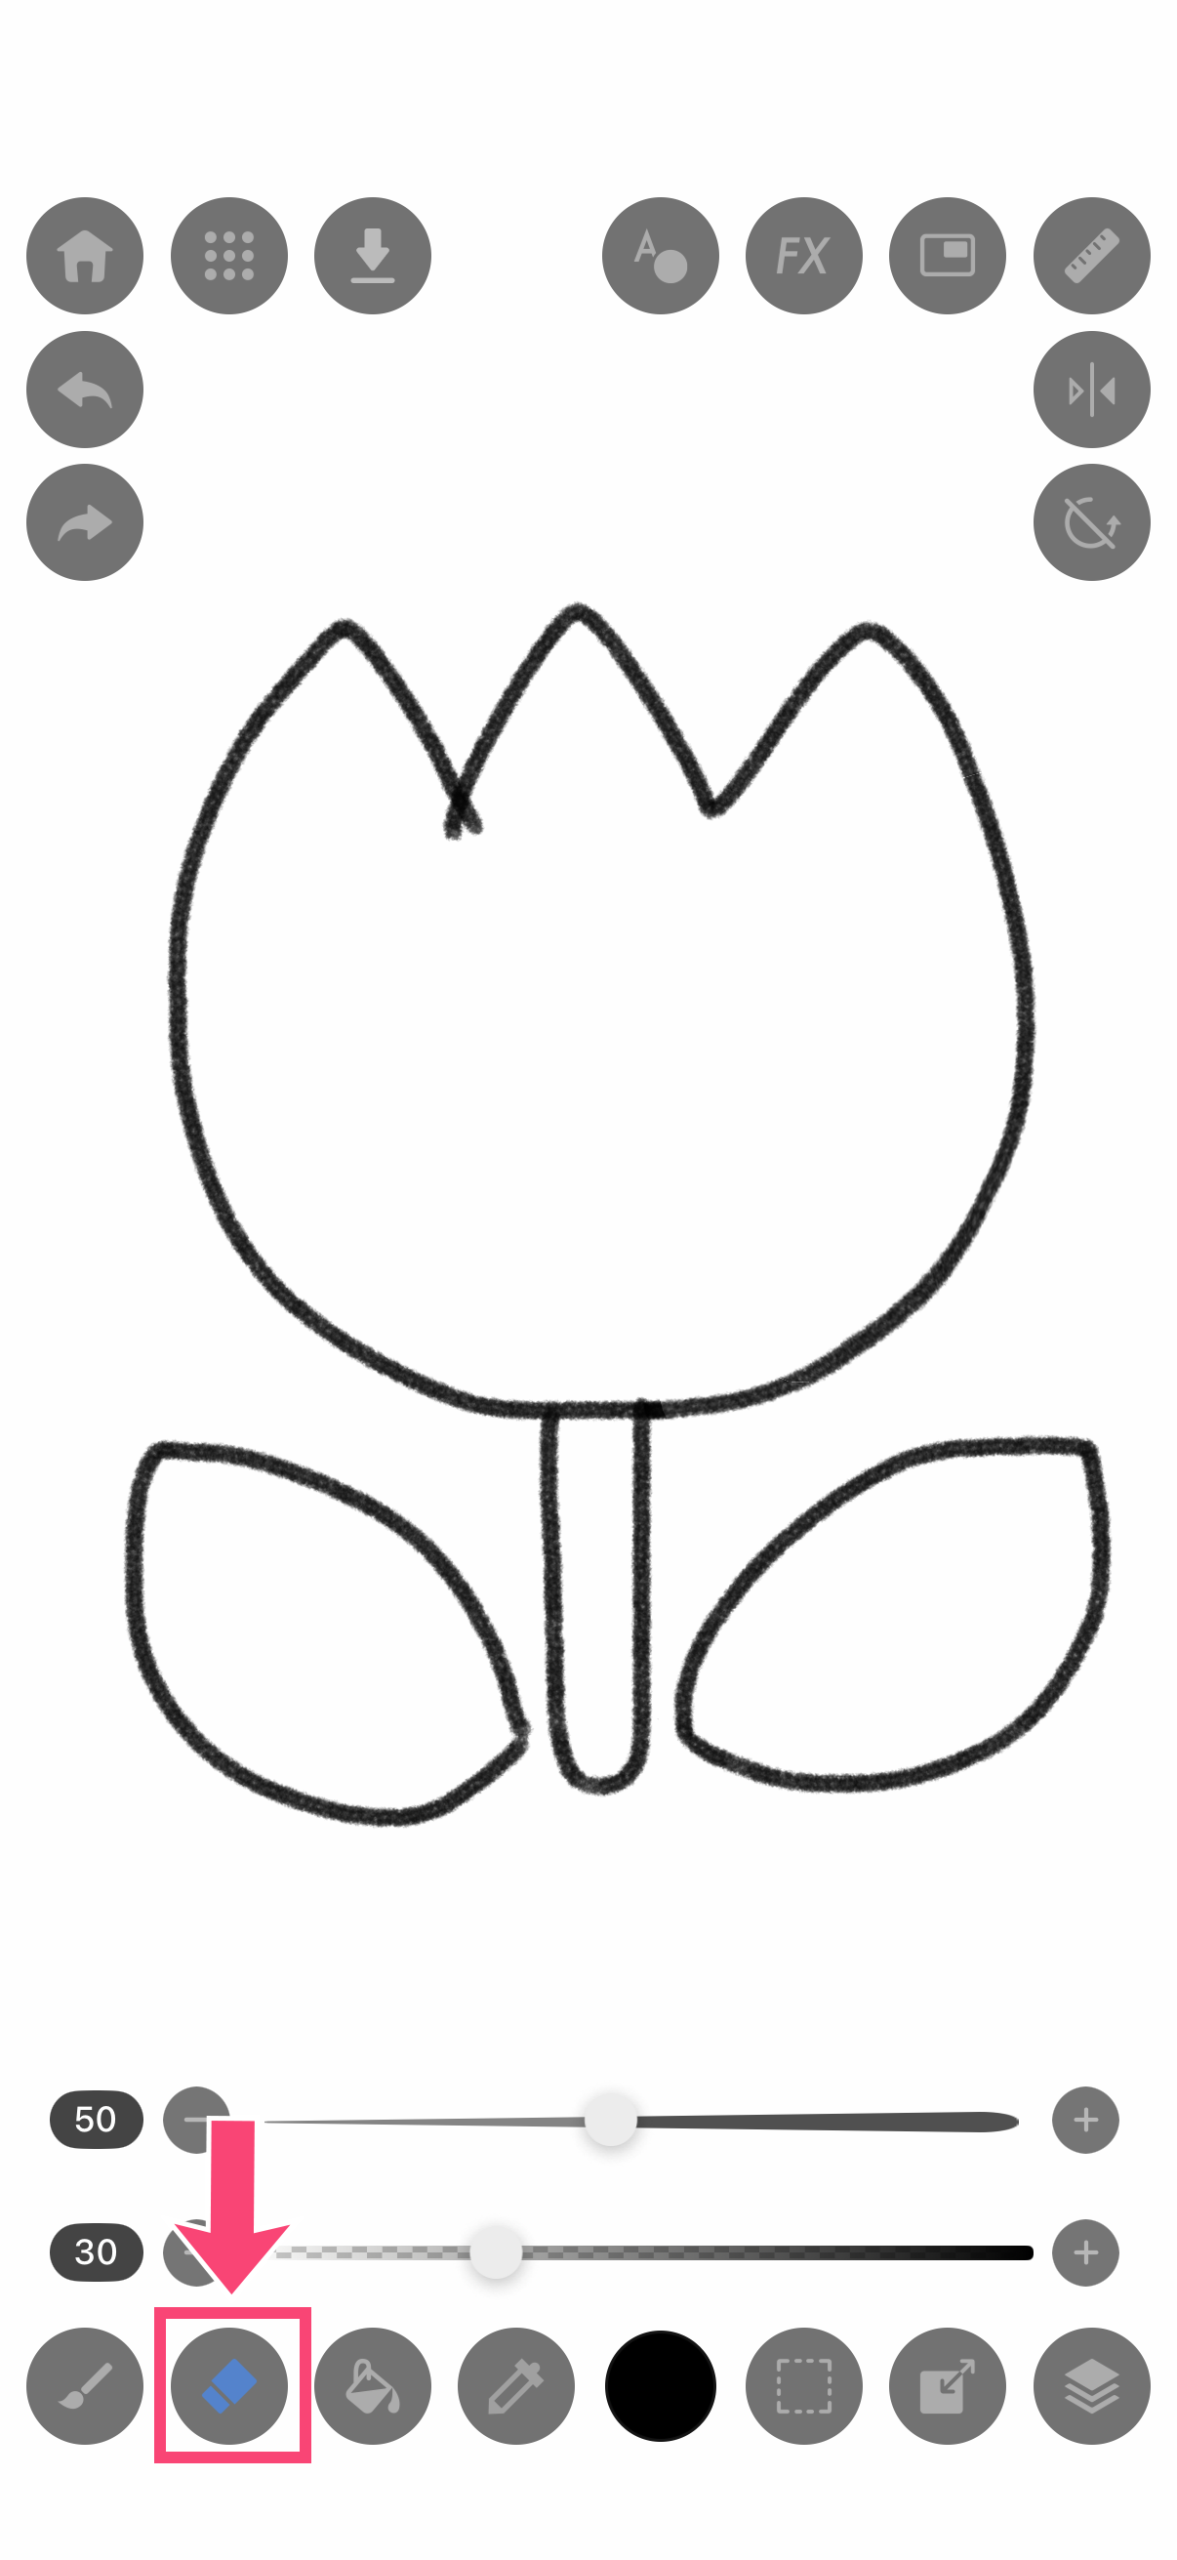
2.”Eraser (Hard)” is selected.

3.Zoom in with two fingers to check the area you want to fix. (Of course, you can also do it without zooming!)
4.Trace over the part you want to fix to erase it.
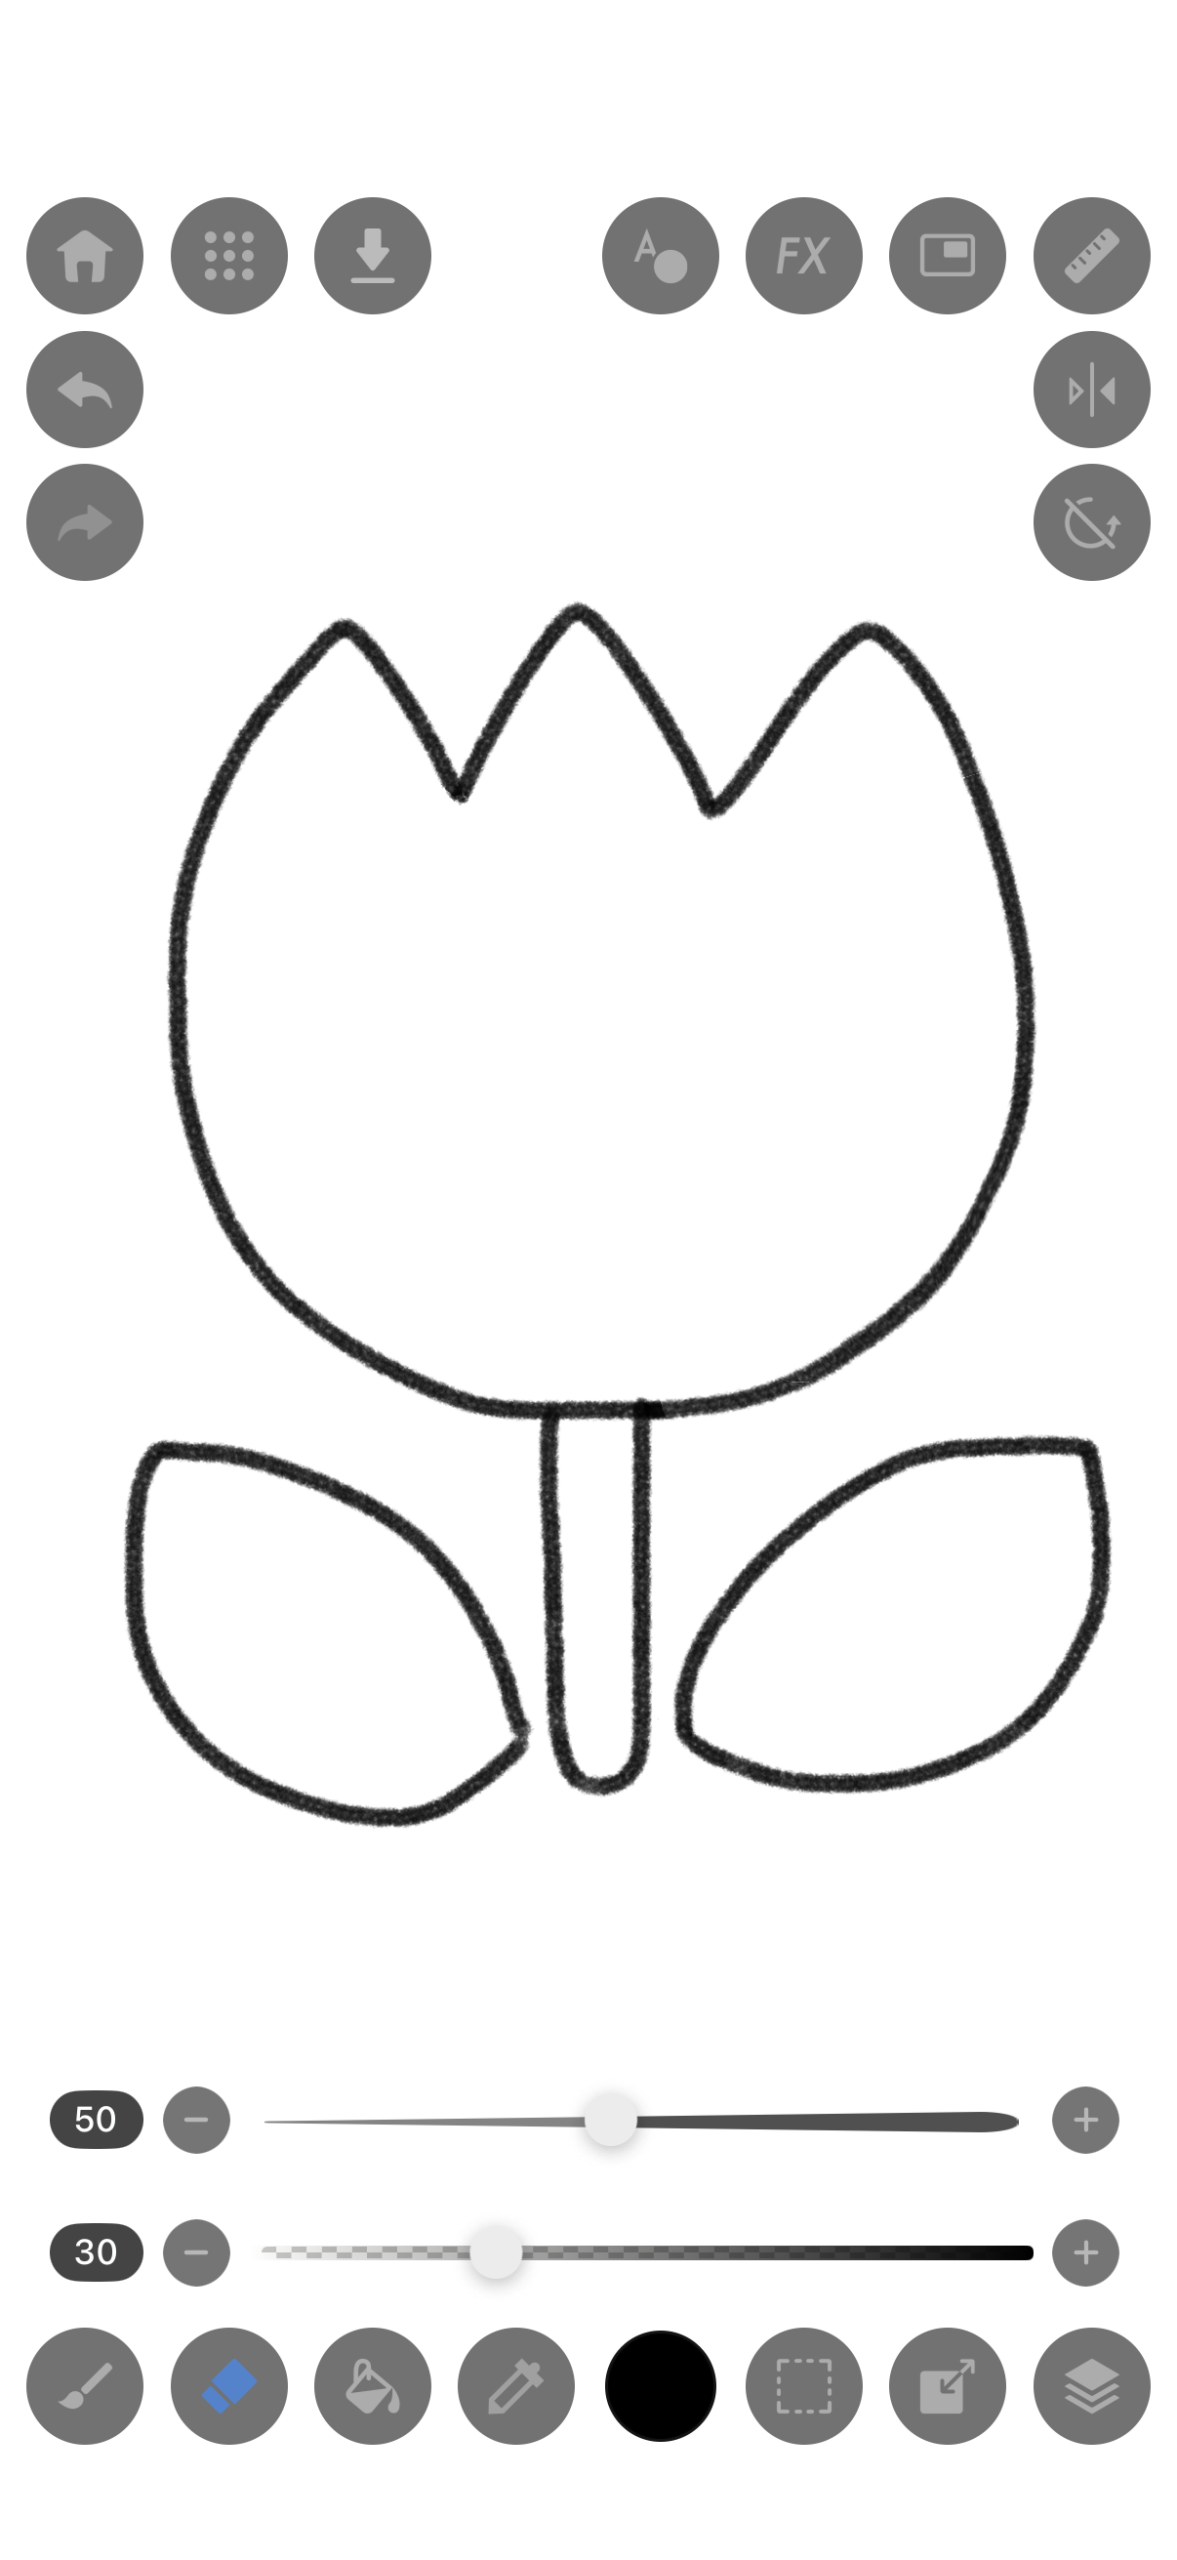
Now the line art is complete!
STEP5:Let’s Use Layers Effectively
<What are Layers?>
Layers are a feature unique to digital art. Imagine stacking multiple sheets of transparent film to create an illustration.
For example, by separating the “film for lines” and the “film for colors,” you can paint without erasing the lines you have drawn.
1.Tap the “Layer icon”.
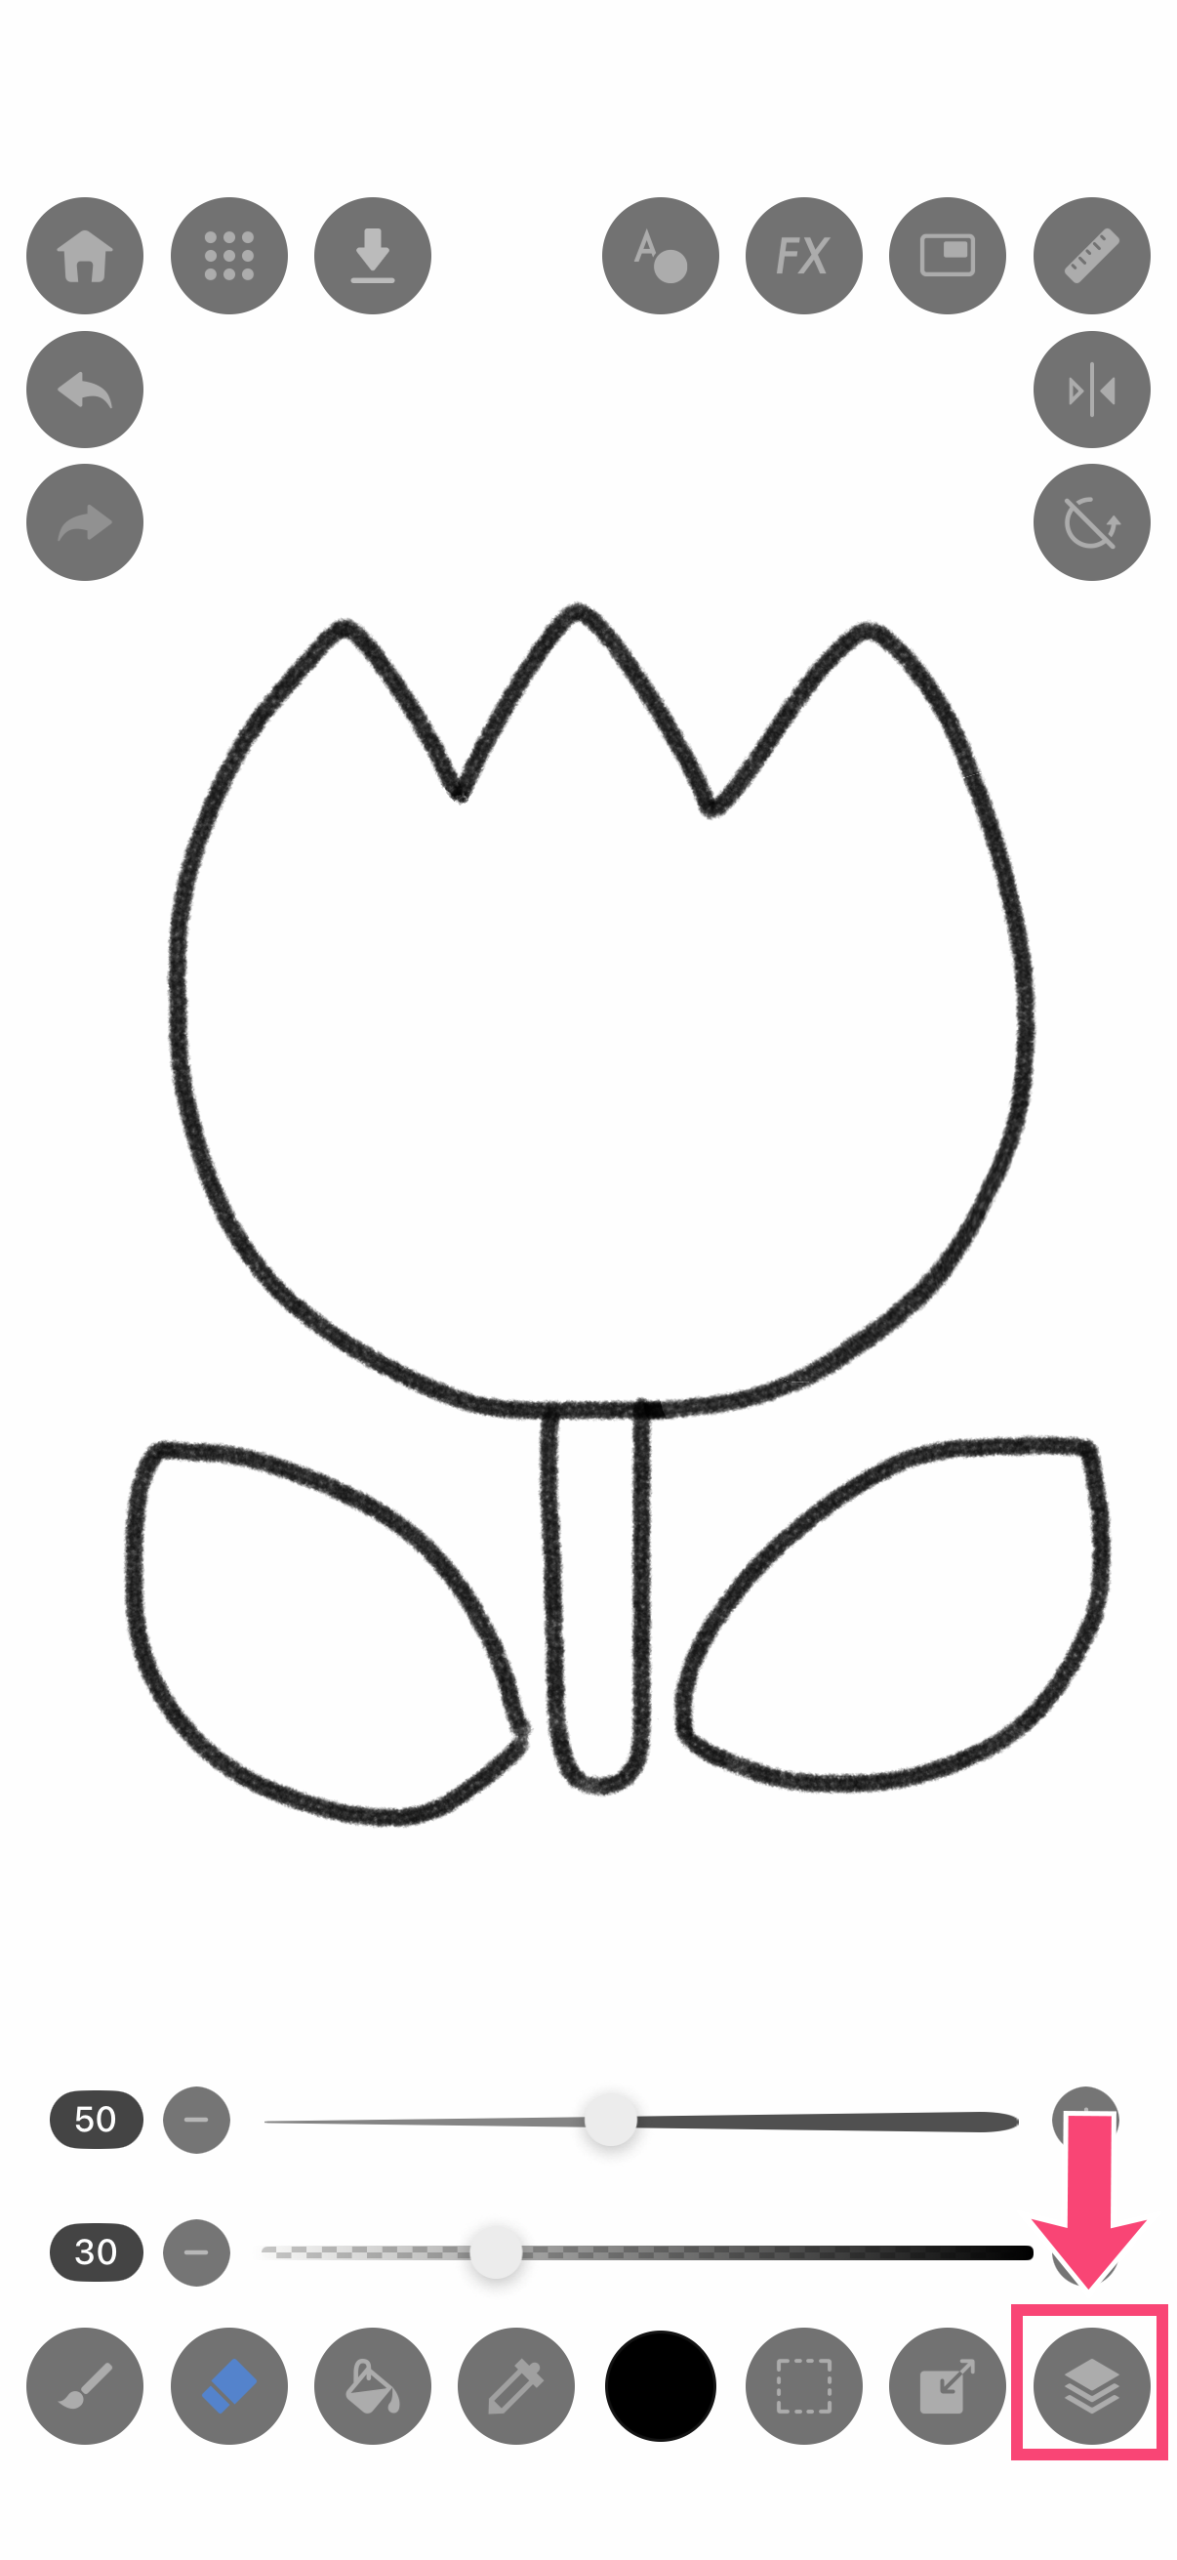
2.The Layer window is now displayed. The selected layer is shown in blue.
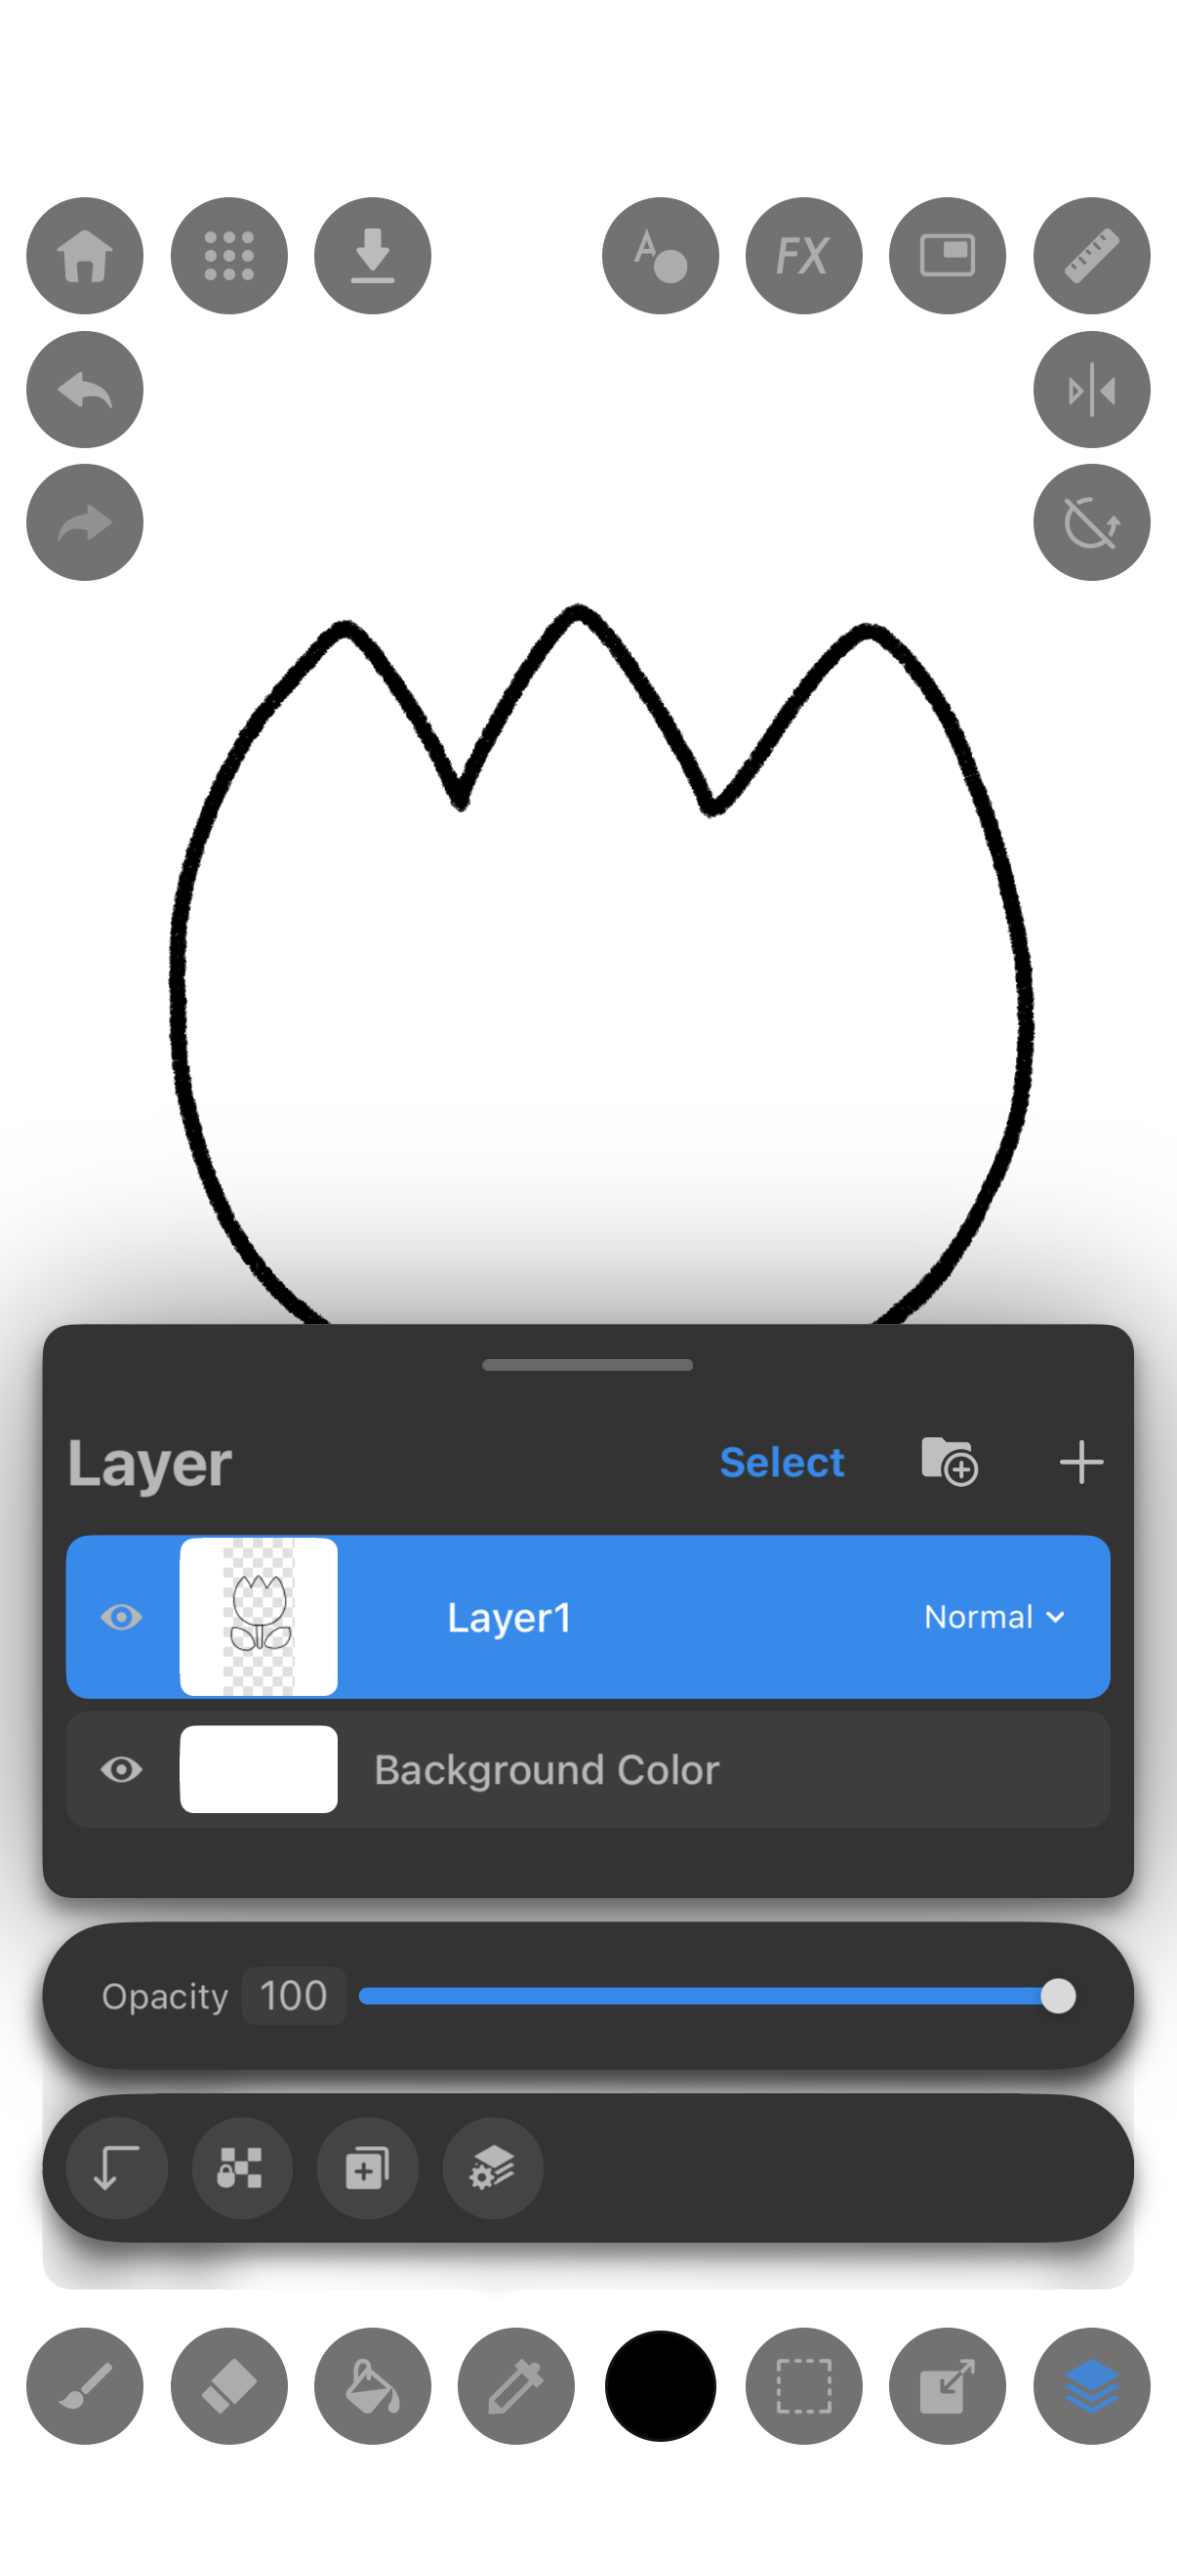
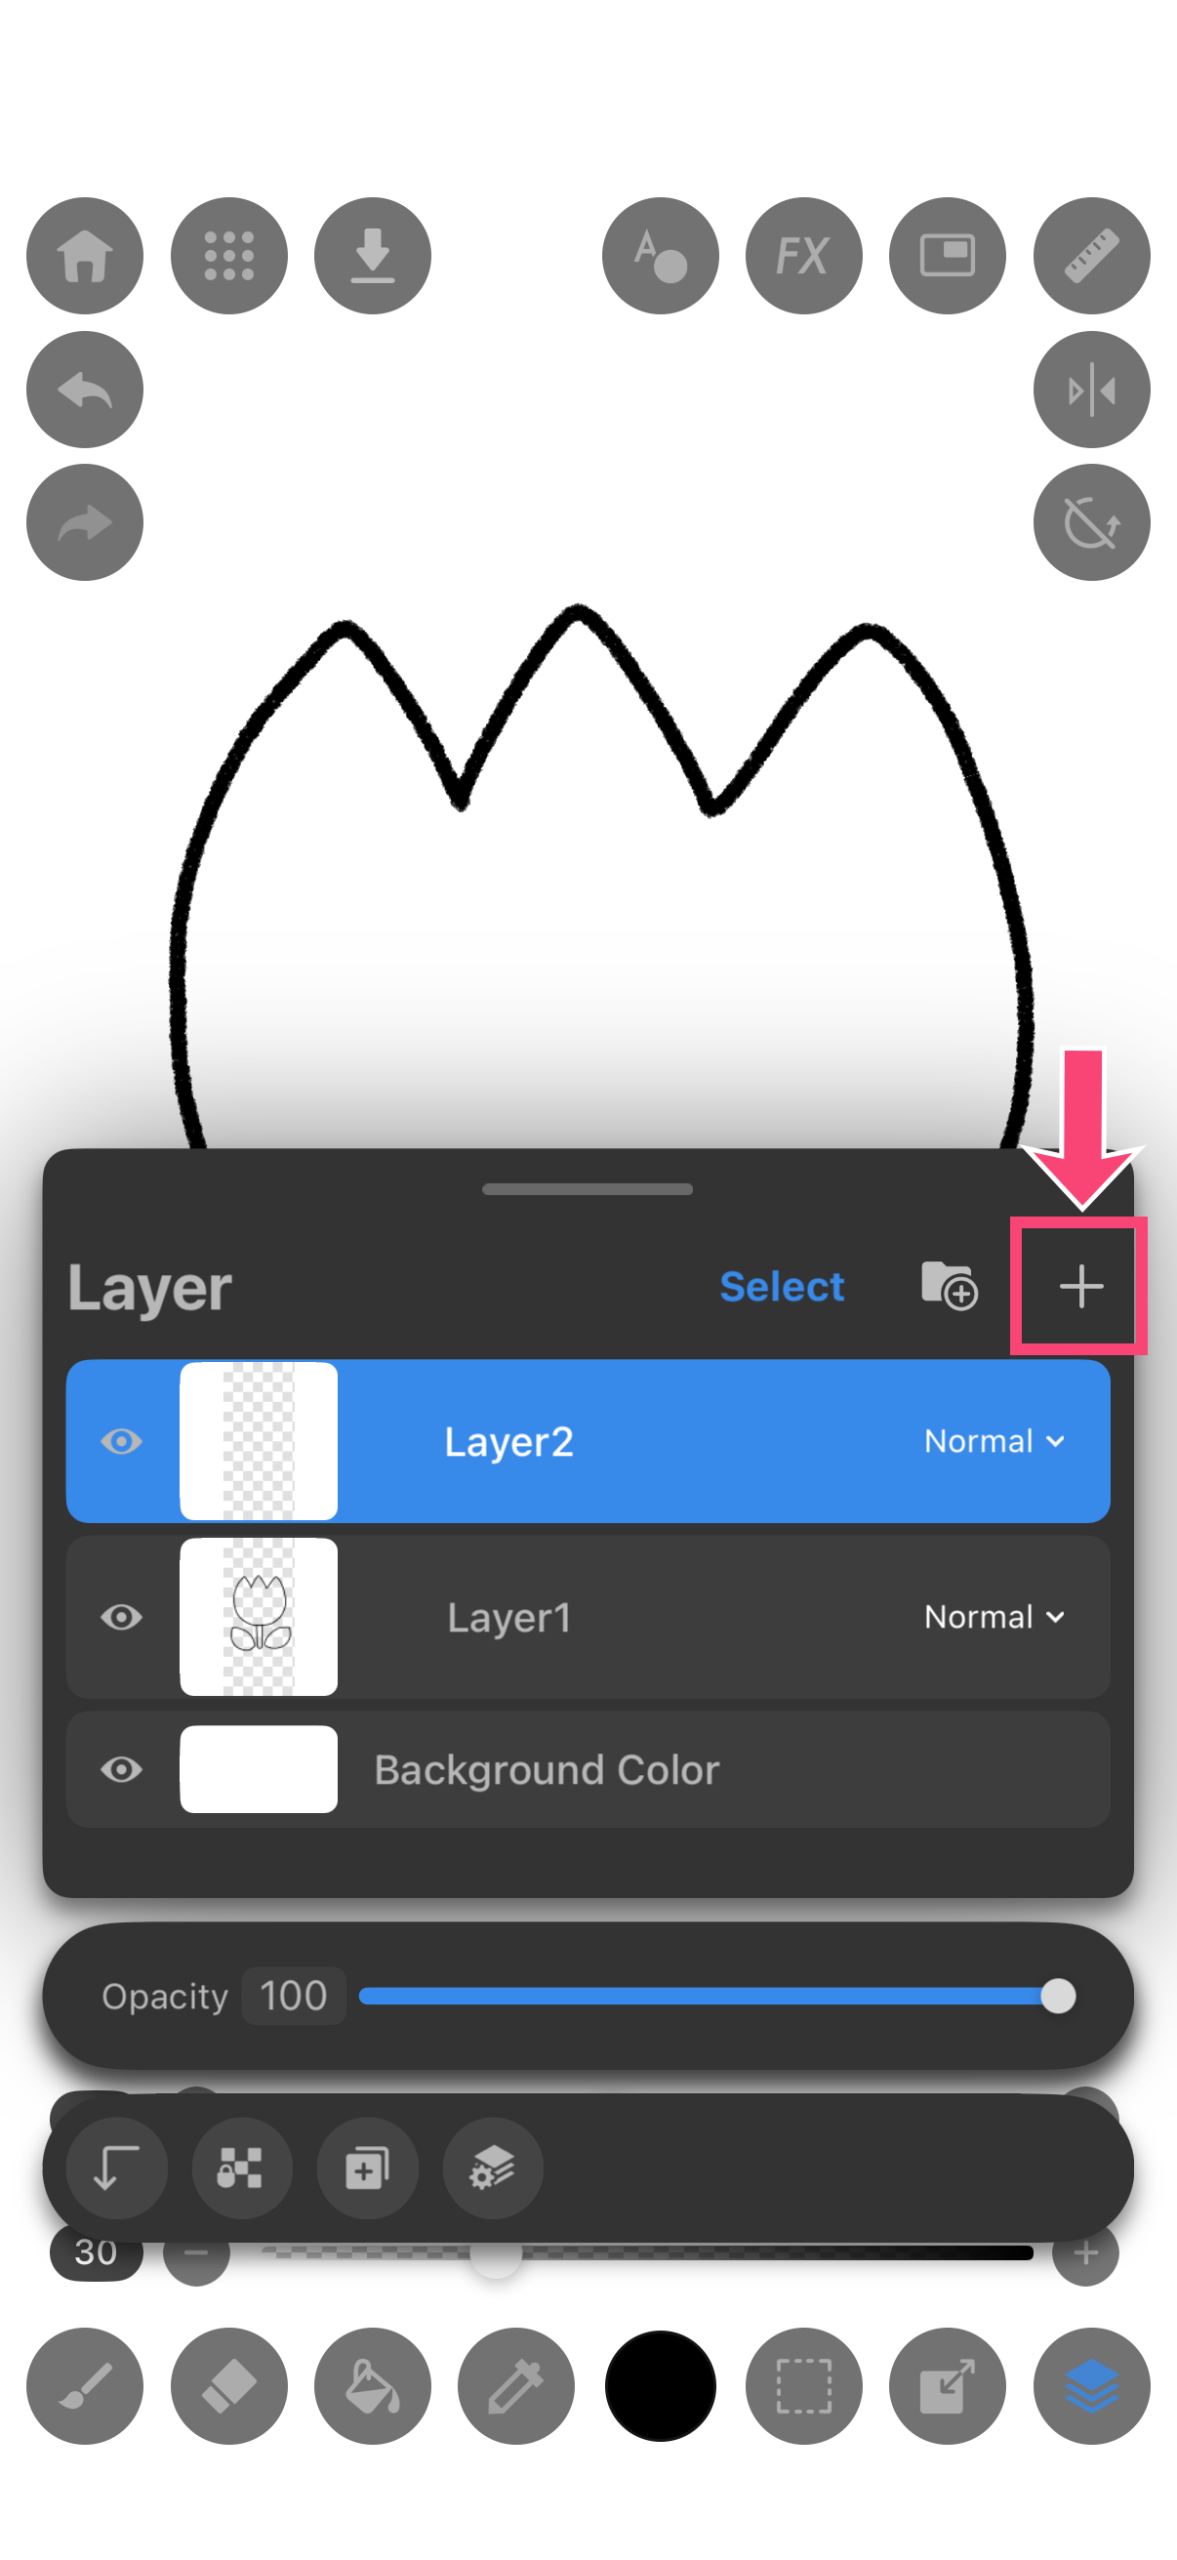
3.Tap the “+” button to add a new layer.
4.Tap and hold the new layer (Layer 2). Then, drag it below the line art layer (Layer 1).
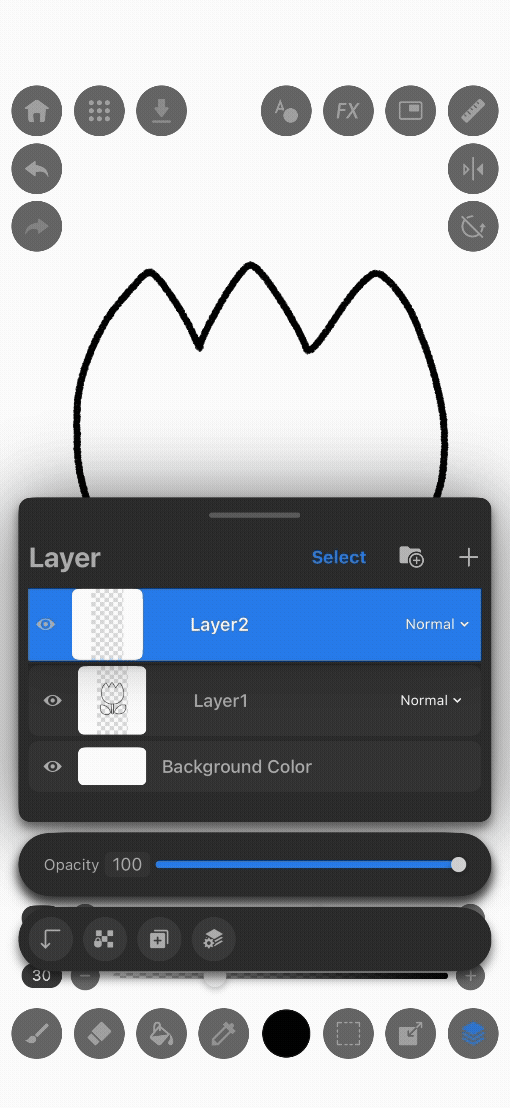
★Tip3:By placing the coloring layer below the line art, your lines won’t disappear when you paint!
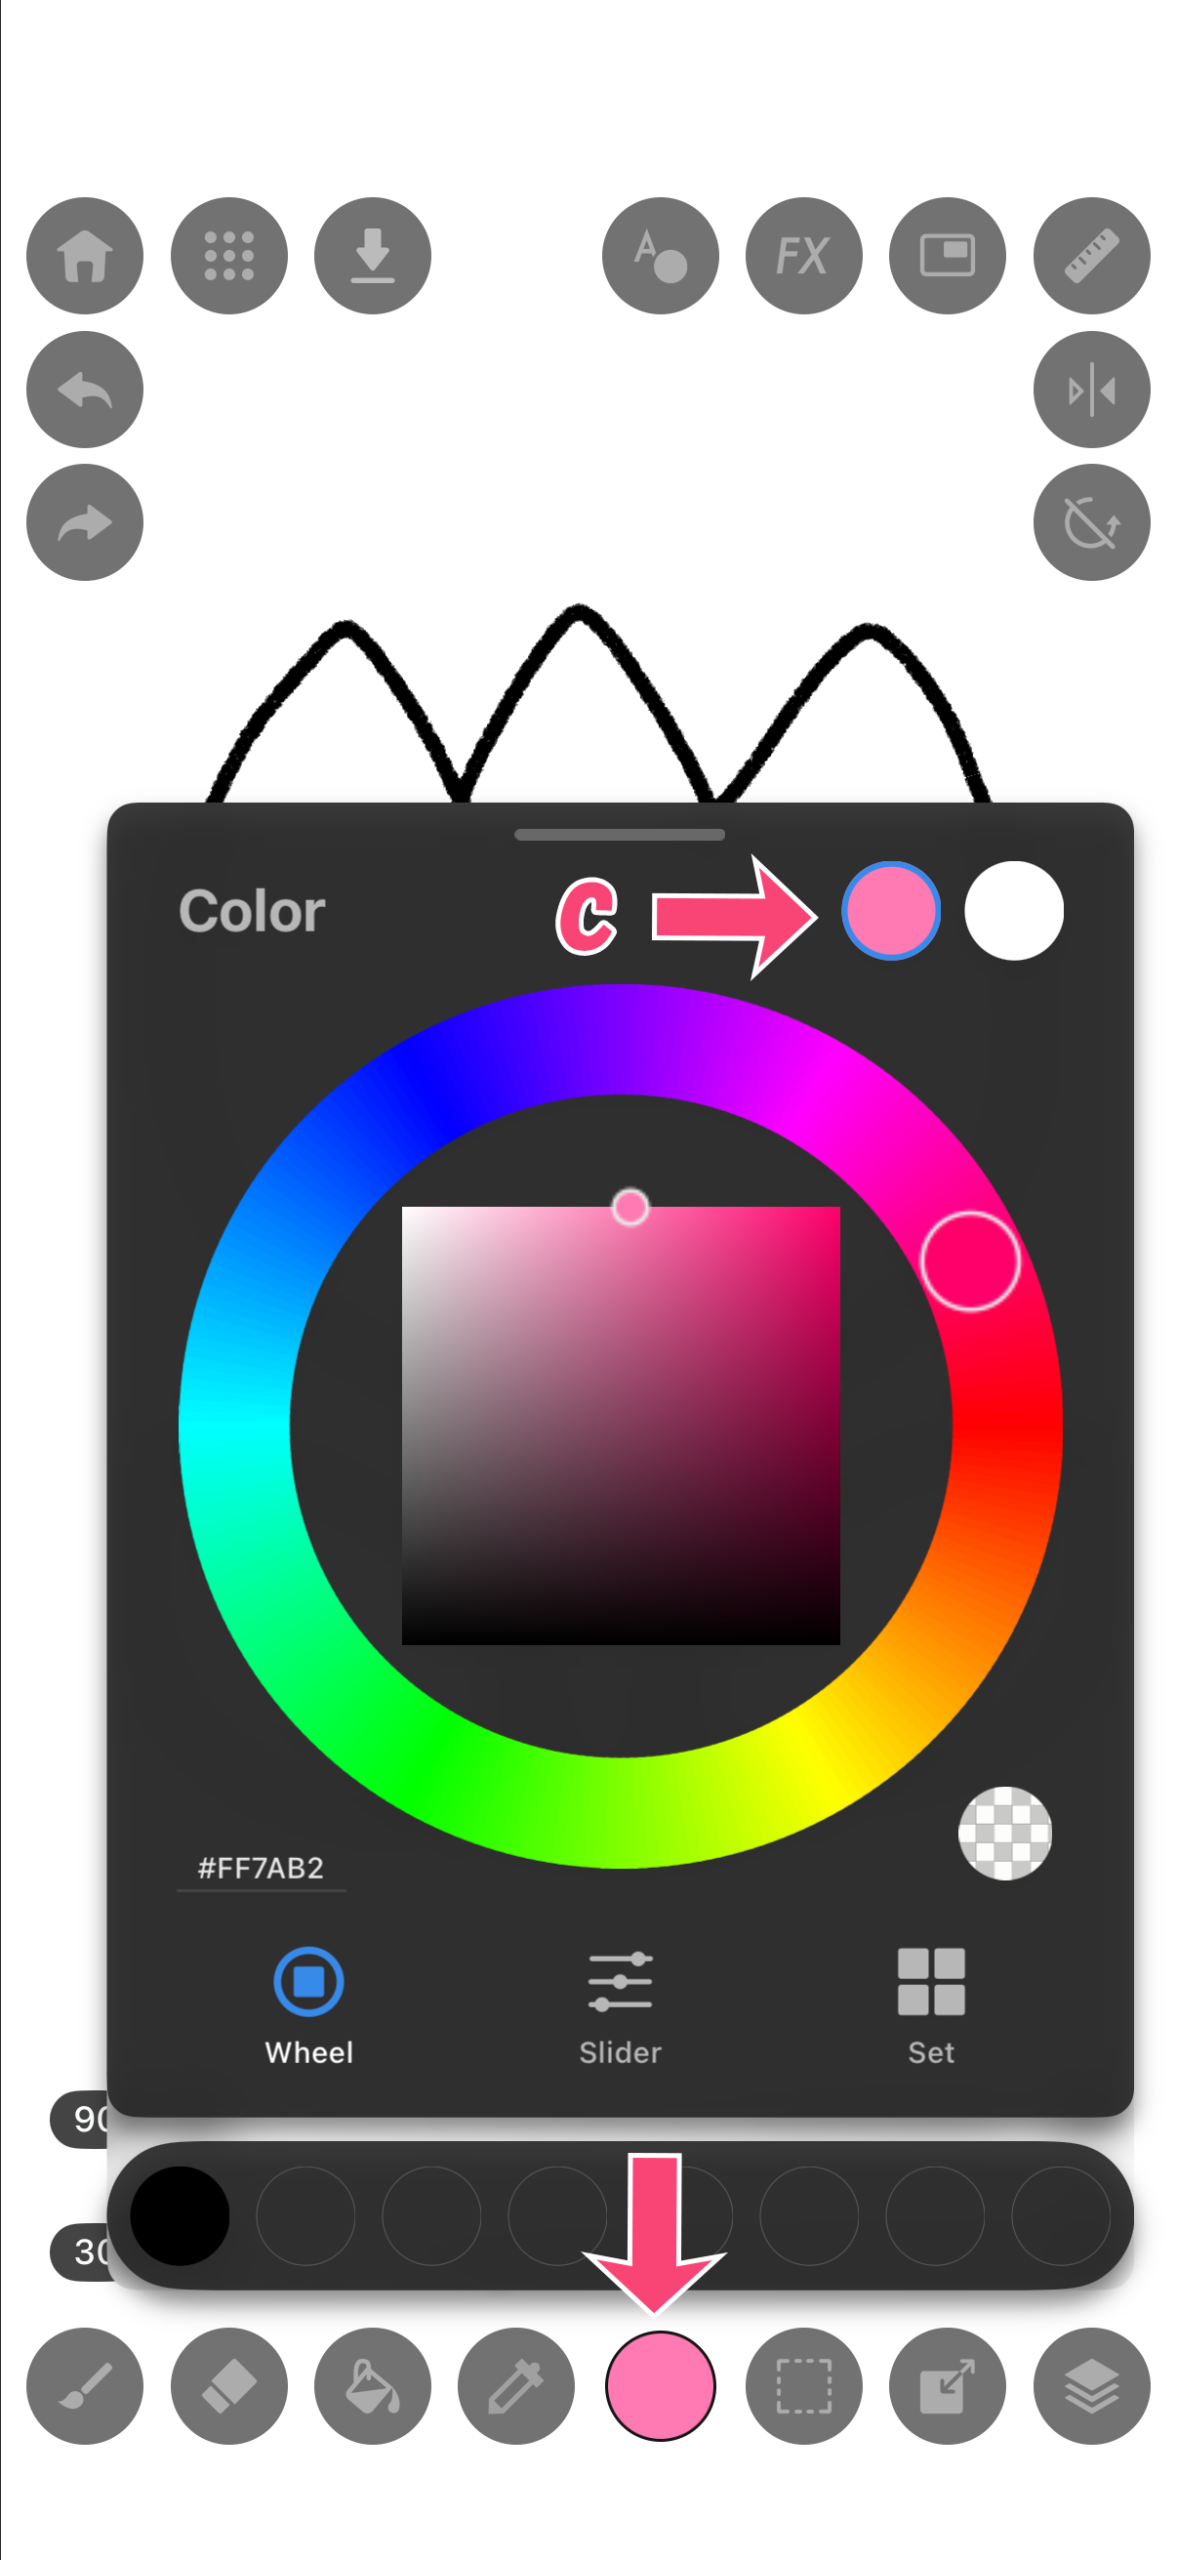
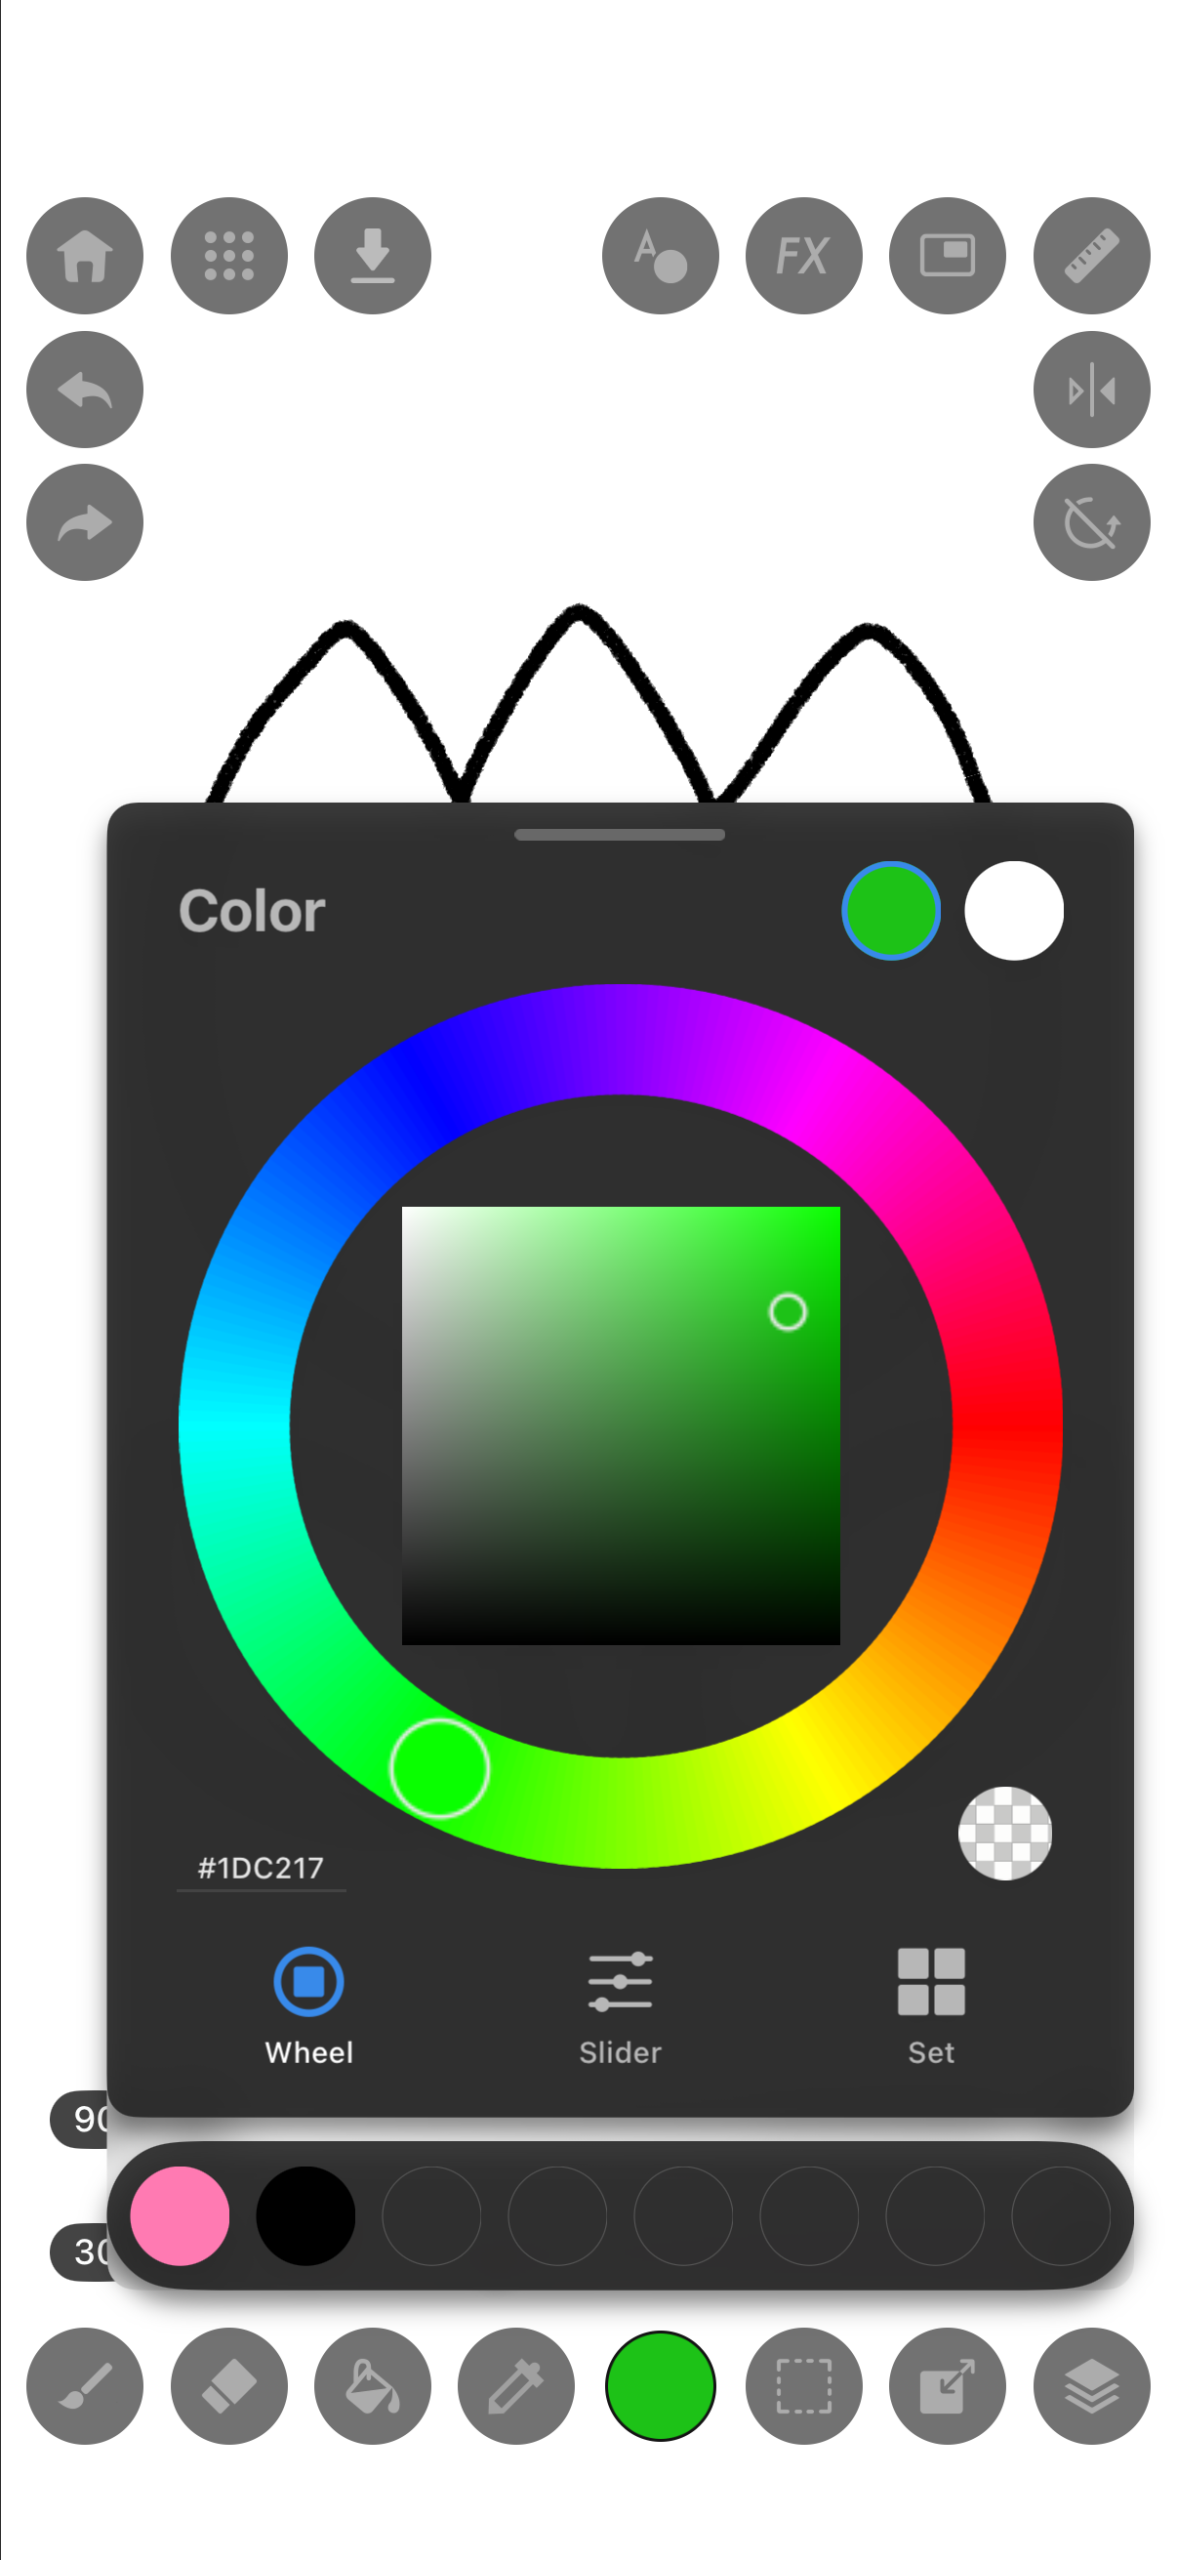
STEP6:Let’s Pick a Color
1.Tap the “Color icon”.
2.The Color window opens. Move the pointer in the color wheel (a) and the pointer in the square (b) to select a color.
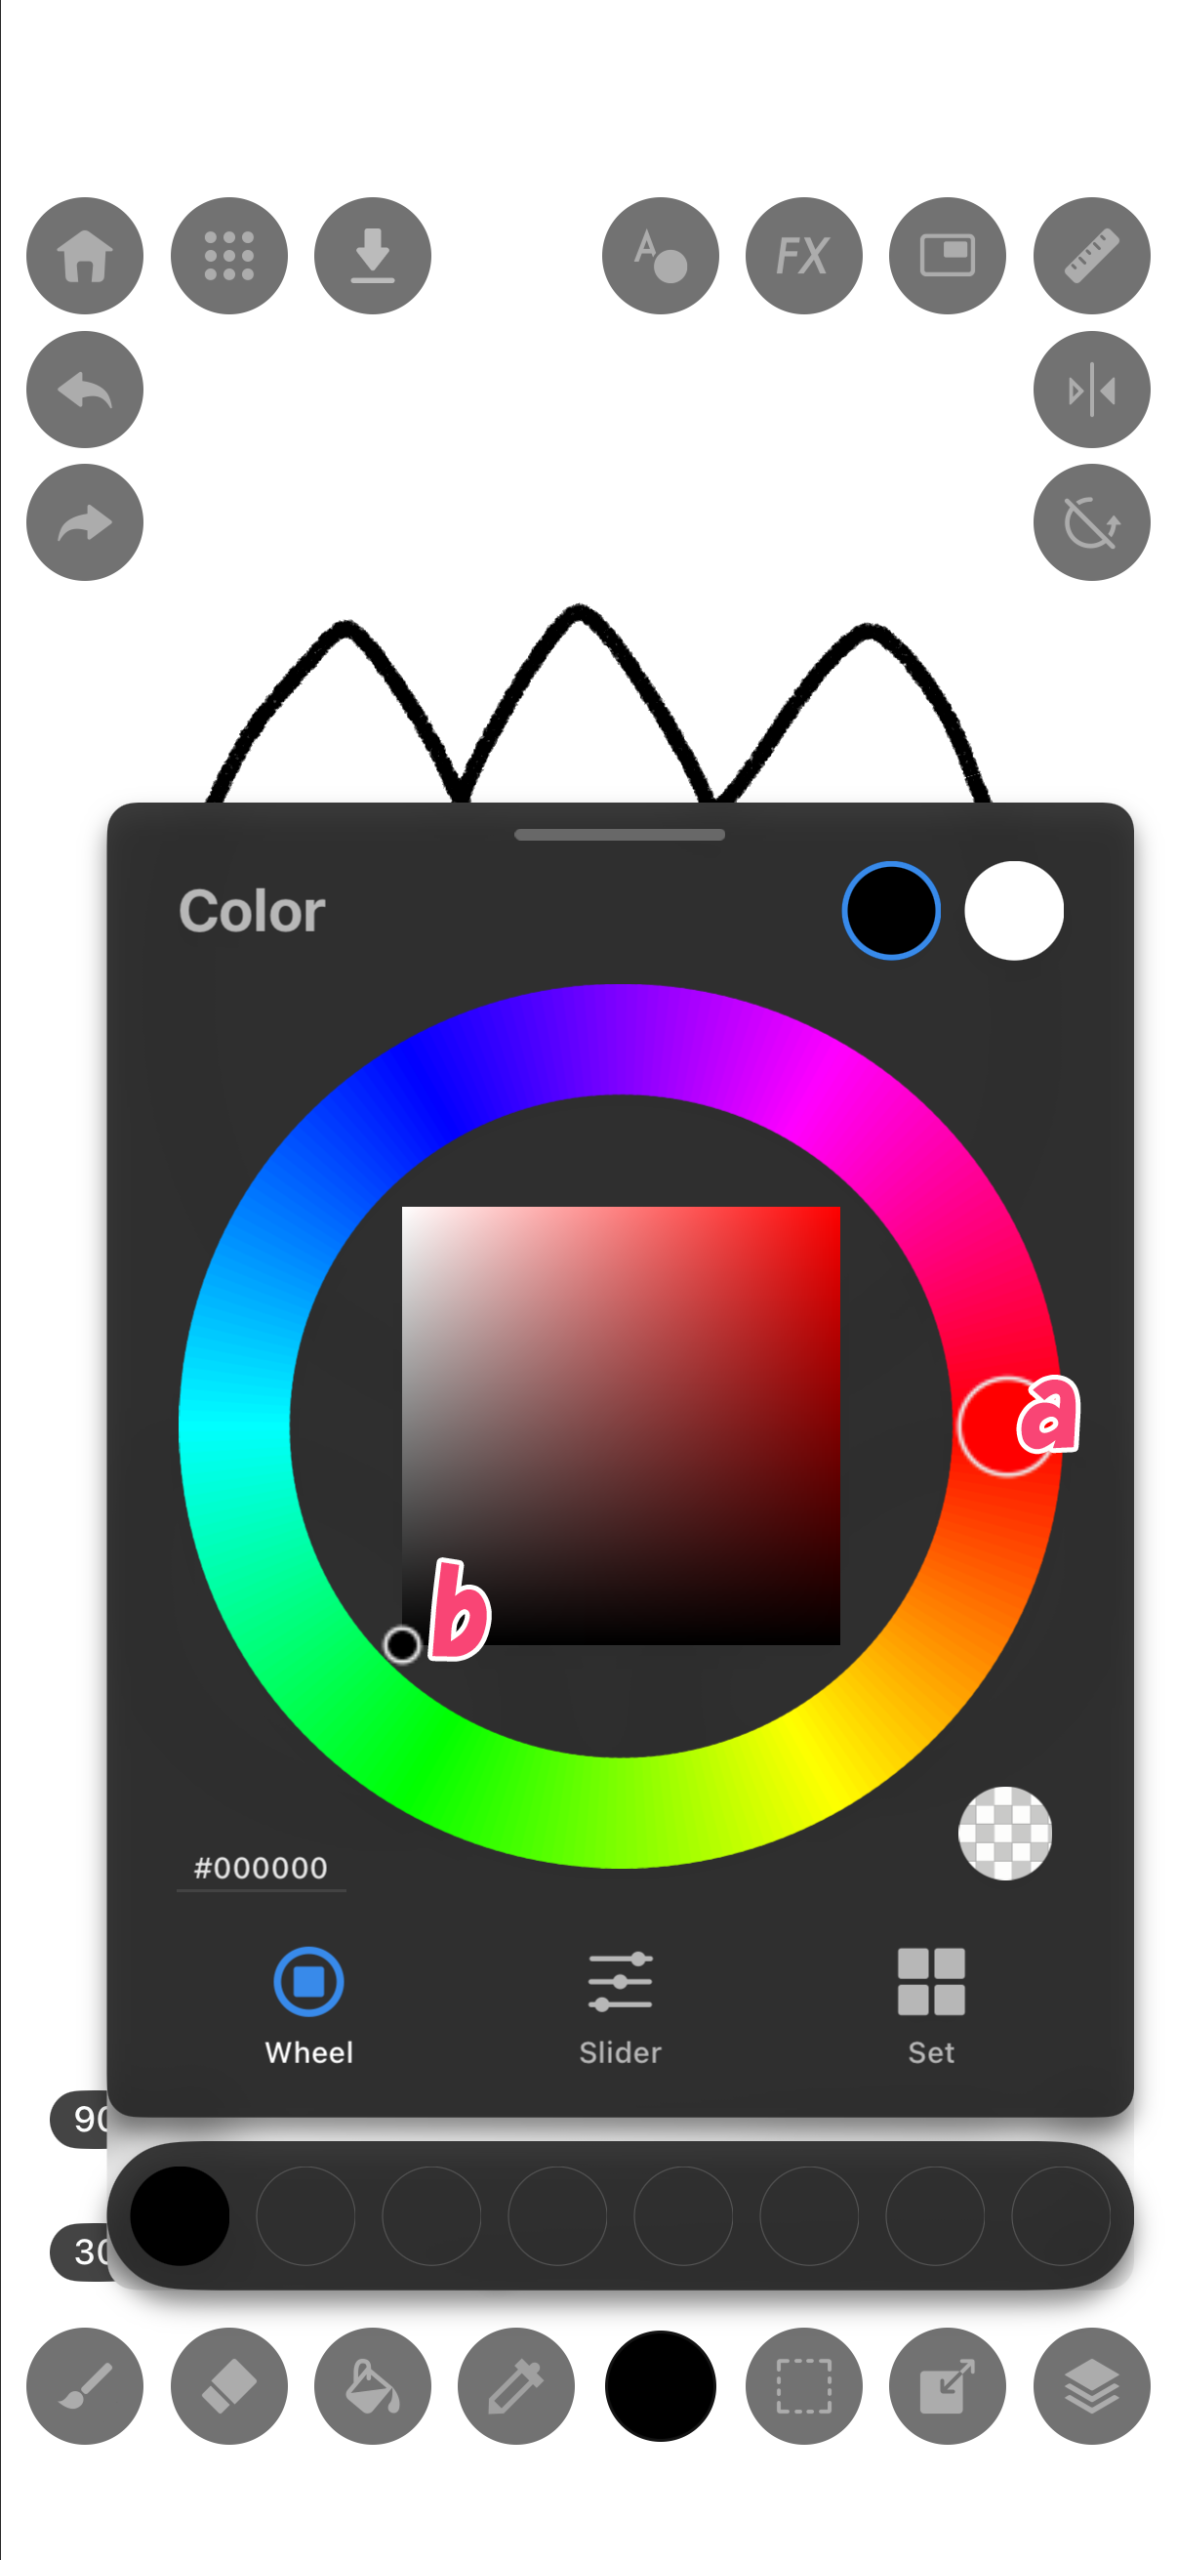
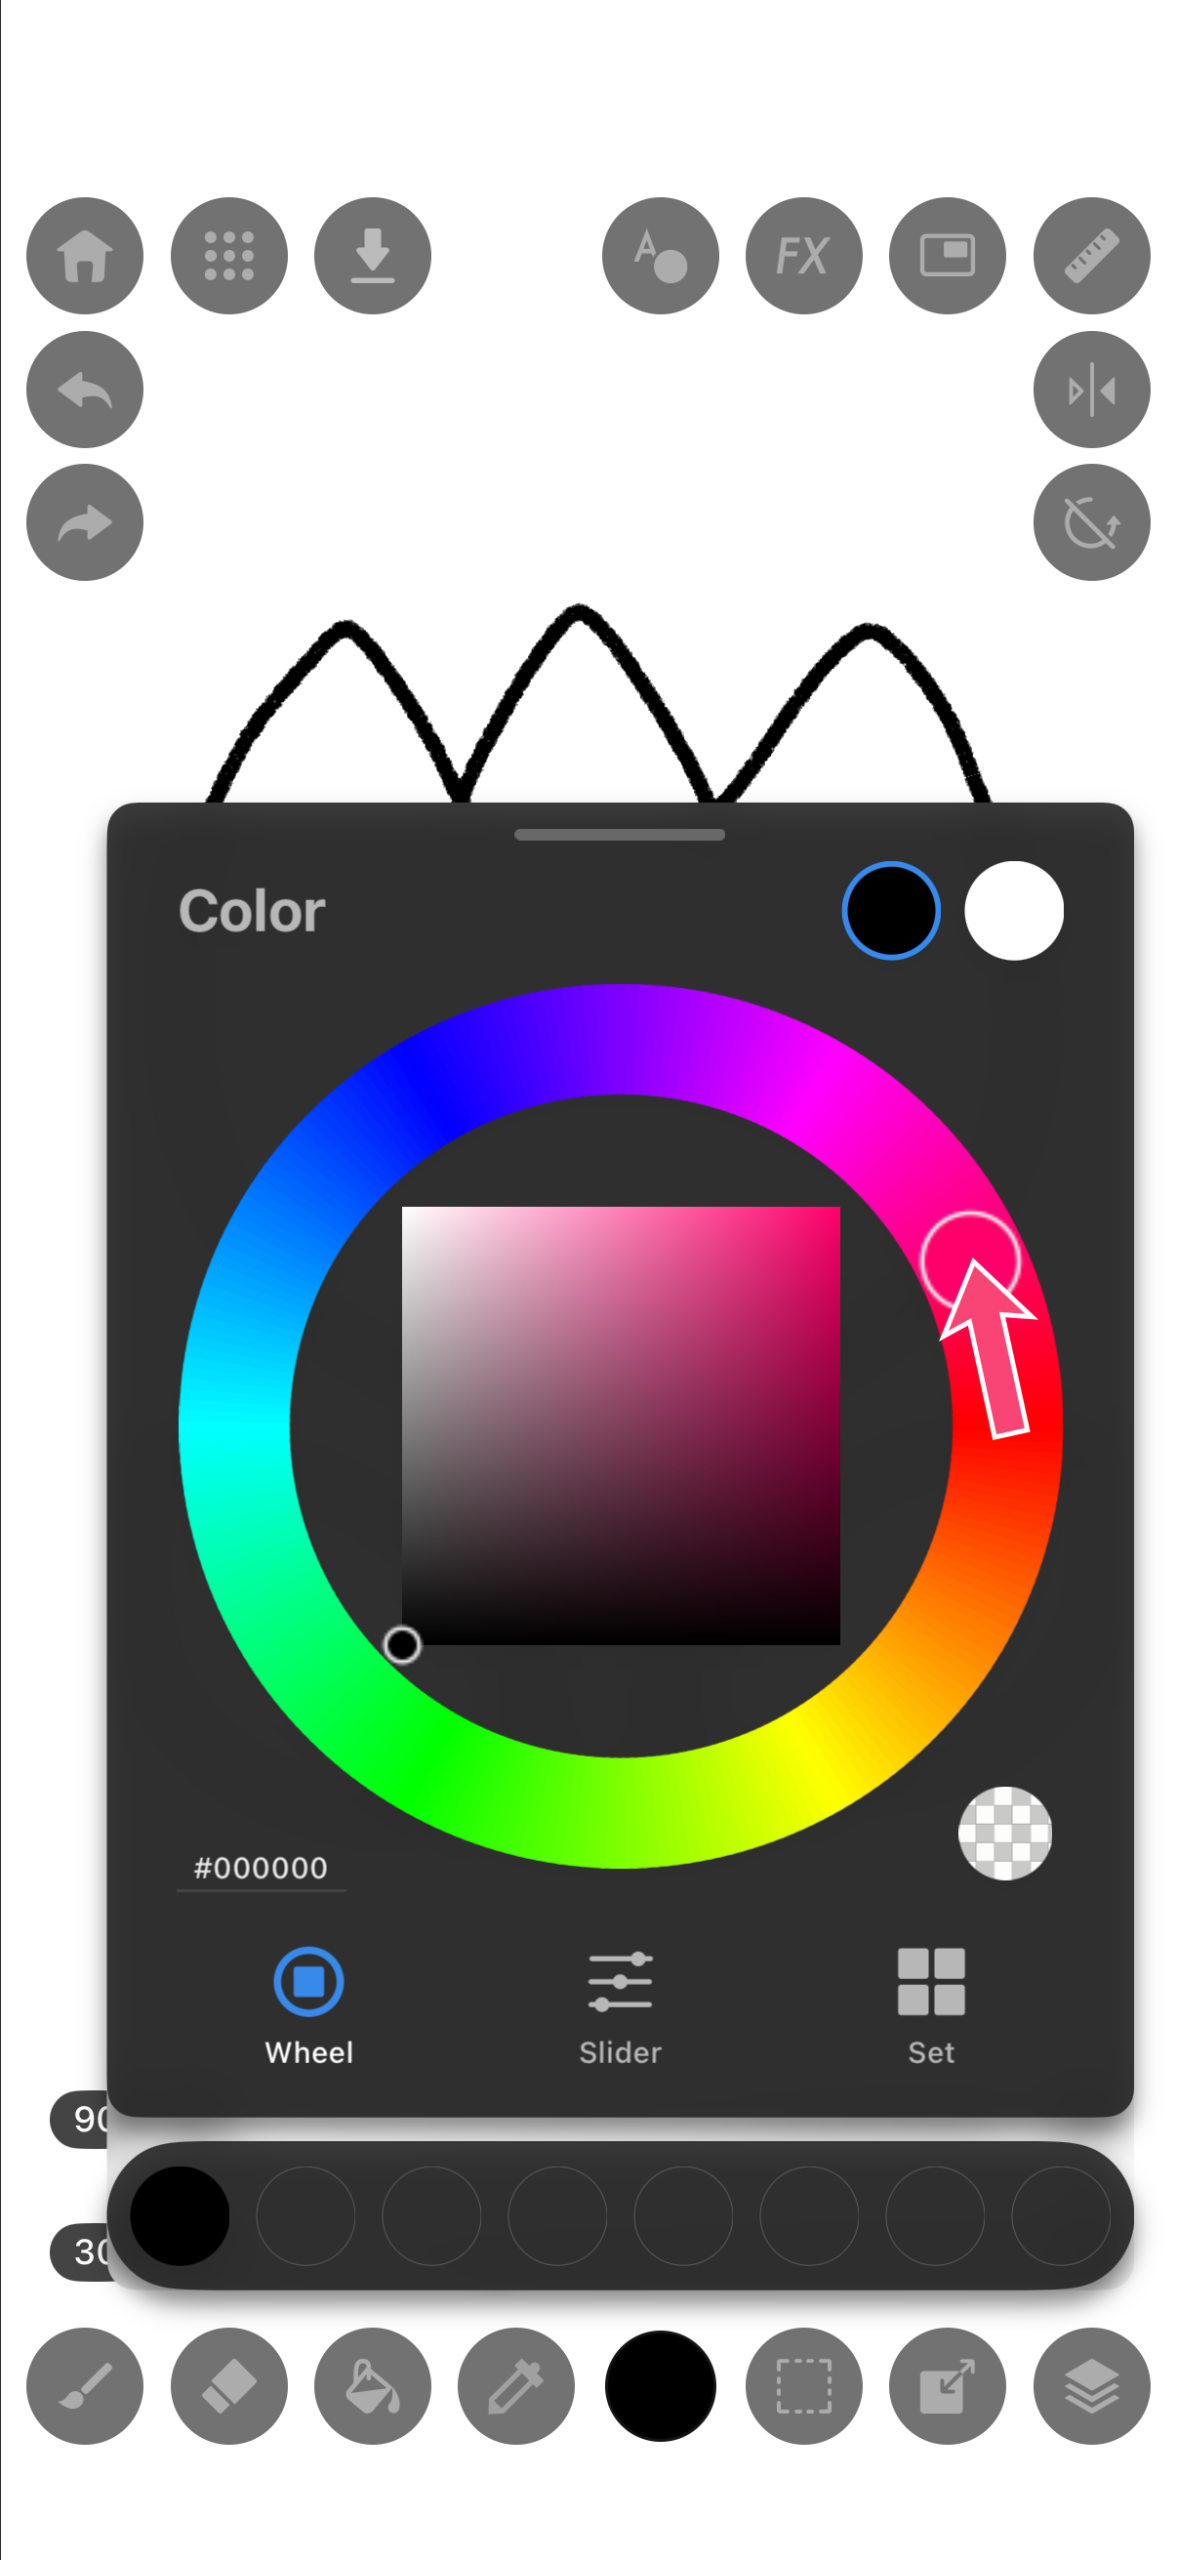
3.Move the pointer on the color wheel to the “Pink” area.
4.Move the pointer inside the square to select a color for the petals. Try moving it around freely!
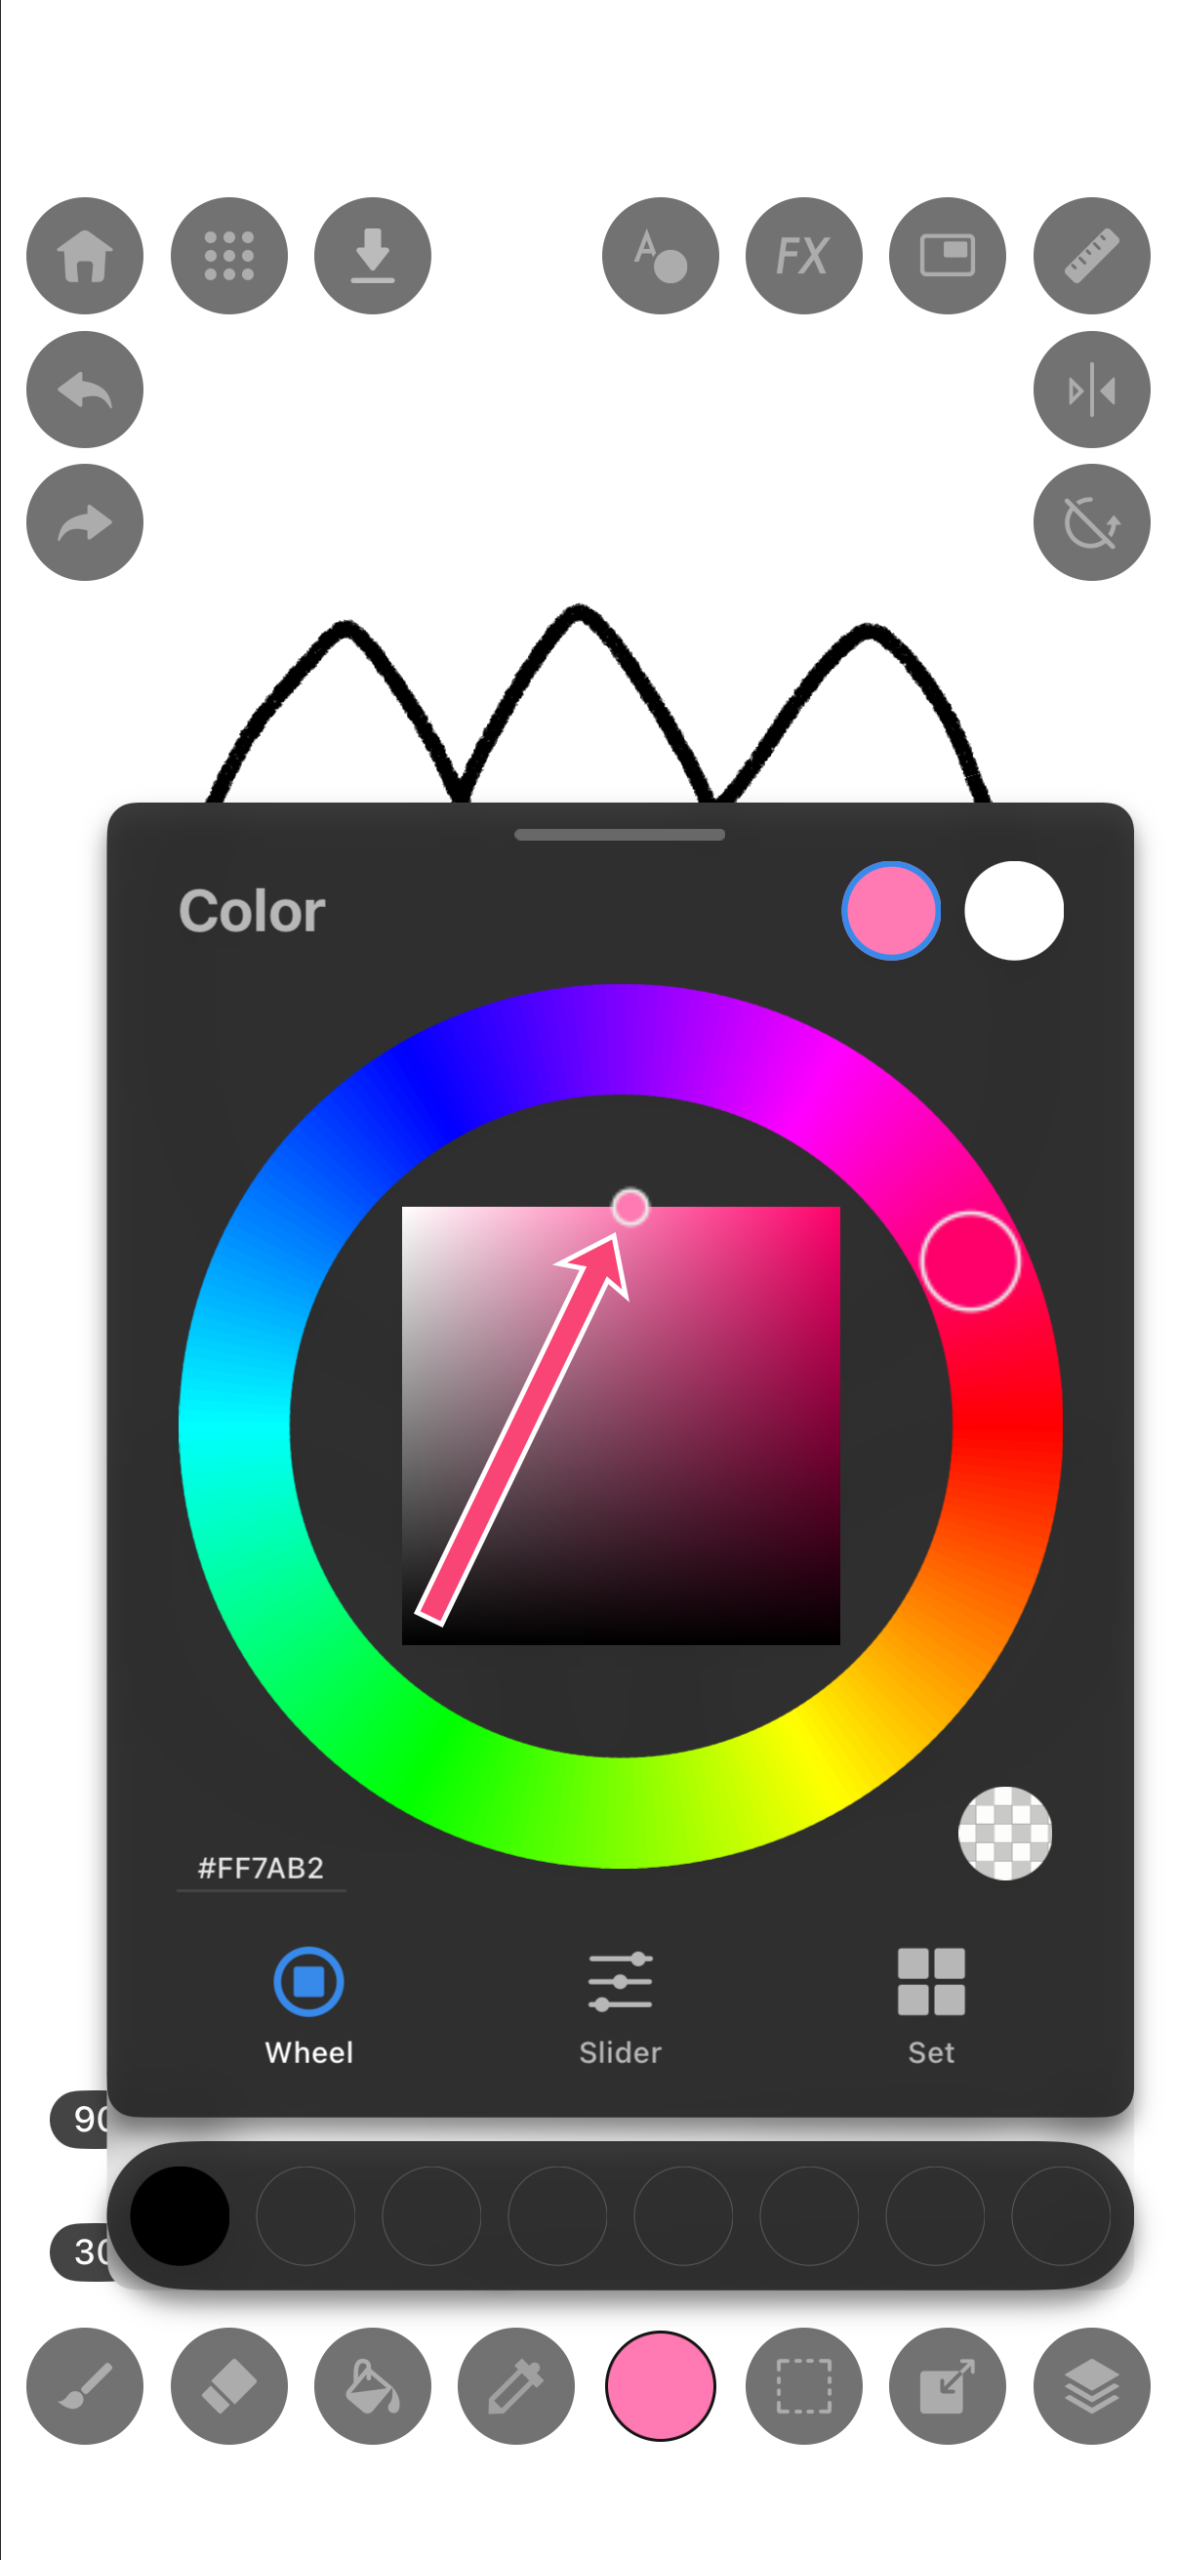
The selected color is shown in “c” or the Color icon.
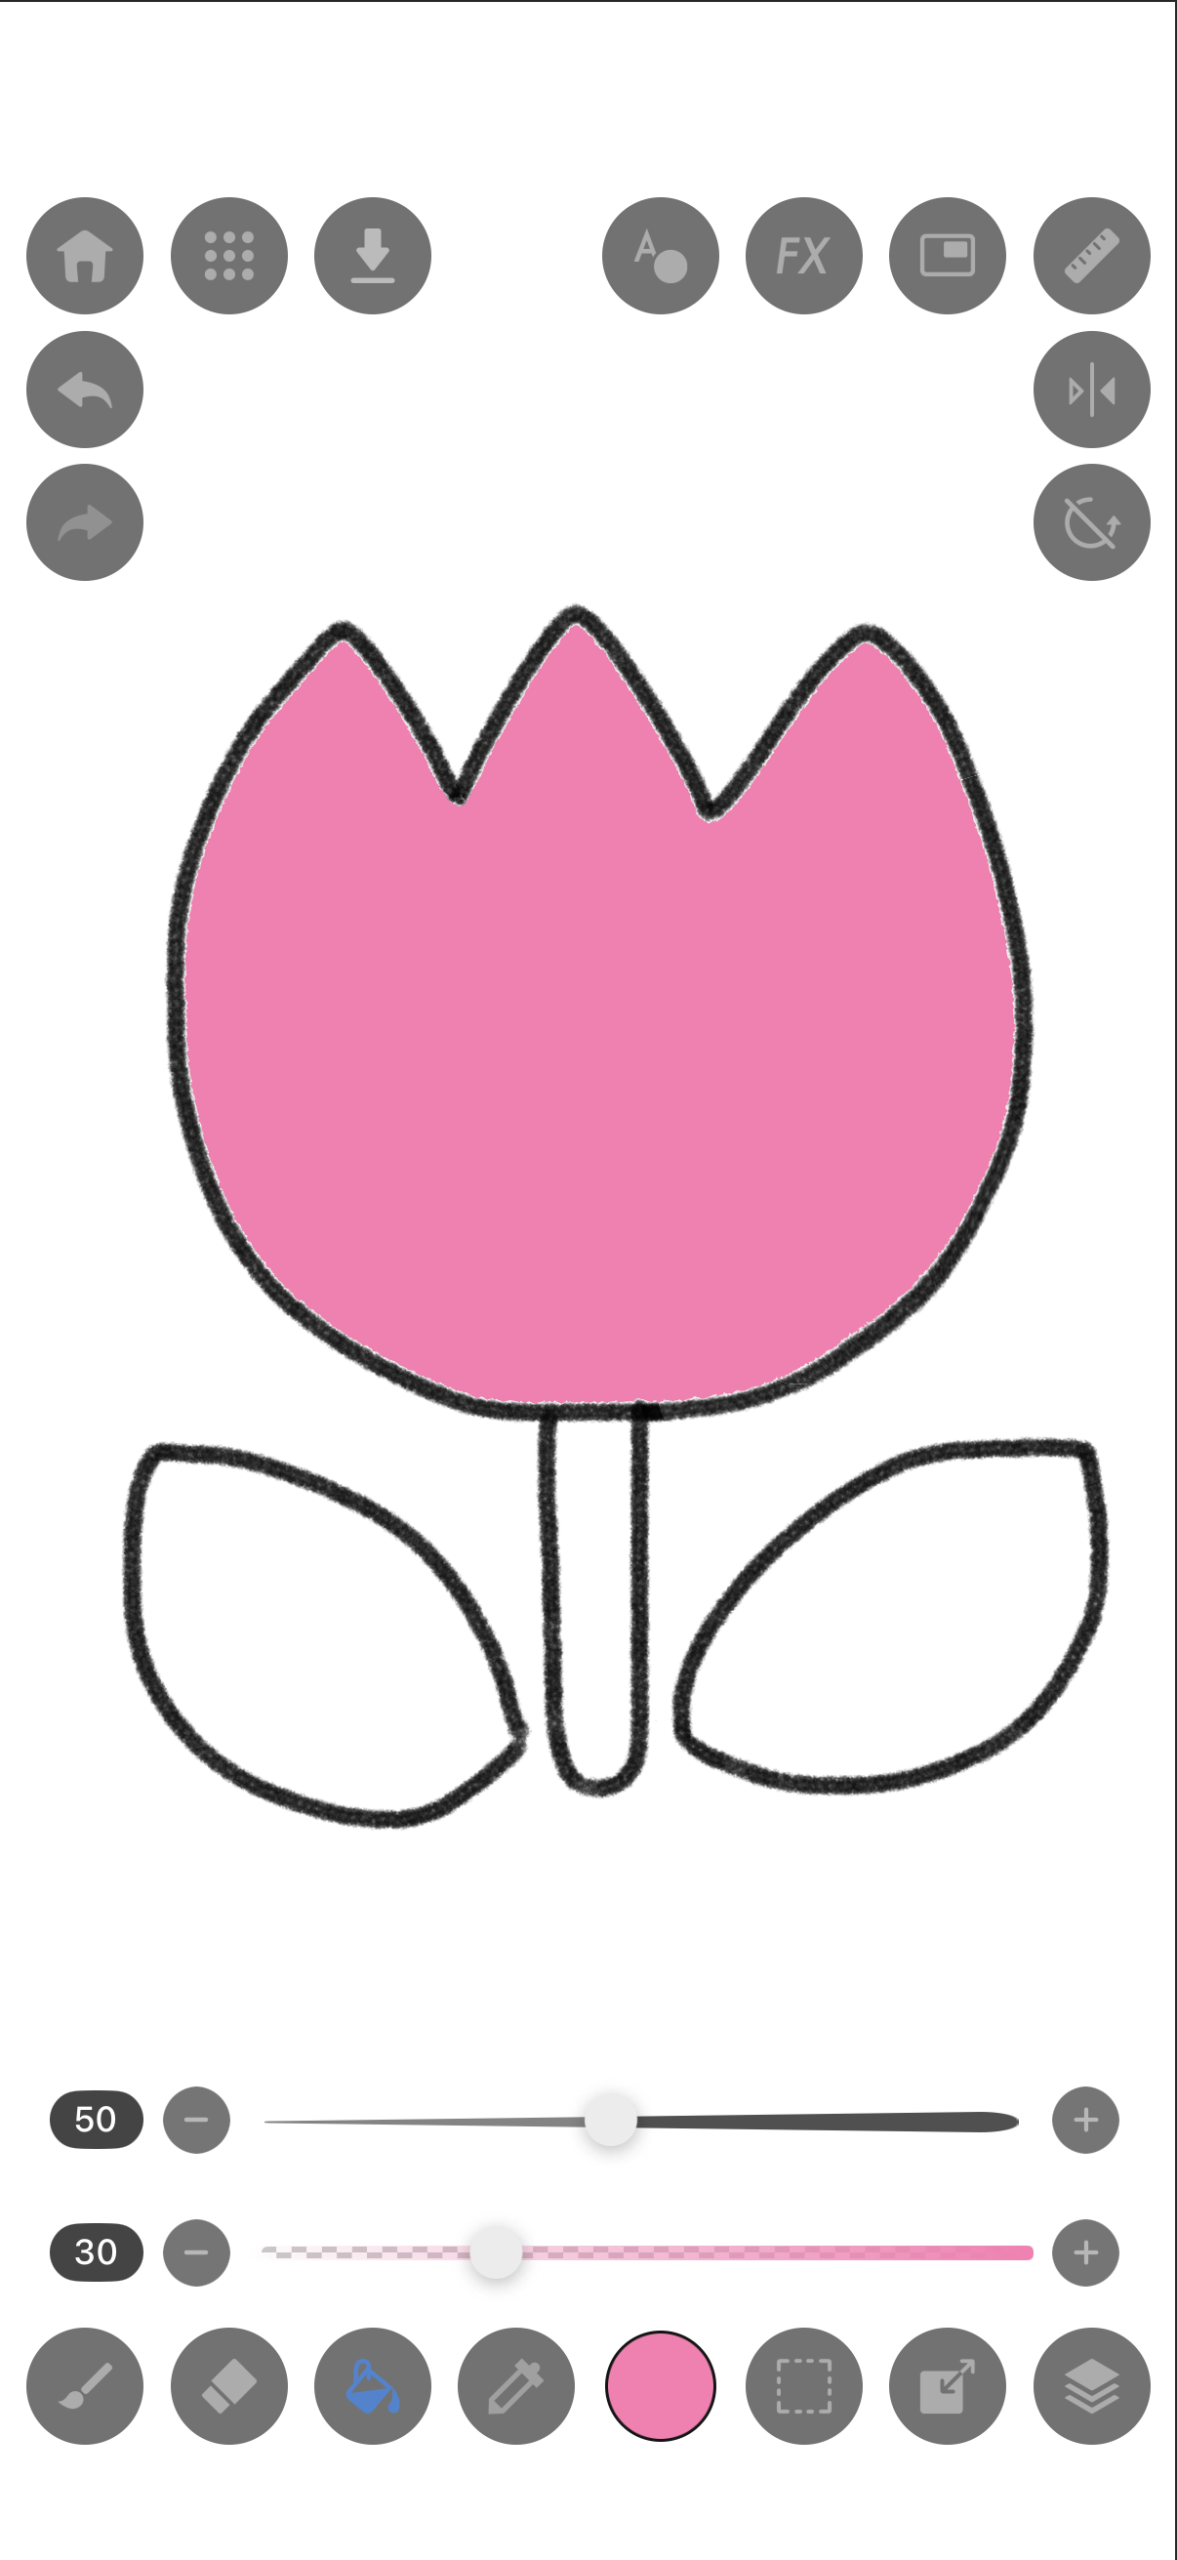
STEP7:Let’s Color the Petals
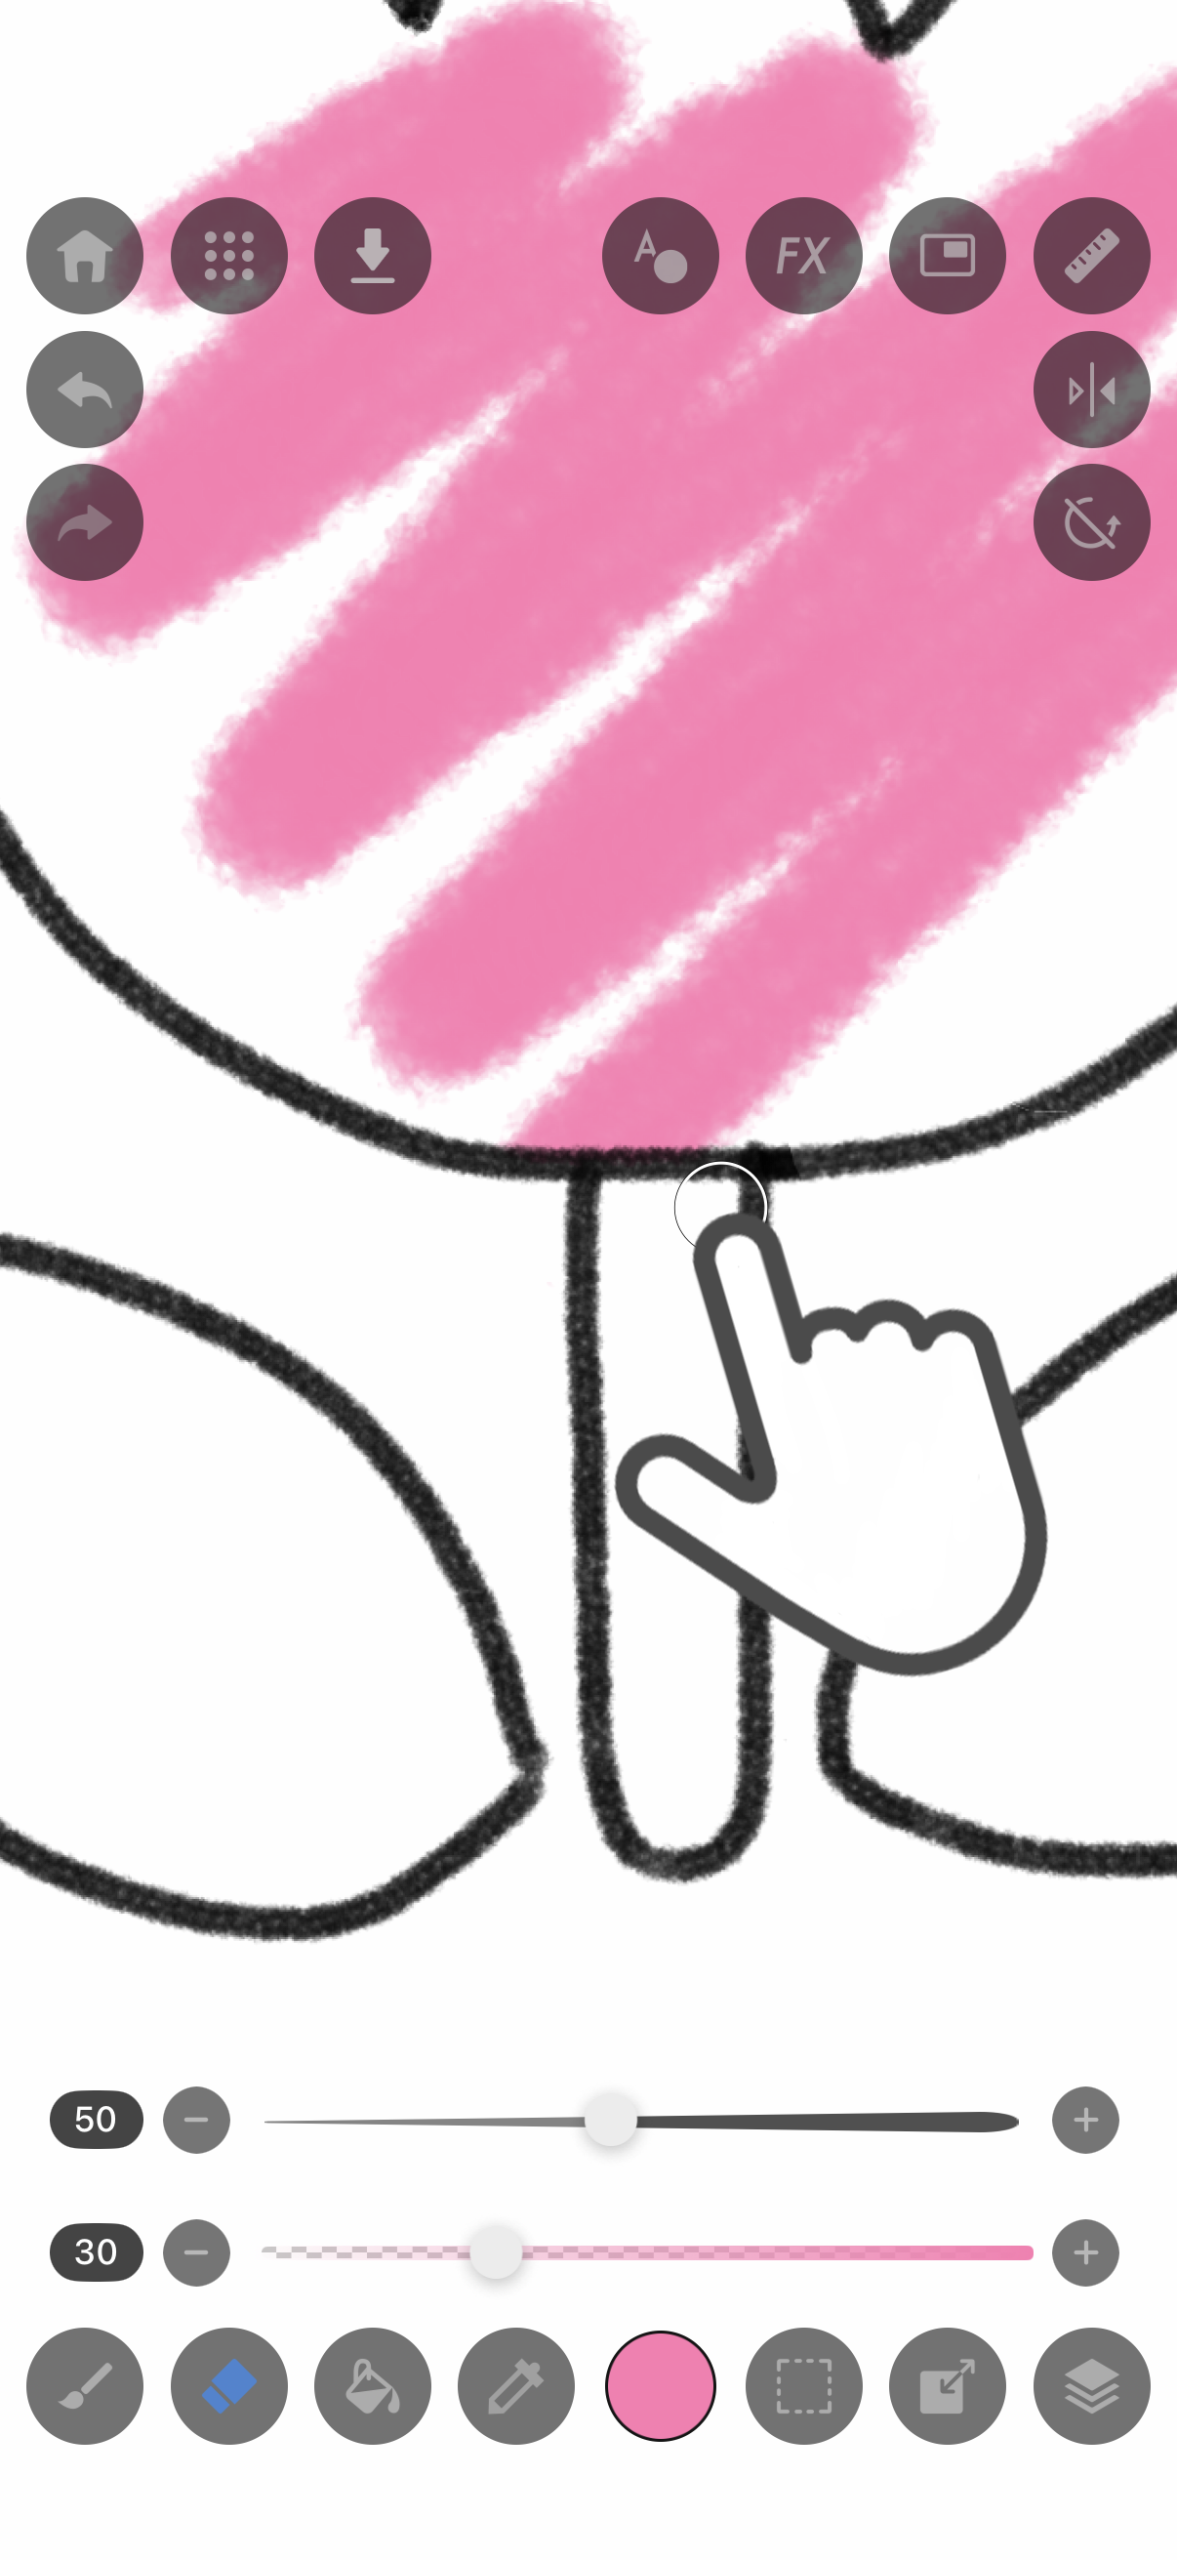
1.Switch back to the “Brush” and color the tulip.
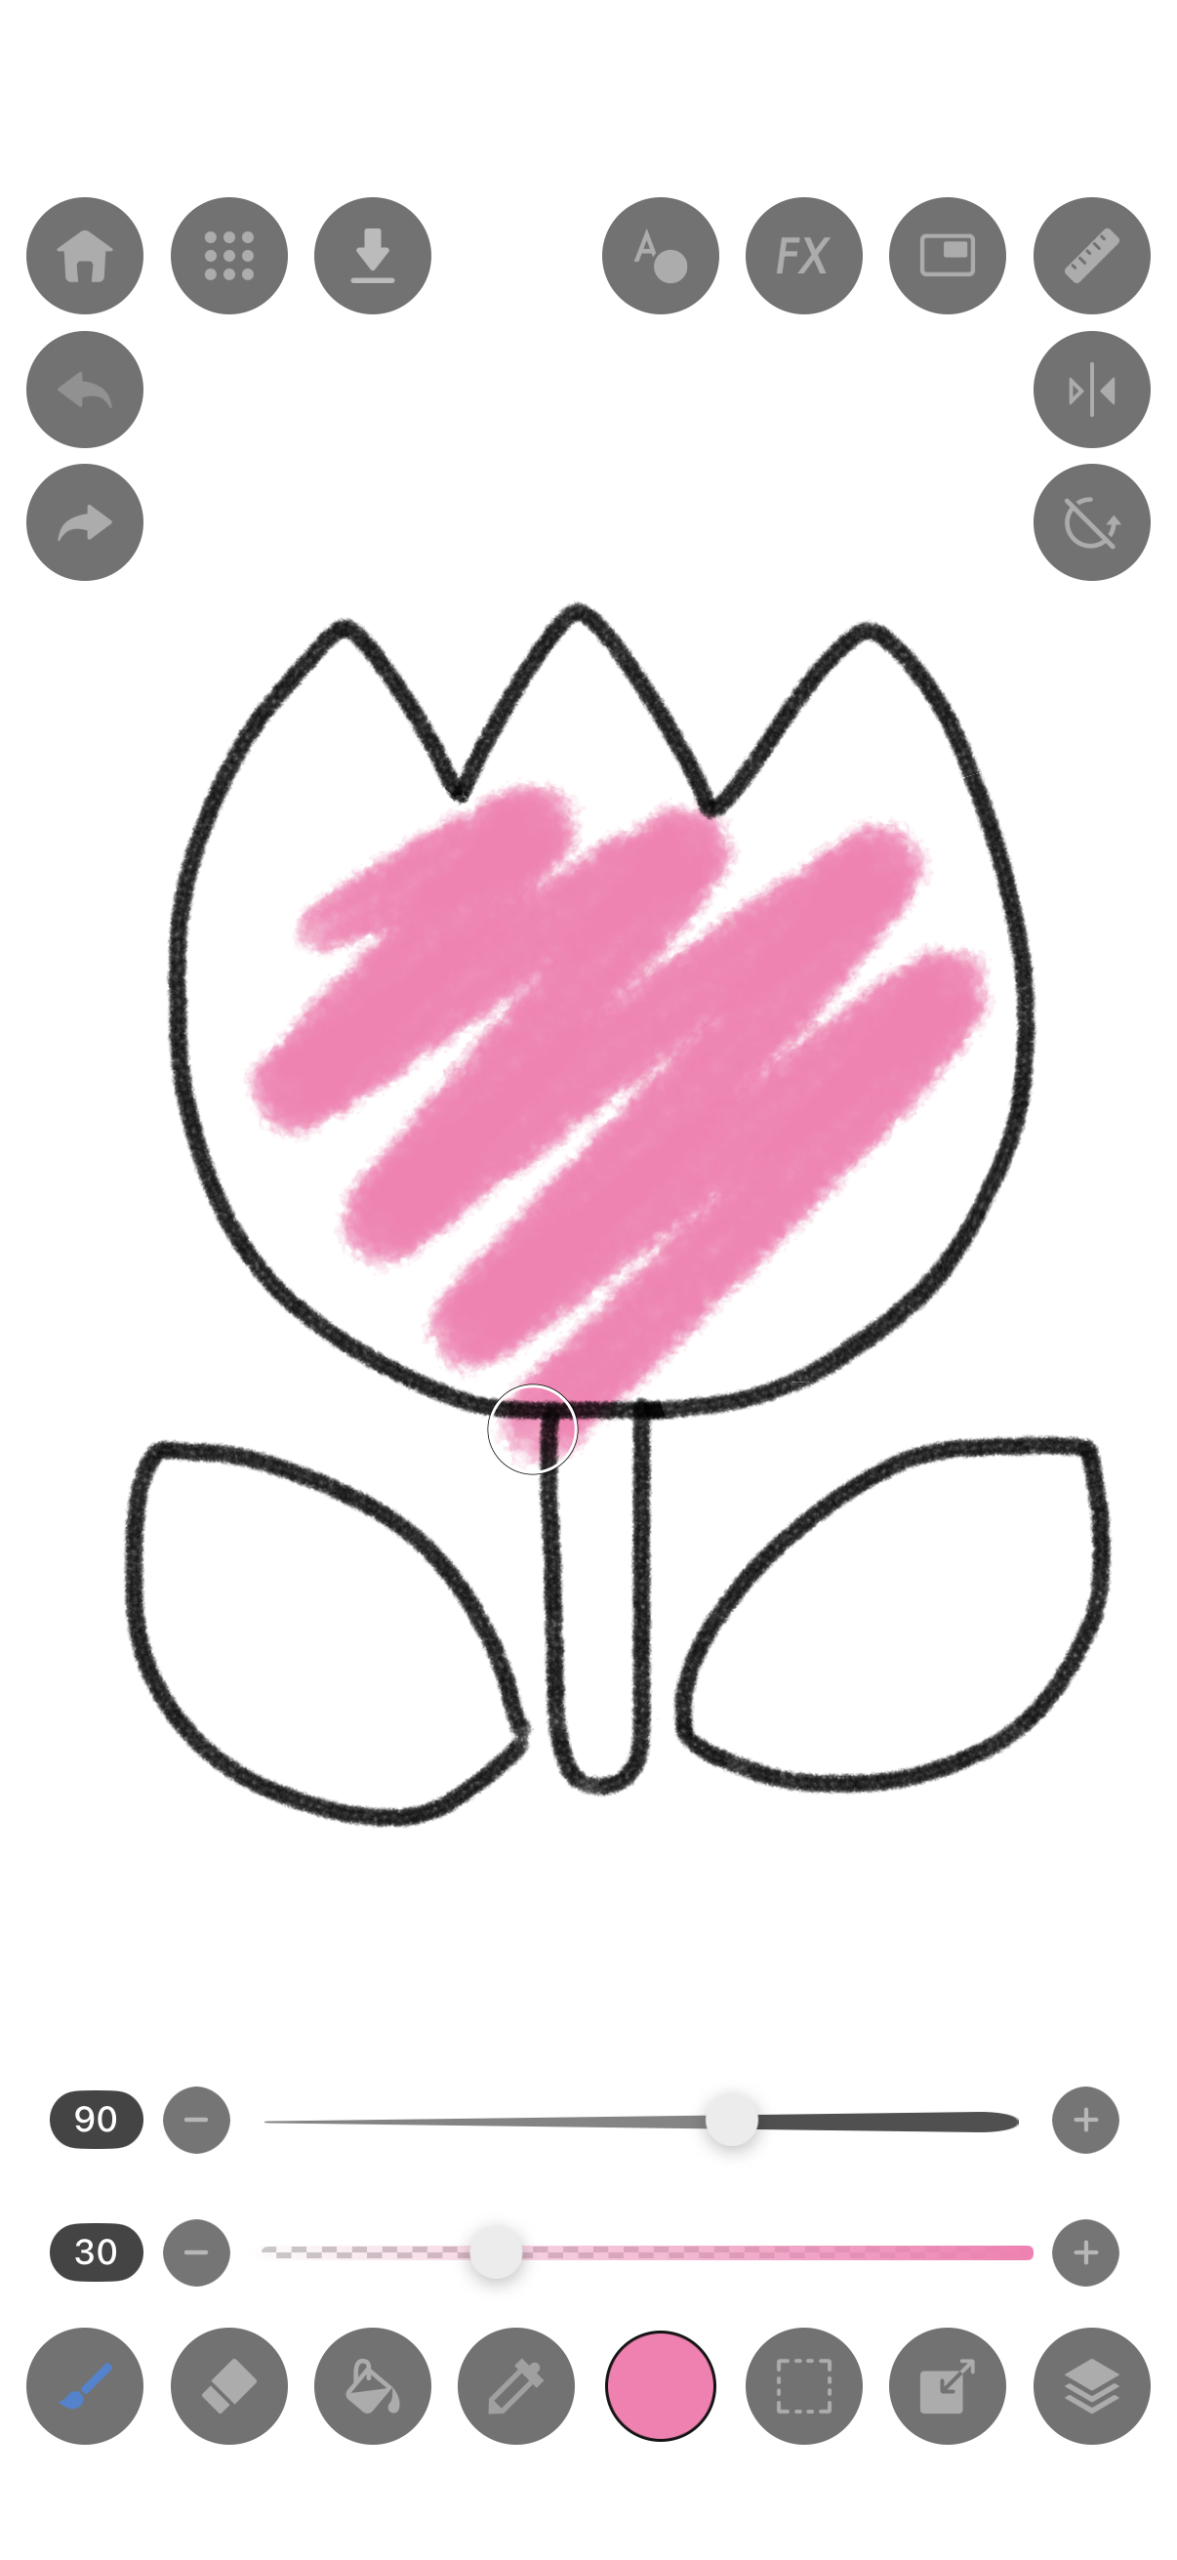
2.If you go outside the lines, switch to the “Eraser” to clean it up.
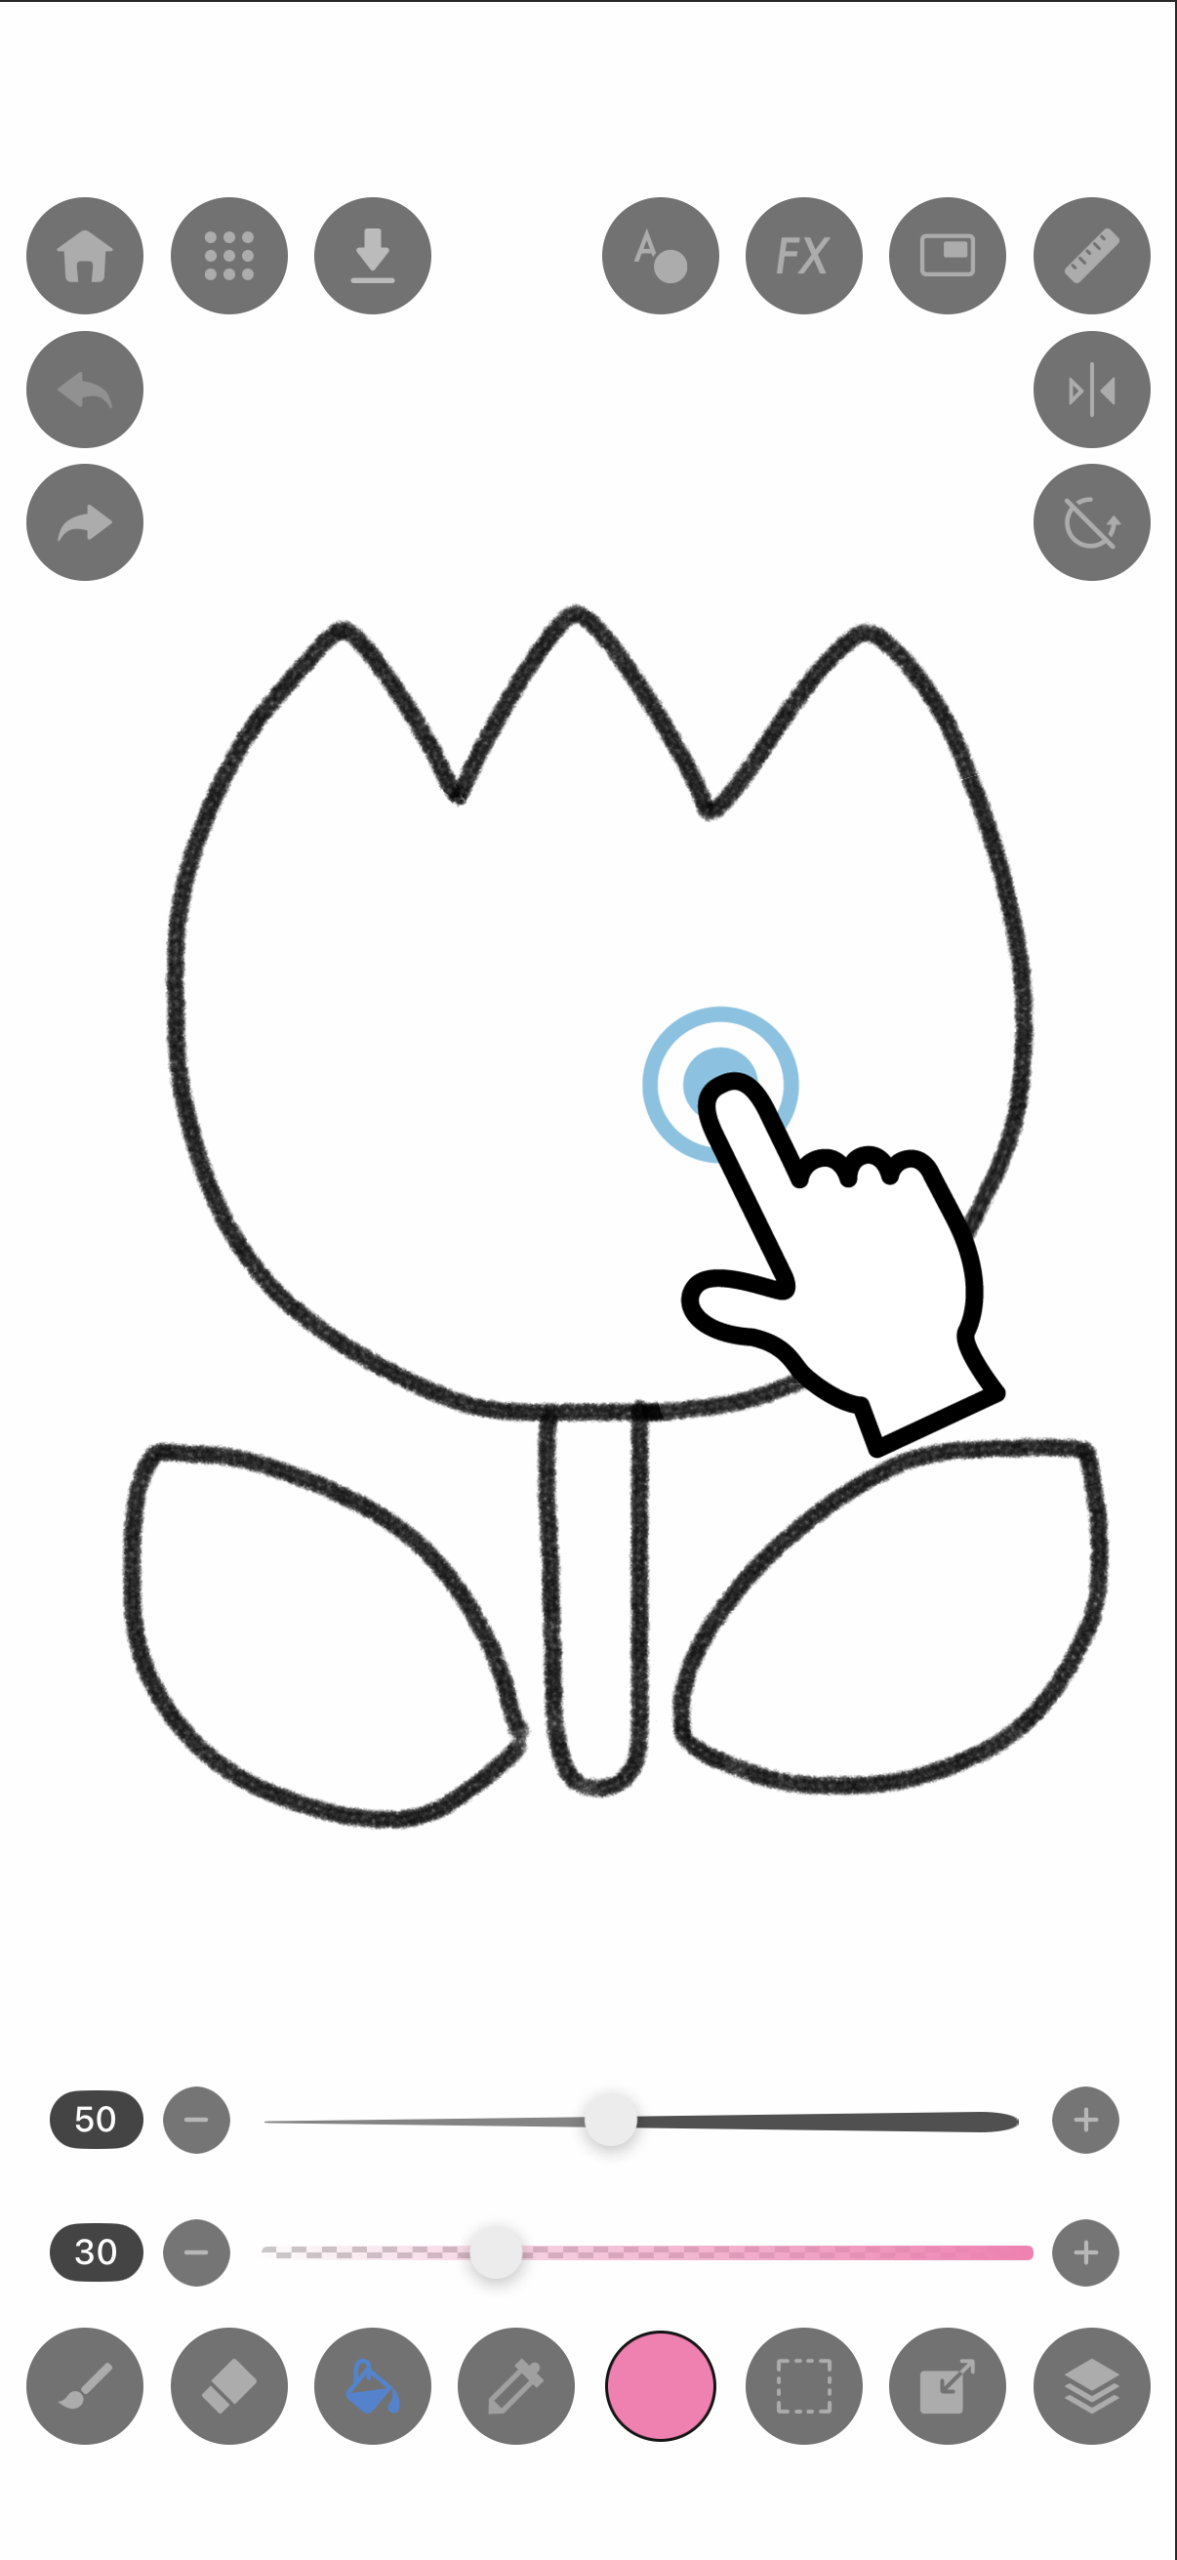
3.【Handy Feature】Color in One Go with the “Bucket”!
Is coloring large areas too much work? That’s where the “Bucket tool” comes in!
1.Tap the “Bucket icon”.
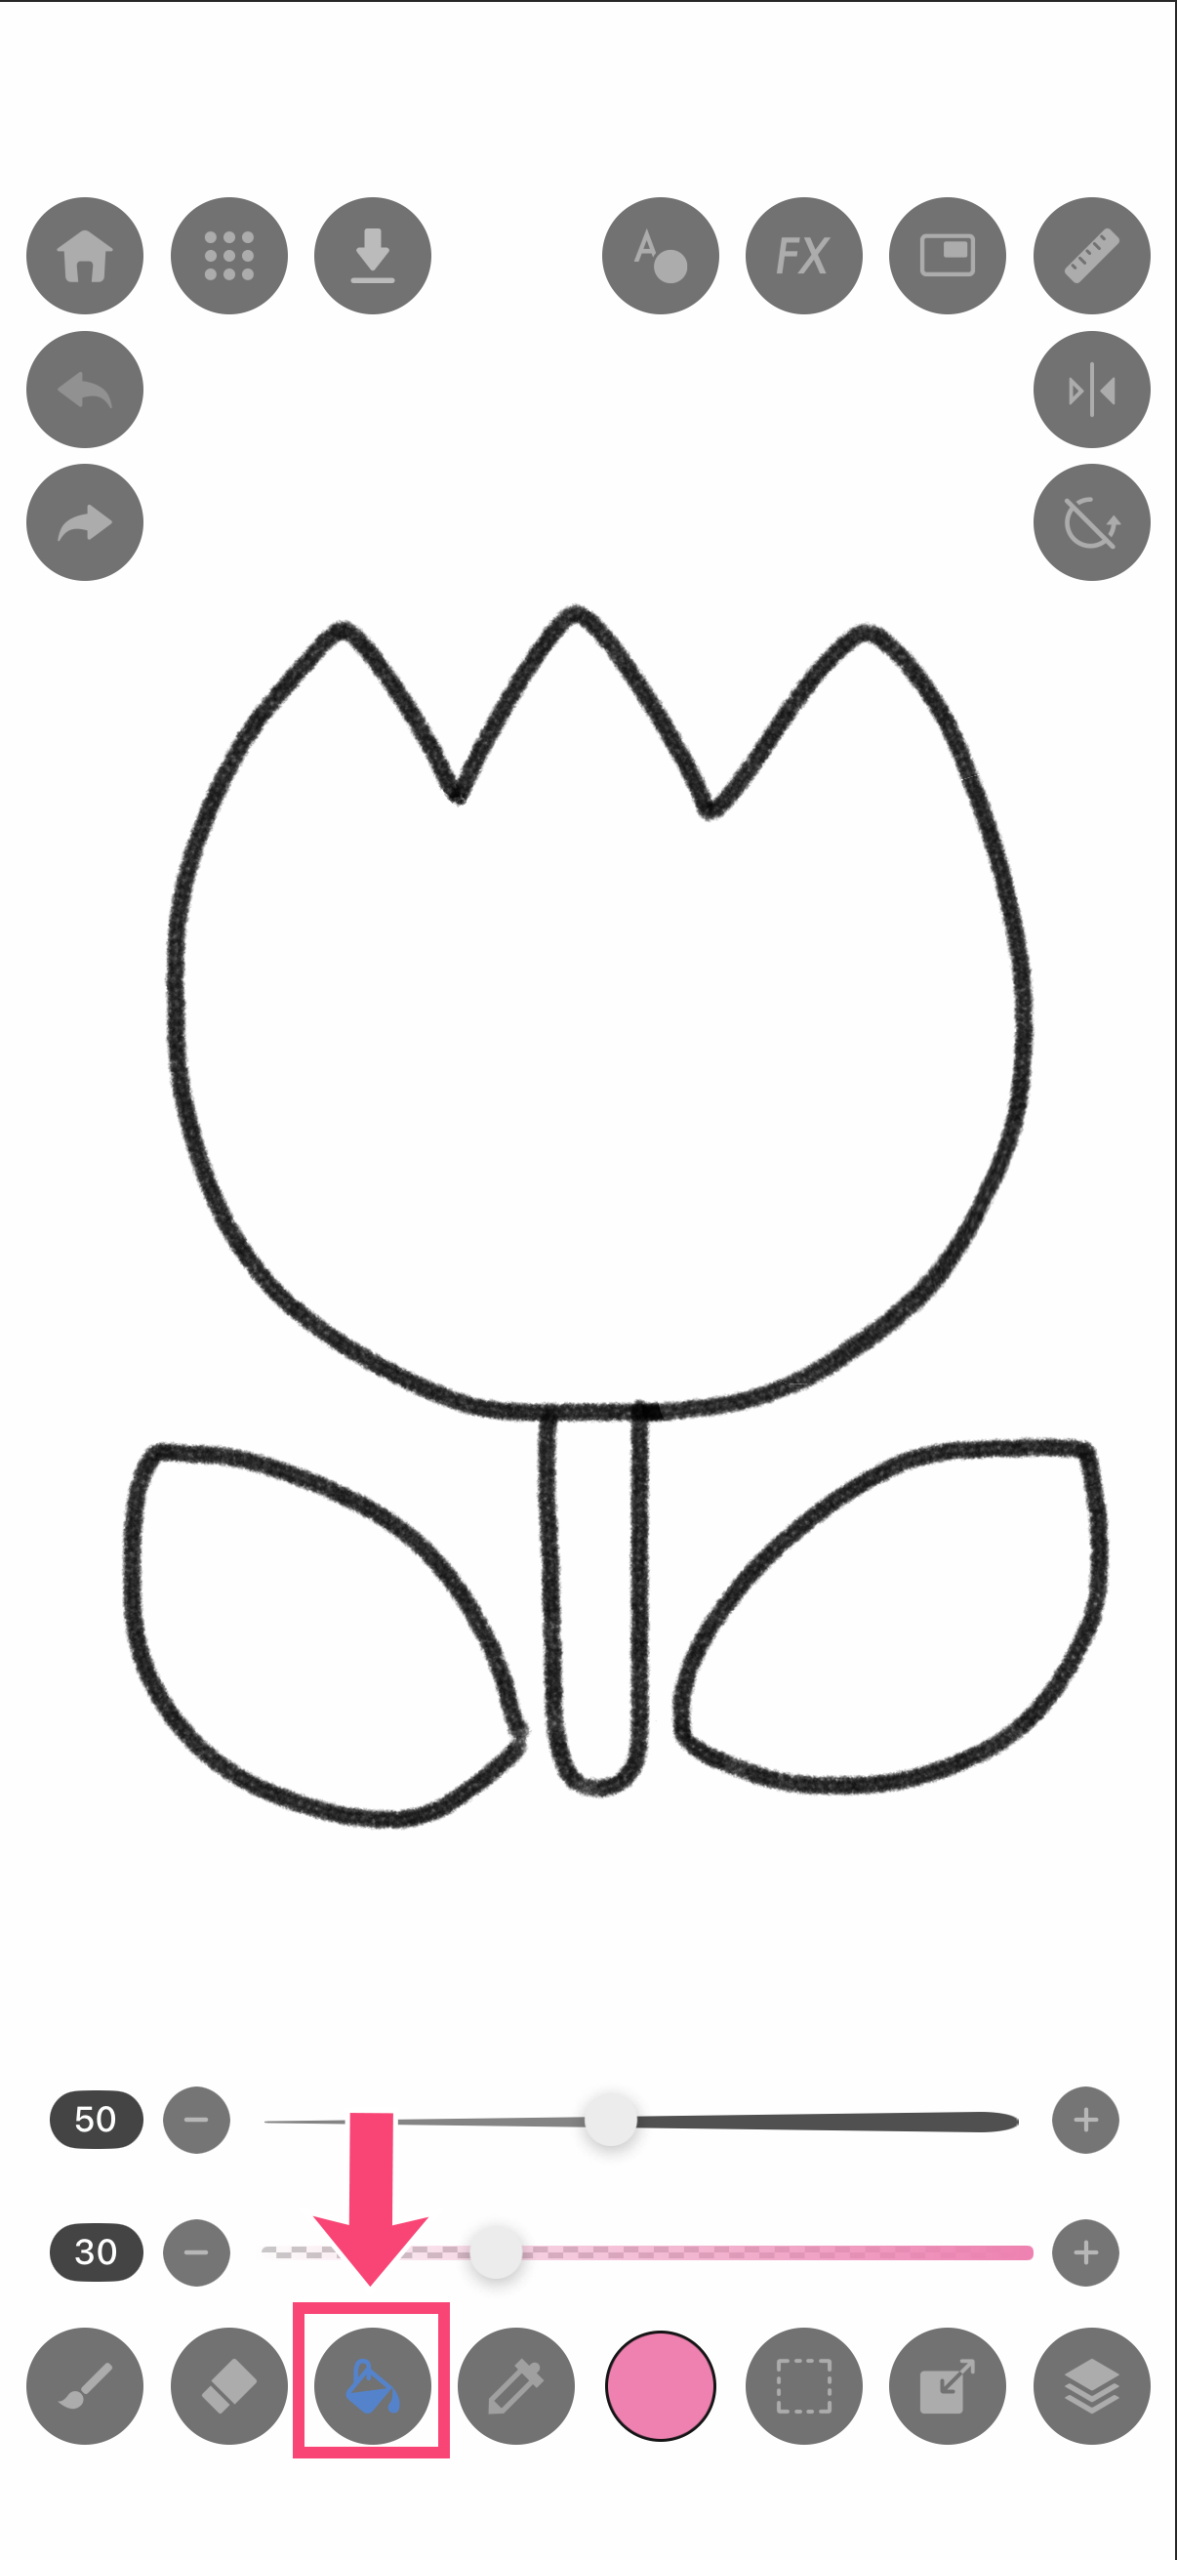
2.Just tap the area you want to fill!
STEP8:Let’s Color the Leaves
Let’s use what you’ve learned to color the leaves!
1.Add a new layer again, then drag it to the very bottom.

2.Use the “Color icon” to select green.
3.Now, let’s color the leaves.
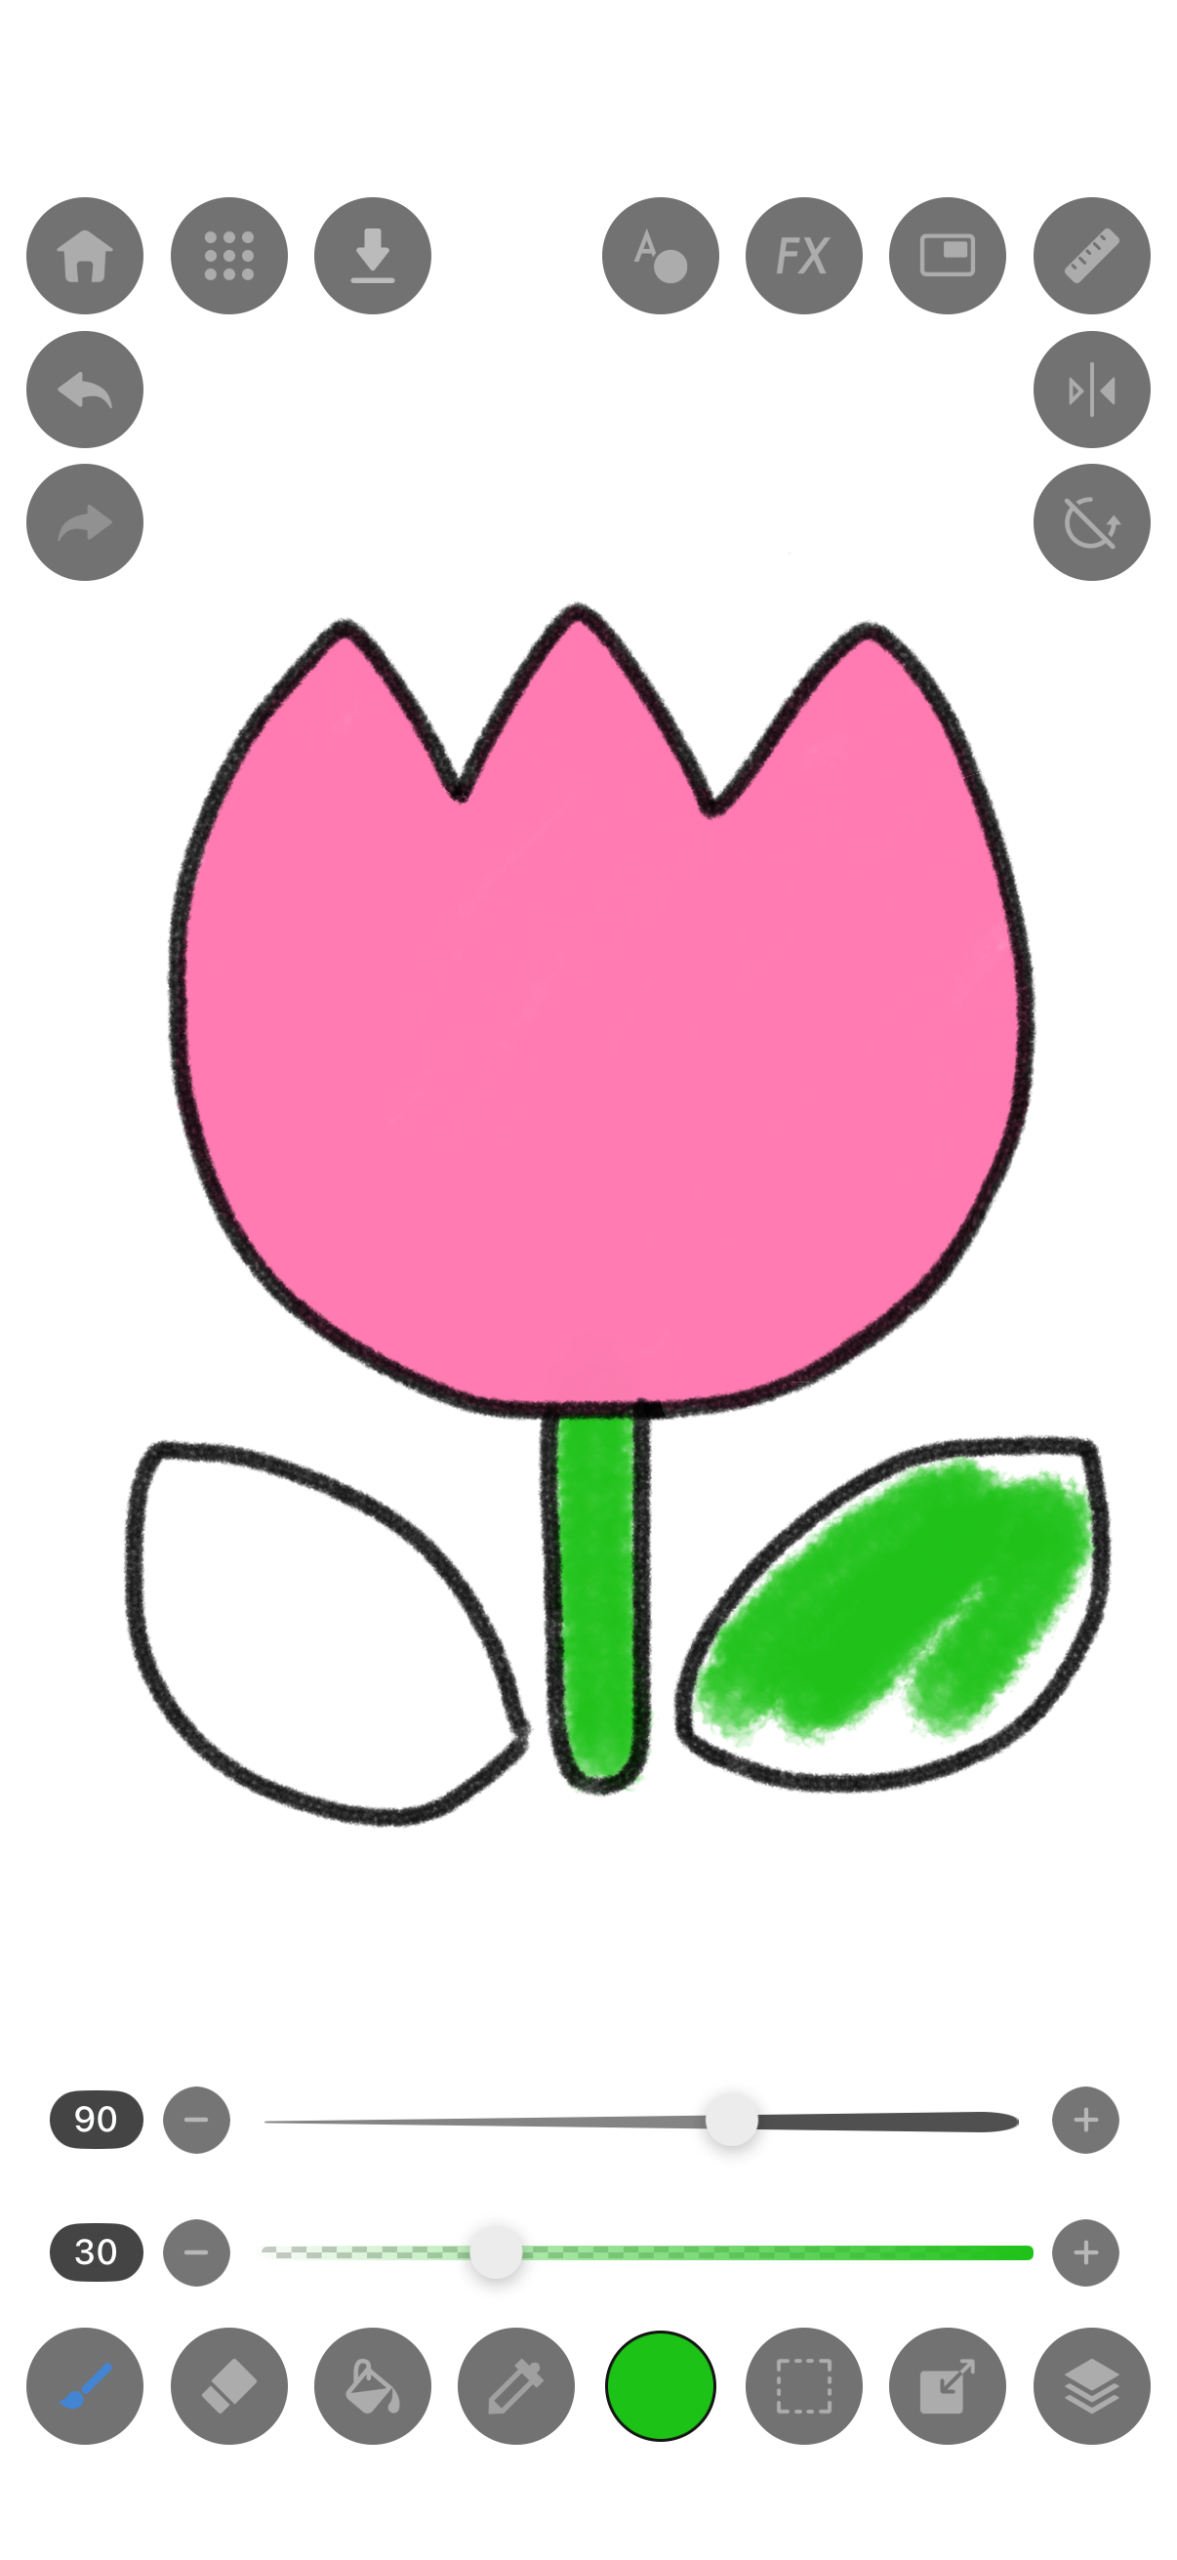
4.The tulip is complete!

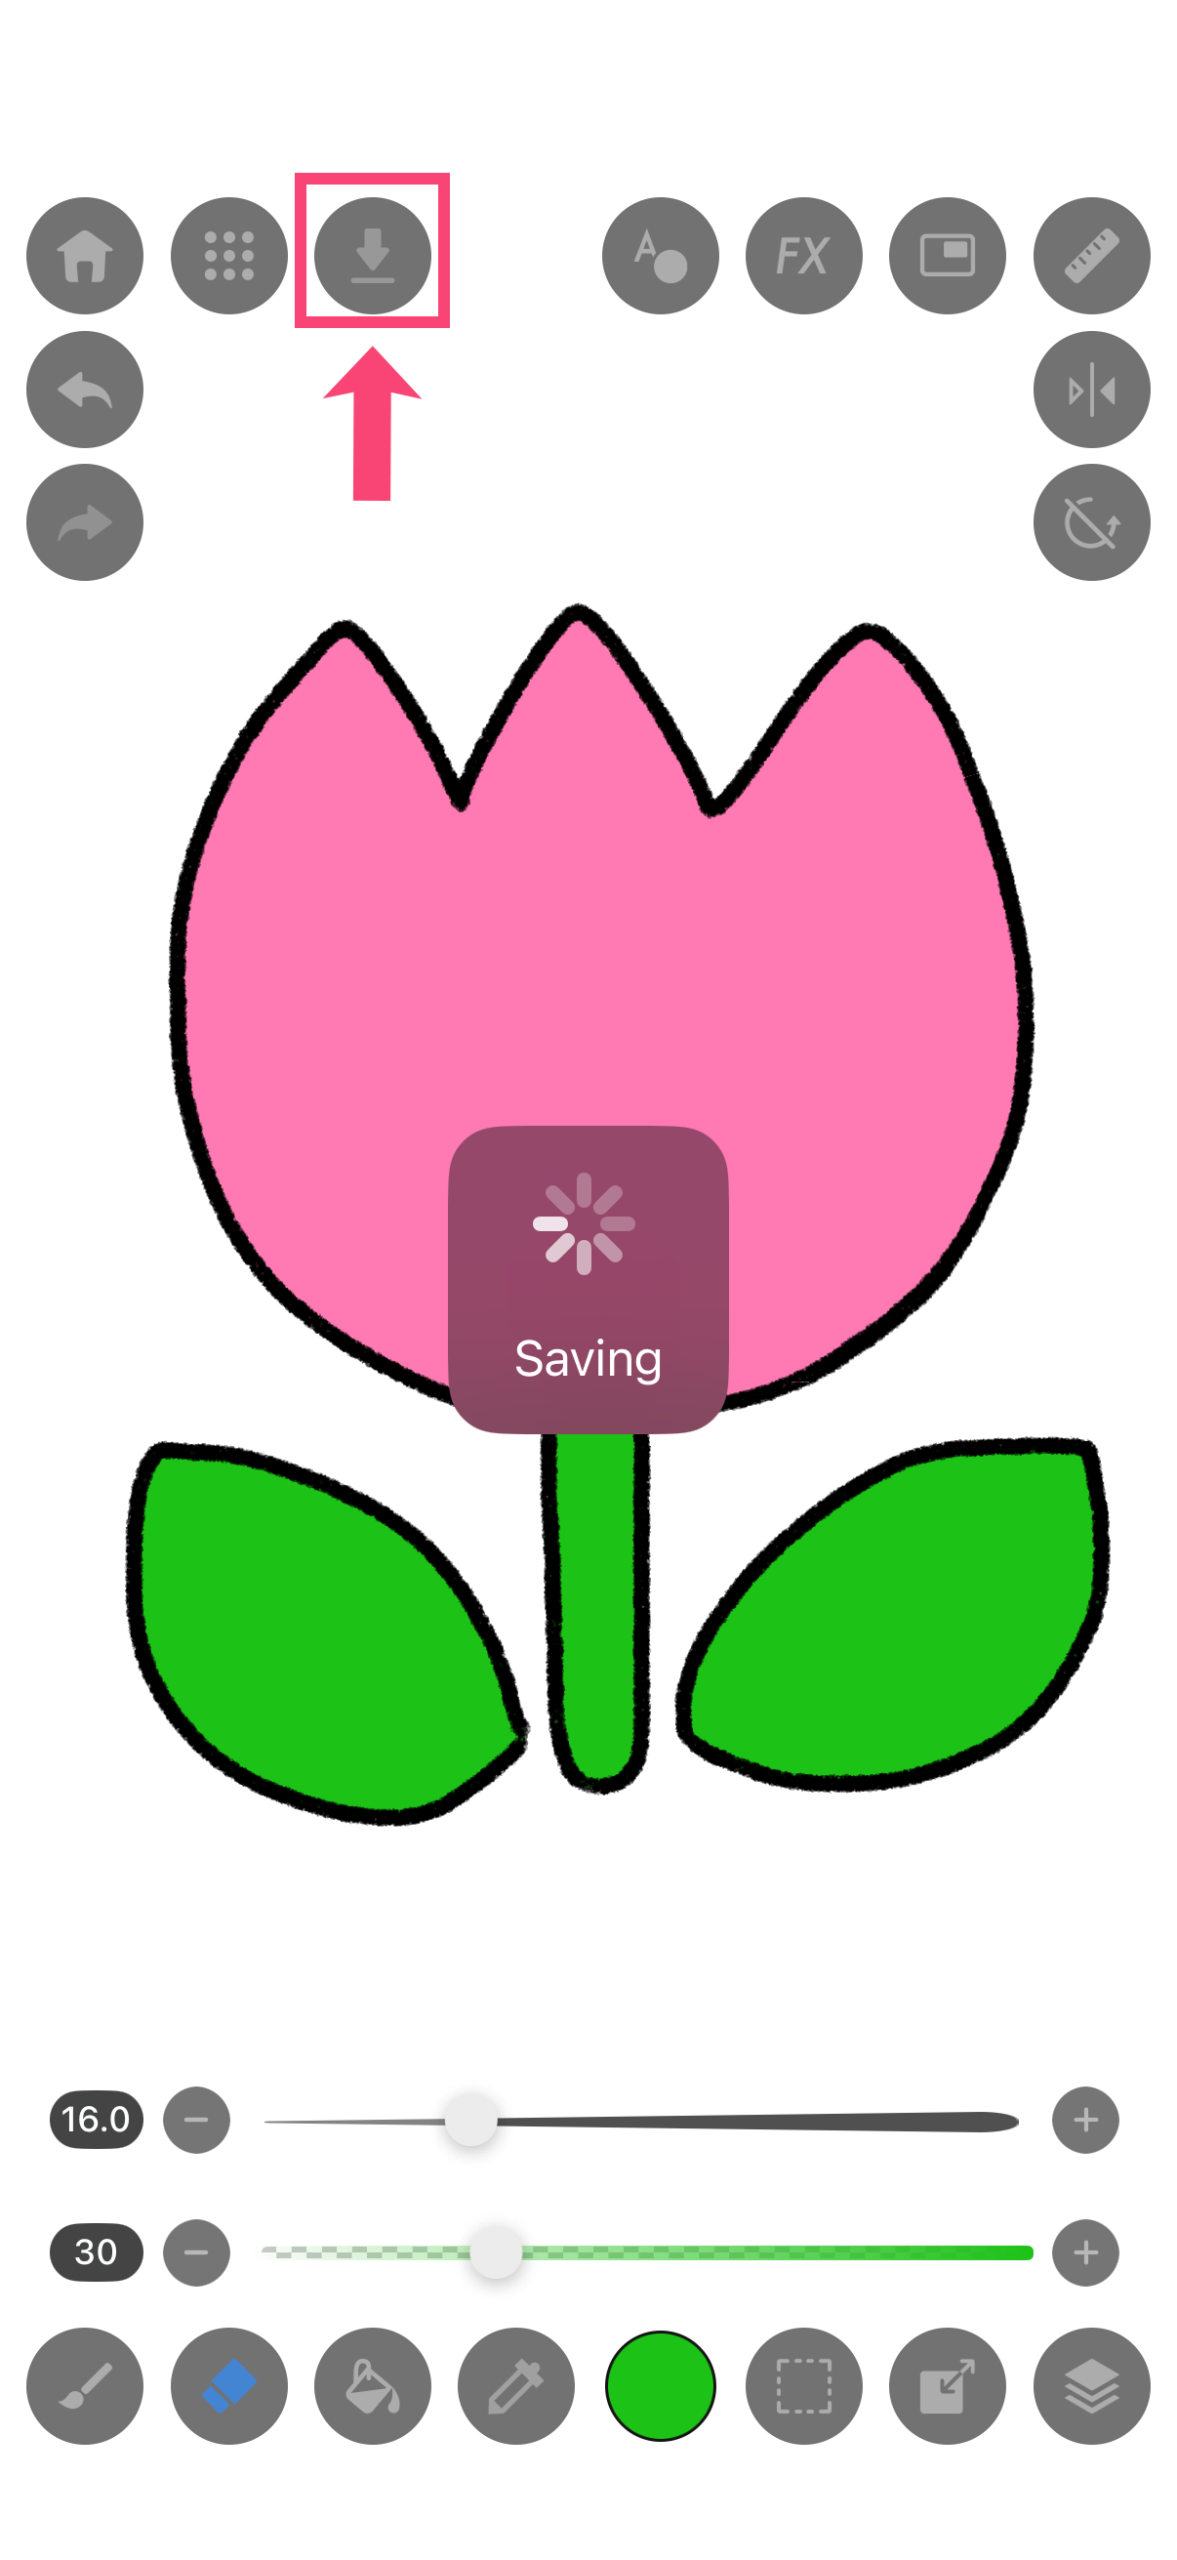
STEP9:Let’s Save Your Artwork
1.Once your artwork is complete, save it first! Tap the “Down Arrow icon” to save it to the app.
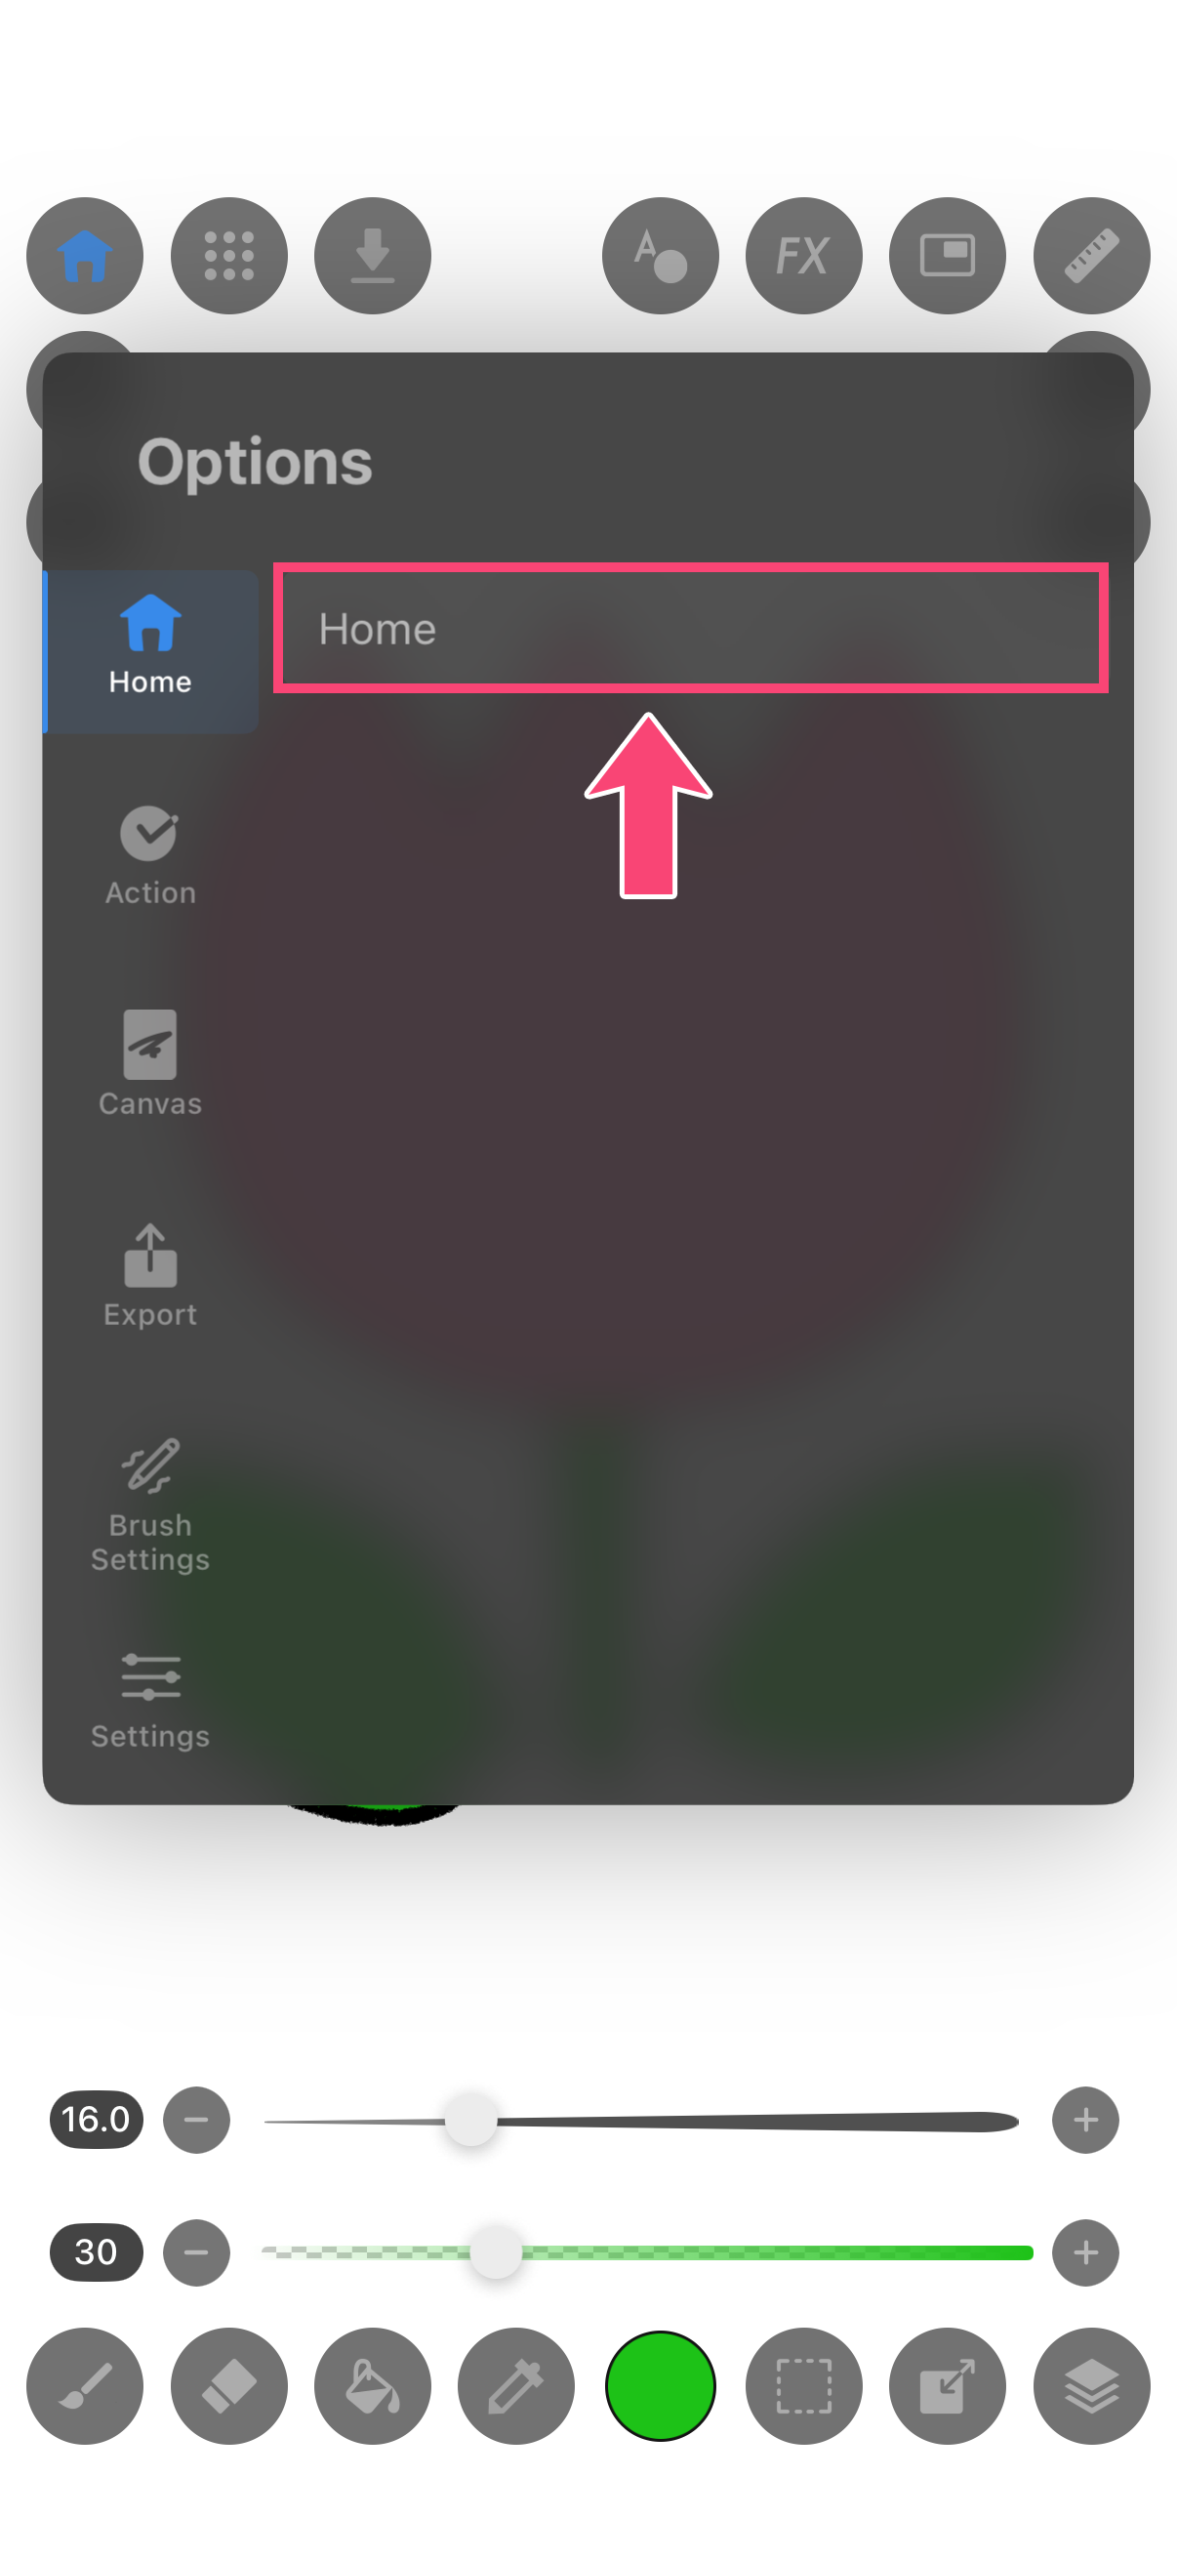
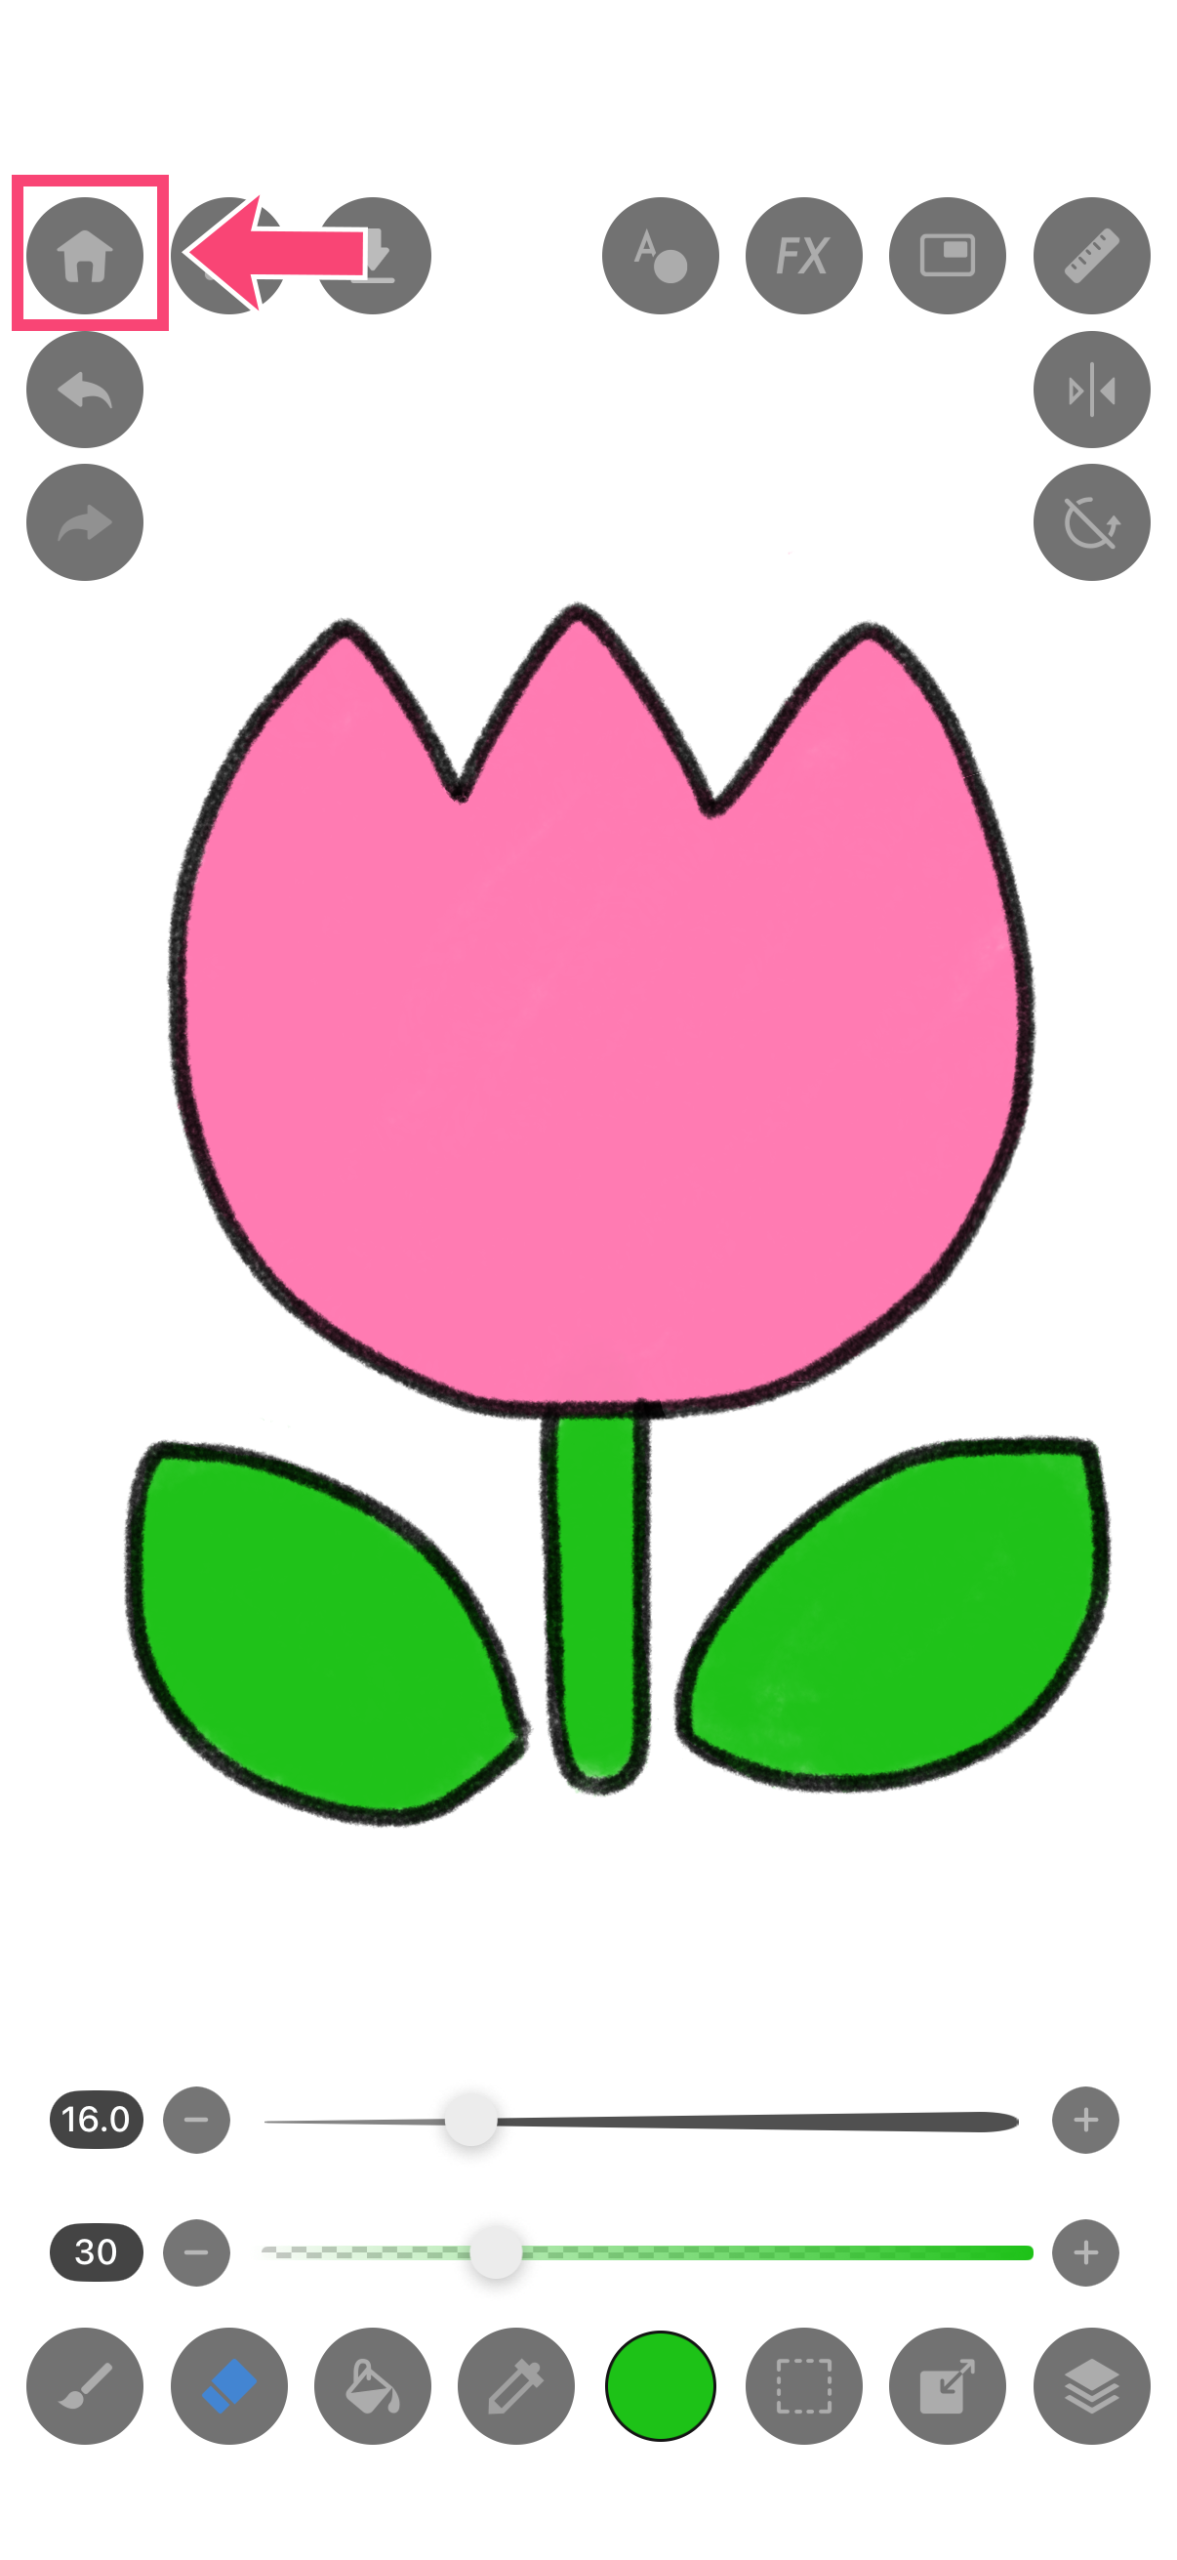
2.To export as an image, tap the “Home icon”!
3.The Options panel appears.
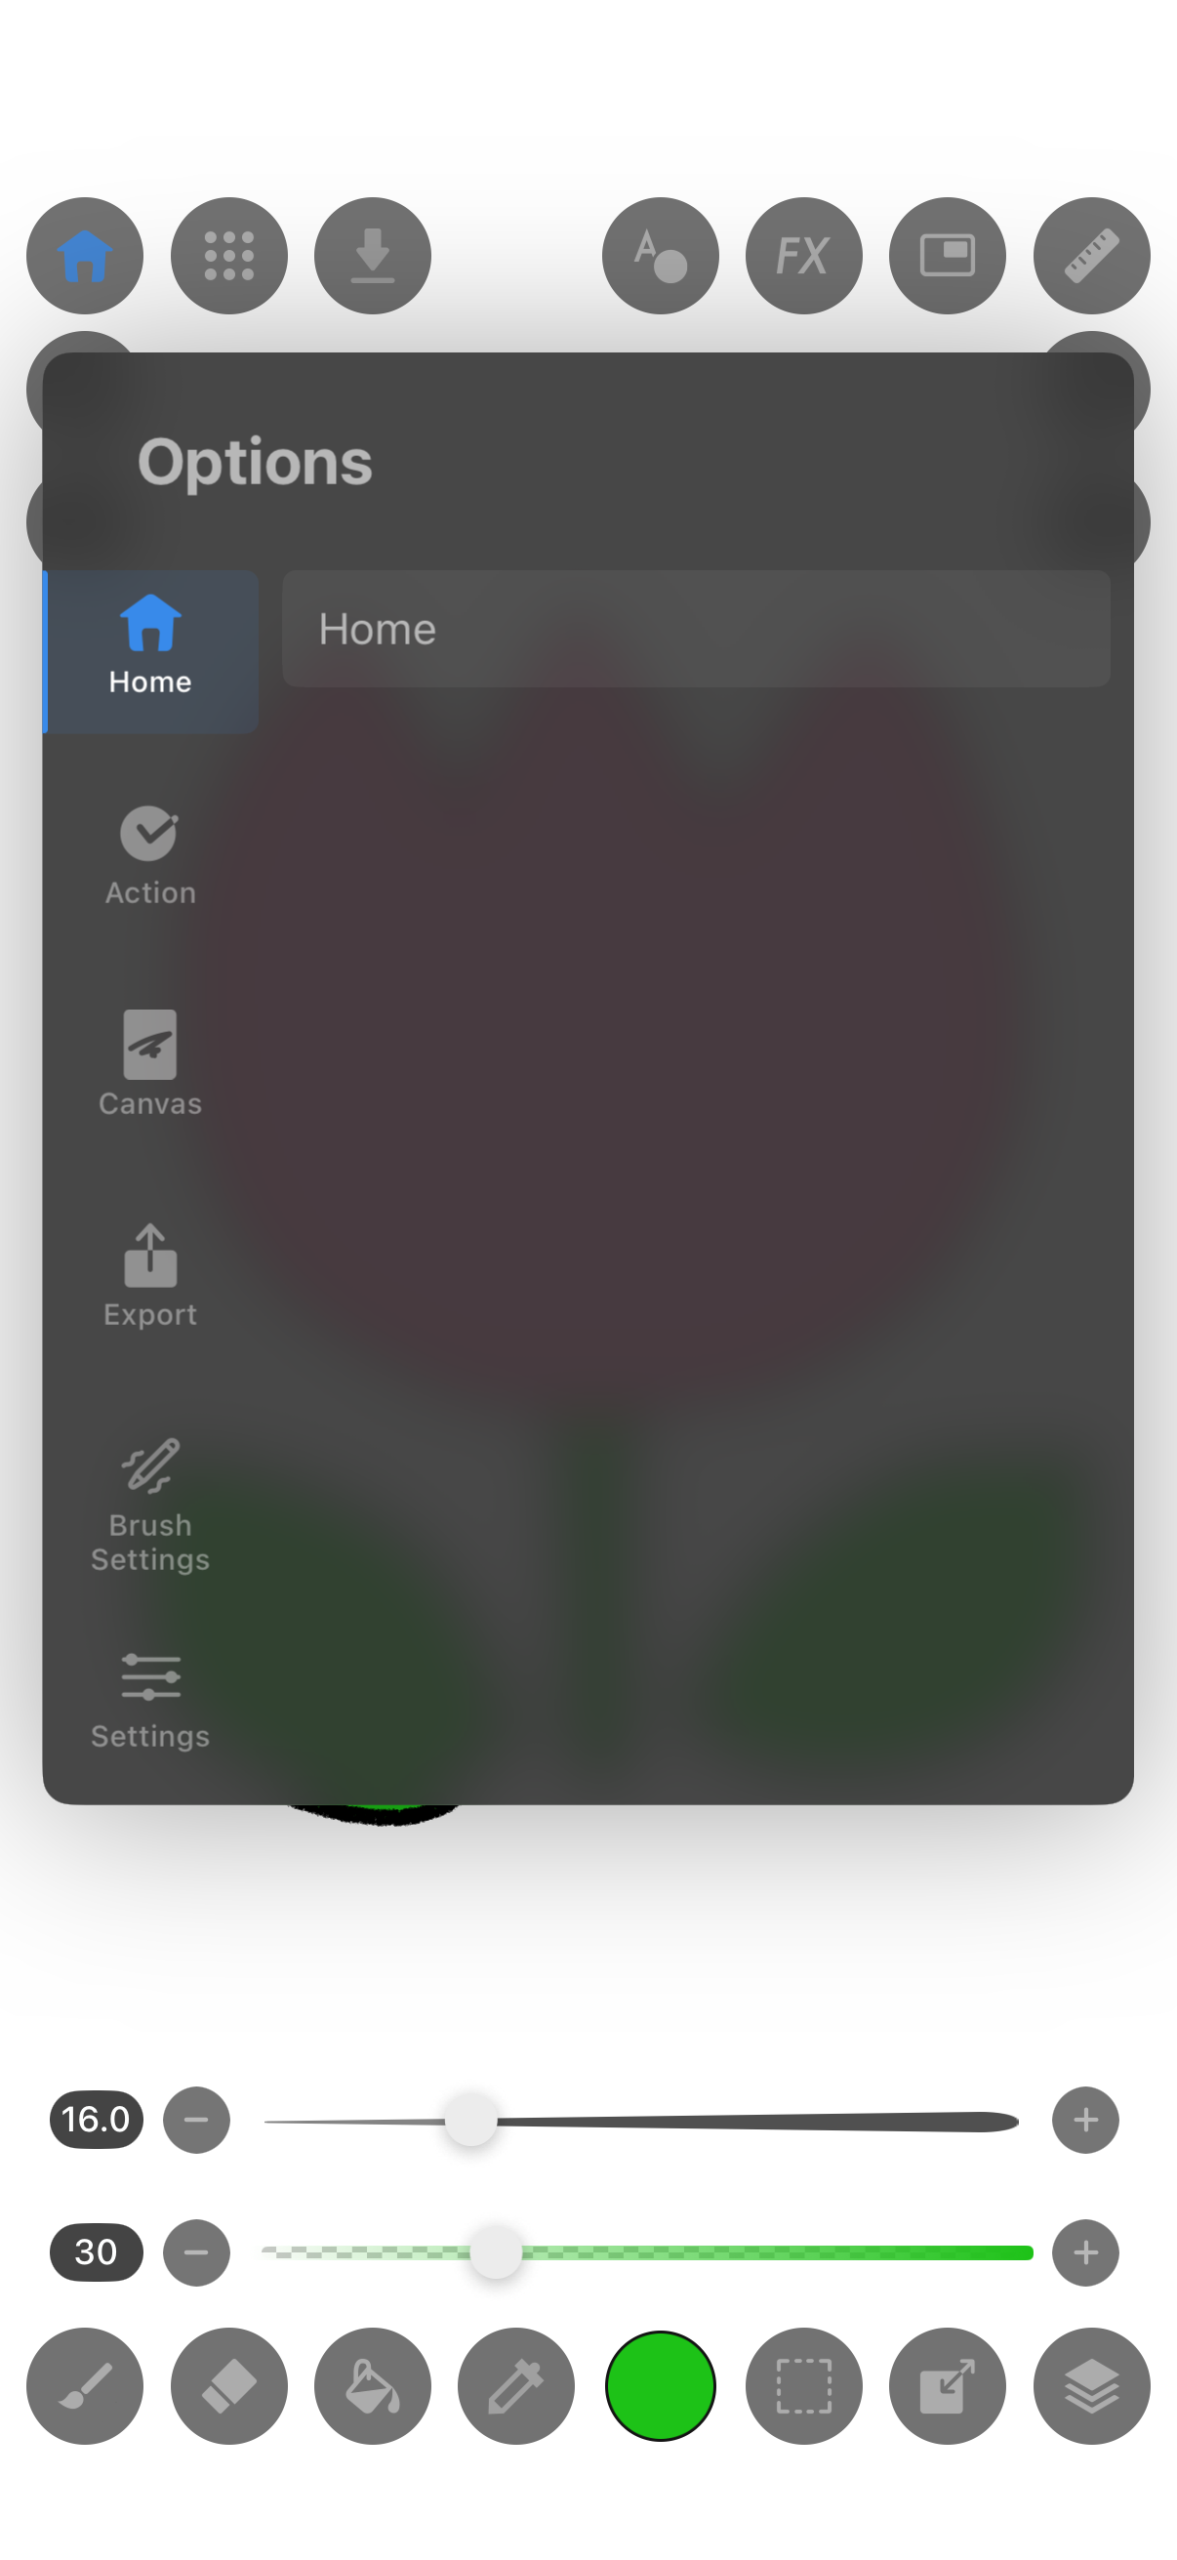
4.Select ① “Export”, then ② “JPEG or PNG”.

5.Saving and exporting are complete. Finally, tap “Home” to check your saved work in the app.