Other Features
Layer Lock prevents you from accidentally editing a completed layer. Tap a layer or folder, open the options, and toggle “Lock” on or off. A small lock icon (?) appears next to the layer name when it’s locked. Unlock again to resume editing. Locked layers cannot be drawn on, moved, or deleted.
MediBang Paletta uses layers, so you can easily edit just one part of your illustration. And don’t worry—even if you make a mistake, you can undo it!
Layer Lock
Lock
Alpha Lock
When “Alpha Lock” is turned on, you can only paint on already drawn parts—great for changing line colors or adding shading. Turn it off if you need to redraw the shape entirely.
Note: To use this on text layers, first rasterize the layer via the options menu. However, once rasterized, the text can no longer be edited.
Layer Mask
Use a Layer Mask to hide or reveal parts of your drawing without deleting anything.
Create
1.Create a new layer right above the parent layer (the one with your artwork), tap it to open the menu, and select “Gray.”
2.Then, open the menu again and select “Mask” to convert it into a mask layer.
Edit
Paint in black to hide parts, paint in white or erase to reveal parts. Gray creates partial transparency. Color tools cannot be used here.
Move
Tap “Select” at the top of the layer panel, check both the parent and mask layer, then slide to move both together.
Delete
Swipe left on the layer mask to reveal the Delete button, then tap it to delete the mask.
Stencil Layer
A Stencil Layer works the opposite way of a mask:
-
Black reveals hidden parts of the parent layer.
-
White (or erasing) hides them again.
Useful for applying patterns or textures to specific areas.
Create
1.Create a new layer right above the parent layer (the one with your artwork), tap it to open the menu, and select “Gray.”
2.Then, open the menu again and select “Stencil” to convert it into a stencil layer.
Edit
Use black to reveal, white or erase to hide. Only black and white are supported.
Move/Delete
Same method as for masks.
Clipping Mask
Clipping Masks limit the visibility of a layer based on the content of the layer below—ideal for coloring within shapes or text.
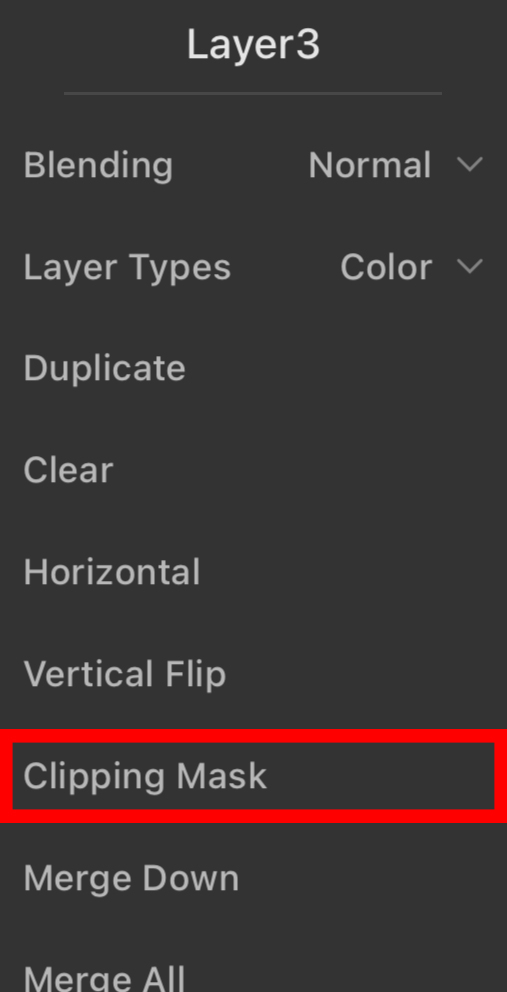
Create
Tap the layer and select “Clipping Mask” to attach it to the layer beneath.
*It won’t work if the layer below is empty. If using a folder, set the blend mode to “Normal” first.
Move
Tap “Select”, check both the clipping layer and its base layer, then slide to move together.
Release/Delete
You can cancel the Clipping Mask by selecting “Clipping Mask” again from the options list.